ISEAI Programming 2
This is the course material for ISEAI Programming 2, a course offered by the University of Jyväskylä.
About the Course
In this course, you will learn:
- the fundamentals and principles of object-oriented programming,
- how to develop small and medium-sized object-oriented programs,
- graphical user interface design and development,
- software testing,
- various programming tools and techniques.
News
Navigating This Material
Here are a few quick tips for navigating this course material.
- You can open and close the table of contents using the sidebar icon .
- You can navigate forwards and backwards through the material using the arrow icons on the left and right sides of the page (or at the bottom of the page when using a mobile device) .
- You can open the search function by clicking the magnifying glass icon in the upper-right corner or by pressing the S key on your keyboard .
Authors and License
Programming 2 course material © 2025 by Denis Zhidkikh, Sami Sarsa, Antti-Jussi Lakanen, Rauli Ruokokoski, Karri Sormunen and Ville Rantala.
Special thanks to Jonne Itkonen for feedback and improvement suggestions.
This material is published under the CC BY-SA 4.0 license. For more information, see the material's GitHub page.
Tool Instructions
On the Programming 2 course, we use the following tools:
-
Java Development Kit (JDK), a software development kit that includes, among other things, the Java compiler and the Java Virtual Machine for running Java programs.
-
Git, a version control system (VCS) that enables source code versioning and collaboration between developers.
-
IntelliJ IDEA, an integrated development environment (IDE) for developing and debugging Java programs and more. We use the free Community Edition of IntelliJ IDEA.
-
SceneBuilder, a helper tool for creating JavaFX user interfaces.
The above programs are pre-installed in the Agora computer classrooms. If you have your own computer, we strongly recommend installing them there as well. In particular, completing the project work is much easier when all required tools are available on your own computer.
The officially supported operating systems for this course are Windows, macOS, and Linux. Installing the tools on ChromeOS may be possible, but unfortunately we cannot provide support for that operating system. For this reason, we do not recommend using ChromeOS.
Select your operating system below.
Prerequisites
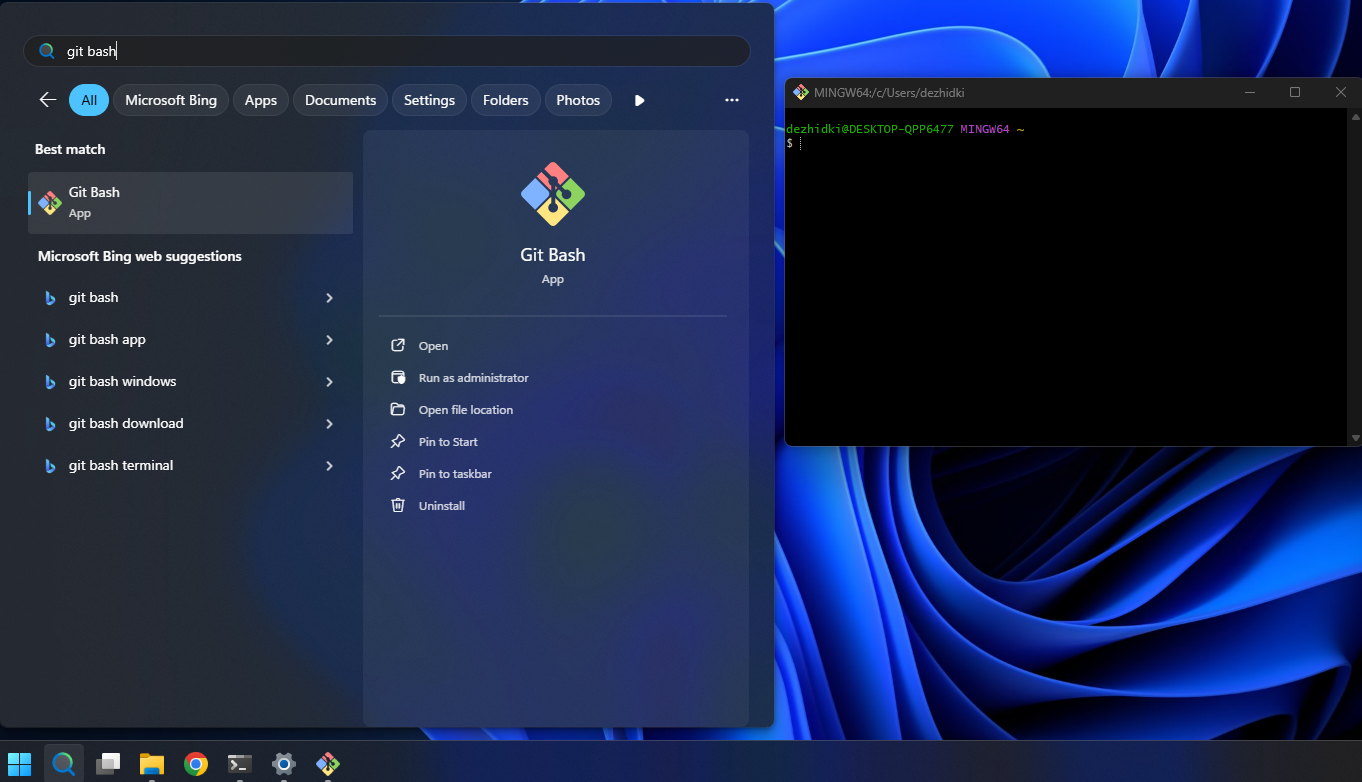
Git
IntelliJ IDEA
Disabling IntelliJ IDEA AI Assistance
IntelliJ IDEA includes two AI-powered code completion features: AI Assistant and Inline Completion. These attempt to automatically complete code as you write.
You can disable these features as follows.
- Disabling AI Assistant
- Settings → Plugins
- Select the Installed tab
- Find JetBrains AI Assistant
- Disable the plugin or uninstall it completely
- Disabling Inline Completion
-
Open IntelliJ IDEA to the Welcome to IntelliJ IDEA screen
-
Select Configure → Settings in the lower-left corner
-
Navigate to:
Editor → General → Code Completion → Inline -
Uncheck:
Enable inline completion using language models -
Save the settings.
Java Development Kit (JDK)
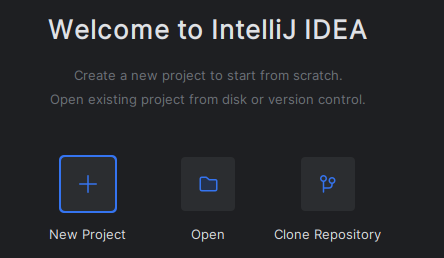
Open IntelliJ IDEA and wait until the Welcome to IntelliJ IDEA screen appears.
Click New Project in the middle or upper part of the window.
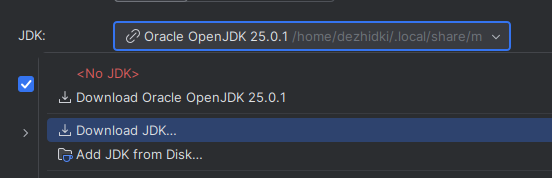
- In the dialog that opens, click the JDK drop-down menu and select Download JDK....
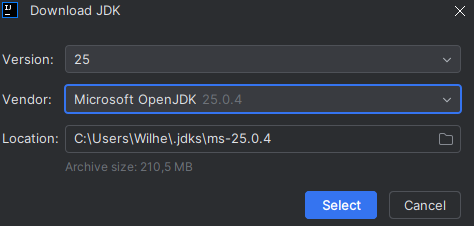
Configure the download as follows:
- Version: 25
- Vendor: Microsoft OpenJDK Do not change the path shown in the Location field. Finally, click Select.
Leave the remaining project settings unchanged.
Click Create in the lower-right corner and allow the project to load.
This opens the IntelliJ IDEA development environment.
Downloading the JDK may take some time. Wait patiently until all errors and red text disappear.
When the project has loaded successfully and no errors are visible, run the project using the Play button in the upper-right corner.
Wait for the project to compile.
If everything works correctly, a console window should appear at the bottom with output similar to:
Hello and welcome!

i = 1
i = 2
i = 3
i = 4
i = 5
- You may now close IntelliJ IDEA.
SceneBuilder
What Next?
Congratulations!
You now have all the tools required for the course and can continue to the course materials.
Common Problems and Solutions
I get the error error: illegal character: '\ufeff' when running a Java project in my IDE.
A problem may occur if you imported settings from JetBrains Rider. Rider settings are not completely compatible with Java development, and IntelliJ IDEA may not automatically fix the resulting issues.
Try the following:
- Open IntelliJ IDEA and return to the Welcome to IntelliJ IDEA screen.
If an old project opens automatically, select:
File → Close Project
-
Open:
Configure → Settings -
Navigate to:
Editor → File Encodings -
Set:
Create UTF-8 filesto:with no BOM -
Save the settings.
-
Create a new project and try running a simple program.
Internal error: com.intellij.platform.ide.bootstrap... Process "C:\...idea64.exe" is still running and does not respond
Another possible cause is that Rider is stuck running in the background.
Try the following:
-
Close IntelliJ IDEA completely.
-
Open Rider.
-
Close Rider.
-
Start IntelliJ IDEA again.
Project Assignment
The course includes a project assignment in which you implement a graphical Java application using the JavaFX library. The exact assessment requirements for the project are listed below.
You may either implement one of the predefined project specifications or come up with your own topic. Descriptions and requirements for all topics are provided below.
The project is completed incrementally during Parts 9–12. Each part contains guidance intended to help you progress, but you may also implement the requirements in another way as long as they are fulfilled.
We strongly recommend completing and studying the Todo application developed in Parts 7–8 before starting the project. It will provide significant assistance when implementing your own application.
You must demonstrate your final project, meeting all requirements, to your course instructor before submitting Part 12, either remotely or during in-person guidance. Once the instructor has approved the work, they will record the approval in TIM.
Pair Projects
The project may be completed individually or as a pair. In pair projects, the application must contain at least three domain entities (individual projects require two; Requirement 1.1) and three views (individual projects require two; Requirement 4.1). All other requirements remain the same as for individual work.
Both students must participate as equally as possible in the development of the project. When presenting the assignment, both students must be able to demonstrate to the instructor that they personally know how to implement the project requirements. For example, it is not acceptable for one student to focus solely on the user interface while the other handles all coding and data-model implementation.
Groups larger than two students are not permitted.
Topic
You may choose one of the predefined topics below or come up with your own topic that satisfies the requirements. Requirements marked as bonus () features are optional.
Expense Tracker
In this application, the user can track personal expenses and income.
Functional Requirements
- The user can enter income and expenses ("transactions").
- The user can view all transactions in a table showing at least the transaction name, amount, and date.
- The user can define expense categories.
- The user can specify which category an expense belongs to. Income does not necessarily need a category.
- The user can view transactions belonging to a specific category.
- The user can view transactions within a selected date range (between two dates).
- The user can edit transactions and categories.
- Renaming a category moves all related transactions to the new category.
- Deleting a category removes that category from transactions but does not delete the transactions themselves.
- An expense category may be marked as mandatory, representing essential expenses such as rent or electricity bills.
- The user can select multiple categories in the filter. For example, you may use the ControlsFX
CheckComboBoxcomponent. - The user can view a graph showing all transactions by month.
- The user can view expense time-series data by category.
You may find the following components useful:
DatePickerfor selecting dates.CheckBoxandComboBoxfor category selection and filtering.FilteredListtogether withTableViewto create filtered views.
Application Data Model
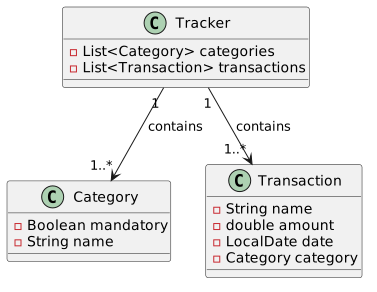
In this model, the distinction between income and expense can be represented by positive and negative amounts.
Another alternative would be to create an IncomeOrExpense enum and add an IncomeOrExpense incomeOrExpense attribute to the Transaction class.
It is probably easiest to start without the enum and add it later if needed.
Predefined categories
You may provide some predefined categories, for example:
- Groceries
- Restaurants
- Rent and Housing Charges
- Water
- Electricity
- Other Housing Costs
- Clothing
- Healthcare
- Car
- Public Transportation
- Other Travel
- Streaming Services
- Daycare
- Insurance
- Home Purchases
- Leisure
- Gifts and Donations
- Savings
- Loan Payments and Interest
- Other Expenses
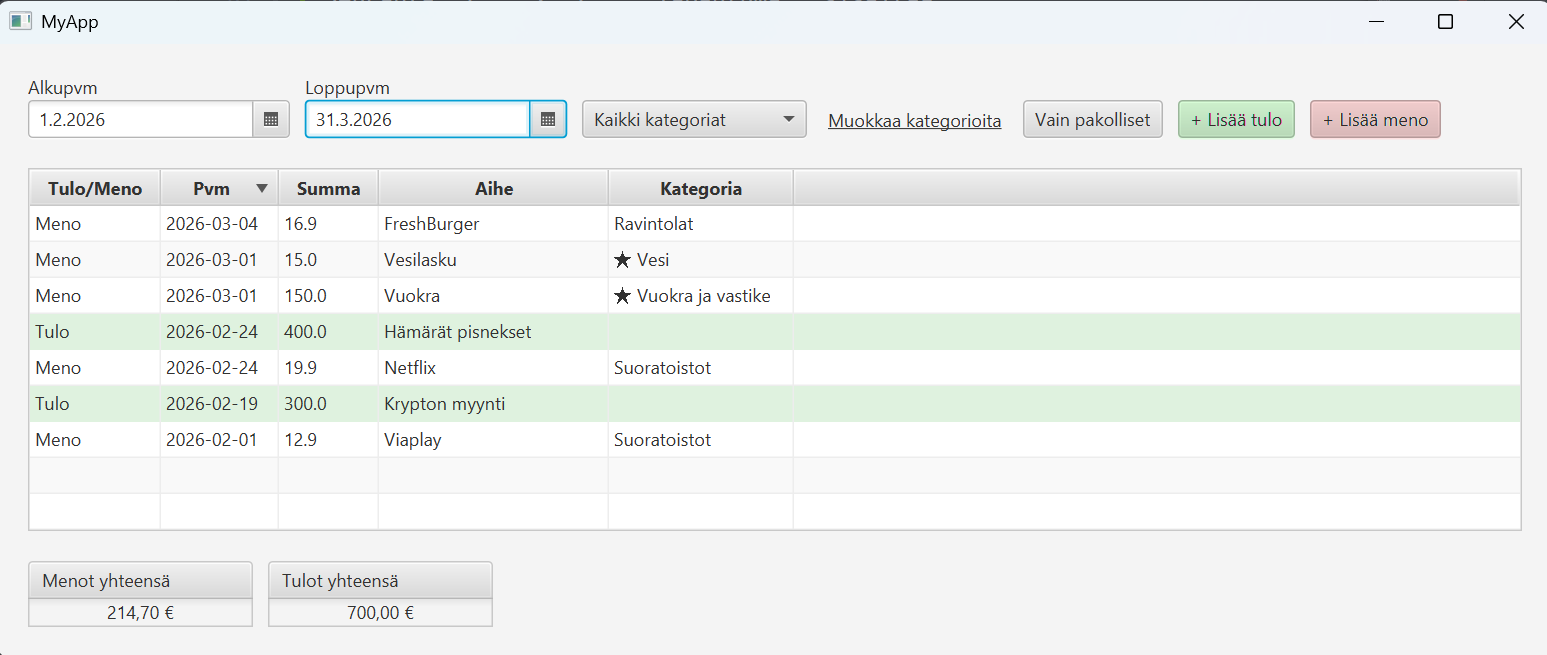
A finished application could look something like this. It does not matter if your own user interface looks different. The important thing is that it fulfills the requirements, not that it resembles the example.
Cash Register
In this application, the user manages products and creates purchase transactions.
- The user can enter products. A product contains an identifier, name, and price.
- The user can view all products in a table.
- The user can create purchase transactions by entering the product and quantity being purchased.
- During a purchase transaction, each row shows the unit price and line total (unit price × quantity). You will need a column that calculates the multiplication of price and quantity.
- The application displays the total purchase price.
- The application may use separate views for products, or both the product list and purchase transaction list can be shown in the same view (two
TableViewcomponents within the same Scene). - Products and purchase rows must be editable, but purchase transactions do not need to be editable after completion. A recommended approach is to store the product price as part of the purchase record so that editing a product does not affect historical purchases.
- Bonus: Line-item discounts or transaction-level discounts.
Application Data Model
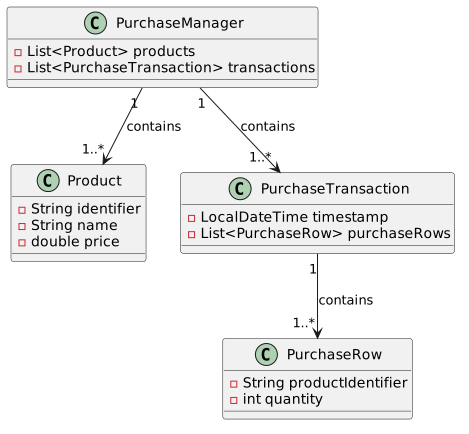
When creating a purchase transaction:
- The user selects a product from a drop-down menu and enters the desired quantity.
- The user can search for products by name using a search field. ControlsFX may be useful here.
- You need a table that displays the current state of the purchase transaction.
- The table must show the product identifier, product name, product price, quantity, and line total.
- Because the
PurchaseRowclass does not contain a direct reference to aProductobject, product information must be retrieved using the product identifier and helper methods. - This can be implemented using the
Bindingsclass.
Library
Application for managing library books and loans.
The librarian can manage book information and loan status, as well as view the loan history of books.
Functional Requirements
- The user can enter books and their information.
- The user can view all books in a table containing at least the book title, author, ISBN identifier, and loan status. The user should also be able to easily see how many times each book has been borrowed.
- The user can loan books to people and mark loans as returned.
- The user can view the loan history of books.
- Each book may only be loaned to one borrower at a time.
- A book can be borrowed again after it has been returned.
- The user can easily see which books are currently loaned out.
- The user can easily see which loans have passed their due date (overdue loans).
Application Data Model
The application contains two primary domain entities: Book and Loan. In addition, there is a Library class that manages all books.

Housing Company Management
In a housing company management application, a property manager can manage information about the housing company, such as apartments, residents, and company events.
Functional Requirements
- The user can enter apartments and their information.
- The user can view all apartments in a table containing the apartment number and the number of residents.
- The user can add and remove residents from an apartment.
- The user can view the residents of an apartment in a table containing at least their names, email addresses, and years of birth.
Application Data Model
The application contains two primary domain entities: Apartment and Resident. In addition, there is a HousingCompany class that manages all apartments.

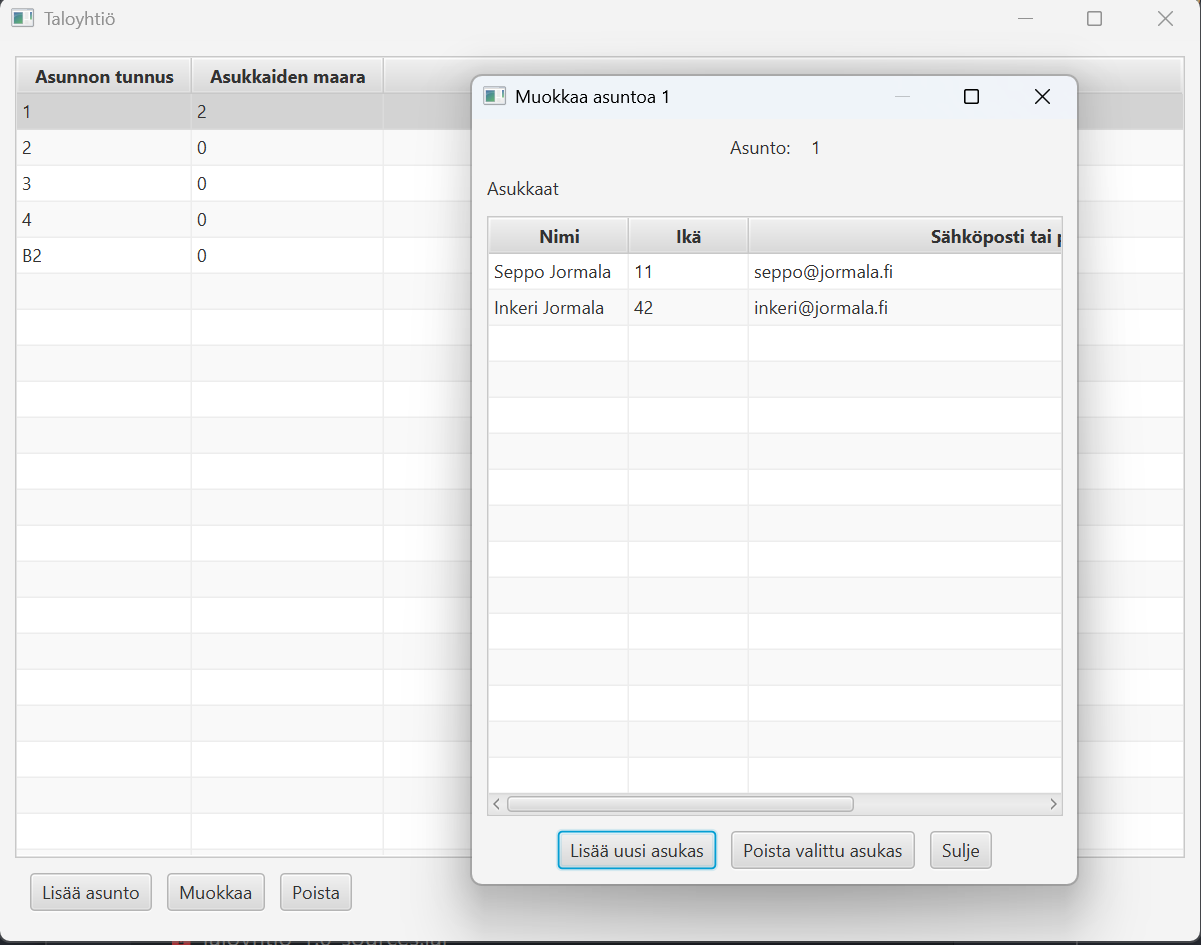
A completed application might look something like this.
Bonus: Extra Features
You may also add the features below if you wish. Additional features do not affect project acceptance and may be implemented in any way you choose. However, if you implement additional functionality, it must still follow the project requirements.
Property Manager and Resident Views
- The application has two modes: Property Manager View and Resident View.
- On the startup screen, the user chooses whether to use the property manager view or the resident view.
- If the resident view is selected, the user chooses which resident they are "logging in" as.
- The property manager can manage apartment information, residents, and housing company events (as in the basic version).
- In the resident view, the user can view information about the apartment they belong to. The resident cannot modify the apartment's basic information.
- In the resident view, the user can submit feedback to the property manager.
- In the property manager view, the user can see feedback in a table containing at least the sender's name, date, and feedback content.
Water Meter Readings
- In the resident view, a resident can enter water meter readings for an apartment.
- A water meter reading contains:
- the reading value,
- the date,
- whether the reading is from cold or hot water.
- The resident can view the apartment's water meter readings in a table.
Water Billing
- The property manager can enter hot- and cold-water prices and their start dates.
- The user can generate a water bill for an apartment.
- A water bill contains the difference between the two most recent cold-water readings and the two most recent hot-water readings.
- It is sufficient for the bill to display:
- the billing period (start and end dates),
- cold-water consumption,
- hot-water consumption,
- total charge (with hot and cold water separated).
You may find the following data model useful.
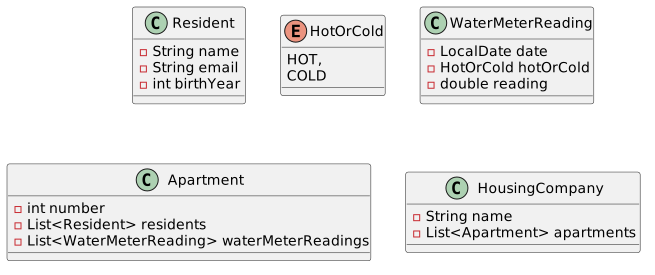
Flashcard Application
An application for creating and managing flashcards (similar to Anki).
The user can create flashcards containing a term and its explanation. Flashcards related to the same topic are collected into decks, which can then be practiced within the application.
Functional Requirements
- The user can create decks that contain cards. A deck has a name and an optional description.
- The user can add cards to a deck. A card contains a term and its explanation.
- The user can browse and edit existing decks.
- The user can practice cards in a deck using a practice mode. In practice mode, the application displays the term of a card. The user can reveal the explanation ("flip the card").
- After viewing the explanation, the user can move to the next or previous card.
- In practice mode, cards are always shown in random order.
- The user can edit and delete decks and cards.
Application Data Model
The application contains two main domain entities: Card and Deck. In addition, a DeckCollection class manages all decks.

Bonus: Extra Features
You may also add the features below if desired. Additional features do not affect project acceptance, and you may implement them however you wish. However, if you implement additional functionality, it must still follow the project requirements.
Usage Statistics
- Add a view count to cards. Every time a user reveals a card's explanation in practice mode, the card's view count increases by one.
- Card view counts are displayed in the deck-editing view.
- Add a practice-session count to decks. Every time the user enters practice mode and goes through every card at least once, increment the counter.
- The number of practice sessions is displayed as a separate column in the main view.
Exam Mode
- Add an exam mode for decks.
- In exam mode, the user is shown a card's term and three possible explanations as a multiple-choice question.
- The user selects the correct explanation.
- Feedback is shown immediately, after which the next question is displayed.
- Exam mode must work equally well with a deck containing three cards or several hundred cards.
- Exam mode is only available if the deck contains at least three cards.
- Components such as
RadioButtonandToggleGroupmay be useful.
Own Idea
A custom JavaFX application of your own choosing that fulfills the project requirements.
You may also extend the Todo application developed in Parts 7 and 8.
If you choose your own topic, you must prepare an initial project plan that describes the application's key functional requirements and the application's data model. You may use the example topics above as a guide for the scope and detail of the plan.
The plan must be approved by the course instructor before implementation begins.
When writing the plan, also think about how the application will satisfy the general project requirements. The instructor may request changes if the scope does not meet the expected requirements.
If you decide to extend the Todo application, the project requirements apply to your extension. For example:
- Requirement 1.1 ("The application contains at least two modeled domain entities") means that you must define two new domain entities in addition to the existing
Taskmodel. - Requirement 4.1 means that you must either add two new views or significantly expand the existing views in such a way that the extension could reasonably be considered its own view.
Technical Requirements and Assessment
The requirements below are used when evaluating the project. The project is graded on a pass/fail basis. A failed project may be revised based on feedback from the instructor.
In principle, the project must satisfy all of the requirements below. Individual requirements may be interpreted more flexibly if the project is otherwise particularly extensive or well executed, or if the project topic specifically requires it.
The final decision is made by the instructor on a case-by-case basis.
Requirement 1: Data Model
-
The application must contain at least two modeled domain entities.
Examples include tasks, transactions, books, customers, workouts, games, recipes, or similar concepts. Each modeled entity must contain attributes or properties that are meaningful within the application's domain. In the Parts 7–8 example application there was one modeled entity:
Task. In the flashcard application they could beCardandDeck. In the expense-tracking application they could beTransactionandCategory. -
Each modeled entity must contain at least one domain-specific attribute.
In the Parts 7–8 example,Taskcontained the attributescompleted,title,description, andpriority.Note that an attribute whose only purpose is to reference another model, or whose value can be derived from another attribute, does not count toward this requirement. For example,
TaskCollectioncontains only a collection of task references and would therefore not satisfy the requirement by itself. By contrast, in the flashcard applicationDeckcontains a title and description in addition to its card collection, making it a distinct modeled entity. -
Application data must not be modeled using UI components but using dedicated model classes.
-
Observable JavaFX structures must be used when connecting data and the user interface.
At minimum, the primary collection of data should be anObservableListor equivalent. -
Data must be displayed using appropriate UI components.
If multiple similar objects are displayed,TableViewis usually an appropriate choice.
Requirement 2: Core Functionality
-
CRUD functionality must be implemented in the user interface for every modeled entity.
Users must be able to create (Create), read (Read), update (Update), and delete (Delete) objects through the user interface. For example, in the Parts 7–8 example application, users can create tasks using a button, read them in a
TableView, edit them in a separate view, and delete them using a delete button. -
The user must not be allowed to enter obviously invalid data.
For example, empty names or missing mandatory fields should not be allowed. Validation may be implemented either in the model or in the user interface.
-
The state of the user interface must always match the state of the model, and vice versa.
When data is updated or deleted, incorrect information must not remain either in the model or in the interface. Removing an object from the model must immediately remove it from the interface as well.
Requirement 3: Persistence
-
Application data must be stored in a file.
Information must persist after the application is closed. Saving may happen automatically or through a dedicated Save action.
-
Stored data must be loaded back when the application starts.
Requirement 4: User Interface
-
The application must contain a graphical user interface with at least two views.
The views may consist, for example, of a main view (listing) and an editing view (dialog).
-
The user interface must be structured and usable.
Input fields, buttons, labels, and lists should be arranged logically rather than placed randomly.
Requirement 5: Architecture and Separation of Responsibilities
-
The application's structure must follow the MVC (Model-View-Controller) architecture.
The key requirement is that the data model, user interface, and controller logic connecting them are separated from one another.
-
Application data and persistence logic must be separated from the controller class.
The UI controller must not contain all of the application's data and persistence logic.
-
Loading and saving data must be separated into their own responsibility area.
In practice, loading and saving should be implemented in dedicated methods located outside the controller logic.
Requirement 6: Testing
-
Unit tests must be written for the application's core model or business logic.
The tests must verify that key methods (such as adding and removing objects) modify the state of the data model as expected.
Requirement 7: Version Control and Project Management
-
A public Git remote repository (for example GitLab or GitHub) must be created for the project.
-
The project must contain a
.gitignorefile and aREADME.mdfile.The README should briefly describe the application and explain how it works.
-
Git commits must have descriptive names.
The commit messages should clearly indicate what changes each commit contains.
-
The project must be developed iteratively, with each iteration saved as a separate commit.
The repository must not contain only a single "finished application" commit. The development history should be visible.
Requirement 8: Code Quality
-
No errors or warnings may be visible in the Java source code within IntelliJ IDEA.
Compilation errors and warnings are checked using IDEA's default Java language inspection settings. IDEA displays warnings in yellow and errors in red. If there is a justified reason to allow a warning, it must be documented in the code using
@SuppressWarningstogether with a short explanation describing why the warning is acceptable.Language-inspection warnings (shown in green) are permitted. Similarly, warning markers inside
.fxmlfiles are allowed.You can run inspections for all files at once using IDEA's Run All Inspections feature.
Note that IntelliJ IDEA provides automatic fixes for many warnings and errors, accessible through the quick-fix action displayed next to the warning ().
-
All
.javasource files must be formatted using a consistent style.Use IDEA's Reformat Code feature and apply all available fixes( Optimize Imports, Rearrange Entries, Cleanup Code)
-
Visibility modifiers must be explicitly defined for every class, attribute, and method, following good encapsulation practices.
Attributes should generally be declared
private. Method visibility should match the method's purpose methods intended for use by other classes should bepublicand the helper methods used only within the class should beprivate
Basic Principles of Java Programming language
Learning objectives
- Get familiar with the syntax, variables and control-structures
- Lean how Java differs from Python
- Learn to write simple Java programs and understand how code is compiled and executed
Hello, Java!
Learning Objectives
- You will become familiar with the basics of the Java language.
- You will know how to compile and run a Java program.
- You will know what the (J)VM is and how compilation differs from interpretation.
- You will be familiar with Java equivalents of the most common I/O operations.
In the Programming 2 course, we use the Java programming language. Java is a general-purpose language that supports object-oriented programming and is designed for writing platform-independent programs. Java consistently ranks among the most popular programming languages (See for example TIOBE index, StackOverflow 2025 developer survey, Most popular languages in GitHub).
Basics of the Java Language
Let's begin with the traditional "Hello, world!" example in Java:
/* 1 */ void main() {
/* 2 */     IO.println("Hello, world!");
/* 3 */ }
Let's examine the program line by line:
-
Execution of a Java program begins from a method named
main. The keywordvoidmeans that the method does not return any value. Since this main program does not take parameters, the parentheses following the wordmaincan be left empty. The method body begins with an opening brace{. -
Printing text to the command-line window is done using the
IO.printlnmethod. In Java, statements usually end with a semicolon;, as in this example. -
The method body is terminated with a closing brace
}. Program execution ends automatically when themainmethod has finished.
Although the program is very simple, it is still a fully valid Java program. Throughout the course, we will write many programs that output to and read from the command-line window. In the latter half of the course, the focus shifts toward graphical user interfaces.
Optional additional information: Back to the 1990s and older Java
Before the introduction of compact source files in Java 25, even the traditional "Hello, world!" program required significantly more boilerplate code.
The program would typically look like this:
public class HelloWorld {
    public static void main(String[] args) {
        System.out.println("Hello, World!");
    }
}
Although this program may currently look somewhat intimidating, by the end of the course you will understand the purpose of every keyword and structure used in it.
The newer compact source-file format allows us to focus on the essentials of programming before introducing the more advanced features of the language. Later in the course we will revisit this older style and see how it relates to the compact programs used in the first chapters.
Differences Between Java and Python
We can already observe several important differences between Java and Python. Some of these differences are syntactic, while others are related to the languages' semantics and type systems.
Syntactic Differences
In Python, indentation is used to mark the bodies of functions, loops, conditional statements and other control structures.
def weird(n: int) -> list:
    # The function body is indented using four spaces.
    sequence = [n]

    while n != 1:
        if n % 2 == 0:
            # The body of the if-statement is indented further.
            n /= 2
        else:
            # The body of the else-statement is indented further.
            n = n * 3 + 1

        # The body of the while-loop is indented using eight spaces.
        sequence.append(n)

    return sequence
In Java, code blocks are enclosed within curly braces { and }. These braces mark the beginning and end of method bodies, loops, conditional statements and other language constructs.
Although indentation is not required by the Java compiler, it is still used to improve readability and make program structure easier for humans to understand.
Another notable difference is that Java statements are typically terminated with a semicolon ;.
Typing System
As you learned in Programming 1, Python supports type hints, which can make programs easier to read and understand.
def square(n: float) -> float:
    return n * n
However, Python is a dynamically typed language, meaning that type hints are optional and are generally not enforced by the interpreter.
Java, on the other hand, is a statically typed language. As a result, type information is required when defining methods and variables.
The equivalent Java method would be:
double square(double n) {
    return n * n;
}

void main() {
    IO.println(square(10));
}
In Java, we must explicitly specify the return type of the method, which in this example is double. We must also specify the type of each parameter. Here the method has a single parameter named n, whose type is also double.
Static typing allows the compiler to detect many programming errors before the program is executed.
In the next section, we will examine Java's primitive data types in more detail.
Methods and Functions
In Python, reusable pieces of code are usually called functions.
In Java, similar constructs are typically called methods, because they are usually associated with a class. Since we have not yet introduced classes, we may occasionally use the terms function and method interchangeably in the first chapters.
Later in the course, we will see why Java programmers usually prefer the term method.
Java Coding Conventions
Most programming languages have a set of coding conventions established for that language. Java is no exception. We will become familiar with various conventions as this material progresses. It is worth mentioning that Java coding conventions differ slightly from those used in Python, particularly in naming and code formatting.
The most important Java conventions to keep in mind at this stage are:
-
The opening brace
{that starts a method body is usually placed on the same line as the method declaration. The same applies to other constructs that use braces, such asif,for,while, anddo-whilestatements. -
Variables and methods use the
camelCasenaming style, where the first letter is lowercase and subsequent words begin with an uppercase letter. For example:thisIsAFunctionName. -
Files and classes use the
PascalCasenaming style, where the first letter is uppercase and each subsequent word also begins with an uppercase letter:HelloWorld.java,public class Student, and so on. PascalCase is similarly used for many other structures that we will learn later, such as interfaces and enumerations.
Guide: Compiling and Running Java Programs
important
In this section, you will need the course development tools. Install all required tools first using the course tool installation guide.
Although many small programs like the one above could technically be created in a web browser, it is much more practical to use a dedicated development environment. In this material, we use the IntelliJ IDEA development environment for creating, running, and debugging Java programs.
Create a New Project
Next, let's create a simple project in IDEA. A project is IDEA's way of grouping source code files, tests, libraries, and other resources into a single entity.
Do the following:
- Open IntelliJ IDEA and open the new project dialog.
-
If you see Welcome to IntelliJ IDEA, select New Project.
-
If an existing Java project is open, select File → New → Project from the menu bar.

-
The menu options may be hidden behind a hamburger menu button depending on your configuration.
- In the new project dialog:
-
Select Empty Project from the list on the left.
-
Enter HelloWorld into the Name field. Project names are usually written without spaces.
-
Set the project location in the Location field. Click the folder icon on the right side of the field and choose a suitable directory. Choose a location that you will be able to find easily later.
-
Clear the Create Git repository checkbox. We do not need version control yet.
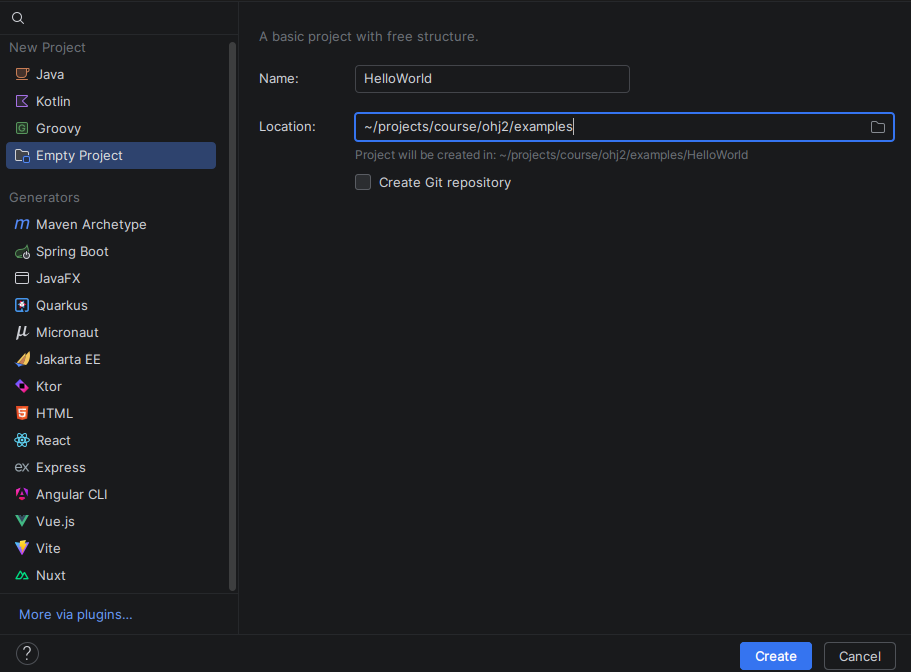
- After making these choices, click Create. IDEA will then create a new project in the selected directory.
Let's briefly review the most important parts of IDEA:
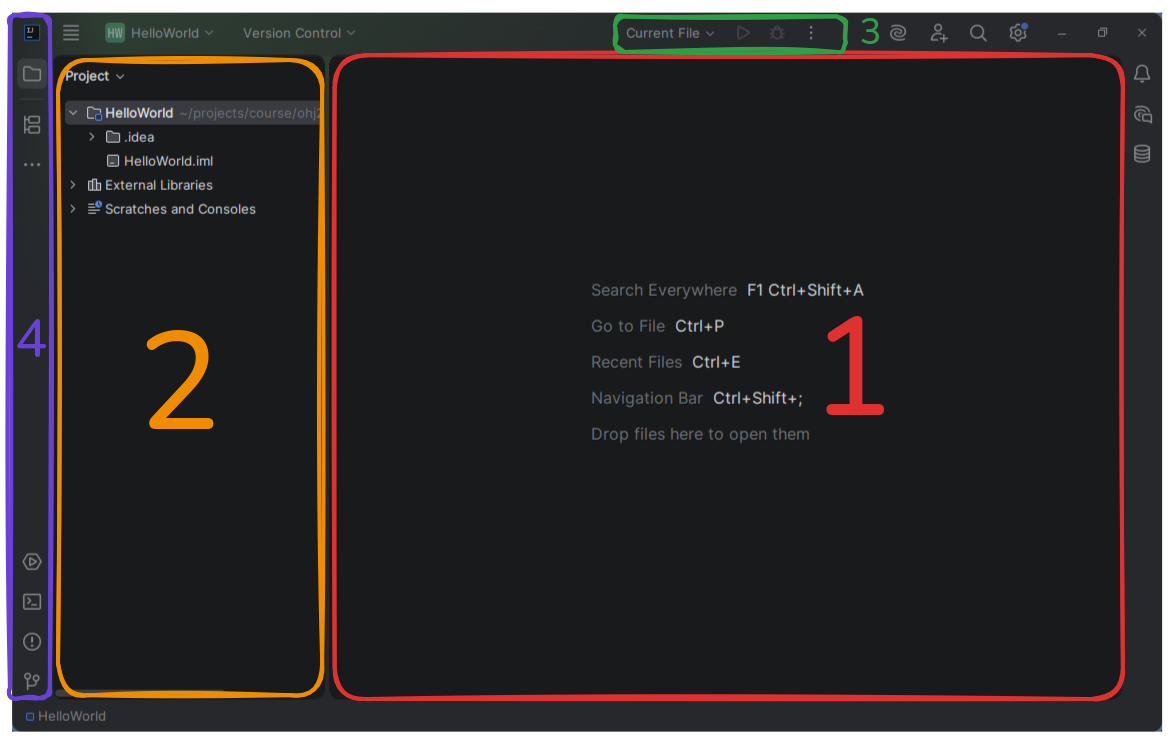
- Code editor: displays the contents of opened files. Each opened file appears in its own tab.
- Project explorer: displays folders and files belonging to the project. Files and directories can be added, removed, moved, and renamed here.
- Run and debug controls: displays the program to be run, together with the run and debug buttons.
- Views and tool windows: IDEA includes various views that are hidden by default. The sidebar can be used to open and hide them as needed. For example, the project explorer can be hidden by clicking its folder icon.
Create a Java Module
By default, a new project is empty. In IDEA, program code is written inside modules. Several modules can be added to the same project and developed or executed independently. For example, you might create a single project for all exercises of a given week and add each exercise as its own module.
Next, create a module named HelloProgram, add a new program to it, and run it.
Do the following:
-
Right-click the project name (
HelloWorld) in the project view and select New → Module. -
In the New Module dialog:
-
Select Java as the module type.
-
Enter HelloProgram into the Name field.
-
Leave the Location field unchanged. IDEA automatically selects the correct location.
-
Select IntelliJ as the Build system.
-
Make sure the JDK field contains the same JDK version that you installed.
-
Clear the Add sample code checkbox. We will create the source file ourselves.
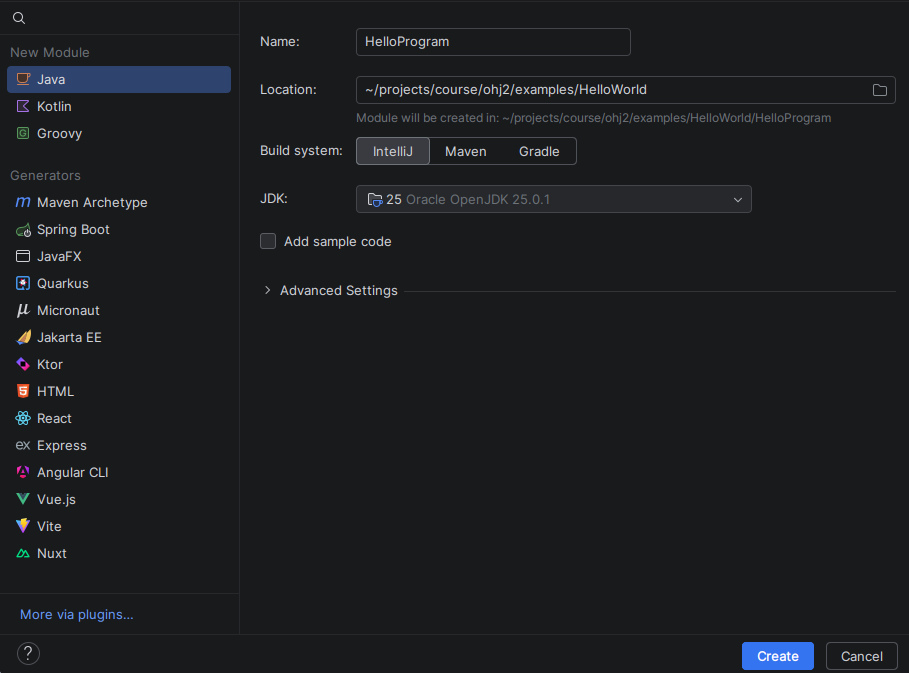
Finally, click Create. This creates a new
HelloProgramdirectory containing asrcdirectory.
Create a Source Code File
In an IntelliJ project, code belonging to a module is placed in the src directory.
If a project contains multiple modules, each module has its own src directory.
Next, create a Java source code file:
- Expand the
HelloProgrammodule in the project explorer. - Right-click the
srcdirectory and select New → Java Compact File. - Enter the name
Programand press Enter.
IDEA creates a new file named Program.java inside the src directory.
IDEA also automatically inserts a main method skeleton into the source file and opens the file in the editor.
You can later reopen the file by double-clicking it.
Write the Program
Next, write a simple "Hello, world!" program from scratch into the newly created Program.java file.
Do the following:
-
Delete all code currently in the file. IDEA usually inserts a default template into new source-code files. For this exercise, however, we will write the code ourselves.
-
Type the following code into
Program.java:void main() { IO.println("Hello, world!"); }Avoid copying and pasting the code. Typing it yourself often helps you remember where important programming symbols such as braces, parentheses, and semicolons are located.
Bonus: Using IDEA's code completion features
IDEA provides various time-saving completion features that are worth practicing.Try at least the following:
-
Automatic insertion of the
mainmethod: Begin typingmain. Press Ctrl+Space (⌘+Space on macOS). Select themaintemplate with the arrow keys and press Enter.IDEA contains many built-in templates that speed up coding and help remember common structures. You can view all templates by pressing Ctrl+J (⌘+J on macOS).
-
Automatic completion of
println: Move the cursor to an empty line inside themainmethod.Type the letter
I. IDEA automatically displays all suitable completions beginning withI. SelectIOand press Enter. This insertsIOat the cursor position.Then type a period (
.). IDEA automatically displays all methods belonging to theIOclass. Selectprintlnand press Enter. This insertsprintln.Type an opening parenthesis
(. IDEA automatically inserts the matching closing parenthesis). Move between the parentheses and type:"Hello, world!"Finally, move to the end of the line and add a semicolon;.IDEA can therefore automatically suggest class and method names based on context. You can always manually open the completion menu as well.
Running the Program
Source files containing a main method can be executed.
Execution can be started using the run button () located next to the main method or from IDEA's toolbar.
Do the following:
-
Click the run button to the left of the
mainmethod ().IDEA first compiles the program. Once compilation is complete, IDEA executes the program and opens the Run window below the editor. The first line shows the command IDEA used to execute the compiled file. The next line contains the output produced by our program:
Hello, world!The final line indicates that the program terminated successfully. -
Try running the program again using the created run configuration.
The first time you run a source file, IDEA creates a run configuration. A run configuration is a small configuration file that stores execution-related settings such as: the JDK version to use, possible command-line parameters and the working directory By default, this configuration is stored in
.ideaworkspace.xml.Once the run configuration has been created, you can run the program in the future directly using the run button in IDEA's toolbar. This makes it easy to execute programs without opening the source file separately.
IDEA's toolbar should now display the name of the
Programrun configuration together with a run button. Try closingProgram.javaand running the program from the toolbar.Run configurations make it possible to execute programs located in different modules. Later in the material, we will also become familiar with the Gradle build tool, which allows us to create separate configurations for running, testing, and building projects.
tip
Become Familiar with Common Keyboard Shortcuts
Keyboard shortcuts speed up the use of the development environment, and with some practice it is possible to program almost entirely without using the mouse. Keyboard shortcuts depend on the operating system and selected keymap settings. However, IDEA displays shortcut keys in menus and tooltips, making them easier to learn.

You can modify keyboard shortcuts in File → Settings → Keymap You can also install keymaps from other development environments, such as Visual Studio Code, through: File → Plugins.
Compiling and Running from the Command Line
Before IDEA actually runs a program, it first compiles it into an executable form. Within IDEA this happens automatically when you press the run button, the debug button, or use commands from the Build menu. However, Java source code can also be compiled and executed manually from the command line. Understanding how this works helps you understand what IDEA is doing behind the scenes.
Let's now explore how a program is compiled and executed from the command line.
How can I follow along?
First, create a simple program according to the guide above.
Then open IDEA's integrated terminal by clicking the terminal button () in the left sidebar. This opens the operating system's command-line shell (zsh on macOS, powerShell on Windows, the default shell on Linux).
If you installed the Java development environment according to the course instructions, the terminal may not initially find Java tools. Enable them temporarily by running the following command.
The command above enables the JDK command-line tools temporarily. The terminal returns to its original state after it is closed and reopened.
Next, move into the project directory and examine its contents.
Because we are using an IntelliJ project, only a few important files and directories are present:
HelloWorld.imlis the project settings file used by IDEA to recognize the directory as a Java project.HelloProgramis the source-code module directory.outcontains compiled programs.
Next, move into the HelloProgram directory and inspect its contents.
A single module contains the following files and directories:
HelloProgram.imlis the module settings file used by IDEA to recognize the directory as a Java module.srcis the source-code directory containing the program's source code.
Move into the src directory and inspect its contents.
Files ending with .java are Java source code files.
They contain the program as text and cannot yet be executed directly.
To run a program, it must first be compiled.
As mentioned earlier, IDEA performs this automatically when running a program, but source code can also be compiled using the javac compiler included with the JDK.
Let's compile Program.java. javac Program.java
If compilation succeeds, the javac command produces no output by default.
Examine the directory contents again using ls.
As a result of compilation, a file with the .class extension is created.
This file contains so-called bytecode.
Bytecode is the compiled form of the program.
It is not directly executable by the processor. Instead, it is an intermediate representation.
Bytecode can be executed by the Java Virtual Machine (JVM), which is a separate program capable of interpreting and executing Java bytecode.
Although this may sound complicated, the benefit is that a program compiled into Java bytecode can run on different platforms (Windows, macOS, Linux and others).
provided that a JVM exists for that platform.
The JVM can then optimize the bytecode for the specific processor and operating system. Java's famous slogan: ”Write Once, Run Anywhere” refers to this principle.
The JDK also includes the Java Runtime Environment (JRE) and the JVM itself.
A bytecode file can be executed using the java command:
java Program
Notice that when using the java command, the .class extension is omitted.
Later in the course we will learn about Gradle, which can compile multiple source files into a single .jar file containing everything needed to run the application.
.jar files can also be executed using the java command.
tip
Beginning with Java 11, the java command can also compile and execute .java source files directly without separately running javac.
In addition, throughout most of this course we will use IntelliJ IDEA, which performs source-code compilation automatically and efficiently.
Bonus: The jshell REPL
Although Java is considered a compiled language, it can sometimes be useful to experiment with Java interactively without continually recompiling.
In this context, interactive means that you can execute commands one line or block at a time without creating classes or a main method.
For this purpose, the JDK includes the jshell program, which is Java's command-line interpreter, or REPL (read-evaluate-print loop).
jshell provides several useful features, including:
- class and method name completion using the Tab key
- execution of expressions without a
mainmethod
You can exit jshell using /exit.
Printing Text and Reading Input in the Command-Line Window
Later on it will often be useful to print information to the terminal and read information from it.
Java's IO class provides three basic operations for console output and input:
| Method | Example | Description |
|---|---|---|
println | IO.println("Hello!"); | Prints the given value followed by a newline |
println | IO.println(); | Prints an empty line |
print | IO.print("On the same line!"); | Prints the given value without adding a newline |
readln | IO.readln(); | Reads one line of input from the user (up to Enter). If the user terminates input without entering data, returns a null reference. |
readln | IO.readln("Enter a word > "); | Same as readln, but prints the given prompt first |
Let's see how these work together.
You can freely modify the example below and experiment with different kinds of output:
void main() {
    String name = IO.readln("Enter your name: > ");
    IO.println();

    IO.println("Hello, " + name + "!");

    IO.print("This text");
    IO.print(" goes on the");
    IO.print(" same line");

    IO.println(); // Try removing this and see what happens

    IO.println("Welcome to the Programming 2 course!");
}
Variables and Data Types
Learning objectives
- You remember what variables and constants are.
- You remember what strings and lists are.
- You know Java's primitive data types.
- You know how strings, arrays, and lists are used in Java.
Programs process data stored in memory. In high-level programming languages, such as Java, human-readable names are used to refer to data stored in memory. Such a name that refers to data in memory is called a variable.
The programmer only needs to remember the name; the operating system and the computer's internal logic take care of the actual location of the data in memory.
Before a variable can be used, it must be declared:
type variableName;
The variable's type is written before its name and indicates what kind of data the variable can contain, such as an integer, a decimal number, or a boolean value.
The variable name is an identifier chosen by the programmer and used to refer to the variable.
A name may contain letters and underscores. However, a variable name cannot be a reserved Java keyword, nor may it begin with a number.
After a variable has been declared, values can be assigned to it:
variableName = expression;
The value of the expression on the right-hand side of the equals sign is stored in the variable named on the left-hand side.
If the variable previously contained another value, it is replaced by the new one.
void main() {
    double interestRate; // Variable declaration, double = decimal number
    double principal;    // Variable declaration

    interestRate = 0.05; // Assign a value to the variable
    principal = 150.0;   // Assign a value to the variable
 IO.println("interestRate = " + interestRate);
 IO.println("principal = " + principal);
}
A variable cannot be used until a value has been assigned to it at least once.
For this purpose, Java allows a combined declaration and assignment statement:
double principal = 0.05;

// Equivalent to:
double principal;
principal = 0.05;
A variable can also be part of an expression, allowing its value to be used as part of a larger computation.
void main() {
    double interestRate = 0.05;
    double principal = 150.0;

    double principalWithInterest = (1 + interestRate) * principal;
 IO.println("interestRate = " + interestRate);
 IO.println("principal = " + principal);
 IO.println("principalWithInterest = " + principalWithInterest);
}
In programming, an assignment is a statement, meaning a single executable instruction.
For example, the statement
double principal = 150.0;
can be understood as:
"Store the number 150.0 in memory at a location that will be referred to from now on as
principal."
A variable's value remains unchanged until another statement modifies it.
Java data types can be divided into two main categories: primitive data types and reference data types
All information in a computer is stored in memory as binary numbers (sequences of zeros and ones). Data types differ in how much memory they occupy, what kind of data they represent, and what rules govern their use.
Primitive types contain simple values such as integers and boolean values, whereas reference types contain more complex structures such as objects, arrays, and strings.
Primitive Data Types
Java provides eight built-in primitive data types. These can be roughly divided into four categories: integers, floating-point numbers, characters, and boolean values.
Integers
There are four integer types, which differ in their range and memory consumption. The most commonly used integer type is int.
| Type | Size (bytes/bits) | Approximate Range |
|---|---|---|
| byte | 1 byte (8 bits) | -128 ... 127 |
| short | 2 bytes (16 bits) | -32,768 ... 32,767 |
| int | 4 bytes (32 bits) | approx. -2 billion ... 2 billion |
| long | 8 bytes (64 bits) | approx. ±9 × 10^18 |
Note: Type of variable doesn't change automatically
In many dynamic programming languages such as Python and JavaScript, integers may not have a maximum value. Additional memory is allocated as needed, or less significant digits are rounded away. This is not the case in Java. If the result of a calculation exceeds the range of the variable type, an overflow occurs and the value wraps around within the allowed range:
void main() {
    int largeNumber = 2000000000;
    IO.println("largeNumber = " + largeNumber);

    largeNumber += 1000000000;
    IO.println("largeNumber = " + largeNumber);
}
Therefore, the possible value range must be considered when writing programs.
If there's a change that overflow happens you need to change the data type.
Java also provides
BigInteger
type for working with extremely large integers, but it is not covered in this course.
Floating-Point Numbers
Floating-point types are used to represent decimal numbers. The most common one is double.
| Type | Size | Precision |
|---|---|---|
| float | 4 bytes (32 bits) | approx. 7 significant digits |
| double | 8 bytes (64 bits) | approx. 15 significant digits |
Note: Floating-point might not be accurate
Java uses the IEEE 754 standard for floating-point arithmetic. Although these types are designed to represent decimal values, they differ from ordinary mathematical decimal numbers in several important ways:
void main() {

    // Rounding errors may occur
    double roundingError = 0.1 + 0.2;
    IO.println("roundingError = " + roundingError);

    // Division by zero is defined
    double negativeInfinity = -1.0 / 0.0;
    IO.println("negativeInfinity = " + negativeInfinity);

    double positiveInfinity = 1.0 / 0.0;
    IO.println("positiveInfinity = " + positiveInfinity);

    // 0/0 does not throw an exception
    double nan = 0.0 / 0.0;
    IO.println("nan = " + nan);
}
Floating-point numbers therefore have special values:
Infinity,
-Infinity and
NaN = Not A Number.
In addition, calculations involving floating-point values may contain small inaccuracies due to their binary representation and rounding behavior.
Java also provides the
BigDecimal
type for applications requiring highly accurate arithmetic, but it is not covered in this course.
Characters
A single character is stored in a char variable, which uses 2 bytes of memory.
Boolean Values
Java provides the boolean type for truth values. It has only two possible values: true or false.
Reference Data Types
Unlike primitive types, a reference-type variable does not contain the actual data itself. Instead, it contains a small fixed-size value called a reference. Through this reference, a program can access the actual data, whose size or contents might not be known until runtime.
In practice, almost every Java type other than the primitive types is a reference type.
For example String is a reference type and likewise arrays and lists.
Starting from Chapter 2, we will explore object-oriented programming. In Java, all objects are reference types.
All reference-type variables can be assigned the special value null.
A null reference indicates that the variable does not currently refer to any data.
Attempting to read or modify a variable whose value is null usually causes a runtime error:
String text = null;
String upperCaseText = text.toUpperCase();
IO.println(upperCaseText);
java.lang.NullPointerException: Cannot invoke "String.toUpperCase()" because "<local1>" is null
	at main.main(main.java:3)
Since this error occurs only during execution, it is generally the programmer's responsibility to ensure that variables and method parameters do not contain null references. Such checks can be implemented using conditional statements, which are introduced in the next section.
Optional information: Why do both primitive and reference types exist?
There are several reasons why Java distinguishes between these two categories of data types.
The first reason relates to performance and memory management.
If all variables were value-based (like primitive types), programs would consume a great deal of unnecessary memory and run more slowly, especially when handling large data structures.
For example, imagine a variable representing a book containing 1,000 pages of text. Every time we wanted to process the book variable, the entire contents of the book would need to be copied in memory. This would be highly inefficient.
Reference types solve this problem by allowing variables to refer to an object located elsewhere in memory without copying the entire object every time it is used.
The second reason is shared state. Often, multiple parts of a program need to access and modify the same data. For example, it makes sense for a bank-account object to be shared by deposit, withdrawal, and balance-checking operations. In a purely value-based system, the entire bank-account object would need to be copied every time money was withdrawn, transferred, or the balance checked. This could easily result in inconsistent copies containing different states of the same account.
The third reason is dynamic size. Reference types enable dynamically growing and shrinking data structures such as linked lists, stacks, and queues. These are difficult to implement efficiently as value types because the size of a value-type variable is fixed at compile time.
The fourth reason is object-oriented programming. References enable polymorphism in Java. Since a variable contains only a reference, it can point to any object that is compatible with the declared type.
Animal pet = new Dog();
pet = new Cat();
If these were pure value types, a variable of type Animal would require a fixed amount of memory.
If a Cat object required more memory than had been allocated for an Animal, the program would fail.
Because variables contain references rather than the actual object data, the size of the variable remains constant regardless of the size of the referenced object.
Literals
A literal is a fixed value written directly into source code. Each data type has its own syntax for literals.
-
Characters (
char): Character literals are enclosed in single quotation marks:'A','*','x'. Special characters begin with a backslash:'\n'(new line),'\u03A9'(Greek capital omega Ω) and'\t'(tab character) -
Integers (
byte,short,int,long): Integer literals are written directly as numbers:42,-7and0. Alongliteral must end with either an uppercase or lowercaseLorl:12345678901L. -
Floating-Point Numbers (
float,double): Floating-point literals are written using a decimal point:3.14,-0.001and2.0. Scientific notation may also be used:1.5e3(1.5 × 10³ = 1500) and2.0E-4(2.0 × 10⁻⁴ = 0.0002). By default, decimal-number literals are of typedouble. To create afloatliteral, appendForf. For example3.14f. -
Boolean Values (
boolean): Boolean literals are written using the keywords:trueandfalse.
void main() {
    char character = 'A';
     IO.println("character = " + character);

    int number = 123;
     IO.println("number = " + number);
    long largeNumber = 12345678901L;
     IO.println("largeNumber = " + largeNumber);

    double decimalNumber = -2.0;
     IO.println("decimalNumber = " + decimalNumber);
    float smallDecimal = 2.0f;
     IO.println("smallDecimal = " + smallDecimal);
    double scientificNotation = 1.5e-2;
     IO.println("scientificNotation = " + scientificNotation);

    boolean truthValue = true;
     IO.println("truthValue = " + truthValue);
}
Wrapper Classes
Each primitive type in Java has a corresponding wrapper class.
A wrapper class wraps a primitive value inside an object, allowing primitive values to be treated as objects.
For example: for primitive type int the wrapper class is Integer.
Wrapper classes provide useful methods and constants such as toString() and MAX_VALUE.
The following table shows the relationship between primitive types and wrapper classes:
| Primitive Type | Wrapper Class |
|---|---|
| byte | Byte |
| short | Short |
| int | Integer |
| long | Long |
| float | Float |
| double | Double |
| char | Character |
| boolean | Boolean |
The following example demonstrates the use of wrapper-class constants, methods and overflowing of range
void main() {
    byte oneByte = Byte.MAX_VALUE;
    short twoBytes = Short.MAX_VALUE;
    IO.println(oneByte);
    IO.println(twoBytes);
    IO.println(Short.toString(twoBytes).charAt(0));

    int maximum = Integer.MAX_VALUE;
    IO.println( maximum + " is the largest value that can be stored in an int variable");
    int overflow = Integer.MAX_VALUE + 1;
    IO.println("Overflowing the range:");
    IO.println(overflow);
}
Strings
In Java, strings are not considered primitive data types. However, Java provides special syntax for creating strings. A string can be created by enclosing characters in double quotation marks :
void main() {
    String text = "I am studying programming!";
    IO.println("text = " + text);
}
Strings in Java are immutable. If you perform an operation on a string, you receive a new string as the result. The original string remains unchanged. For example:
void main() {

    String immutable = "This string is immutable.";
    IO.println("immutable = " + immutable);

    immutable.concat(" Or is it?");
    IO.println("immutable = " + immutable);
}
The new string returned by concat() is not stored anywhere, so it is discarded and
the original string remains unmodified.
To modify the value stored in a string variable, you must assign the new string back to the variable:
void main() {
String immutable = "This string is immutable.";
IO.Printlnt("immutable = " + immutable);

// HIGHLIGHT_GREEN_BEGIN
immutable = immutable.concat(" Or is it?");
// HIGHLIGHT_GREEN_END
 IO.println("immutable = " + immutable);
}
String contains numerous useful methods. Some of the most commonly used ones are listed below.
| Method | Description |
|---|---|
string.charAt(index) | Returns the character at the specified index. |
string.length() | Returns the number of characters in the string. |
string.trim() | Returns a copy of the string with leading and trailing whitespace removed. |
string.replace(target, replacement) | Returns a copy of the string where occurrences of target have been replaced with replacement. |
string.split(pattern) | Splits the string at occurrences of pattern and returns an array containing the resulting substrings. Note that pattern is a regular expression. |
string.contains(search) | Returns true if the string contains search. |
string.indexOf(search) | Returns the index of the first occurrence of search. |
string.substring(start, end) | Returns a substring beginning at start and ending at end. |
String.join(separator, strings) | Returns a string formed by joining the strings in the collection using separator. |
Complete documentation for all methods can be found in the JavaDocs documentation (see Class String).
The following example demonstrates the use of some of these methods:
void main() {
    String text = "I am studying programming using Java.";
    IO.println("text = " + text);
    IO.println("First character: " + text.charAt(0));
    IO.println("Length of string: " + text.length());

    IO.println(); // Prints additional newline

    // Concatenation using +
    text = text + " Hello world!";
    IO.println("text (after addition) = " + text);

    // Replacing text
    text = text.replace("Java", "JAVA");
    IO.println("text (after replacement) = " + text);
    IO.println();

    // Split the string at periods
    // HOX! In split method the characters \^$.|?*+()[]{}
    // So for example if you would like to split at period, you need to write
    // text.split("\\.") and not text.split(".").
    // The last one is so called regular expression
    // which would split text at every character.
    String[] sentences = text.split("\\.");
    IO.println("sentences = " + Arrays.toString(sentences));

    IO.println();

    // Find position of a substring
    int programmingIndex = text.indexOf("programming");
    IO.println("programmingIndex = " + programmingIndex);

    // Extract a substring using the index
    String substring = text.substring(programmingIndex, programmingIndex + 11);
    IO.println("substring = " + substring);

    IO.println();

    // Operation "String + expression" converts the expression value into a string
    String anotherString = "1/2 = " + (1.0 / 2);
    IO.println("anotherString = \"" + anotherString + "\"");
}
Parsing Numbers from Strings
A string can be converted into a numeric value using the wrapper classes parsing methods.
For example: Integer.parseInt() converts a string to an integer and
Double.parseDouble() converts a string to a floating-point number.
void main() {
    String integerString = "42";
    int integerValue = Integer.parseInt(integerString);
    IO.println("integerValue = " + integerValue);

    String decimalString = "3.14";
    double decimalValue = Double.parseDouble(decimalString);
    IO.println("decimalValue = " + decimalValue);
}
StringBuilder
Use the StringBuilder class whenever you need a mutable string.
StringBuilder provides methods for modifying text without creating a new string object after every operation, resulting in better memory efficiency.
Some useful methods are listed below.
| Method | Description |
|---|---|
sb.charAt(index) | Returns the character at the specified index. |
sb.length() | Returns the number of characters in the sequence. |
sb.append(value) | Appends a value to the end of the sequence. |
sb.toString() | Returns a String copy of the contents. |
A complete description of all methods can be found in the JavaDocs documentation (see
Class
StringBuilder).
Example how to use StringBuilder methods
void main() {

    StringBuilder mutable = new StringBuilder("This is mutable");
    IO.println("mutable = " + mutable);
    IO.println("mutable.length() = " + mutable.length());

    IO.println();

    mutable.append(" string.");
    IO.println("mutable = " + mutable);
    IO.println("mutable.length() = " + mutable.length());

    IO.println();

    String immutableCopy = mutable.toString();
    IO.println("immutableCopy = " + immutableCopy);
}
Arrays
Arrays are used to store a collection of elements of the same type in a single variable. This makes data organization simpler and more efficient.
A new array can be declared and created in Java as follows:
Type[] name = new Type[size];
Here, new Type[size] creates an array containing size elements of type Type.
After creating the array, values can be assigned using assignment statements:
void main() {
int[] grades = new int[4];
grades[0] = 4;
grades[1] = 2;
grades[2] = 2;
grades[3] = 5;
IO.println( "grades = " + Arrays.toString(grades));
}
In the expression [number], the number refers to the element's position, or index, within the array.
Java uses zero-based indexing: so first element is at index 0, second one is at index 1 and so on.
The index of the last element is always array.length - 1.
If the values are already known when the array is created, initialization can be written as:
void main() {
int[] grades = new int[] {4, 2, 2, 5};
    IO.println( "grades = " + Arrays.toString(grades));
}
The new Type[] portion may be omitted when declaration and initialization occur on the same line:
void main() {
int[] grades = {4, 2, 2, 5};
IO.println( "grades = " + Arrays.toString(grades));
}
In Java, the size of an array cannot be changed after it has been created. Attempting to access or assign an element outside the valid index range causes a runtime error:
int[] grades = new int[]{4, 2, 2, 5};
grades[5] = 3;
java.lang.ArrayIndexOutOfBoundsException: Index 5 out of bounds for length 4
	at main.main(main.java:3)
The length of an array can always be checked using the length attribute.
An array can be printed using Arrays.toString()
(see
JavaDocs
)
void main() {
    int[] grades = {4, 2, 2, 5};
    IO.println( "Array length: " + grades.length);
    IO.println( "Array contents: " + Arrays.toString(grades));
}
Multidimensional Arrays
Unlike languages such as C#, Java does not provide a separate multidimensional array type.
Instead, Java allows arrays whose elements are themselves arrays. In other words, a two-dimensional array has the type
Type[][]:
void main() {
int[][] array2D = new int[][] {
    new int[] {1, 2, 3},
    new int[] {4, 5, 6, 7},
    new int[] {8, 9, 0},
};

// The length of the array is the number of arrays it contains,
// that is, the number of "rows".
IO.println( "The array contains " + array2D.length + " arrays.");

// Indexing works as normal -> each element is now an entire array
IO.println( "array2D[0] is an array: " + Arrays.toString(array2D[0]));
IO.println( "array2D[1] is an array: " + Arrays.toString(array2D[1]));
IO.println( "array2D[2] is an array: " + Arrays.toString(array2D[2]));

// Indexing individual elements also works normally,
// but do note the syntax!
int firstElement = array2D[0][0];
IO.println( "The first element of the first row: " + firstElement);

IO.println( "The third element (index 2) of row 2 (index 1) is: " + array2D[1][2]);
}
Notice that in the example above, array2D[0][0] refers to
the first arrays (array2D[0]) first element within that array
(array2D[0])[0]
The structure can be visualized as follows:
Notice especially that the "row arrays" do not need to have the same length.
Constants
A variable whose value can only be assigned during initialization is declared using the final keyword.
According to Java coding conventions, final variables are written using uppercase letters with words separated by underscores.
Java allows final to be used with both primitive and reference types.
However, when used with a reference type, final means that the reference itself cannot be changed to point to a different object. The data referenced by the variable may still be modified if the type allows it.
final int DAYS_IN_WEEK = 7;

final int[] DAYS_PER_MONTH_LEAP_YEAR = new int[] {31, 29, 31, 30, 31, 30, 31, 31, 30, 31, 30, 31};

// DAYS_IN_WEEK = 8; // This would cause a compilation error
DAYS_PER_MONTH_LEAP_YEAR[0] = 30; // This is allowed
Constants are used, among other things, to improve code readability, reduce code duplication, increase reliability, and improve performance.
Lists
A list is a data structure that can grow and shrink as needed. Like an array, a list can contain only elements of a single type. Unlike arrays, the size of a list is not fixed, making lists more flexible when the number of elements is not known beforehand. Java lists correspond roughly to arrays in JavaScript.
The most commonly used list implementation in Java is ArrayList<T>, where T represents the type of elements stored in the list. To use lists, the appropriate classes must first be imported:
import java.util.*;

// Program code
void main() ...
The import statement tells the compiler that the program uses types from the java.util package.
Briefly, a package is Java's way of organizing related classes.
If you have previously used Python, Java packages can be thought of equivalent of a Python package.
import java.util.ArrayList; is conceptually similiar to from collections import deque in Python.
Packages will be discussed in greater detail later. For now, it is sufficient to know that the compiler may not be aware of certain types unless they are imported.
Once the java.util package has been imported, lists can be initialized as follows:
import java.util.*;

void main() {
    // Method 1: Empty list without elements
    List<Integer> grades = new ArrayList<Integer>();

    // Add the elements one by one.
    grades.add(4);
    grades.add(2);
    grades.add(2);
    grades.add(5);
    IO.println("grades = " + grades);

    // Method 2: Initialized list where the elements are given
    List<Integer> predefinedGrades = new ArrayList<Integer>( List.of(4, 2, 2, 5));
    IO.println( "predefinedGrades = " + predefinedGrades);
}
Because of limitations in Java's generic type system, the element type of a list must always be a reference type. Therefore, the following is not allowed:
List<int> list = new ArrayList<int>();
error: unexpected type
List<int> lista = new ArrayList<int>();
     ^
  required: reference
  found:    int
If you need a list containing primitive values, use the corresponding wrapper classes,
which works the same as the primitive values, but are reference type. In other words
ArrayList<Integer> is allowed, whereas
ArrayList<int> is not.
Likewise,
ArrayList<String>
is valid because String is a reference type.
note
According to Java coding conventions, variables should generally be declared using the interface type List<T>, while the actual object is created using a more specific implementation such as ArrayList<T>.
Thus, although the following is allowed:
void main() {
ArrayList<String> names = new ArrayList<String>(List.of("Matti", "Teppo"));
IO.println("names = " + names);
}
the more common style is:
void main() {
List<String> names = new ArrayList<String>(List.of("Matti", "Teppo"));
IO.println("names = " + names);
}
Furthermore, when the compiler can infer the element type from the declaration, the type argument can often be omitted:
void main() {
// The compiler infers that ArrayList<> must be ArraList<String>
// based on the declared variable type
List<String> names = new ArrayList<>(List.of("Matti", "Teppo"));
IO.println("names = " + names);
}
We will examine the differences between List<T> and ArrayList<T> in more detail in Part 5.
For now, it is enough to think of List<T> as the general concept of a list, and ArrayList<T> as one concrete implementation provided by Java.
Let's now look at some useful methods provided by lists.
| Method | Description |
|---|---|
size() | Returns the number of elements in the list. |
add(element) | Adds an element to the end of the list. |
add(index, element) | Inserts an element at the specified index and shifts subsequent elements one position forward. |
get(index) | Returns the element at the specified index. |
remove(element) | Removes the first occurrence of the specified element from the list and shifts remaining elements one position backward. |
remove(index) | Removes the element at the specified index. |
Additional methods can be found in the JavaDocs documentation (see
Class ArrayList<E>).
import java.util.*;

void main() {
    // Create an empty list of strings
    List<String> names = new ArrayList<>();
    // Add elements to the list
    names.add("Matti");
    names.add("Teppo");
    names.add("Liisa");

    // Print the size of the list
    IO.println("List size: " + names.size());
    IO.println("------");
    // Retrieve the element at index 1 (the second element)
    String second = names.get(1);
    IO.println("Second element: " + second);
    IO.println("------");

    // Remove the element at index 0 (the first element)
    names.remove(0);
    IO.println("Removed the first element.");
    IO.println("------");
    // Print all elements
    IO.println("names = " + names);
    IO.println("------");

    // Print the size of the list
    IO.println("List size: " + names.size());

    // Two examples of creating lists with predefined contents
    List<String> animals = new ArrayList<>(List.of("dog", "cat", "fish"));
    List<String> colors = Arrays.asList("red", "blue", "yellow");
    IO.println("animals = " + animals);
    IO.println("colors = " + colors);
}
Notice at least the following differences between Java, C#, and Python when working with lists.
The variable i refers to a list index.
| Operation | Java | C# | Python |
|---|---|---|---|
| Read an element at a specific position | list.get(i) | list[i] | list[i] |
| List size | list.size() | list.Count | len(list) |
| Remove an element | list.remove(i) | list.RemoveAt(i) | list.pop(i) |
| Is the list empty? | list.isEmpty() or list.size() == 0 | list.Count == 0 | if not list: or len(list) == 0 |
Java's Type System
Java is a statically typed language, which means that variable types are determined at compile time rather than during program execution. If you attempt to assign a value of the wrong type to a variable, the program will fail to compile and the compiler will report an error.
In practice, different data types cannot generally be used interchangeably unless Java explicitly allows it. For example a boolean value cannot be used as a numeric value and a reference value cannot be treated as an integer. If a programmer attempts to violate these rules, a compilation error occurs.
void main() {
    boolean truthValue = false;
    truthValue = 1;
}
error: incompatible types: int cannot be converted to boolean
    truthValue = 1;
                 ^
1 error
The compiler error above indicates that an integer (int) cannot be converted into a boolean (boolean).
This is a clear difference compared to dynamically typed languages such as Python and JavaScript, where a variable's type is determined at runtime and variables may store values of different types during execution.
For example, the following code is valid in JavaScript:
let truthValue = true;
console.log(`truthValue = ${truthValue}`);
truthValue = 1;
console.log(`truthValue = ${truthValue}`);
However, it is inevitable that programs must work with values of different types. To support this, Java provides a number of automatic conversion rules that allow the compiler to perform implicit type conversions in assignments and expressions.
For example:
- An integer (
int) can be automatically converted into a floating-point number (double). - Smaller integer types (such as 8-bit
byte) can be automatically widened into larger integer types (such as 32-bitint).
There are many such conversion rules. As a general principle, if a conversion does not result in information loss, Java usually provides an implicit conversion for it.
void main() {
    int integerValue = 23;
    IO.println("integerValue = " + integerValue);
    double decimalValue = integerValue; // OK: implicit int -> double conversion
    IO.println( "decimalValue = " + decimalValue);

    // NOTICE:
    // division is int / int => decimal part lost
    double halfIncorrect = 1 / 2;
    IO.println( "halfIncorrect = " + halfIncorrect);

    // CORRECT:
    // division int / double => double division
    double halfCorrect = 1 / 2.0;
    IO.println( "halfCorrect = " + halfCorrect);
}
In addition, the programmer may explicitly force a conversion using the syntax
(newType)variable.
This is known as an explicit type conversion or cast.
Explicit conversions are used when the desired conversion is not allowed implicitly.
void main() {
    long hugeNumber = 40000000000L; // long = 64-bit integer
    IO.println("Large long value: " + hugeNumber);

    // long -> int is not implicit, but can be done explicitly
    int truncated = (int) hugeNumber; // int = 32-bit integer
    IO.println("int after explicit conversion: " + truncated);
}
In practice, static typing means that Java attempts to prevent type-related errors before the program is executed. The compiler acts as a safety net that ensures values, variables, and operations are compatible with one another before the program is run.
Control Structures and Basic Data Structures
important
- Conditional statements (
if,switch) - Loop statements (
for,while,do-while) and list-like data structures - Understanding that in Java, strings are compared using the
equals()method rather than the==operator
Programming is rarely just about executing lines of code sequentially. To make programs useful, they must be able to make decisions, repeat actions, and manage data in a sensible way. In this section, we will cover Java's control flow mechanisms, iteration structures, and two ways of storing data: traditional arrays and flexible lists.
Comparison Operators
Before we can teach a program to make choices ("if this, then that"), we need to understand how a computer sees the world. Computer logic is binary: statements are either true (true) or false (false).
Comparison operators can be thought of as questions that return a Boolean value. Below are the most common comparison operators in Java.
| Operator | Meaning | Example (when x = 5, y = 3) | Result |
|---|---|---|---|
== | Equal to | x == y | false |
!= | Not equal to | x != y | true |
> | Greater than | x > y | true |
< | Less than | x < 4 | false |
>= | Greater than or equal to | x >= 5 | true |
<= | Less than or equal to | y <= 3 | true |
Often, decisions depend on more than one condition. For example:
"I will go outside IF it is not raining AND I have free time."
For this purpose, we use logical operators to combine conditions.
&&(AND): The expression is true only if both conditions are true.||(OR): The expression is true if at least one of the conditions is true.!(NOT): Reverses a Boolean value (true becomes false, false becomes true).
warning
Do not confuse the assignment operator = with the comparison operator ==.
if (x = 5)attempts to assign the value5tox(error)if (x == 5)checks whether the value ofxis5(correct)
Comparing Reference-Type Variables
Unlike primitive types (int, double, etc.), the == operator in Java compares references when used with reference types rather than the contents of the objects themselves.
For this reason, the equals() method should be used when comparing the contents of strings and other reference-type variables.
void main() {
    String string1 = "Slush";
    String string2 = new String("Slush"); // Force creation of a new String object

    // INCORRECT: Compares references -> prints false
    IO.println(string1 == string2);

    // CORRECT: Compares contents -> prints true
    IO.println(string1.equals(string2));
}
Comparing Against null
Checking for a null reference can, however, be done with the == operator, because in this case we specifically want to compare references.
void main() {
    String string = null;
    IO.println(string == null);
}
Methods often use a null reference to represent the absence of a value. For example, IO.readln() may return null if input could not be read (see
JavaDoc documentation).
This may occur if the user terminates the program unexpectedly. In such situations, it can be sensible to verify that a variable is not null before using it.
void main() {
    String input = IO.readln("Enter input");

    if (input == null) {
        // Do something if no input was provided
        // For example: exit the program
        return;
    }

    // Here we know that input contains at least some string
    IO.println("Text in uppercase: " + input.toUpperCase());
}
Conditional Statements
Conditional statements control the flow of a program. Constructing a conditional statement always requires one or more Boolean expressions.
The if Statement
The basic conditional statement is if. The code block inside it is executed only if the Boolean expression inside the parentheses evaluates to true.
Often, we also need alternative branches, in which case we use else if and else structures.
The syntax for the if statements is the following:
if (points >= 90) {
    IO.println("Grade: 5");
} else if (points >= 50) {
    IO.println("Grade: Pass");
} else {
    // Executed if none of the above conditions were met
    IO.println("Grade: Fail");
}
The switch Statement
When you want to compare the value of a single variable against several specific values (for example, a menu selection), a switch statement may be clearer than a long if-else chain.
int choice = 2;

switch (choice) {
    case 1:
        IO.println("You selected option 1");
        break; // Important: stops execution within this switch block
    case 2:
        IO.println("You selected option 2");
        break;
    default:
        IO.println("Unknown selection");
}
In addition to the traditional switch statement, modern versions of Java (Java 14+) support a more
concise arrow syntax using -> operator.
void main() {
int choice = 2;

switch (choice) {
    case 1 -> IO.println("You selected option 1");
    case 2 -> IO.println("You selected option 2");
    case 6,7 -> IO.println("Six or Seven");
    default -> IO.println("Unknown selection");
}
}
The Ternary Operator
In simple either-or situations where you want to assign a value to a variable based on a condition, you can use the ternary operator (?:).
Syntax: (condition) ? valueIfTrue : valueIfFalse;
Example:
void main() {
    int number1 = 5;
    int number2 = 8;

    // Read as:
    // If number1 is greater than number2,
    // assign number1 to larger, otherwise assign number2
    int larger = (number1 > number2) ? number1 : number2;

    IO.println("The larger number is: " + larger);
}
Loops
Loops are needed when you want to perform actions repeatedly. Java provides four main ways to create loops:
for, for-each, while and do-while.
for
Use a for loop when you know in advance how many repetitions are needed or when you need an index (position number) during the iteration.
The structure is as follows:
for (initialization; condition; update) {
    // loop body
}
Below is an example of calculating a sum with a for loop.
void main() {
int[] numbers = {1, 2, 3, 4};
int sum = 0;

// Traverse the array using indices 0, 1, 2, and 3
for (int i = 0; i < numbers.length; i++) {
    sum += numbers[i];
}

IO.println("The sum is: " + sum);
}
The initialization, condition, and update expressions can technically be left empty, but the semicolons must remain in place. An infinite loop can be created by leaving the condition empty, although this is rarely desirable.
for-each
A for-each loop is often the most readable and safest way to iterate through an entire data structure. If you do not need the index and do not intend to modify the size of the structure, use a for-each loop.
The for-each loop has some limitations: You do not know the index of the current element and
you cannot modify the structure by adding or removing elements.
void main() {
    int[] numbers = {1, 2, 3, 4};
    int sum = 0;

    // "For each number in the numbers array..."
    for (int number : numbers) {
        sum += number;
    }

    IO.println(sum);
}
while
A while loop is a good choice when you do not know beforehand how many times an action must be repeated. The loop continues as long as the condition remains true.
Typical examples include reading a file line by line or running a game loop.
void main() {
    String input = "";

    IO.println("Welcome to the game! (Type 'quit' to exit)");

    // Note the "!" (NOT operator) and .equals() for strings
    // The loop continues as long as
    // input is NOT missing (i.e., not null)
    // AND input is NOT "quit"
    while (input != null && !input.equals("quit")) {
        input = IO.readln("> "); // Stops to wait user input

        IO.println("Echo: " + input);
    }

    IO.println("Game ended.");
}
do-while
This loop works like a while loop, but with one important difference: the loop body is always executed at least once because the condition is checked only at the end.
do-while is the only loop whose closing line ends with a semicolon.
The following pseudocode example repeatedly generates a new location for an apple if it is too close to the player.
void main() {
    Vector2D playerPosition = new Vector2D(0, 0);
    Vector2D applePosition = new Vector2D(0, 0);

    do {
        // Generate a new position for the apple
        applePosition.x = Math.random() * 10;
        applePosition.y = Math.random() * 10;
        // If the apple is too close to the player, generate a new position
    } while (applePosition.distanceTo(playerPosition) < 2.0);
}
Controlling Loop Execution
When necessary, loop execution can be controlled using the following statements:
break: Terminates the loop and continues execution with the code following the loop.continue: Ends the current iteration and proceeds directly to the loop's update expression and condition check.
In the example below, the numbers 1, 2, 3, 4, 6, and 7 are printed. The number 5 is skipped, and the loop terminates when it reaches 8.
 void main() {
for (int i = 1; i <= 10; i++) {
    if (i == 5) {
        continue; // Move to the next iteration
    }

    if (i == 8) {
        break; // Stop the loop
    }

    IO.println(i);
}
}
Combining Control Structures
A loop structure can contain other structures, such as conditional statements and additional loops. When using nested structures, it is important to understand variable scope: a variable defined inside an inner structure is not visible outside that structure and a variable defined in an outer structure is visible inside nested structures.
For example, a variable defined inside an if statement cannot be used outside the if block.
void main() {
    int number = 10;

    if (number > 5) {
        int number2 = number + 1; // OK: number is defined in an outer scope
        number2 *= 5;
    }

    IO.println(number2); // ERROR: number2 is defined inside the if-block
}
error: cannot find symbol
    IO.println(number2);
               ^
  symbol:   variable number2
In situations like this, one solution is to move the variable declaration into the outer scope.
void main() {
    int number = 10;

    // Define and initialize the variable in the outer scope
    int number2 = 0;

    if (number > 5) {
        // OK: both number and number2 are defined in the outer scope
        number2 = number + 1;
        number2 *= 5;
    }

    // OK: number2 is defined in the same scope as this statement
    IO.println(number2);
}
Nested Loops
Nested loops mean writing one or more loop structures inside another loop. For each iteration of the outer loop, a certain number of additional iterations are performed by the inner loop.
A common use case for nested loops is processing multidimensional arrays T[][].
void main() {
int[][] table2D = {
    {1, 2, 3},
    {4, 5, 6},
    {7, 8, 9}
};

for (int rowIndex = 0; rowIndex < table2D.length; rowIndex++) {
    IO.println("Row " + rowIndex + ":");
    for (int columnIndex = 0; columnIndex < table2D[rowIndex].length; columnIndex++) {
        int element = table2D[rowIndex][columnIndex];
        IO.println("  Column " + columnIndex + ": " + element);
    }
}
}
Remember that int[][] means an array whose elements are themselves arrays of integers. Therefore, in the example above:
table2D.lengthreturns the number of arrays contained intable2D, that is, the number of rows.table2D[rowIndex]returns theint[]array stored at the specified index, containing all elements of that row.table2D[rowIndex][columnIndex]returns the element at indexcolumnIndexwithin the rowtable2D[rowIndex].
Subroutines
- You can define a subroutine.
- You can process data using subroutines.
- You understand the difference between Java primitive types and reference types when calling a subroutine.
- You can document a subroutine.
A subroutine is a part of a program that performs a specific task. Subroutines make programs easier to structure because they allow a program to be divided into smaller, more manageable parts. Subroutines also improve reusability, as the same subroutine can be called multiple times from different parts of a program without rewriting the code.
Subroutines are sometimes called functions, and in the context of object-oriented programming, they are often referred to as methods. The exact terminology depends on the context, but in this context we use the term subroutine.
A subroutine can receive inputs, called parameters. After completing its task, a subroutine may return a result. Consider the average subroutine below, which calculates the average of a collection of integers. The subroutine receives an integer array as a parameter and returns the average as a double.
void main() {
    int[] numbers = {4, 8, 15, 16, 23, 42};
    double average = average(numbers);
    IO.println("The average of the numbers is: " + average);
}

double average(int[] numbers) {
    if (numbers.length == 0) {
        return 0;
    }
    double sum = 0;
    for (int number : numbers) {
        sum += number;
    }

    return sum / numbers.length;
}
Defining a Subroutine
The average subroutine above consists of four main parts (1) return type,
(2) name,
(3) parameters,
(4) body.
- (1) Return type (here
double): Specifies the type of value returned by the subroutine. If the subroutine does not return a value, the return type isvoid. - (2) Subroutine name (here
average): Specifies the name used when calling the subroutine. - (3) Parameters (here
int[] numbers): Variables declared within the parentheses that receive the inputs provided to the subroutine. A subroutine may have zero or more parameters, separated by commas. Each parameter has its own type and name.
Together, these three parts are called the subroutine declaration. In Part 2, we will also introduce object-oriented programming modifiers, which can be added to the declaration.
Following the declaration, the body of the subroutine is written inside curly braces. The body contains the code that is executed whenever the subroutine is called.
As with all source code, the names of subroutines and parameters should be descriptive, follow Java naming conventions, and comply with the style guide used in this course.
Return Values and Data Processing
A subroutine can be viewed as a black box: raw materials (parameters) go in, processing happens inside the box, and a finished product (the return value) comes out.
The return keyword immediately terminates the execution of a subroutine and returns a value to the caller. The type of the returned value must match the return type specified in the subroutine declaration.
When using a subroutine written by someone else, we do not necessarily know what happens inside the box. Instead, we trust that it behaves according to its specification. This is common in programming, where we routinely use pre-existing libraries and subroutines.
Void Subroutines
Sometimes a subroutine is needed only to perform an action, such as printing text to the screen or causing some other side effect. In such cases, the subroutine does not need to return a value.
The return type is then specified as void.
Parameter Passing: Primitive Types and Reference Types
It is important to understand what is actually passed as a parameter when a subroutine is called. In Java, all parameters are passed by value (pass-by-value), but the nature of the value being passed depends on the parameter's type.
- If the parameter type is a primitive type (such as
int,double,char, orboolean), the subroutine receives a copy of the original value. - If the parameter type is a reference type (such as an array), the subroutine receives a copy of the reference to the original data.
When a primitive type is passed as a parameter, (see Chapter 1.2) the value of the variable is copied and passed to the called subroutine. If the subroutine modifies this copy, the original variable remains unchanged.
void tryToModify(int number) {
    number = 99; // Only the copy is modified
    IO.println("Inside method: " + number);
}

void main() {
    int x = 10;

    tryToModify(x);

    IO.println("In main: " + x); // Still prints 10
}
When a reference type is passed as a parameter (see Chapter 1.2) , the reference is copied rather than the underlying data. The subroutine therefore receives a copy of a reference that points to the same data as the variable in the main program. If the subroutine modifies the data being referenced (for example, elements of an array), the change is visible in the main program as well.
You can think of a reference as a remote control used to operate a television, where the television represents the data. Even though a copy of the remote control is passed to the subroutine, it can still control the same television.
The following example demonstrates this by passing an int[] array as a parameter and modifying its elements:
void zeroArray(int[] array) {
    // This modification affects the original array!
    // The variable "array" refers to the same array.
    for (int i = 0; i < array.length; i++) {
        array[i] = 0;
    }
}

void main() {
    int[] numbers = {1, 2, 3};

    zeroArray(numbers);

    // The original array has been modified
    IO.println(numbers[0]); // Prints 0
}
However, it is important to understand that the subroutine call passed a copy of the reference, not the original reference itself. If the subroutine attempts to make the reference point to different data (for example, another array), this change will not affect the original reference in the calling code.
The following example demonstrates this:
void main() {
    int[] numbers = {1, 2, 3};

    changeReference(numbers);

    // The original array has not changed
    IO.println(numbers[0]); // Still prints 1
}

void changeReference(int[] array) {
    // This does not affect the original reference!
    array = new int[] {9, 9, 9};
}
In some languages, such as C++, it is possible to pass the original variable itself by reference (pass-by-reference). Java does not provide such a mechanism. Instead, all parameters are passed by value, as described above.
Subroutines and Side Effects
A subroutine that modifies data provided through its parameters is often said to produce side effects.
For example, consider the following reverse subroutine, which reverses the order of elements in an array:
void reverse(int[] array) {
    // Implementation hidden to save space
 for (int i = 0; i < array.length / 2; i++) {
     int temp = array[i];
     array[i] = array[array.length - 1 - i];
     array[array.length - 1 - i] = temp;
 }
}

void main() {
    int[] array = {1, 2, 3, 4, 5};
    IO.println("array = " + Arrays.toString(array));
    reverse(array);
    IO.println("array = " + Arrays.toString(array));
}
Notice that reverse does not return a value, yet it has the side effect of reversing the array that was provided as a parameter.
The same functionality could also be implemented without side effects by returning a new array instead:
int[] reverse(int[] array) {
    // Implementation hidden to save space
 int[] result = new int[array.length];
 for (int i = 0; i < array.length; i++) {
     result[i] = array[array.length - 1 - i];
 }
 return result;
}

void main() {
    int[] array = {1, 2, 3, 4, 5};
    IO.println("array = " + Arrays.toString(array));
    int[] reversed = reverse(array);
    IO.println("reversed = " + Arrays.toString(reversed));
}
Side effects can be useful, for example, when optimizing memory usage. However, they can also make programs more difficult to understand.
In the example above, the side effect of void reverse(int[] array) is not immediately obvious unless the implementation of the subroutine is examined.
Side effects can unintentionally modify or even destroy data if the programmer is not aware of them.
For this reason, it is extremely important to understand how subroutines process their parameters.
Comments and Documentation
Source code can contain text that is not executable code but instead explains it. Such explanatory text comes in two forms: (1) comments written directly within the code (referred to simply as comments) and also (2) documentation comments.
The purpose of comments is to support the development process. They are intended for programmers working with the code. Documentation comments, on the other hand, are intended for everyone who uses the code. They are visible not only to the programmer who wrote the code but also to users who access the code through an API (Application Programming Interface), for example.
Single-Line Comments
Single-line comments, which use the syntax //, can be used to mark TODO items in code:
void main() {
    // TODO: Investigate potential issues with this solution
    String input = IO.readln();
    IO.println("You typed: " + input);
}
In general, a good principle is to write code that explains itself. Variables, classes, subroutines, and other programmer-defined names should be as descriptive as possible, reducing the need for comments on individual lines.
Sometimes, however, single-line comments are unavoidable when an operation is not self-explanatory or when a descriptive variable name would become excessively long:
void main() {
    int n = 9;
    // Rounds down to the nearest number divisible by four
    int rounded = n & ~3;
    IO.println(rounded);
}
The variable name roundedDownToNearestNumberDivisibleByFour would also not be a particularly reasonable alternative.
Multi-Line Comments
In Java, a multi-line comment is enclosed between /* and */. This style of comment is recommended when more complex logic requires additional explanation and/or when it is useful to explain why a particular solution was chosen. Unlike documentation comments, these explanations are not intended to be displayed to users of the code.
if (user.usesLegacySystem()) {
    /*
     * Users registered before 2022 still use the legacy
     * authorization model for the time being.
     * Do not remove this check until all accounts have
     * been migrated.
     */
    return useLegacyPermissions(user);
}
Documentation Comments
A documentation comment is a comment from which documentation intended for users of the code can be generated automatically. Examples of such documentation include HTML API documentation that explains how to use the code, as well as tooltips displayed by IDEs when using subroutines.
Documentation comments are placed immediately before the code element being documented, such as a subroutine or a class.
In Java, documentation comments use a special syntax that differs from ordinary comments. They begin with /** and end with */, making them very similar to multi-line comments.
 void main() {
     IO.println("sum(1, 2) ==> " + sum(1, 2));
 }

/**
 * Calculates the sum of two integers.
 *
 * @param a The first number
 * @param b The second number
 * @return The sum of the numbers
 */
int sum(int a, int b) {
    return a + b;
}
The basic structure of a documentation comment can be generated automatically in the IntelliJ IDEA development environment by typing /** above a subroutine declaration and pressing Enter.
Bonus: How does the Java documentation look like?
Suppose that you save the code above in a file called Sum.java and then execute the command
javadoc Sum.java
This generates documentation files, including an index.html file. Opening this file in a web browser and navigating to the Sum class produces a view similar to the following:
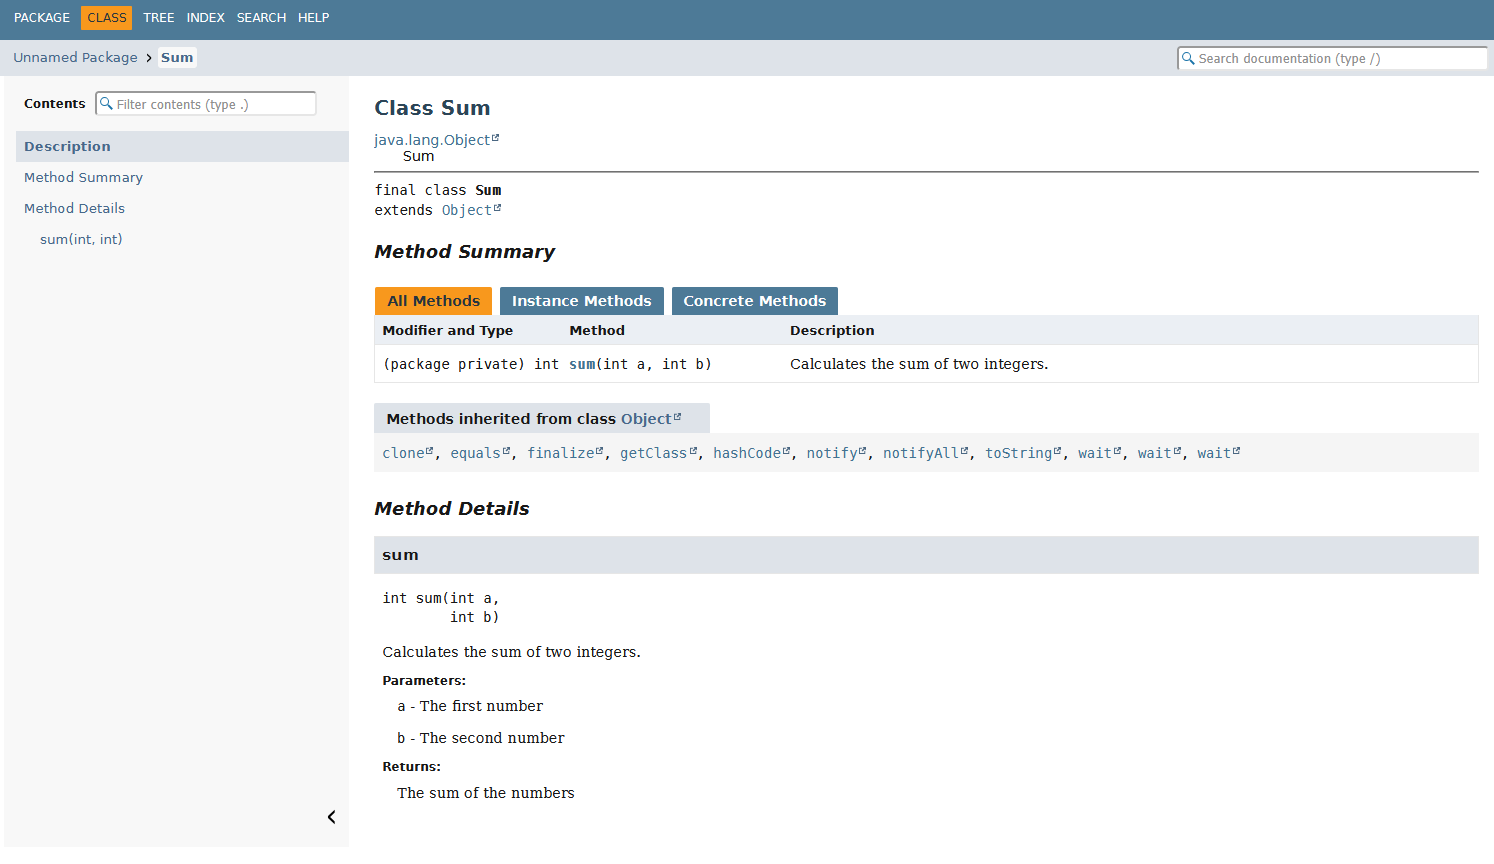
Does it look familiar? Compare it to Java's official API documentation of Object class .
tip
It is worth exploring the official Java documentation linked throughout these course materials. Links to official documentation can usually be recognized by the text "JavaDoc".
Be prepared, however, for documentation to feel challenging at first. Official documentation often contains terminology and syntax that have not yet been introduced and may therefore be difficult to understand. There is no need to worry about this. Everything required for the course will be covered in these course materials unless explicitly stated otherwise.
Nevertheless, the ability to read and understand documentation is an important skill for any programmer. It is worth becoming gradually accustomed to it—even in the age of artificial intelligence. AI tools do not always provide the most recent information, nor do they always accurately reproduce what the documentation says. If you learn to rely solely on AI, you may encounter difficulties when problems become more complex. Artificial intelligence, particularly generative AI, tends to perform best when problems are common, well-known, and do not require deep expertise or careful attention to detail.
All Exercises in This Part
Create a new IDEA project named Week1 (see the Create a New Project guide).
Add a module named Task11 to the project (see the Create a Java Module guide).
Add a Java Compact File named MyDetails.java to the project. Write a program in the file that prints, each on a separate line:
- your name,
- the brand of your phone,
- the model of your phone.
Create a program that prints the number of words contained in a string entered through the console. You may assume that words are separated by a single space. Other punctuation marks do not need to be considered.
The program must print "No words" if the input is an empty string.
The program may terminate after displaying the output. It does not need to keep asking for input continuously.
Test your program by reading a string from the user and printing the number of words, for example:
Number of words: 5
Create a program that reads non-negative integers from the user, one line at a time, in a loop using the IO.readln() method, until the user enters an empty string.
Store these numbers in a list.
Then write the methods sum, average, smallest, and largest, which calculate the smallest number in the list, the largest number in the list, the sum of the numbers, and the average of the numbers. Print the values returned by these methods to the user.
Add appropriate handling for empty lists to the methods and document them.
You may assume that the user enters only non-negative integers as input. If a method receives an empty list as input, it must return the value -1.
The use of built-in methods from the Collections class, such as Collections.min() and Collections.max(), is prohibited.
Hint
You can convert a string to an integer using the
Integer.parseInt(number) method.
Create a method called compressString that takes a String as a parameter
and returns a new compressed String in such a way that consecutive identical
characters are represented by the character followed by its count.
For example:
compressString("aaaabbbccd")would return"a4b3c2d1",compressString("00666663332222222")would return"02653327",compressString("Niiiiiin")would return"N1i6n1",compressString("nnNNnnnN")would return"n2N2n3N1",compressString("ohjelmointi")would return"o1h1j1e1l1m1o1i1n1t1i1".
Also write an appropriate documentation comment for the method and add
at least one usage example to the main() method.
Tip 1
Use a StringBuilder and its methods to construct the resulting string.
Tip 2
Try solving the problem manually on paper first for a short string
(e.g., "aabb"). What information needs to be tracked (variables)?
Tip 3
It may be easier to start from the second character and always compare it to the previous one:
Create a function called isPasswordStrong that checks the strength of a password (String) passed as a parameter.
The password must be at least 8 characters long, contain one digit, and include at least one uppercase and one lowercase letter.
The function returns true if the password provided as a string meets the above requirements. Otherwise, it returns false.
Also write an appropriate documentation comment for the method and add at least one usage example to the main() method.
Hint
Take a look at the Character class method isDigit.
For example, by calling Character.isDigit(character), the return value is true if the character is a digit and false if it is not.
The methods isUpperCase and isLowerCase, which can also be found in the same class, work according to the same principle.
Create a method called printMatrix that prints all the numbers in the integer matrix given as a parameter on a single line.
The method does not return anything.
Example of how the method works:
int[][] matrix = {
    {42, 2, 3},
    {4, 67, 6},
    {7, 8, 9}
};

printMatrix(matrix);
The output should then be:
42 2 3 4 67 6 7 8 9
Create a program that asks the user for input and prints how many times each digit (0-9) appears in the input.
For example, if the user enters:
12223
the program should print:
1: 1 pcs
2: 3 pcs
3: 1 pcs
Similarly, if the input is:
10002244412
the program should print:
0: 3 pcs
1: 2 pcs
2: 3 pcs
4: 3 pcs
After printing the results, the program asks the user for new input. If the user enters an empty input, the program terminates.
Tip
A single character can be converted to an integer by combining
Character.toString and Integer.parseInt:
int digitAsNumber = Integer.parseInt(Character.toString(a));
Note that Integer.parseInt assumes that the given string is actually a number. If it contains anything other than numeric characters, the function throws an exception.
You can check whether a single character is a digit by using the Character.isDigit method.
Create a function
int missingNumber(int[] array)
The function is given an array as a parameter that contains the numbers
1 through N in random order, but one of the numbers is missing.
The function must return the missing number.
The function must not cause any side effects.
Examples:
missingNumber(new int[] { 1, 6, 3, 4, 5 })returns 2missingNumber(new int[] { 8, 2, 4, 1, 3, 5, 6 })returns 7missingNumber(new int[] { })returns 1missingNumber(new int[] { 2 })returns 1
You can use the helper function below to generate a random array:
int[] generateInput(int maxNumber) {
    Random r = new Random();
    List<Integer> numbers = new ArrayList<>(IntStream.range(1, r.nextInt(2, maxNumber + 1)).boxed().toList());
    Collections.shuffle(numbers);
    numbers.remove(r.nextInt(numbers.size()));
    return numbers.stream().mapToInt(Integer::intValue).toArray();
}
You can use the method as follows:
// Creates an random array of size 1-10, but with one number missing
int[] input = generateInput(10);

// Determine which number is missing
int missing = missingNumber(input);
Print all prime numbers between 1 and 100.
A prime number is an integer greater than 1 that is divisible only by itself and by 1.
Hint
First, create a function called isPrime that takes an integer as a parameter and returns a boolean value indicating whether the number is prime or not. Use this function in the main program, where you print all prime numbers between 1 and 100 using a loop.
Basics of Object-Oriented Programming
Learning objectives
- You understand the basic idea of object-oriented programming and how it differs from procedural programming.
- You can view an object as a whole in which data and behavior are combined.
- You understand the relationship between a class and an object, and how a class serves as a template for creating objects.
- You can define your own class and its members, including attributes, methods, and constructors.
- You understand the lifecycle of objects and can use objects as components of a program.
- You know what the
staticmodifier means in relation to class members. - You understand the principles and benefits of encapsulation and can distinguish an object's internal implementation from its external use.
Towards Object-Oriented Programming
Learning goals
- You take a step from the procedural programming mindset of data and functions toward the object-oriented programming mindset of state and methods.
- You understand the concept of an object: data and functionality combined into a single package.
- You understand how modeling concepts as objects can make building programs easier.
So far, we have mostly created programs in which data is stored in variables and processed using functions. This style of programming is called procedural programming. In this course, we will become familiar with another programming paradigm: object-oriented programming.
Object-oriented programming is a very broad topic, and in this course we will cover its theory selectively, focusing especially on the needs of this study module.
Basic Idea
The idea of object-oriented programming is to create structures called objects that contain both data and the functionality used to manipulate that data. Objects may be similar to one another, but each object has its own state, which can change during program execution. The state of an object is stored in its own variables, called attributes.
An object can also have its own subroutines, called methods. A method is a subroutine that belongs to an object and can inspect and modify the state of the object that owns it. Before objects can be created, a class must first be defined. A class describes the structure of an object.
Objects are meant to be responsible for the functionality within their own area of responsibility. Cooperation and communication between objects through method calls are central concepts in object-oriented programming. In some programming languages, this may be referred to as message passing.
A minimal program utilizing objects could look like this:
class Cat {
    private String name;

    public String getName() {
        return name;
    }

    public void setName(String newName) {
        this.name = newName;
    }
}

void main() {
    Cat cat1 = new Cat();
    cat1.setName("Miuku");

    Cat cat2 = new Cat();
    cat2.setName("Katti");

    IO.println(cat1.getName());
    IO.println(cat2.getName());
}
In the example, a class called Cat is first defined, and objects are then created from it in the main program. Each object contains a string attribute called name and two methods.
The name of an object can be changed by calling its setName method and retrieved by calling its getName method. Both objects have their own state—that is, their own name. The state of one object does not affect the state of another.
From this simple example, we can see how data can be grouped inside objects. In this case, the object's only attribute, name, is accessed directly through methods. In practice, this kind of direct manipulation is uncommon in production code, but we will return to this topic later.
It is hardly worth creating separate objects for a single variable, but the benefits of object-oriented programming quickly become apparent when the amount of data increases. Consider a situation where we want to store information about competitors participating in a contest. There may be many competitors, and for each one we need to store at least a name, a competitor number, and a score. Using objects, we can keep a single competitor's data and the functionality related to modifying that data within the same structure, making the information easier to manage.
class Competitor {
    private String name;
    private int number;
    private int score;

    public Competitor(String name, int number, int score) {
        this.name = name;
        this.number = number;
        this.score = score;
    }

    // ...

    public void printInformation() {
        IO.println(String.format("%d: %s, %d points", number, name, score));
    }
}

void main() {
    Competitor[] competitors = {
        new Competitor("A", 2, 20),
        new Competitor("B", 4, 15),
        new Competitor("C", 6, 10)
    };

    for (Competitor competitor : competitors) {
        competitor.printInformation();
    }
}
Creating an equivalent program without object-oriented programming requires some mental gymnastics. One possible approach would be to use three separate arrays: one containing names, another containing competitor numbers, and a third containing scores. However, you would then need to ensure that each competitor's information is always stored at the same index in all arrays, which is cumbersome in practice and prone to errors.
Objects make it possible to package data and functionality together in a clearer and more organized manner. Organizing related data and functionality within the same structure makes program code easier to understand and extend. However, this is not the only advantage of object-oriented programming. We can also hide some of a class's implementation details for internal use only, allowing programmers who use the class to access only a carefully defined public interface without needing to understand its internal workings. In Part 3, we will also explore polymorphism, inheritance, and interfaces, where the benefits of object-oriented programming become even more apparent.
Main Program in Java
Java is a programming language that is particularly oriented toward object-oriented programming. Historically, even the main program had to be placed inside a class. In newer versions of Java, this has changed; writing simple programs has been made easier so that the main program no longer needs to be wrapped inside a class. You can read more about these changes from Java 21 documentation and Java 25 documentation published in autumn 2025.
Today, the straightforward main program used in these materials is sufficient:
void main() {
    IO.println("Hello World!");
}
Previously, a minimal Java program might have looked like this:
public class HelloWorld {
    public static void main(String[] args) {
        IO.println("Hello World!");
    }
}
The older-style example introduces a few new concepts that we will examine more closely in this section. First, a class is defined using the class keyword. In the example, the class is named HelloWorld. The main program, main, is placed inside this class.
In the older style, the main program must also include the static modifier, which we will examine in more detail shortly.
Because the simpler style of writing a main program is a relatively new feature, the majority of examples found online and in books still use the original style, where the main program is embedded inside a class. This is useful to keep in mind when searching for information.
Class and Object
Learning goals
- You understand the relationship between a class and an object, and how a class serves as a template for creating objects.
- You can define your own class and its members: attributes, methods, and constructors.
- You understand the lifecycle of objects and know how to use objects as parts of a program.
- You understand how the
thisreference works in object methods. - You know what the
staticmodifier means for class members.
Class
The first step in object-oriented programming is defining a class using the class keyword. A class can be thought of as a blueprint or template from which objects are created. A class specifies what data an object contains (attributes) and what it can do (methods). Attributes and methods defined in a class are also called class members.
Let's do a small thought experiment: consider building houses. From a single architectural blueprint, many buildings can be constructed. They would have the same structure because they are built according to the same design, but each building would still have its own state: a different owner, color, interior, and so on. The blueprint can be compared to a class in object-oriented programming, while the buildings are the objects created from it. The name of a class describes what an object is. Therefore, if we created a class for buildings, a suitable name would be Building.
Note that in Java, class names are conventionally written starting with an uppercase letter.
Let's begin by defining an empty Building class and gradually expand it.
class Building {
    // Inside the class we define the structure
    // that objects created from this class will follow.
}
Objects (instances) are created from a class using the new keyword. This allocates memory for the object, selects and executes an appropriate constructor, and returns a reference to the newly created object. We store this reference in a variable so that we can access the object through it. The class name serves as the variable's type and tells the compiler what kind of object must exist at the referenced memory location.
void main() {
    // The expression 'new Building()' creates an object
    // and returns a reference to it.
    // We store this reference in the variable 'building'.
    Building building = new Building();
}
note
A reference variable and an object are two different things. A reference variable is like an arrow that can point to an object. However, a reference variable does not have to point to anything, in which case its value is null.
An object may also be created without assigning its reference to a variable. However, if there are no references pointing to it, the object becomes inaccessible and is automatically marked as garbage.
Multiple reference variables may refer to the same object, but a single reference variable can point to only one object at a time.
Attributes
An attribute is a variable defined inside a class but outside any methods. It represents a property, characteristic, or state of an object. Objects created from a class always contain the attributes defined in that class. While a class defines what information objects can have, attributes store the concrete values for each individual object. Like variables in general, attributes may be primitive data types or references. The same naming conventions apply to them. Note that variables declared inside methods are not attributes; they are local variables. Local variables are not part of an object's state.
Let's add a few attributes to our Building class.
public class Building {
    // These variables are attributes of the object.
    // Every building has an owner and a color, but
    // the values do not have to be the same for all objects.
    private String owner;

    // An attribute can be given a default value.
    // In this case, the default color is blue.
    private String color = "blue";
}
Attributes differ from local variables because their visibility can be controlled using access modifiers. Local variables only exist and are visible within a method during its execution. Attributes, on the other hand, exist for the entire lifetime of the object and are visible to all members within the class. Attributes can also be made visible outside the object, although this is generally considered a poor design choice. We will return to access modifiers later.
note
A local variable may have the same name as an attribute, in which case the local variable shadows the attribute. When an attribute and a local variable share the same name, expressions refer to the local variable by default. Even in this case, methods can still access the attribute using the this reference, which we will discuss shortly.
An attribute may be assigned a default value in the class definition. Objects created from that class then receive the same initial value for their corresponding attribute. If no default value is provided, the attribute's value can be set when the object is created, later through methods, or left uninitialized.
public class Building {
    // Object attribute with a default value.
    private String color = "blue";

    public void print() {
        // This local variable shadows the attribute.
        String color = "red";

        // Prints "red".
        // The identifier 'color' refers to the local variable.
        IO.println(color);

        // Prints "blue".
        // The object's attribute can be accessed using 'this'.
        IO.println(this.color);
    }
}
Methods
Subroutines defined inside a class are called methods. While an attribute represents the internal state of an object, a method can be described as the object's ability to perform some action. One distinctive feature of Java is that all subroutines are always contained within some class. Perhaps for this reason, Java developers commonly refer to all subroutines as methods.
Method definitions do not differ syntactically from other subroutines, and the same naming conventions apply. Methods can also be overloaded. Like attributes, their visibility outside the class can be controlled using access modifiers.
As with any subroutine, a method should perform the task indicated by its name. Large tasks should generally be divided into smaller methods.
To call an object's method, we need both the object and a reference to it. Let's add a couple of simple methods to our Building class for manipulating its state. Methods like these are often called accessor methods.
public class Building {
    private String owner;
    private String color;

    // Object method that receives a string and stores
    // it in the 'color' attribute.
    public void setColor(String color) {
        // The parameter and attribute have the same name,
        // so we use the 'this' reference.
        this.color = color;
    }

    // Object method that returns the value of the
    // 'color' attribute to the caller.
    public String getColor() {
        return this.color;
    }
}
We could also add similar methods for the class's other attribute. Later in this chapter, we will discuss more sensible ways of managing object state, but for now simple get and set methods are sufficient.
The this Reference
The keyword this refers to the object itself. It acts as a reference to "this object" in whose context the code is currently executing.
In previous examples, we used the this reference to read the object's attributes:
public class Building {
    private String color;

    // ...

    public String getColor() {
        return this.color;
    }
}
This reference is automatically available whenever an object's method is called.
When a method is invoked, this is automatically set to refer to the object whose method was called, and it cannot be changed. Through this reference, the method can access the correct object's state and other methods.
Inside object methods, writing this is only required when another member with the same name exists within the current scope, such as a local variable. Therefore, we do not have to prefix every attribute or method call with this; the compiler can determine it automatically if no ambiguity exists.
In some programming languages, a similar reference is called self.
Let's look at a few examples.
public class Building {
    private String owner;
    private String color;

    public void setColor(String color) {
        // We use 'this' because the parameter and
        // attribute have the same name.
        this.color = color;
    }

    public String getColor() {
        // Here 'this' is optional.
        // There are no other variables named 'color'
        // in this scope.
        return this.color;
    }
}
Inside methods, we can use this just like any other reference variable.
For example, we can pass it as a parameter to another method. This is not necessary when calling the object's own methods, but it allows us to pass a reference to the object to methods outside the class.
public class Building {
    private String owner;
    private String color;

    public String getOwner() {
        return owner;
    }

    public void setOwner(String owner) {
        this.owner = owner;
    }

    public String getColor() {
        return color;
    }

    public void setColor(String color) {
        this.color = color;
    }

    // Object method
    public String beautify() {
        // Pass this object to a method in another class.
        return Formatter.formatNicely(this);
    }
}
Constructor
A constructor is a special method of a class that is used to initialize the state of a new object when it is created. The constructor's name is always the same as the class name and begins with an uppercase letter. This differs from the naming style typically used for other methods. A constructor does not have a return type. Instead, it always returns a reference to the newly constructed object.
Every class must have at least one constructor. So far, however, we have been creating objects without defining one ourselves. This works in Java because if a class contains no constructors at all, the compiler automatically creates a parameterless constructor. This automatically generated default constructor contains no statements. However, it is only generated if the class does not define any constructor of its own.
Because constructors share the same name as the class, defining multiple constructors with different parameters is a form of method overloading. The compiler chooses the appropriate constructor automatically based on the arguments provided during object creation.
Let's temporarily remove the methods from the Building class and examine what happens when objects are created.
public class Building {
    private String owner;
    private String color;
}
In this case, the object is created using the compiler-generated default constructor because no constructor has been defined. We can also define an equivalent constructor ourselves:
public class Building {
    private String owner;
    private String color;

    // Parameterless constructor equivalent
    // to the default constructor.
    public Building() {
        // Here we could initialize the
        // object's state if desired.
    }
}
Up to this point, we have been creating objects without proper initialization. This is generally not good practice.
A newly created building currently has neither an owner nor a color. The values of these attributes are null.
Depending on the object and its intended use, such values may be acceptable. However, if a building exists, it should probably have some owner and color.
A better approach is for the object to be usable immediately after creation. We could create an object directly in the correct staty by defining a constructor that accepts the information needed to initialize the object's state as parameters and properly initializes its attributes.
Let's add a constructor to the Building class that receives the owner and color as parameters and uses them to initialize the object's attributes. This way, we do not have to set the attributes separately after the object is created.
We can also remove the parameterless constructor so that objects can no longer be created in an invalid initial state.
public class Building {
    private String owner;
    private String color;

    public Building(String owner, String color) {
        // Initialize the object's state using the parameters.
        // Note the use of 'this', since the parameter names
        // are the same as the attribute names.
        this.owner = owner;
        this.color = color;
    }
}
A couple of observations:
We cannot create a building using only one parameter, for example
Building building2 = new Building("University of Jyväskylä");
because the constructor requires two parameters.
Similarly, we cannot create a building without parameters
Building building3 = new Building();
because the default constructor no longer exists.
Let's add a somewhat more advanced constructor that accepts another object of the same class and copies its state into the newly created object. Such a constructor is often called a copy constructor.
public class Building {
    private String owner;
    private String color;

    public Building(String owner, String color) {
        this.owner = owner;
        this.color = color;
    }

    // Constructor that copies another Building object.
    public Building(Building source) {
        this.owner = source.owner;
        this.color = source.color;
    }
}
We can also use the this keyword inside a constructor similarly to a method call if we want to delegate object creation to another constructor of the same class. This often helps avoid code duplication.
Let's modify the class so that one constructor uses another constructor to initialize the attributes.
public class Building {
    private String owner;
    private String color;

    public Building(String owner, String color) {
        this.owner = owner;
        this.color = color;
    }

    public Building(Building source) {
        // Delegate construction to the constructor above.
        this(source.owner, source.color);
    }
}
Create a class called Clock with the integer attributes minutes and hours.
Add the methods setMinutes and setHours to the class. These methods take the minutes and hours to be set as parameters.
The value of minutes must be between 0 and 59; otherwise, an error message should be printed and the time should remain unchanged. Similarly, the value of hours must be between 0 and 23; otherwise, an error message should be printed.
Also create a method called displayTime that prints the time in the format "HH:MM".
You can test the functionality of the class using the provided main program.
Create a class called Timer with the integer attributes minutes and seconds.
Add the methods addMinutes and addSeconds to the class. These methods take the number of minutes and seconds to be added to the timer as parameters. Also add a method called toString that returns the timer's minutes and seconds as a string.
The number of minutes can be any non-negative value, but the number of seconds must always be between 0 and 59. If the seconds exceed this range, they must be converted into minutes. You can convert seconds into minutes and remaining seconds as follows:
int seconds = 75; // Example of value in parameter

// This gives the amount of minutes to be added
int minutesToAdd = (this.seconds + seconds) / 60;

int remainingSeconds = (this.seconds + seconds) % 60;
You can test the functionality of the class using the provided main program.
Choose a real-world object or concept and create your own simple class for it.
Add the following to the class:
- At least two attributes that are appropriate for the class.
- At least two methods that modify or examine the state of the object in some way.
- At least two different constructors that initialize the object to a sensible state.
What constitutes a sensible state depends on the object you choose. You may use the examples from the course material as inspiration when coming up with attributes and methods.
Create an object and experiment with changing its state in the main program. Print the object's information both before and after modifying its state.
Static
Class members can be defined as belonging to the class itself rather than to individual objects by using the static modifier. Such members are called class attributes and class methods.
The word static can be slightly misleading. In this context, it does not mean that the member is permanent or immutable. Throughout this material, however, we use the term static to refer to class members.
Attributes and methods normally belong to an object. Object attributes and methods can access the object's state. A class attribute, on the other hand, is not part of any object's state. There is only one copy of it, shared by all objects of the class. If one object changes the value of a class attribute, the change is visible to all objects of the same class.
Similarly, class methods are shared by all objects of a class. They do not belong to any particular object and therefore cannot directly access an object's state.
Objects may call static methods of their class, but doing so does not provide access to the object's state.
Since static methods do not belong to any object, the this reference cannot be used inside them.
To call an object method, we need an object and a reference to it. A static class method, however, can be called directly through the class without creating an object. Although static methods can also be invoked through object references, doing so still does not grant access to any object's state.
Let's start with a class that has no static members.
public class Person {
    private String firstName;
    private String lastName;

    public Person(String firstName, String lastName) {
        this.firstName = firstName;
        this.lastName = lastName;
    }

    public String getName() {
        return firstName + " " + lastName;
    }
}
Because getName is an object method, we must first create an object. We cannot call it statically using something like Person.getName().
Now let's add a class attribute called adultAgeLimit, which represents the age of adulthood for all people. We will also add a method called isAdult that checks whether a given age qualifies as an adult.
Notice that this method is not associated with any particular object. It simply evaluates the given age.
public class Person {
    private String firstName;
    private String lastName;
    private static int adultAgeLimit = 18;

    public Person(String firstName, String lastName) {
        this.firstName = firstName;
        this.lastName = lastName;
    }

    public String getName() {
        return firstName + " " + lastName;
    }

    public static boolean isAdult(int age) {
        return age >= adultAgeLimit;
    }
}
We now have a class method, isAdult, that can be called without creating an object.
We could call this through an object, but that's unecessary and compiler warns about it.
Static members are useful when we want functionality that does not belong to any single object but instead relates to the class as a whole.
Static members can also be accessed from object methods. For example, we can check if person is adult
// An object method can use a static variable.
public boolean isPersonAdult() {
    return this.age >= adultAgeLimit;
}
For clarity, it is often a good idea to use the class name even inside the class itself
Person.adultAgeLimit.
This makes it easier to distinguish static members from object members.
The previous example is also a warning: the adulthood limit can be modified from anywhere that has access to the Person class. Using this kind of global shared state is generally considered a poor design choice.
One example of a static method that we use frequently is IO.println().
This is a static method of IO class
and it is convenient because we do not need to create a separate object every time we want to print something.
Modify the example Person class so that every created person is automatically assigned a unique identification number, which is an integer.
The first person created should receive the number 1, the next person should receive the number 2, and so on.
The number must not be assigned from outside the object, for example by calling one of its methods.
Also implement a method called getNumber that returns the identification number of a particular object as an integer. No other methods need to be added.
Tip
You will need static class members in this exercise.
Before you begin, consider the following questions:
- When does an object receive its number?
- How does an object know what its number should be?
- What information is shared among all objects, and what information is specific to each object?
Object Lifecycle
During program execution, instances of classes are created; these instances are called objects. To access an object, we create a reference variable for it. During compilation, Java verifies that the variable type is compatible with the object being created and then stores a reference to the newly created object in that variable.
When an object is created, Java allocates space for it in the JVM's heap memory. When there are no longer any references to the object, it becomes eligible for destruction. In Java, programmers do not need to manually allocate or free memory. The memory occupied by discarded objects is eventually reclaimed by Java's automatic garbage collector.
Let's walk through an object's entire lifecycle using examples.
To create objects, we first need a class. We'll once again use a Person class and add a few simple methods for modifying the object's state.
class Person {
    private String firstName;
    private String lastName;

    public Person(String firstName, String lastName) {
        this.firstName = firstName;
        this.lastName = lastName;
    }

    public String getName() {
        return firstName + " " + lastName;
    }

    public void setFirstName(String firstName) {
        this.firstName = firstName;
    }

    public void setLastName(String lastName) {
        this.lastName = lastName;
    }
}
In the main program above, objects are created in several different ways while demonstrating how references behave.
Once objects have been created, we can inspect and modify their state during program execution.
void main() {
    Person p1 = new Person("Joni", "Mäkinen");
    IO.println(p1.getName());
    p1.setLastName("Korhonen");
    IO.println(p1.getName());
}
Let's finally examine the end of an object's lifecycle: its destruction. When an object no longer has any references pointing to it, it becomes garbage, meaning that Java's automatic garbage collection mechanism may eventually remove it from memory and reclaim the space it occupies.
void main() {
    // Create two objects.
    Person p1 = new Person("Joni", "Mäkinen");
    Person p2 = new Person("Anna", "Korhonen");

    // p1 is currently the only reference to the first object.
    // If we assign another reference to p1 or set it to null,
    // the object becomes eligible for garbage collection,
    // because no references to it remain.
    p1 = null;

    // When the method ends, all local variables created
    // inside it (p1 and p2) are destroyed.
    // If there are no other references to the objects,
    // they too become eligible for garbage collection.
}
We will not study Java's garbage collector or memory management in great detail in this course. For the purposes of this course, it is sufficient to understand when an object becomes garbage and can be destroyed. Once no references to an object exist, it becomes eligible for garbage collection, and Java may later reclaim the memory it occupies. If you would like to explore the topic in more detail, you can start by reading more about heap memory and memory allocation here, and about Java garbage collection from here, both of which provide relatively accessible introductions to the subject.
Create a class called Phone with the attributes brand (a string) and batteryLevel (an integer representing the battery charge as a percentage between 0 and 100).
Add the following methods to the class:
-
sendMessage(String person, String message): prints a message in the format:"Sending a message to <person>: <message>"Sending a message reduces the battery level by 5 percentage points. -
call(String person, int minutes): prints a message in the format:"Calling <person>, duration: <minutes> minutes"Making a call reduces the battery level by 1 percentage point per minute. -
charge(int percentage): increases the battery level by the given amount, but the battery level cannot exceed 100%. -
printInfo(): prints the phone's brand and battery level in the format:"The battery level of the <brand> phone is <battery>%."
Replace the parts enclosed in angle brackets with the appropriate attribute or parameter values.
The battery level cannot drop below 0%.
If the battery level is 0%, messages cannot be sent and calls cannot be made. Print:
"Battery empty. Cannot send message."
or
"Battery empty. Cannot make a call."
Test your application by creating a Phone object, sending a message, making a call, charging the battery, and printing the phone's information.
Optional additional exercise: if battery runs out
Modify the sendMessage and call methods so that if the battery level is not sufficient to send the entire message or complete the entire call, the message is sent or the call is made only for as long as the battery lasts.
If the battery runs out during a message or call, print how much of the message was successfully sent or how long the call lasted before the battery was depleted. For example:
"Battery empty. You managed to send 60% of the message.""The battery ran out after 3 minutes."
Implement a class called Book that keeps track of individual books while also maintaining global library statistics.
Create the following variables for the class:
Instance variables:
String title: The title of the book.String author: The author of the book.boolean isBorrowed: Indicates whether the book is currently on loan.
Class variables (static):
static int totalBooks: The total number of books that have been created.static int borrowedBooks: The number of books that are currently on loan.
The constructor should take the title and author as parameters. Whenever a new book is created, the totalBooks variable should be increased by one.
Create the instance methods borrow() and returnBook(). These methods change the book's isBorrowed status and update the static borrowedBooks counter.
Create a static method printStatistics() that prints the library statistics in the following format:
"Library contains X books, of which Y are currently on loan."
A main program is provided that you can use to test your implementation.
Encapsulation
Learning objectives
After this chapter, you will:
- Know what visibility modifiers such as
publicandprivatemean. - Understand that methods are the primary way for objects to communicate.
- Understand the principles and benefits of encapsulation, and how an object's internal implementation differs from its external use.
- Be able to implement programs where objects work together without depending on each other's internal implementation.

Visibility Modifiers
Java provides three main visibility modifiers: public, protected, and private.
Visibility modifiers determine from where the members of a class can be accessed.
If no visibility modifier is explicitly specified, the member receives package-private visibility. This means that the member is visible only to classes in the same package.
The table below summarizes the effects of the different visibility modifiers. The Default row refers to package-private visibility.
| Modifier | Meaning | Class | Package | Subclass | Other Code |
|---|---|---|---|---|---|
public | public | Yes | Yes | Yes | Yes |
protected | protected | Yes | Yes | Yes | No |
| default | – | Yes | Yes | No | No |
private | private | Yes | No | No | No |
The first column ("Class") indicates whether the class itself can access the member. As you can see, a class always has access to its own members. The second column ("Package") indicates whether other classes in the same package can access the member. The third column ("Subclass") indicates whether subclasses located outside the package can access the member. The fourth column indicates whether any other code can access the member.
When other programmers—or even your future self—use a class you have created, visibility modifiers help ensure that the class is used in the way it was intended. As a general rule, a programmer should use the most restrictive visibility modifier possible, unless there is a specific reason not to. This helps protect the internal state of the class and prevents both intentional and accidental misuse. In particular, public attributes should be carefully considered, as they expose the internal state of a class directly to external code. In this course, we aim to design programs so that public attributes—except constants—are not needed.
note
Occasionally, this material may use public attributes in examples for brevity and demonstration purposes. However, this is not recommended in production code.
A visibility modifier can be assigned to attributes and methods by adding it to their declaration. Classes can also have visibility modifiers.
class Person {
    // The 'private' visibility modifier hides the attribute so that it
    // cannot be accessed from outside the class.
    private String firstName;
    private String lastName;

    // The 'public' visibility modifier allows the method to be called
    // from outside the class.
    public String getFullName() {
        return firstName + " " + lastName;
    }
}
Encapsulation and Cohesion
Encapsulation is one of the most important concepts in object-oriented programming. It refers to designing classes to be as independent and modular as possible. Each class has its own responsibility, and the information and functionality required for that responsibility are encapsulated within the object. Some of this information and functionality can be hidden for internal use only. To allow access to an object's state, a class typically provides a public interface consisting of methods. This improves maintainability and extensibility by reducing side effects caused by internal changes.
The first principle of encapsulation is:
Place related data and functionality inside the same structure.
We have already done this by defining classes together with suitable attributes and methods.
Cohesion describes how well a class's methods and attributes fit its intended purpose. The goal when designing classes is to achieve high cohesion. The members of a class should be closely related to what the class is meant to represent. For example, if we create a class representing a car, it may not make sense to include the owner's name, address, and phone number in that class. Owner-related information and functionality would likely belong in a separate class.
Let's create a class Car and apply encapsulation principles.
First, we add only attributes and a simple constructor.
class Car {
    String model;
    String serialNumber;
    double kilometersDriven;

    public Car(String model, String serialNumber, double kilometersDriven) {
        this.model = model;
        this.serialNumber = serialNumber;
        this.kilometersDriven = kilometersDriven;
    }
}
We would also like to store information about the car's various components. For example, for the engine we might want to store its model and current RPM. For the tires, it would be useful to know at least the model, tire pressure, and perhaps also a type that allows us to distinguish between summer and winter tires.
We could add all of this information directly to the Car class as attributes, but the number of attributes would become quite large because each tire has its own data. If we used arrays or lists, we would need several of those as well. It is also possible that a car might not always have an engine installed. Tires can also be removed, and the number of tires may vary between different car models.
The car does not really need to be aware of the internal workings of its engine or tires, so it is better to create multiple classes, each responsible for its own data and functionality.
Let's now add Engine and Tire classes and define suitable attributes and constructors for them.
class Engine {
    String model;
    double rpm;

    public Engine(String model, double rpm) {
        this.model = model;
        this.rpm = rpm;
    }
}
Next, we add an engine and a list of tires as attributes of the Car class. These attributes contain references to Engine and Tire objects. Remember that references do not point to anything by default, so we must create the objects and assign the references ourselves.
The Car object now contains objects from other classes that manage their own responsibilities as part of the overall car. This type of structure is called composition. One benefit of composition is that the engine or tires can easily be replaced by assigning the reference attributes to new objects.
Let's also add a small main program that creates a car with default values and prints some of its information. For now, we will still access attribute values directly, which is not considered good practice. We will improve this shortly.
class Engine {
    String model;
    double rpm;

    public Engine(String model, double rpm) {
        this.model = model;
        this.rpm = rpm;
    }
}
The second principle of encapsulation is hiding a class's internal information and restricting access to it so that it can only be accessed through a carefully defined public interface. An object may contain a large amount of internal information used to maintain its state, and that information is usually not intended to be viewed or modified directly from outside the object. In fact, all attributes are typically hidden to prevent the object from being accidentally placed into an invalid state through direct modification.
To modify an object's internal state, classes define public methods that can be called from elsewhere in the program. These methods form the public interface mentioned above. All changes to the object's state take place through these methods, allowing invalid changes to be detected and handled appropriately within the method itself.
What attributes a class contains and how they are internally managed are usually implementation details that users of the class do not need to know. The purpose of hiding these implementation details is to make programming easier: when internal details are hidden and the object's state is managed only through its public interface, internal changes can often be made without affecting the code that uses the class. This is one of the greatest benefits of encapsulation.
Let's add a few methods to the Car class to provide a simple public interface. We will also hide the attributes so that the car's state can no longer be modified directly. The Engine and Tire classes remain unchanged for now.
import java.util.ArrayList;

public class Car {
    private String model;
    private String serialNumber;
    private double kilometersDriven;
    private Engine engine;
    private ArrayList<Tire> tires = new ArrayList<>();

    public Car(String model, String serialNumber, double kilometersDriven) {
        this.model = model;
        this.serialNumber = serialNumber;
        this.kilometersDriven = kilometersDriven;

        // Add an engine by creating a new Engine object.
        engine = new Engine("M100", 0);

        // Add four tires by creating Tire objects and storing
        // references to them in the tires list.
        tires.add(new Tire("TT", "studded", 100.0));
        tires.add(new Tire("TT", "studded", 100.0));
        tires.add(new Tire("TT", "studded", 100.0));
        tires.add(new Tire("TT", "studded", 100.0));
    }

    public void drive(double kilometers) {
        if (kilometers < 0) return;
        this.kilometersDriven += kilometers;
    }

    public void addEngine(Engine engine) {
        this.engine = engine;
    }

    public void addTire(Tire tire) {
        this.tires.add(tire);
    }

    public void printDetails() {
        IO.println("Model: " + model);
        IO.println("Serial number: " + serialNumber);
        IO.println("Kilometers driven: " + kilometersDriven);

        // We will add printing of the engine and tires next.
    }
}
We hid the attributes of the Car class using the private visibility modifier, and the car's state is now managed through a simple public interface. We also moved the responsibility for printing information into the class itself.
We should make similar changes to the Engine and Tire classes so that the Car class can use their public interfaces instead of relying on their internal implementation details.
import java.util.ArrayList;

public class Car {
    private String model;
    private String serialNumber;
    private double kilometersDriven;
    private Engine engine;
    private final int maxTires = 4;
    private ArrayList<Tire> tires = new ArrayList<>();

    public Car(String model, String serialNumber, double kilometersDriven) {
        this.model = model;
        this.serialNumber = serialNumber;
        this.kilometersDriven = kilometersDriven;
    }

    public void drive(double kilometers) {
        if (kilometers < 0) return;
        this.kilometersDriven += kilometers;
    }

    public void addEngine(Engine engine) {
        this.engine = engine;
    }

    public void addTire(Tire tire) {
        if (tires.size() < maxTires) {
            tires.add(tire);
        }
    }

    public void printDetails() {
        IO.println("Car model: " + model);
        IO.println("Car serial number: " + serialNumber);
        IO.println("Kilometers driven: " + kilometersDriven);

        IO.println();
        IO.println("Engine:");
        IO.println();

        // Delegate the printing operation to the engine object.
        if (engine != null) {
            engine.printDetails();
        }

        IO.println();
        IO.println("Tires:");

        // Delegate the printing operation to each tire.
        for (Tire tire : tires) {
            IO.println();
            tire.printDetails();
        }
    }
}
Our Car class is now no longer dependent on the internal implementation details of the Engine or Tire classes.
Responsibility for an Object's State Belongs to the Object Itself
In some examples we have seen so far, attributes were hidden, but they could still be modified almost directly through methods. This is not entirely in line with the goals of object-oriented programming. A public interface is not intended to serve merely as an intermediate step for modifying an attribute. The idea of a public interface is to send an object a command to perform an action, after which the object carries out that action in the way it considers most appropriate.
A good example would be a game character whose position is represented by the coordinates x and y. Instead of modifying the character's position through simple setX and setY methods, we could define a method called moveTo that receives target coordinates and allows the character to perform the movement according to its own internal implementation and constraints.
In this case, responsibility for movement belongs to the character itself. For example, if the character is temporarily unable to move, the method can handle the situation internally, and the code calling the method does not need to consider such special cases.
In practice, simple getter and setter methods are often used in production code because designing objects ideally takes time and effort. In some situations, directly modifying a simple attribute through a method may also be perfectly reasonable. Although such a method may seem unnecessary, its existence still provides an important benefit: the internal implementation of the class can be changed in the future without breaking the code that uses the class.
Unfortunately, we do not have time in this course to cover object-oriented design theory in depth. We recommend studying a dedicated object-oriented programming course for a more thorough understanding of these concepts.
Cooperation Between Objects
Let's review the concepts introduced in this chapter through another example involving object collaboration. The benefits of objects become much more apparent when we begin building programs consisting of multiple classes that work together. Now that we have learned the principles of encapsulation, we can use them to organize our code more effectively.
Objects can cooperate in many different ways. Objects can contain other objects—or, more precisely, references to other objects. When an object consists of other objects, each contributing its own functionality, this is often called composition. Objects can also call each other's methods to delegate tasks to the object that is responsible for them or communicate in response to events. Objects may additionally contain collections of other objects; for example, Java's built-in data structures are themselves objects that contain collections of objects.
Let's look at an example where we want our program to model buildings, rooms located within those buildings, and reservations made for those rooms. Each building can contain multiple rooms, and each room can contain multiple reservations. For now, we will ignore the possibility of overlapping reservations. We will also keep the classes relatively simple.
First, let's define the required classes: Building, Room, and Reservation and constructors for these classes.
import java.util.*;

public class Building {
    private String name;
    private List<Room> rooms = new ArrayList<>();

    public Building(String name) {
        this.name = name;
    }
}
Next, let's add methods to the Building class for adding rooms. We would like to find a room later based on its name, so a building should not contain multiple rooms with the same name. Therefore, we also need a way to search for a room by name.
To add a room, we only need the room's name.
import java.util.*;

public class Building {
    private String name;
    private List<Room> rooms = new ArrayList<>();

    public Building(String name) {
        this.name = name;
    }

    public Room findRoom(String roomName) {
        for (Room room : rooms) {
            if (room.getName().equals(roomName)) {
                return room;
            }
        }
        return null;
    }

    public void addRoom(String roomName) {
        Room room = findRoom(roomName);
        if (room != null) {
            IO.println("Building " + name + " already contains room " + roomName);
            return;
        }
        rooms.add(new Room(roomName));
    }
}
Rooms should also support making reservations. To keep the example simple, we will assume that reservations start on the hour. The system might represent room reservations for a single day.
To make a reservation, we need the name of the person making the reservation, the starting hour, and the duration.
Add the following method to the Room class:
public void addReservation(String reservedBy, int startTime, int duration) {
    reservations.add(new Reservation(reservedBy, startTime, duration));
}
Next, let's add the ability to create reservations through the Building class so that the user does not even need to know that the Room class exists.
How the Building class stores room information remains an implementation detail hidden from the user.
To add a reservation, we need the room name, the name of the person making the reservation ,the starting hour and duration.
We will also add simple print methods to all classes so that we can easily display all rooms and reservations within a building.
import java.util.*;

public class Building {
    private String name;
    private List<Room> rooms = new ArrayList<>();

    public Building(String name) {
        this.name = name;
    }

    public Room findRoom(String roomName) {
        for (Room room : rooms) {
            if (room.getName().equals(roomName)) {
                return room;
            }
        }

        return null;
    }

    public void addRoom(String roomName) {
        Room room = findRoom(roomName);
        if (room != null) {
            IO.println( "Building '" + name + "' already contains room '" + roomName + "'");
            return;
        }
        rooms.add(new Room(roomName));
    }

    public void addReservation(String roomName, String reservedBy, int startTime, int duration) {
        Room room = findRoom(roomName);
        if (room == null) {
            IO.println( "Building '" + name + "' does not contain room '" + roomName + "'");
            return;
        }

        room.addReservation(reservedBy, startTime, duration);
    }

    public void print() {
        IO.println(name);
        for (Room room : rooms) {
            room.print();
        }
    }
}
We can now use the Building class without needing to know anything about how rooms or reservations work internally.
Similarly, the Building class does not depend directly on how the Room class stores reservation information.
At this point, we are still missing some of the most important tools of object-oriented programming: inheritance, polymorphism, and interfaces. We will explore these concepts in the next chapter.
Implement a class called Door that models a door which can be either locked or open.
Attributes:
private boolean lockedprivate String keyCode
The constructor receives the door's key code as a parameter:
Door(String keyCode)
The constructor must set the key code and initially set the door to the locked state.
Methods:
-
boolean open(String code): opens the door only if the code is correct and the door is locked. Returnstrueif the door was opened; otherwise returnsfalse. -
boolean lock(): locks the door only if it is open. Returnstrueif locking was successful; otherwise returnsfalse. -
boolean changeCode(String oldCode, String newCode): changes the key code to a new one if the old code is correct and the door is open. The new code cannot be an empty string. Returnstrueif the change was successful; otherwise returnsfalse. -
String getStatus(): returns either"Door is locked"or"Door is open".
Only getStatus() may produce output. The other methods must not print anything.
Write a main program that:
- creates a door
- locks the door
- attempts to open the door with an incorrect code
- opens the door with the correct code
- attempts to open an already open door
- attempts to lock an already locked door
- attempts to change the code while the door is locked
- attempts to change the code using an incorrect old code
- changes the code using the correct old code
- prints the status of the door
Implement a class called PiggyBank, whose purpose is to store money.
Attributes:
private double balance: The current amount of money in the piggy bank.private String owner: The name of the piggy bank's owner.private final String PASSWORD: A password required for withdrawing money.
Constructor:
- Takes
ownerandPASSWORDas parameters. - Sets the initial balance to
0.0.
Methods:
public void deposit(double amount): Adds money only ifamountis positive.public double withdraw(double amount, String suppliedPassword): Checks whethersuppliedPasswordis correct. Checks whether there is enough money in the piggy bank. If both conditions are met, decreases the balance and returns the withdrawn amount. Otherwise, returns0.0and prints an error message.public void printBalance(): Prints"Hello <owner>, the balance of your piggy bank is <balance> euros."
Replace the parts enclosed in angle brackets with the appropriate attribute or parameter values.
Create a main program in which you create a PiggyBank object and test its functionality in different situations, such as depositing money, a successful withdrawal, and unsuccessful withdrawals (incorrect password, withdrawal amount exceeding the available balance).
In this exercise, you will build a system that monitors the electricity consumption of buildings and prevents fuses from blowing. The exercise consists of several stages.
Stage 1: Electrical Device
Create a class called ElectricalDevice.
Devices have two immutable properties: a name and a current consumption in amperes.
Add the attributes:
private final String NAMEprivate final double CURRENT
Assume that the current consumption is always a positive number.
Create a constructor that initializes these values.
Add private boolean connected, which indicates whether the device is turned on.
Implement the methods connect() and disconnect(), which modify the state of the connected variable.
Also implement a getCurrent() method that returns the device's current consumption, and a corresponding getName() method.
Test your class in a main program by creating a few devices and turning them on and off.
Stage 2: Electrical Panel and Object List
Create a class called ElectricalPanel. The purpose of this class is to manage electrical devices.
Add the attribute final double FUSE_RATING. A fuse rating might be, for example, 16 amperes or 35 amperes.
Also add private boolean fuseActive, which indicates whether the fuse is intact (true) or blown (false). Initially, the fuse is active.
Create List<ElectricalDevice> connectedDevices (use an ArrayList).
Implement the method double calculateCurrentConsumption(), which iterates through the list and calculates the sum of the devices' CURRENT values.
Stage 3: Supervisory Logic and State Management
The panel must decide whether a device can be turned on.
Implement the method boolean connect(ElectricalDevice device).
The method should check whether the current consumption plus the new device's current consumption is less than or equal to the fuse rating. If so, the device is added to the list and device.connect() is called.
Otherwise, the fuse blows: set fuseActive = false, turn off all devices in the list by calling disconnect(), and clear the list of connected devices.
Also implement the method void disconnect(ElectricalDevice device), which removes the device from the list and calls device.disconnect().
Stage 4: Global Monitoring
The power company wants to monitor the status of all electrical panels.
Add static double totalNationalConsumption to the ElectricalPanel class.
Update this variable whenever any device in any panel is turned on, disconnected from a panel, or when a fuse blows.
Add a static method printNationalStatus(), which prints the total electricity consumption.
You can test your program using the provided main program in TIM, or you may write your own test program.
Modify the example program containing the Building, Room, and Reservation classes so that the program does not allow overlapping reservations to be added to the same room. If the room already has a reservation that overlaps with a new reservation, the new reservation must not be created.
Also add validation checks that prevent invalid reservations from being created. The reservation duration must be at least 1 hour, and the start time must be between 0 and 23.
In this exercise, error situations may be handled by printing an error message.
Before starting the exercise, it is worth taking a moment to consider which responsibilities belong to which objects.
You can test your program using the provided main program.
All Exercises in This Part
Create a class called Clock with the integer attributes minutes and hours.
Add the methods setMinutes and setHours to the class. These methods take the minutes and hours to be set as parameters.
The value of minutes must be between 0 and 59; otherwise, an error message should be printed and the time should remain unchanged. Similarly, the value of hours must be between 0 and 23; otherwise, an error message should be printed.
Also create a method called displayTime that prints the time in the format "HH:MM".
You can test the functionality of the class using the provided main program.
Create a class called Timer with the integer attributes minutes and seconds.
Add the methods addMinutes and addSeconds to the class. These methods take the number of minutes and seconds to be added to the timer as parameters. Also add a method called toString that returns the timer's minutes and seconds as a string.
The number of minutes can be any non-negative value, but the number of seconds must always be between 0 and 59. If the seconds exceed this range, they must be converted into minutes. You can convert seconds into minutes and remaining seconds as follows:
int seconds = 75; // Example of value in parameter

// This gives the amount of minutes to be added
int minutesToAdd = (this.seconds + seconds) / 60;

int remainingSeconds = (this.seconds + seconds) % 60;
You can test the functionality of the class using the provided main program.
Choose a real-world object or concept and create your own simple class for it.
Add the following to the class:
- At least two attributes that are appropriate for the class.
- At least two methods that modify or examine the state of the object in some way.
- At least two different constructors that initialize the object to a sensible state.
What constitutes a sensible state depends on the object you choose. You may use the examples from the course material as inspiration when coming up with attributes and methods.
Create an object and experiment with changing its state in the main program. Print the object's information both before and after modifying its state.
Modify the example Person class so that every created person is automatically assigned a unique identification number, which is an integer.
The first person created should receive the number 1, the next person should receive the number 2, and so on.
The number must not be assigned from outside the object, for example by calling one of its methods.
Also implement a method called getNumber that returns the identification number of a particular object as an integer. No other methods need to be added.
Tip
You will need static class members in this exercise.
Before you begin, consider the following questions:
- When does an object receive its number?
- How does an object know what its number should be?
- What information is shared among all objects, and what information is specific to each object?
Create a class called Phone with the attributes brand (a string) and batteryLevel (an integer representing the battery charge as a percentage between 0 and 100).
Add the following methods to the class:
-
sendMessage(String person, String message): prints a message in the format:"Sending a message to <person>: <message>"Sending a message reduces the battery level by 5 percentage points. -
call(String person, int minutes): prints a message in the format:"Calling <person>, duration: <minutes> minutes"Making a call reduces the battery level by 1 percentage point per minute. -
charge(int percentage): increases the battery level by the given amount, but the battery level cannot exceed 100%. -
printInfo(): prints the phone's brand and battery level in the format:"The battery level of the <brand> phone is <battery>%."
Replace the parts enclosed in angle brackets with the appropriate attribute or parameter values.
The battery level cannot drop below 0%.
If the battery level is 0%, messages cannot be sent and calls cannot be made. Print:
"Battery empty. Cannot send message."
or
"Battery empty. Cannot make a call."
Test your application by creating a Phone object, sending a message, making a call, charging the battery, and printing the phone's information.
Optional additional exercise: if battery runs out
Modify the sendMessage and call methods so that if the battery level is not sufficient to send the entire message or complete the entire call, the message is sent or the call is made only for as long as the battery lasts.
If the battery runs out during a message or call, print how much of the message was successfully sent or how long the call lasted before the battery was depleted. For example:
"Battery empty. You managed to send 60% of the message.""The battery ran out after 3 minutes."
Implement a class called Book that keeps track of individual books while also maintaining global library statistics.
Create the following variables for the class:
Instance variables:
String title: The title of the book.String author: The author of the book.boolean isBorrowed: Indicates whether the book is currently on loan.
Class variables (static):
static int totalBooks: The total number of books that have been created.static int borrowedBooks: The number of books that are currently on loan.
The constructor should take the title and author as parameters. Whenever a new book is created, the totalBooks variable should be increased by one.
Create the instance methods borrow() and returnBook(). These methods change the book's isBorrowed status and update the static borrowedBooks counter.
Create a static method printStatistics() that prints the library statistics in the following format:
"Library contains X books, of which Y are currently on loan."
A main program is provided that you can use to test your implementation.
Implement a class called Door that models a door which can be either locked or open.
Attributes:
private boolean lockedprivate String keyCode
The constructor receives the door's key code as a parameter:
Door(String keyCode)
The constructor must set the key code and initially set the door to the locked state.
Methods:
-
boolean open(String code): opens the door only if the code is correct and the door is locked. Returnstrueif the door was opened; otherwise returnsfalse. -
boolean lock(): locks the door only if it is open. Returnstrueif locking was successful; otherwise returnsfalse. -
boolean changeCode(String oldCode, String newCode): changes the key code to a new one if the old code is correct and the door is open. The new code cannot be an empty string. Returnstrueif the change was successful; otherwise returnsfalse. -
String getStatus(): returns either"Door is locked"or"Door is open".
Only getStatus() may produce output. The other methods must not print anything.
Write a main program that:
- creates a door
- locks the door
- attempts to open the door with an incorrect code
- opens the door with the correct code
- attempts to open an already open door
- attempts to lock an already locked door
- attempts to change the code while the door is locked
- attempts to change the code using an incorrect old code
- changes the code using the correct old code
- prints the status of the door
Implement a class called PiggyBank, whose purpose is to store money.
Attributes:
private double balance: The current amount of money in the piggy bank.private String owner: The name of the piggy bank's owner.private final String PASSWORD: A password required for withdrawing money.
Constructor:
- Takes
ownerandPASSWORDas parameters. - Sets the initial balance to
0.0.
Methods:
public void deposit(double amount): Adds money only ifamountis positive.public double withdraw(double amount, String suppliedPassword): Checks whethersuppliedPasswordis correct. Checks whether there is enough money in the piggy bank. If both conditions are met, decreases the balance and returns the withdrawn amount. Otherwise, returns0.0and prints an error message.public void printBalance(): Prints"Hello <owner>, the balance of your piggy bank is <balance> euros."
Replace the parts enclosed in angle brackets with the appropriate attribute or parameter values.
Create a main program in which you create a PiggyBank object and test its functionality in different situations, such as depositing money, a successful withdrawal, and unsuccessful withdrawals (incorrect password, withdrawal amount exceeding the available balance).
In this exercise, you will build a system that monitors the electricity consumption of buildings and prevents fuses from blowing. The exercise consists of several stages.
Stage 1: Electrical Device
Create a class called ElectricalDevice.
Devices have two immutable properties: a name and a current consumption in amperes.
Add the attributes:
private final String NAMEprivate final double CURRENT
Assume that the current consumption is always a positive number.
Create a constructor that initializes these values.
Add private boolean connected, which indicates whether the device is turned on.
Implement the methods connect() and disconnect(), which modify the state of the connected variable.
Also implement a getCurrent() method that returns the device's current consumption, and a corresponding getName() method.
Test your class in a main program by creating a few devices and turning them on and off.
Stage 2: Electrical Panel and Object List
Create a class called ElectricalPanel. The purpose of this class is to manage electrical devices.
Add the attribute final double FUSE_RATING. A fuse rating might be, for example, 16 amperes or 35 amperes.
Also add private boolean fuseActive, which indicates whether the fuse is intact (true) or blown (false). Initially, the fuse is active.
Create List<ElectricalDevice> connectedDevices (use an ArrayList).
Implement the method double calculateCurrentConsumption(), which iterates through the list and calculates the sum of the devices' CURRENT values.
Stage 3: Supervisory Logic and State Management
The panel must decide whether a device can be turned on.
Implement the method boolean connect(ElectricalDevice device).
The method should check whether the current consumption plus the new device's current consumption is less than or equal to the fuse rating. If so, the device is added to the list and device.connect() is called.
Otherwise, the fuse blows: set fuseActive = false, turn off all devices in the list by calling disconnect(), and clear the list of connected devices.
Also implement the method void disconnect(ElectricalDevice device), which removes the device from the list and calls device.disconnect().
Stage 4: Global Monitoring
The power company wants to monitor the status of all electrical panels.
Add static double totalNationalConsumption to the ElectricalPanel class.
Update this variable whenever any device in any panel is turned on, disconnected from a panel, or when a fuse blows.
Add a static method printNationalStatus(), which prints the total electricity consumption.
You can test your program using the provided main program in TIM, or you may write your own test program.
Modify the example program containing the Building, Room, and Reservation classes so that the program does not allow overlapping reservations to be added to the same room. If the room already has a reservation that overlaps with a new reservation, the new reservation must not be created.
Also add validation checks that prevent invalid reservations from being created. The reservation duration must be at least 1 hour, and the start time must be between 0 and 23.
In this exercise, error situations may be handled by printing an error message.
Before starting the exercise, it is worth taking a moment to consider which responsibilities belong to which objects.
You can test your program using the provided main program.
Inheritance and Polymorphism
Learning objectives
- You can create a class hierarchy using inheritance.
- You can override the functionality of a base class.
- You understand the difference between concrete and abstract classes.
- You understand how polymorphism enables different classes to be treated uniformly.
Inheritance
Learning Objectives
After completing this chapter, you will:
- Understand the concept of inheritance in object-oriented programming and know how to inherit classes in Java.
- Be able to create a simple class hierarchy where one class inherits from another.
- Understand that all Java classes ultimately inherit from the
Objectclass.
Inheritance is a mechanism that allows a class to include the properties (attributes) and behaviors (methods) of another class. This enables code reuse and the creation of hierarchies between classes.
In practice, objects often share common characteristics. One way to handle these shared characteristics without duplicating code is through inheritance.
Student Information System
Let's consider an imaginary student information system.
Olli Student, Maija Teacher, and Satu Secretary could all be objects in a fictional student information system called Kisu. They all share properties common to all users, such as a name and a username. Each user should also be able to log in to and log out of the system.
However, each user also has characteristics specific to their role: A student may have a list of courses they are enrolled in and the credits they have earned. A teacher has courses they teach and a job title but does not have earned credits. A secretary is responsible for recording completed courses and awarding degrees but does not have a student number or teaching assignments.
Let's start with a simpler version of the system.
Below are Student and Teacher classes containing a few attributes and methods. Examine these classes.
warning
Many of the examples below are missing documentation comments, or the comments may be incomplete. This is intentional, as adding full documentation would make the example code considerably longer and more difficult to read. In this material, the surrounding text serves as the primary explanation of the code.
warning
The example below is intended to demonstrate inheritance syntax and therefore does not yet follow all best practices. In particular, assigning a name directly through a public setName method violates the principle of information hiding (see Chapter 2.3). We will fix this issue later as the example progresses.
import java.util.*;

class Student {
    String name;
    List<String> currentCourses;

    public Student() {
        this.currentCourses = new ArrayList<>();
    }

    void setName(String name) {
        this.name = name;
    }

    String getName() {
        return this.name;
    }

    void showStudyProgram() {
        String courses = String.join(", ", currentCourses);
        IO.println(name + " studies the following courses: " + courses);
    }

    void enrollInCourse(String course) {
        IO.println(this.name + " enrolled in course: " + course);
        currentCourses.add(course);
    }
}
Notice that both classes contain the same name attribute as well as the methods getName and setName.
Although the classes also have differences, the duplication is problematic because:
- Every class must redefine the same properties and behaviors.
- If we want to change a shared property or behavior, we must make the change in multiple places.
- Adding a new class with the same characteristics requires copying the same code yet again.
Suppose we wanted to change the name attribute so that first and last names are stored separately. We would need to make the same modification in every class.
This increases the likelihood of errors and makes maintenance difficult.
One of the key principles of software development is
Don't Repeat Yourself (DRY) (see Wikipedia)
Class Hierarchy
To avoid duplication, we can create a superclass called Person that contains all shared properties and behaviors.
The subclasses Student and Teacher can then inherit from the Person class and automatically gain access to all of its attributes and methods.
This allows us to add only the role-specific functionality to each subclass without duplicating common code.
Let's create a new Person class and modify the Student and Teacher classes so that they inherit from it.
In Java, inheritance is implemented using the extends keyword.
For example: class Student extends Person
means that the Student class inherits from the Person class.
Let's make that change.
public class Person {
    String name;

    String getName() {
        return this.name;
    }

    void setName(String name) {
        this.name = name;
    }
}
Notice that the Student and Teacher classes no longer define the name attribute or
the getName method or the setName method
because these are inherited from the Person class.
The code is now considerably cleaner and easier to maintain.
Inheritance defines one
superclass (Person) and
one or more subclasses (Student, Teacher)
that extend the superclass with additional information and functionality.
In other words, when Student and Teacher inherit from Person, they gain access to all non-private attributes and methods defined in Person.
Private members remain part of the object's internal structure but are not directly available to subclasses. They are generally not considered part of the object's public interface.
In the literature, you may also encounter the terms base class (superclass) and derived class (subclass). These terms mean the same thing. In this material, however, we mainly use the terms superclass and subclass.
Inheritance can be represented using a diagram such as the following:
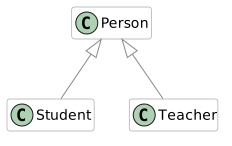
Here:
- Big letter
Cmeans Class Personis the superclass.StudentandTeacherare subclasses.- The inheritance arrow points from subclass to superclass.
This type of diagram is based on UML (Unified Modeling Language).
Constructors and the super Keyword
Constructors defined in a superclass can be called from a subclass using the super keyword.
Let's look at an example where such a call becomes necessary.
Our previous example has a couple of problems. The Person class does not have a constructor, so the name is initialized through the setName method instead. This means that after a Person object has been created, the name attribute is initially null until it is explicitly assigned a value.
This is not good practice for two reasons:
an object should ideally be ready for use immediately after it is created, without requiring additional initialization.
Secondly setting the name through a public setName method breaks the principle of encapsulation.
While there may be situations where changing a person's name is necessary in a student information system, allowing any object to change the name of any Person object through a public method is not desirable. Such changes should occur through a much more controlled process.
Let's improve the design.
First, make the name attribute private in the Person class. Then add a constructor that receives a name as a parameter and initializes the attribute accordingly.
After that, we can remove the setName method entirely, making the constructor the only way to assign a name. This means the name can no longer be changed after object creation, which is acceptable for our purposes at this stage.
We must also update object creation in the main program to use the new constructor.
class Person {

    // HIGHLIGHT_GREEN_BEGIN
    private String name;

    public Person(String name) {
        this.name = name;
    }
    // HIGHLIGHT_GREEN_END

    // HIGHLIGHT_RED_BEGIN
    void setName(String name) {
        this.name = name;
    }
    // HIGHLIGHT_RED_END

    public String getName() {
        return this.name;
    }
}
Now that Person defines a constructor that takes parameters, Java no longer automatically creates a default no-argument constructor.
As a result, the compiler produces an error similar to the following:
java: constructor Student in class Student cannot be applied to given types;
    required: no arguments
    found: java.lang.String
    reason: actual and formal argument lists differ in length
The essential point of this error message is that the constructor of Student does not match the way we are trying to create the object.
A very important observation follows from this:
classes do not inherit constructors from their superclasses.
For example, the Student class does not inherit the constructors of the Person class. Constructors must be defined separately in each subclass.
Let's add constructors to both Student and Teacher.
The beginning of the Student constructor might look like this:
class Student extends Person {
    public Student(String name) {
        // Constructor body goes here
    }
}
However, since we made the name attribute private, we cannot assign it directly in the subclass:
class Student extends Person {
    public Student(String name) {
        // HIGHLIGHT_YELLOW_BEGIN
        this.name = name;
        // HIGHLIGHT_YELLOW_END
    }
}
This results in compiler errors such as:
Student.java:6:5
java: constructor Person in class Person cannot be applied to given types;
  required: java.lang.String
  found:    no arguments
  reason: actual and formal argument lists differ in length

Student.java:8:13
java: nimi has private access in Person
The second error is our current concern. Because name is private, subclasses cannot access it directly.
Since the setName method was removed, the only way to initialize the name is to call the superclass constructor from within the subclass constructor and pass the required parameter to it.
This is done using the super keyword.
Let's modify both subclasses accordingly and make the remaining attributes private as well.
import java.util.*;
class Student extends Person {
    // HIGHLIGHT_GREEN_BEGIN
    private ArrayList<String> ongoingCourses;
    // HIGHLIGHT_GREEN_END


    // HIGHLIGHT_GREEN_BEGIN
    public Student(String name) {
        super(name);
        ongoingCourses = new ArrayList<>();
    }
    // HIGHLIGHT_GREEN_END
    // ...
}
Notice that the call to super(...) is usually the first statement in a constructor.
With certain restrictions, the super(...) call may also appear elsewhere in the constructor body (see JEP 513: Flexible Constructor Bodies).
Make the same change to the Teacher class.
After doing so, the program still will not compile because the subclasses are still attempting to access the superclass's private name attribute directly.
class Student extends Person {
    void showStudyPlan() {
        String courses = String.join(", ", ongoingCourses);
        // HIGHLIGHT_YELLOW_BEGIN
        IO.println(this.name + " is studying: " + courses);
        // HIGHLIGHT_YELLOW_END
        // Compilation error: name is private
    }
}
The only way to access the name attribute is through the superclass's public getName() method.
Replace all direct references to the name attribute in subclasses with calls to getName().
For example:
public class Person {
    String name;

    public Person(String name){
        this.name = name;
    }

    public String getName() {
        return this.name;
    }
}
After making these changes, the program compiles successfully again.
We no longer need a no-argument constructor, so we will simply leave it unimplemented.
UML Representation
In UML diagrams, it is common to include not only inheritance relationships but also information about attributes, methods, and their visibility. Attributes are listed below the class name, and methods—including constructors—are listed beneath the attributes. Inherited members are usually omitted from the subclass unless they are overridden—more from this in Part 3.2. Green ball means public visibility and a red square means a private attribute/methods. These diagrams allow us to describe program structure without needing to explain every implementation detail in prose.
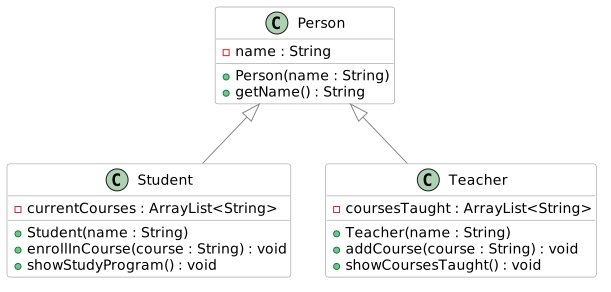
A class hierarchy can be more than two levels deep.
For example, we might also have a Secretary class that can record completed studies. The Secretary class would inherit directly from Person.
We might also distinguish between different types of students:
DegreeStudent and OpenUniversityStudent
A DegreeStudent could belong to a degree program and
an OpenUniversityStudent might not belong to a degree program, but instead would need to pay fees before receiving study credits.
In such a hierarchy:
DegreeStudent and OpenUniversityStudent inherits from Student.
and since Student inherits from Person, both subclasses also indirectly inherit from Person.
This means that a DegreeStudent object inherits:
all non-private members of Student and also
all non-private members of Person
The same is true for an OpenUniversityStudent object.
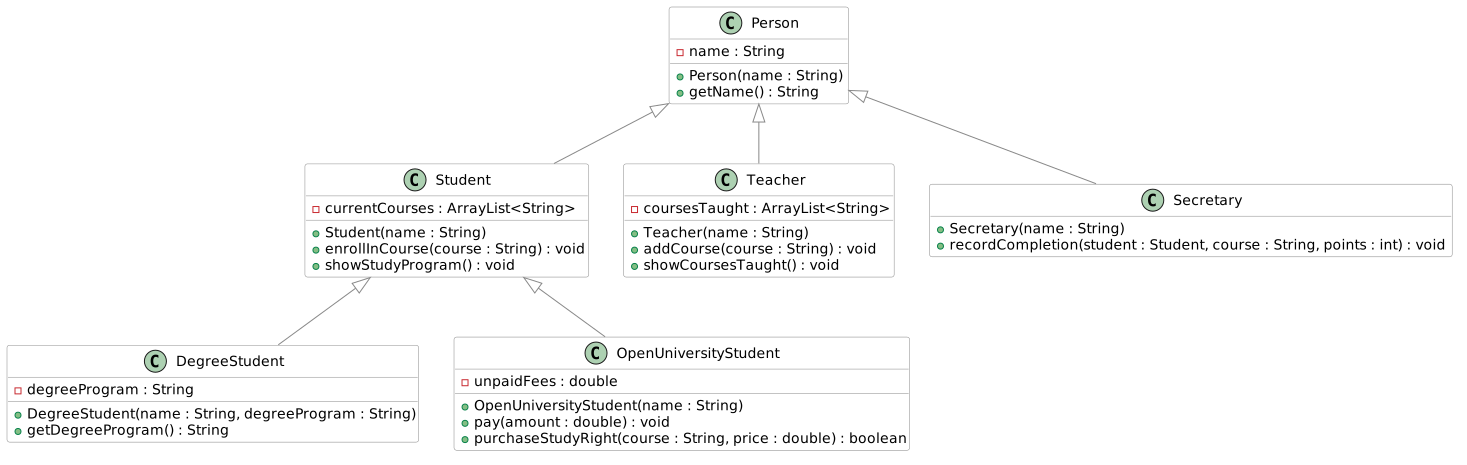
We don't implement this system, but you can find the code in finnish here.
One final note: calling a superclass constructor with super(...) always invokes the constructor of the immediate superclass.
You cannot "skip levels" in the hierarchy with something like: super().super();
For example, a constructor in DegreeStudent can directly call only the constructor of Student, not the constructor of Person.
Methods and the super Keyword
The super keyword can also be used when calling a method inherited from a superclass. It allows us to explicitly refer to the superclass version of a method.
class Student extends Person {

    // ...
    public void showCourses() {
        String allCourses = String.join(", ", ongoingCourses);
        // HIGHLIGHT_RED_BEGIN
        IO.println(this.getName() + " is studying: " + allCourses);
        // HIGHLIGHT_RED_END
        // HIGHLIGHT_GREEN_BEGIN
        IO.println(super.getName() + " is studying: " + allCourses);
        // HIGHLIGHT_GREEN_END
    }
}
In this example, using this.getName() or super.getName() produces exactly the same result because the getName() method exists only in the superclass and has not been redefined in the subclass.
In the next chapter, 3.2 Polymorphism, we will examine situations where a subclass defines a method with the same name as one in the superclass. In such cases, the super keyword allows us to specifically invoke the superclass implementation.
A Note About the Absence of Multiple Inheritance
In Java, a class can inherit from only one class. Some other programming languages, such as C++, support multiple inheritance, where a class may inherit from more than one superclass. We will not explore multiple inheritance in detail here, but it is worth mentioning that it can introduce certain complications. One famous example is the Diamond Problem, where the same member may be inherited through multiple paths in the inheritance hierarchy.
You may sometimes read that Java's interfaces provide functionality somewhat similar to multiple inheritance. While there are similarities, interfaces are fundamentally a different concept and serve a different purpose. Interfaces will be covered later in the course.
Exercises
Create a class called Product. Give it the attributes name (a string) and
price (a decimal number). Initialize the attribute values in the constructor.
Also create a method void printDetails() that prints the product's name and
price in the format "Name: Price €".
Create the classes Clothing and Food that inherit from the Product
class. The constructors of the derived classes do not need to do anything
other than call the superclass constructor with the correct values.
Now create two different clothing items and two different food products in
your program and print their details by calling the
void printDetails() method.
Let's continue from the previous exercise. Also create a class Electronics
that inherits from the Product class. Add the following special features to
each subclass:
-
Clothing: attribute
String size(e.g., "M", "L", etc.), and a methodvoid tryOn(String customerSize)that prints whether the clothing item is suitable for the person trying it on. -
Electronics: attribute
int warrantyMonths(e.g., 24), and a methodint warrantyRemaining(int monthsElapsed)that returns how many months of warranty are left (or 0 if the warranty has expired). -
Food: attribute
String bestBefore(e.g., "31.01.2026"), and a methodvoid eat()that prints: "You consume food whose expiration date is DD.MM.YYYY." (replace DD.MM.YYYY with the value ofbestBefore).
Note that the constructors of the subclasses must now call the superclass constructor with the correct values and also initialize their own attributes.
A main program has been provided for you on the exercise page. Use it to test your classes. It must not produce any compilation or runtime errors. However, you may add your own code to the main program if you wish.
Extend the online store class hierarchy you created earlier according to the UML diagram below.
A main program has been provided on the exercise page, which you can use to test your classes. You can also view the sample output produced by the program.
Open the example output here.
Calling inherited methods:
Dulce & Käppänä Winter Jacket: 120.0 €
Reissurähjä Rye Bread: 2.5 €
HighPower Computer: 899.0 €

----------------------------

Calling subclass-specific methods:
Test 1: Trying it on a user who wears size M:
Trying on the clothing item Dulce & Käppänä Winter Jacket...
This may not be the best fit. You wear size M, but this clothing item is size L.

Test 2: Trying it on a user who wears size L:
Trying on the clothing item Dulce & Käppänä Winter Jacket...
Great! Size L fits you perfectly!

Eating Reissurähjä Rye Bread.
The best-before date was 20.12.2024. Hopefully it's still good.

Warranty remaining: 19 months.

pHone: 999.99 €
Phone warranty remaining: 19 months
Operating system: Orange
Connection type: 4G
Calling from Orange (4G) to 0401122330

Pea Bag: 0.99 €
You thawed the frozen food Pea Bag for 10 minutes.
Recommended storage temperature is -18 °C.
Eating Pea Bag.
The best-before date was 31.5.2026. Hopefully it's still good.
Task Description
Below is a description of the new classes and their required features. The same information can also be found in the UML diagram.
-
Phone(inherits fromElectronics)-
Add the attributes:
private String operatingSystem(e.g."Droid"or"AiOS")private boolean is5G
-
Add the methods:
public void call(String number). The method prints, for example:Calling from Orange (4G) to 0401122330public void printPhoneDetails(int monthsElapsed). The method should first call the inherited method (printDetails()), and then print additional phone-related information(remaining warranty, operating system and 5G support)
-
-
FrozenFood(inherits fromFood)-
Add the attribute:
private int recommendedStorageTemperature(e.g.-18)
-
Add the method:
private void thaw(int minutes)(note theprivatemodifier) When called, the method prints, for example:You thaw the frozen food for 10 minutes. Recommended storage temperature: -18 °C.
-
Add the method:
public void thawAndEnjoy(int minutes)- The method first calls
thaw(minutes)and then the inheritedeat()method.
-
UML Diagram
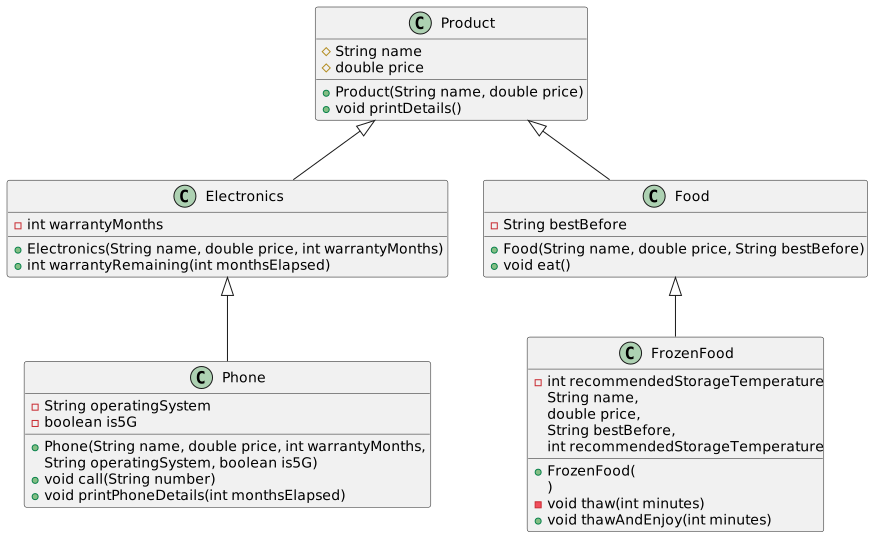
Polymorphism
Learning Objectives
After completing this chapter, you will:
- Understand the basic idea of polymorphism.
- Be able to override a superclass method in a subclass and prevent overriding with the
finalkeyword. - Be able to write a small program that utilizes polymorphism.
- Recognize overridable methods inherited from
Object, such astoString().
Polymorphism refers to the ability in object-oriented programming to treat different kinds of objects in a uniform way. When a method is called, the decision about which implementation is actually executed is made at runtime based on the object's real type. Polymorphism makes it possible to write flexible code where new object types can be added without requiring changes to existing code.
Polymorphism is usually divided into two main categories: (1) Compile-time polymorphism, also called static binding and (2). Runtime polymorphism.
In Java, compile-time polymorphism refers to method overloading. This topic was covered in Programming 1, so we will not discuss it in detail here. Briefly, method overloading means that a method may have multiple implementations that differ in the number of parameters, parameter types, or return type. Refer to the Programming 1 material for more information.
This may all sound a bit abstract, so let's look at a concrete example!
Method Overriding and Dynamic Binding
Imagine a program that contains different musical instruments: a Guitar, a Piano, and a DrumSet.
We want to be able to play these instruments. One possibility would be to create a separate method for each instrument:
Guitar guitar = new Guitar();
guitar.playGuitar();
Piano piano = new Piano();
piano.playPiano();
DrumSet drumSet = new DrumSet();
drumSet.playDrums();
This approach is not very extensible. If we wanted to process instruments as a group—for example, in a list—we would need awkward and error-prone type checks just to determine which play method should be called.
The solution is to find something common to all instruments.
After all, both guitars and pianos are instruments. Let's create a superclass called Instrument that contains a behavior every instrument should support: play().
note
The Instrument class is defined here as a regular class, although it could also be an abstract class. Since abstract classes will not be covered until Chapter 3.3 Abstract Classes, we will keep it as a regular class for now.
public class Instrument {
    // Every instrument has a play() method.
    public void play() {
        IO.println("An unknown instrument is playing.");
    }
}
Now we can define Guitar and Piano as subclasses of Instrument.
public class Guitar extends Instrument {
    // ...
}

public class Piano extends Instrument {
    // ...
}
We now have a common method name, but if we call play() on either a Guitar or a Piano, they will both execute the superclass implementation: "An unknown instrument is playing."
That is not sufficient!
We want each instrument to play in its own distinctive way. To achieve this, a subclass can override a superclass method with its own specialized implementation.
Overriding is indicated using the @Override annotation. Although the annotation is not required by Java syntax, it is strongly recommended because it helps both the programmer and the IDE recognize that the method is intended to override an inherited method.
In the assignments for this course, the @Override annotation is required.
public class Guitar extends Instrument {
    // Override Instrument.play()
    @Override
    public void play() {
        IO.println("The guitar plays and its strings are plucked.");
    }
}

public class Piano extends Instrument {
    // Override Instrument.play()
    @Override
    public void play() {
        IO.println("The piano plays and its keys are pressed.");
    }
}
Inheritance gave us a common type (Instrument).
Method overriding gave us object-specific implementations.
Together, these two mechanisms enable polymorphism. When we call a method through a superclass reference, the program automatically selects the correct overridden method based on the actual runtime type of the object.
This allows the uniform processing we were looking for:
void main() {
    ArrayList<Instrument> orchestra = new ArrayList<>();
    orchestra.add(new Guitar());
    orchestra.add(new Piano());
    // A DrumSet could be implemented similarly
    // orchestra.add(new DrumSet());

    // Call the same play() method for all instruments...
    for (Instrument instrument : orchestra) {
        instrument.play();
    }
}
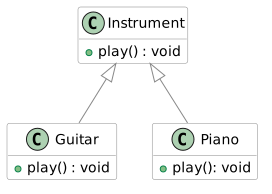
The is-a Relationship
An inheritance relationship is often described using the English term is-a relationship.
We can say that: A Piano is an Instrument and A Guitar is an Instrument.
Importantly, the relationship works in this direction.
Let's briefly return to our student information system example.
There too we can say:
A Student is a Person and
a Teacher is a Person and
a Secretary is a Person.
Likewise, a DegreeStudent is a Person, because it inherits from Student, which in turn inherits from Person.
As we learned above, polymorphism allows us to treat Student, Teacher, and Secretary objects as Person objects in our code.
We can therefore place all these objects into a Person array:
Student student = new Student();
Teacher teacher = new Teacher();
Secretary secretary = new Secretary();

Person[] people = {student, teacher, secretary };
To make the example a bit more meaningful, let's add methods login() and logout() to the Person class.
All subclasses of Person automatically inherit these methods.
class Person {
    // HIGHLIGHT_GREEN_BEGIN
    private boolean loggedIn;
    // HIGHLIGHT_GREEN_END

    public Person(String name) {
        // ...

        // HIGHLIGHT_GREEN_BEGIN
        this.loggedIn = false;
        // HIGHLIGHT_GREEN_END

        // ...
    }

    // HIGHLIGHT_GREEN_BEGIN
    void login() {
        this.loggedIn = true;
        IO.println(this.getName() + " logged in.");
    }

    void logout() {
        this.loggedIn = false;
        IO.println(this.getName() + " logged out.");
    }
    // HIGHLIGHT_GREEN_END
}
We can now call logout() for every object in the people array without knowing their exact types:
for (Person person : people) {
    person.logout();
}
Notice the direction of the is-a relationship:
A Teacher is not a Secretary, even though both inherit from Person.
Let's add a boolean attribute studyRightValid to our Student example that indicates whether the student has a valid right to study. If the study right is not valid, the student should not be allowed to log into the system.
Override the login() method in the Student class so that it checks this condition before logging in.
class Student extends Person {
    // ...

    boolean studyRightValid;

    @Override
    void login() {
        if (studyRightValid) {
            super.login(); // Call the superclass login() method
        } else {
            IO.println("Your study right is not valid. " + "You cannot log in.");
        }
    }
}
In other subclasses of Person, such as Teacher and Secretary, the login() method continues to work exactly as before because it has not been overridden.
There are a couple of important rules related to method overriding:
- Overriding always applies to the closest superclass method in the hierarchy.
- When a method is called on a subclass object, the call is always resolved to the closest overridden version in the inheritance hierarchy.
The following example demonstrates method overriding and how method calls are resolved in a class hierarchy.
public class TestOverriding {
    public static void main(String args[]) {
        C c = new C();
        c.hello();     // Calls A.hello()
        c.hi();        // Calls B.hi()
        c.whew();      // Calls C.whew()
    }
}
The UML diagram for this example would look as follows:
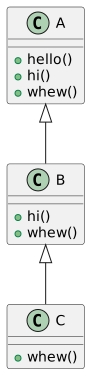
Example: The Shape Class
Let's look at another example.
Consider a class called Shape that contains a method calculateArea().
public class Shape {
    public double calculateArea() {
        return 0.0;
    }
}
The implementation of calculateArea() looks a bit strange. The reason is that there is no such thing as a truly generic shape. A Shape should always represent some concrete type of shape, such as a rectangle or a circle, each of which has its own way of calculating area.
As we mentioned in the instrument example, we will return to this issue in Chapter 3.3, Abstract Classes.
For now, let's create the subclasses Rectangle and Circle.
Since these shapes calculate their areas differently, each class should provide its own implementation of calculateArea().
public class Rectangle extends Shape {
    private double width;
    private double height;

    public Rectangle(double width, double height) {
        this.width = width;
        this.height = height;
    }

    @Override
    public double calculateArea() {
        return width * height;
    }
}
We can now write code that works with Shape objects without needing to know whether they are rectangles or circles.
public class Main {
    public static void main() {

        Shape shape1 = new Circle(5);
        Shape shape2 = new Rectangle(5, 7);

        IO.println(shape1.calculateArea());
        IO.println(shape2.calculateArea());
    }
}
Why Do We Need Polymorphism?
Polymorphism enables flexible and extensible program design in many ways. In object-oriented programming, polymorphism is particularly useful because it provides a unified way to work with objects that may be very different from one another.
When several classes inherit from the same superclass (or implement the same interface, which we will discuss later in Chapter 4.1 Interface), they can all be treated through a single common type. This allows a program to work with collections of diverse objects such as:
- all instruments (
Instrument), including guitars, pianos, and drums, - all vehicles (
Vehicle), including cars, bicycles, and airplanes, - all animals (
Animal), including dogs, cats, and birds, - all graphical user interface components (
Drawable), including buttons, text fields, and images, - all payment methods (
PaymentMethod), including credit cards, PayPal, and cash.
Java provides another way to distinguish object types through the instanceof operator.
For example:
if (instrument instanceof Guitar) {
    ((Guitar) instrument).playGuitar();
}
else if (instrument instanceof Piano) {
    ((Piano) instrument).playPiano();
}
In this course, we generally avoid using instanceof unless specifically instructed otherwise.
The reason is that frequent use of instanceof often indicates that inheritance and polymorphism are not being used effectively. It tends to lead to complicated chains of conditional statements like the example above and undermines one of the key benefits of object-oriented programming: hiding implementation details behind a common interface.
instanceof can still be appropriate in certain situations, such as:
- when we do not control the class hierarchy,
- when code operates at a system boundary, such as parsing external data, integrating with another system, or using reflection,
- when the alternative would be significantly more complex or require excessive code duplication.
Example of usage of instanceof operator
Consider a situation where a program receives messages (text messages, image messages) from an external system such as a JSON API, a network connection, or a third-party library. The message classes cannot be modified, and they share only a common supertype.interface Message { }
// Concrete message types (from an external library)
class TextMessage implements Message {
String text;
}
class ImageMessage implements Message {
byte[] data;
}
The program must process messages differently depending on their actual runtime type.
void process(Message message) {
    if (message instanceof TextMessage textMessage) {
        IO.println("Text: " + textMessage.text);
    } else if (message instanceof ImageMessage imageMessage) {
        IO.println( "Image size: " + imageMessage.data.length);
    } else {
        throw new IllegalArgumentException("Unknown message type");
    }
}
This is one of the rare situations where instanceof is genuinely the correct solution:
- The class hierarchy cannot be modified. The message classes come from an external library, so methods cannot be added to them.
- Polymorphism is not available. For example, we cannot define a
process()method in theMessageinterface. - Processing depends on the concrete runtime type. A text message and an image message require fundamentally different logic.
- The code belongs to a system boundary, such as an I/O layer, integration layer, or adapter layer.
Overriding Methods from the Object Class
In Java, all classes share a common superclass called Object.
This means that every class automatically inherits the attributes and methods of the Object class unless specified otherwise. The Object class contains several useful methods that can be overridden in subclasses.
One example is the toString() method, which provides a string representation of an object.
By default, the method returns the object's class name and hash code, which is often not very informative. We can override this method in our own classes so that it returns a representation that is more meaningful for our needs.
Let's create a Vector3D class representing a three-dimensional vector. In the main program, we create a few Vector3D objects and print their values.
public class Main {
    public static void main(String[] args) {
        Vector3D v1 = new Vector3D(1.0, 2.0, 3.0);
        Vector3D v2 = new Vector3D(4.0, 5.0, 6.0);

        IO.println("Vector 1: (" + v1.getX() + ", " + v1.getY() + ", " + v1.getZ() + ")");
        IO.println("Vector 2: (" + v2.getX() + ", " + v2.getY() + ", " + v2.getZ() + ")");
    }
}
Although the printing works, it would be much more convenient if we could simply write
IO.println("Vector 1: " + v1);
without explicitly retrieving coordinates and concatenating strings.
To accomplish this, we can override the toString() method in Vector3D.
public class Main {
    public static void main(String[] args) {
        Vector3D v1 = new Vector3D(1.0, 2.0, 3.0);
        Vector3D v2 = new Vector3D(4.0, 5.0, 6.0);

        IO.println("Vector 1: " + v1);
        IO.println("Vector 2: " + v2);
    }
}
The main program now looks considerably cleaner.
You are encouraged to explore other methods inherited from Object in the Java documentation.
Preventing Inheritance or Overriding (final Keyword)
Inheritance of a class or overriding of a method can be prevented using the final keyword.
When a class is declared with the final keyword, it cannot be inherited.
Similarly, when a method is declared with the final keyword, it cannot be overridden in a subclass.
Somewhat confusingly, the final keyword can also be used with variables. In that context, it means that the value of the variable cannot be changed after initialization. However, that usage is unrelated to inheritance.
Exercises
In the classes Product, Electronics, and Phone, override the toString() method. In each implementation, first call the superclass's toString() method and then append information from the class's own attributes to the resulting string.
A main program has been provided on the exercise page, which you can use to test your classes.
Example of what the program might print
HighPower Computer: 899.0 €
Original device warranty: 24 months
Aifoun42: 888.0 €
Original device warranty: 37 months
Operating system: AiOS
Connection type: 5G
----------------------------
--- NEW STORE PRODUCT ---
Light Bulb: 67000.0 €
Original device warranty: 73 months
Battery health: 100.00%
Range: 404.00 km
--- ACTIVATION AND CHARGING ---
Charging vehicle Light Bulb...
Charging vehicle Light Bulb...
Charging vehicle Light Bulb...
Charging vehicle Light Bulb...
Charging vehicle Light Bulb...
--- STATUS AFTER CHARGING ---
Light Bulb: 67000.0 €
Original device warranty: 73 months
Battery health: 99.50%
Range: 401.98 km
Further extend the class hierarchy. Add a class ElectricVehicle that inherits from the Electronics class.
Add the following to the class:
-
Attributes
- Constant
MAX_RANGE, which represents the maximum distance in kilometers that the electric vehicle can travel on a single charge. private double batteryHealth(as a percentage; between 0 and 100).
- Constant
-
Methods
charge(), which decreases the battery health by 0.1% each time the vehicle is charged.toString(), which first calls the superclass methodtoString(), and then appends the battery health as a percentage and the vehicle's range in kilometers. The range is calculated using the formula: (batteryHealth / 100 * MAX_RANGE)
Create a class Vehicle with an attribute String brand and a constructor that initializes this value. Also add a method move(), which does nothing.
Create the classes Car and Airplane that inherit from Vehicle. Add a move() method to both Car and Airplane that overrides the move() method from the Vehicle class.
A Car object should print "
Car <brand> drives down the highway with its tires squealing."
and an Airplane object should print:
"Airplane <brand> takes off from the runway and flies above the clouds.".
Create a main program in which you create two Vehicle variables (not Car or Airplane variables) and assign a Car object to one and an Airplane object to the other.
Call the move() method on both objects.
Add an attribute int mileage to the Car class. Add an attribute int flightHours to the Airplane class. Add a new constructor to both classes that initializes these attributes. Modify the existing constructor so that these attributes are assigned the value 0.
Modify the move() methods so that they increase these values. The move() method of the Car class should increase the mileage attribute by 10, and the move() method of the Airplane class should increase the flightHours attribute by 1.
Also override the toString() method in the Vehicle class so that it returns the text:
"Vehicle <brand> information: "
Then override this method in the Car and Airplane classes so that they also include the mileage or flight hours, respectively.
Abstract Classes
Learning Objectives
After completing this chapter, you will:
- Be able to create abstract classes and abstract methods in Java.
- Understand the concepts of abstract classes and abstract methods, as well as their benefits in object-oriented programming.
When designing superclass–subclass relationships, we may encounter situations where it is useful to create a superclass that defines shared functionality, but where creating instances of the superclass itself does not make sense.
Consider the concept of a chair. While the word chair probably brings a specific image to mind, there are actually many different kinds of chairs: wooden chairs, rocking chairs, office chairs, and so on. Each type of chair is somewhat different. One could argue that the concept of a chair is itself an abstraction. A chair is essentially just something that enables sitting. To describe an actual physical chair that could be manufactured, we need a more specific concept, such as an office chair.
Let's look at another example that is closer to actual code.
We'll continue the Shape example from the previous chapter. In principle, we could create an instance of Shape and call its calculateArea() method.
Shape shape = new Shape();
double area = shape.calculateArea();
IO.println("The area of the shape is " + area); // 0.0
However, this doesn't really make sense.
A Shape object does not represent any concrete shape. It is merely a general concept from which concrete shapes such as Circle and Rectangle inherit.
This becomes especially obvious when we try to print the area of such a generic shape.
The Shape class is therefore intended only to be inherited from, and creating direct instances of it is not meaningful.
Let's make Shape an abstract class and calculateArea() an abstract method.
public abstract class Shape {
public abstract double calculateArea();
}
After this change, instances of Shape can no longer be created.
Shape shape = new Shape();
java: Shape is abstract; cannot be instantiated
An abstract class is a class that allows us to express this idea directly in code. An abstract class cannot be instantiated directly. Instead, it serves only as a foundation for classes that inherit from it. An abstract class may contain: abstract methods (methods without an implementation) and also concrete methods (methods with an implementation). A subclass must implement all abstract methods unless the subclass itself is also abstract.
note
At this point, it is worth briefly considering the student information system from the previous chapter: do we actually need plain Person objects at all, or is every person really something more specific, such as a student or teacher?
Example: Smart Home
A smart home might contain many different kinds of devices, such as lights, security cameras, and of course a smart coffee maker.
Let's assume that every device has an operation called toggleState(), which performs the device's primary action( for example a light turns on or off, a security camera starts or stops recording, a coffee maker starts or stops brewing coffee.)
Each device should also be able to report its current state through a method called reportState().
We'll begin with a simple example where a device can only switch between two states. More advanced controls will be considered later.
Our class diagram might look like this:
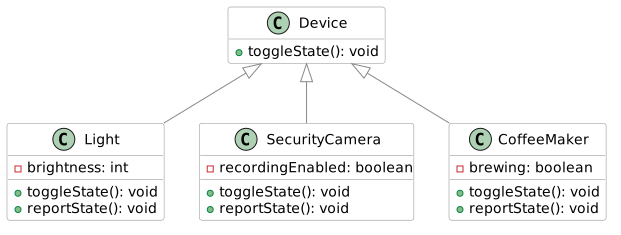
public class Main {
public static void main() {
Device[] devices = {
new Light(),
new SecurityCamera(),
new CoffeeMaker()
};
for (Device device : devices) {
device.toggleState();
device.reportState();
}
}
}
If we examine the Device class, we notice that its methods toggleState() and reportState() do nothing.
In theory, we could also create instances of Device directly and call its methods:
Device device = new Device();
device.toggleState(); // Does nothing
device.reportState(); // Does nothing
As we can see, nothing happens when these methods are called, making Device objects largely useless.
It doesn't really make sense to have some generic "device" without knowing what type of device it is.
Therefore, the Device class is really intended only for inheritance.
Let's make Device an abstract class. Since its methods are also intended to be implemented by subclasses, we will make those methods abstract as well.
All subclasses must implement these methods, as they already do in our example.
public class Main {
public static void main() {
Device[] devices = {
new Light(),
new SecurityCamera(),
new CoffeeMaker()
};
for (Device device : devices) {
device.toggleState();
device.reportState();
}
}
}
Just as in the earlier Shape example, instances of Device can no longer be created.
Device device = new Device();
java: Device is abstract; cannot be instantiated
The class diagram looks almost the same as before, but now Device is marked as an abstract class, and its methods are marked as abstract methods. In UML notation, abstract classes and abstract methods are written in italics.
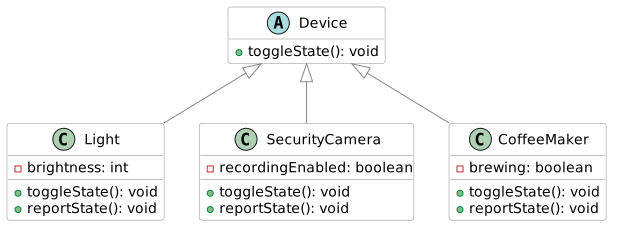
The opposite of an abstract class is often called a concrete class, meaning a class that can be instantiated. For example, Light, SecurityCamera, and CoffeeMaker are concrete classes because objects can be created from them.
Why Are Abstract Classes Useful?
An abstract class is not merely a way to prevent instantiation.
Its primary purposes are:
- to define a common contract that all subclasses must follow, and
- to provide shared attributes and implementations so that subclasses can focus only on their unique behavior.
Because Device is abstract, we can add attributes and method implementations that all subclasses share.
Let's add the attribute name, representing the device's name, and the attribute poweredOn, indicating whether the device is currently powered on.
These attributes are useful for all devices and therefore belong naturally in the abstract superclass.
public abstract class Device {
// HIGHLIGHT_GREEN_BEGIN
private String name;
private boolean poweredOn;
// HIGHLIGHT_GREEN_END
public abstract void toggleState();
public abstract void reportState();
}
If we were modeling network devices, useful or even mandatory attributes might include a MAC address and an IP address. To keep the example simple, however, we will limit ourselves to the device name and power state.
Let's also add the methods powerOn() and powerOff(), which provide common startup and shutdown logic that all devices can follow.
public abstract class Device {
private String name;
private boolean poweredOn;
// HIGHLIGHT_GREEN_BEGIN
protected Device(String name) {
this.name = name;
this.poweredOn = false; // default
}
public void powerOn() {
if (!poweredOn) {
poweredOn = true;
IO.println(name + " is powering on.");
}
}
public void powerOff() {
if (poweredOn) {
poweredOn = false;
IO.println(name + " is powering off.");
}
}
// HIGHLIGHT_GREEN_END
public abstract void toggleState();
public abstract void reportState();
}
Notice that because we decided every device must have a name, the name must now be supplied as a constructor parameter. As a result, we can no longer create instances using a parameterless constructor.
Light light = new Light();
Light.java
java: constructor Device in class Device cannot be applied to given types;
required: java.lang.String
found: no arguments
reason: actual and formal argument lists differ in length
Creating an object now requires a name, for example:
new Light("PhilipsHue");
Therefore, each subclass constructor must call the superclass constructor.
Let's make this change in all subclasses.
public class Main {
public static void main() {
Device[] devices = {
new Light("PhilipsHue"),
new CoffeeMaker("Moccamaster"),
new SecurityCamera("Reolink")
};
for (Device device : devices) {
device.powerOn();
device.toggleState();
device.reportState();
device.powerOff();
}
}
}
Subclasses now inherit the power-on and power-off logic directly, but they are required to implement the device-specific functionality themselves. This creates a balance between flexibility and enforced structure: changing state and reporting state are mandatory, the implementation of those operations is up to each individual device, startup and shutdown behavior is shared by all devices.
Visibility of Methods in Abstract Classes
Abstract methods follow the same visibility rules as other methods.
Abstract methods are usually declared either public or protected so that subclasses can implement them.
If a method will be called by code that uses objects of the class, the method should be public.
If the method is intended for use only within subclasses, protected is sufficient.
It is important to note that a subclass implementation cannot reduce visibility.
For example, a public abstract method cannot be implemented as a protected method in a subclass.
Concrete methods may also be declared private. In that case they serve as internal helper methods and are not visible to subclasses.
An abstract method cannot be declared private.
Template Method Pattern
An abstract class may also contain a concrete method whose implementation calls an abstract method. This design is known as the Template Method pattern. The abstract class defines the overall algorithm or workflow, while delegating specific steps to subclasses.
The previously implemented parts have been hidden from the code. You can reveal them by clicking the eye icon in the upper-right corner of the code area.
public abstract class Device {
private String name;
private boolean poweredOn;
protected Device(String name) {
this.name = name;
}
public final void performUpdate() {
powerOn();
prepareUpdate(); // Abstract step implemented by subclasses
update();
powerOff();
}
protected abstract void prepareUpdate();
private void update() {
IO.println("Downloading the latest update from the network...");
IO.println("Updating device...");
}
public void powerOn() {
if (!poweredOn) {
poweredOn = true;
IO.println(name + " is powering on.");
}
}
public void powerOff() {
if (poweredOn) {
poweredOn = false;
IO.println(name + " is powering off.");
}
}
public abstract void toggleState();
public abstract void reportState();
}
performUpdate() now acts as a predefined recipe that subclasses cannot modify because it is declared final.
The subclasses instead customize the recipe by implementing the abstract methods required by the process.
🤔 Something to think about: In what situations would you want to prevent a subclass from overriding a particular method?
Exercises
Create an abstract class Message with an attribute String message, which is initialized in the constructor. Set the visibility of the message attribute to be as restrictive as possible. The class also contains an abstract method void send().
Create the classes Email and TextMessage that inherit from Message. Both classes should have a constructor that calls the superclass constructor. Implement the send() method in both classes.
The send() method of the Email class should print
"Sending email: <message>" and
the send() method of the TextMessage class should print
"Sending text message: <message>".
Modify the Vehicle class and its move() method from Exercise 3.6 to be abstract.
Keep the toString() method as a regular (non-abstract) method.
-
Create an abstract class
CommunicationChannel. It has an attributeString recipient, which is initialized in the constructor. Add an abstract methodsendInternally(String message)that does not return a value. -
Also create a method
String getRecipient(), which returns the recipient. -
Create a concrete method
send(String message)that immediately exits (return) if the message is empty ornull. Otherwise, the method should call the abstract methodsendInternally(String message). -
Create the classes
EmailandTextMessagethat inherit fromCommunicationChannel. In both classes, override the abstract methodsendInternally(String message), which prints a message to the console in the format "Sending <channel> to <address/number>: <message>". For example "Sending email to matti@maikalainen.com: Hi, what's up?" or "Sending text message to 0401234567: Welcome to the course!".
Create a MessagingService class to which different CommunicationChannel objects can be added using the method
addChannel(CommunicationChannel channel)
Also add a method
sendToAll(String message)
which sends the message through all channels at once.
Optional extra challenges (no points awarded, but they are included in the model solution):
- Modify the
CommunicationChannelclass so that it accepts a list of recipients instead of just one recipient. As a result, thesendInternallymethods must also be modified. - Add a character limit (e.g. 80 characters) to the
TextMessageclass. If a message exceeds this limit, it should be split into multiple parts according to the character limit.
All Exercises in This Part
Create a class called Product. Give it the attributes name (a string) and
price (a decimal number). Initialize the attribute values in the constructor.
Also create a method void printDetails() that prints the product's name and
price in the format "Name: Price €".
Create the classes Clothing and Food that inherit from the Product
class. The constructors of the derived classes do not need to do anything
other than call the superclass constructor with the correct values.
Now create two different clothing items and two different food products in
your program and print their details by calling the
void printDetails() method.
Let's continue from the previous exercise. Also create a class Electronics
that inherits from the Product class. Add the following special features to
each subclass:
-
Clothing: attribute
String size(e.g., "M", "L", etc.), and a methodvoid tryOn(String customerSize)that prints whether the clothing item is suitable for the person trying it on. -
Electronics: attribute
int warrantyMonths(e.g., 24), and a methodint warrantyRemaining(int monthsElapsed)that returns how many months of warranty are left (or 0 if the warranty has expired). -
Food: attribute
String bestBefore(e.g., "31.01.2026"), and a methodvoid eat()that prints: "You consume food whose expiration date is DD.MM.YYYY." (replace DD.MM.YYYY with the value ofbestBefore).
Note that the constructors of the subclasses must now call the superclass constructor with the correct values and also initialize their own attributes.
A main program has been provided for you on the exercise page. Use it to test your classes. It must not produce any compilation or runtime errors. However, you may add your own code to the main program if you wish.
Extend the online store class hierarchy you created earlier according to the UML diagram below.
A main program has been provided on the exercise page, which you can use to test your classes. You can also view the sample output produced by the program.
Open the example output here.
Calling inherited methods:
Dulce & Käppänä Winter Jacket: 120.0 €
Reissurähjä Rye Bread: 2.5 €
HighPower Computer: 899.0 €
----------------------------
Calling subclass-specific methods:
Test 1: Trying it on a user who wears size M:
Trying on the clothing item Dulce & Käppänä Winter Jacket...
This may not be the best fit. You wear size M, but this clothing item is size L.
Test 2: Trying it on a user who wears size L:
Trying on the clothing item Dulce & Käppänä Winter Jacket...
Great! Size L fits you perfectly!
Eating Reissurähjä Rye Bread.
The best-before date was 20.12.2024. Hopefully it's still good.
Warranty remaining: 19 months.
pHone: 999.99 €
Phone warranty remaining: 19 months
Operating system: Orange
Connection type: 4G
Calling from Orange (4G) to 0401122330
Pea Bag: 0.99 €
You thawed the frozen food Pea Bag for 10 minutes.
Recommended storage temperature is -18 °C.
Eating Pea Bag.
The best-before date was 31.5.2026. Hopefully it's still good.
Task Description
Below is a description of the new classes and their required features. The same information can also be found in the UML diagram.
-
Phone(inherits fromElectronics)-
Add the attributes:
private String operatingSystem(e.g."Droid"or"AiOS")private boolean is5G
-
Add the methods:
public void call(String number). The method prints, for example:Calling from Orange (4G) to 0401122330public void printPhoneDetails(int monthsElapsed). The method should first call the inherited method (printDetails()), and then print additional phone-related information(remaining warranty, operating system and 5G support)
-
-
FrozenFood(inherits fromFood)-
Add the attribute:
private int recommendedStorageTemperature(e.g.-18)
-
Add the method:
private void thaw(int minutes)(note theprivatemodifier) When called, the method prints, for example:You thaw the frozen food for 10 minutes. Recommended storage temperature: -18 °C.
-
Add the method:
public void thawAndEnjoy(int minutes)- The method first calls
thaw(minutes)and then the inheritedeat()method.
-
UML Diagram
In the classes Product, Electronics, and Phone, override the toString() method. In each implementation, first call the superclass's toString() method and then append information from the class's own attributes to the resulting string.
A main program has been provided on the exercise page, which you can use to test your classes.
Example of what the program might print
HighPower Computer: 899.0 €
Original device warranty: 24 months
Aifoun42: 888.0 €
Original device warranty: 37 months
Operating system: AiOS
Connection type: 5G
----------------------------
--- NEW STORE PRODUCT ---
Light Bulb: 67000.0 €
Original device warranty: 73 months
Battery health: 100.00%
Range: 404.00 km
--- ACTIVATION AND CHARGING ---
Charging vehicle Light Bulb...
Charging vehicle Light Bulb...
Charging vehicle Light Bulb...
Charging vehicle Light Bulb...
Charging vehicle Light Bulb...
--- STATUS AFTER CHARGING ---
Light Bulb: 67000.0 €
Original device warranty: 73 months
Battery health: 99.50%
Range: 401.98 km
Further extend the class hierarchy. Add a class ElectricVehicle that inherits from the Electronics class.
Add the following to the class:
-
Attributes
- Constant
MAX_RANGE, which represents the maximum distance in kilometers that the electric vehicle can travel on a single charge. private double batteryHealth(as a percentage; between 0 and 100).
- Constant
-
Methods
charge(), which decreases the battery health by 0.1% each time the vehicle is charged.toString(), which first calls the superclass methodtoString(), and then appends the battery health as a percentage and the vehicle's range in kilometers. The range is calculated using the formula: (batteryHealth / 100 * MAX_RANGE)
Create a class Vehicle with an attribute String brand and a constructor that initializes this value. Also add a method move(), which does nothing.
Create the classes Car and Airplane that inherit from Vehicle. Add a move() method to both Car and Airplane that overrides the move() method from the Vehicle class.
A Car object should print "
Car <brand> drives down the highway with its tires squealing."
and an Airplane object should print:
"Airplane <brand> takes off from the runway and flies above the clouds.".
Create a main program in which you create two Vehicle variables (not Car or Airplane variables) and assign a Car object to one and an Airplane object to the other.
Call the move() method on both objects.
Add an attribute int mileage to the Car class. Add an attribute int flightHours to the Airplane class. Add a new constructor to both classes that initializes these attributes. Modify the existing constructor so that these attributes are assigned the value 0.
Modify the move() methods so that they increase these values. The move() method of the Car class should increase the mileage attribute by 10, and the move() method of the Airplane class should increase the flightHours attribute by 1.
Also override the toString() method in the Vehicle class so that it returns the text:
"Vehicle <brand> information: "
Then override this method in the Car and Airplane classes so that they also include the mileage or flight hours, respectively.
Create an abstract class Message with an attribute String message, which is initialized in the constructor. Set the visibility of the message attribute to be as restrictive as possible. The class also contains an abstract method void send().
Create the classes Email and TextMessage that inherit from Message. Both classes should have a constructor that calls the superclass constructor. Implement the send() method in both classes.
The send() method of the Email class should print
"Sending email: <message>" and
the send() method of the TextMessage class should print
"Sending text message: <message>".
Modify the Vehicle class and its move() method from Exercise 3.6 to be abstract.
Keep the toString() method as a regular (non-abstract) method.
-
Create an abstract class
CommunicationChannel. It has an attributeString recipient, which is initialized in the constructor. Add an abstract methodsendInternally(String message)that does not return a value. -
Also create a method
String getRecipient(), which returns the recipient. -
Create a concrete method
send(String message)that immediately exits (return) if the message is empty ornull. Otherwise, the method should call the abstract methodsendInternally(String message). -
Create the classes
EmailandTextMessagethat inherit fromCommunicationChannel. In both classes, override the abstract methodsendInternally(String message), which prints a message to the console in the format "Sending <channel> to <address/number>: <message>". For example "Sending email to matti@maikalainen.com: Hi, what's up?" or "Sending text message to 0401234567: Welcome to the course!".
Create a MessagingService class to which different CommunicationChannel objects can be added using the method
addChannel(CommunicationChannel channel)
Also add a method
sendToAll(String message)
which sends the message through all channels at once.
Optional extra challenges (no points awarded, but they are included in the model solution):
- Modify the
CommunicationChannelclass so that it accepts a list of recipients instead of just one recipient. As a result, thesendInternallymethods must also be modified. - Add a character limit (e.g. 80 characters) to the
TextMessageclass. If a message exceeds this limit, it should be split into multiple parts according to the character limit.
Basics of Interfaces and Generic Types
Learning objectives
- You can use interfaces to define a contract that specifies the behavior of a class.
- You can implement the
Comparableinterface, which enables objects to be ordered and sorted. - You understand the concepts of generic classes and type parameters.
- You can implement reusable classes and methods using generic types.
Interfaces
Learning Objectives
After completing this chapter, you will:
- Understand what an interface means in object-oriented programming.
- Be able to define and use interfaces in Java.
- Be able to use an interface as a method parameter and as a variable type.
- Understand when to use an interface instead of inheritance.
- Understand that a class can implement multiple interfaces but inherit only one class.
An interface acts as a binding contract: it defines which methods a class must provide without specifying how those methods are technically implemented. Unlike an abstract class, which provides a foundation for attributes and methods, an interface focuses on describing an object's capabilities. Interfaces make it possible to define common capabilities even when classes are completely different or belong to different inheritance hierarchies. When a programmer works with an object through its interface, they can rely on the object providing the agreed functionality regardless of the object's actual class.
Smart Home: Adjustable Devices
Let's continue the smart home example that we started in Part 3.
Some devices in our smart home could be adjustable, meaning that a value such as brightness, temperature, or volume can be set directly.
This is essentially what our Light class already does, where brightness changes between a few predefined values. From the perspective of the object's user, however, it would be more convenient if the brightness could be set directly to a desired value (for example, 33%) instead of repeatedly calling toggleState() and hoping to reach the correct setting.
For an end user, this would be similar to setting the desired brightness directly in a mobile application instead of repeatedly clicking Increase Brightness or Decrease Brightness buttons.
Let's define an interface called Adjustable, containing the method setValue(int value).
The file is saved as Adjustable.java, just like a class definition.
/**
* A device that can be adjusted directly to a desired value.
*/
public interface Adjustable {
void setValue(int value);
}
This can be read as follows:
Every class implementing the
Adjustableinterface must provide asetValue()method.
We can now modify the Light class to implement the Adjustable interface.
For simplicity, we will leave CoffeeMaker and SecurityCamera out of this example because we decide that they are not adjustable devices.
public class Main {
public static void main() {
Light light = new Light("PhilipsHue");
light.setValue(33);
light.reportState();
light.toggleState();
light.reportState();
}
}
Our class diagram would now look like this. The letter I indicates an interface. Like abstract classes, interfaces are displayed in italics. Implementing an interface is represented with a dashed line ending in a hollow arrow pointing toward the interface.
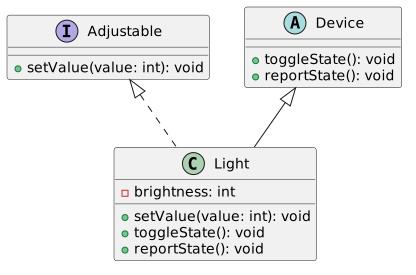
Implementing Multiple Interfaces
A class can implement multiple interfaces.
For example, Java's built-in ArrayList class implements several interfaces:
List, RandomAccess, Cloneable and Serializable (see ArrayList class documentation).
Each interface describes a particular capability:
Listdefines basic list operations such as adding, removing, and retrieving elements.RandomAccessindicates that elements should be accessed efficiently by index.Cloneableallows an object to be cloned.Serializableallows an object to be stored in a file or transmitted over a network.
Similarly, Java's Date class also implements the Cloneable interface, allowing date objects to be cloned.
Notice that Date and ArrayList are otherwise unrelated classes, yet they both implement the same interface.
Let's create two interfaces of our own and classes that implement them.
Suppose we have user-interface components that can: be drawn on the screen, and be clicked with a mouse.
We define two interfaces: Drawable and Clickable.
These interfaces describe the capabilities of user-interface components.
Let's agree on the following:
a drawable component can draw itself and
a clickable component can process click events and highlight itself when the mouse cursor is over it.
/**
* A component that can be drawn in the user interface.
*/
public interface Drawable {
public void draw();
}
Notice that we neither know nor care how these methods are implemented.
Rendering could happen
in a graphical user interface,
in a text-based interface,
or even by writing output to a file.
All we need to know is that every class implementing Drawable provides a draw() method, and every class implementing Clickable provides clicked() and setHighlight() methods.
Let's continue by implementing Text, a user-interface component that displays only text.
/**
* A drawable component displaying only text.
*/
public class Text implements Drawable {
private String content;
public Text(String content) {
this.content = content;
}
@Override
public void draw() {
// Draw only the text content without a border
IO.println(content);
}
}
The benefits of interfaces are not yet fully apparent, partly because draw() is currently the only method provided by the Drawable interface.
Now, however, we can create another component: a Button, which is a box-shaped clickable button containing text.
The Button class implements both interfaces: Drawable and Clickable.
/**
* A box-shaped clickable button
* containing text.
*/
public class Button implements Drawable, Clickable {
private String content;
private boolean highlighted;
public Button(String content) {
this.content = content;
this.highlighted = false;
}
@Override
public void draw() {
// Draw a rectangle and text
if (!highlighted) {
IO.println("[ " + content + " ]");
} else {
IO.println("[*" + content + "*]");
}
}
/**
* Handle a click event.
*/
@Override
public void clicked() {
IO.println( "(The button labeled \"" + content + "\" was clicked)");
}
/**
* Set the highlight state.
* If the state changes,
* redraw the component.
*/
@Override
public void setHighlight(boolean highlight) {
if (this.highlighted == highlight) {
return;
}
this.highlighted = highlight;
this.draw();
}
}
We now have two different user-interface components that can both be drawn on the screen.
In addition, the Button component is clickable.
Let's use these components in a main program.
/**
* A component that can be drawn
* in the user interface.
*/
public interface Drawable {
public void draw();
}
Optional additional information: Moving drawing responsibility out of components.
The example above is somewhat artificial in the sense that user-interface components usually are not responsible for drawing themselves. Instead, rendering is often delegated to another part of the system. In such architectures, components merely provide the information needed for rendering, while another part of the system handles the actual drawing on the screen (or another presentation medium).
Let's modify our example accordingly.
We create a Screen class that keeps track of all user-interface components currently visible.
/**
* The Screen class manages drawable components.
*/
public class Screen {
private ArrayList<Drawable> components = new ArrayList<>();
public void addComponent(Drawable component) {
components.add(component);
}
public void removeComponent(Drawable component) {
components.remove(component);
}
}
Next, we create a Renderer class that acts as an intermediate layer between Screen and the user-interface components.
The Renderer is responsible for drawing components correctly. In this example, rendering simply prints output to the console, but in a real application it could render graphics to a graphical display.
/**
* Responsible for rendering the drawing surface.
*/
public class Renderer {
public void drawButton(String text, boolean highlighted) {
if (!highlighted) {
IO.println("[ " + text + " ]");
} else {
IO.println("[*" + text + "*]");
}
}
public void drawText(String text) {
IO.println(text);
}
public void clear() {
IO.println("Clearing drawing area");
// Left unimplemented
}
}
The Screen class can now use the Renderer whenever components need to be displayed.
Let's add an update() method that goes through every component currently on the screen and asks it to render itself using a Renderer object.
import java.util.ArrayList;
/**
* The Screen class manages drawable components.
*/
public class Screen {
private ArrayList<Drawable> components = new ArrayList<>();
// HIGHLIGHT_GREEN_BEGIN
private Renderer renderer = new Renderer();
// HIGHLIGHT_GREEN_END
public void addComponent(Drawable component) {
components.add(component);
}
public void removeComponent(Drawable component) {
components.remove(component);
}
// HIGHLIGHT_GREEN_BEGIN
public void update() {
renderer.clear();
for (Drawable component : components) {
component.draw(renderer);
}
}
// HIGHLIGHT_GREEN_END
}
Notice that the Drawable interface's draw() method must now receive a Renderer object as a parameter.
This allows components to use the renderer for drawing.
public interface Drawable {
// HIGHLIGHT_GREEN_BEGIN
public void draw(Renderer renderer);
// HIGHLIGHT_GREEN_END
}
Now comes the important part:
As a consequence of this change, the draw() methods of Text and Button no longer print anything themselves. Instead, they call methods of the Renderer object.
/**
* A drawable component
* displaying only text.
*/
public class Text implements Drawable {
private String content;
public Text(String content) {
this.content = content;
}
/**
* Draw the component.
*
* @param renderer Renderer
*/
@Override
// HIGHLIGHT_GREEN_BEGIN
public void draw(Renderer renderer) {
renderer.drawText(content);
}
// HIGHLIGHT_GREEN_END
}
A corresponding change must also be made to the Button class.
In our simplified example everything is still rendered by printing to the console. In a real graphical user interface, however, the Renderer class could use a graphics library such as JavaFX or Swing for actual rendering.
Interface Inheritance
An interface can also extend (inherit from) another interface.
Syntactically, this is done using the extends keyword, just as with classes.
Unlike classes, however, an interface may inherit from multiple interfaces.
A subinterface automatically inherits all methods declared in its parent interfaces.
The following synthetic example demonstrates this.
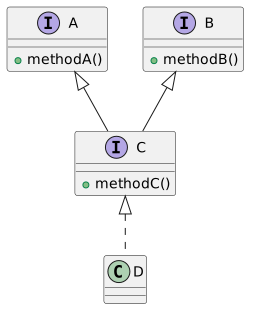
Notes
Optional additional information: default method implementations
Starting with Java 8, interfaces can also contain default method implementations. This feature can be useful when adding a new method to an existing interface without breaking older implementations. Read more about this in Java documentation
Exercises
-
Create an interface named
Converter. Define a single method in the interface:String convert(String input);Remember that methods in an interface do not have a body (no curly braces{}). -
Create the classes
Lowercase,Uppercase, andCapitalize, which implement theConverterinterface.- The
convertmethod of theLowercaseclass converts the given string to lowercase.convert("Hello World")->"hello world". - The
convertmethod of theUppercaseclass converts the given string to uppercase.convert("Hello World"->"HELLO WORLD". - The
convertmethod of theCapitalizeclass converts the given string so that only the first letter is uppercase and all other letters are lowercase.convert("HELLO WORLD")->"Hello world"
- The
-
Test your program using the provided main program.
Spies send messages to each other, but the encryption method changes daily so that the enemy cannot figure out the logic. We need an interface that allows us to switch the encryption algorithm on the fly.
- Create an interface
Encryptor. Define the following two methods in the interface:
String encrypt(String message);
String decrypt(String encryptedMessage);
-
Implement three different classes:
Reverser,Hacker, andNextLetter, which implement theEncryptorinterface using the following logic:-
Reverser (Mirror Writing) Reverses a word or message. Example: "Agent" → "tnegA" Hint: You can use the
reverse()method of theStringBuilderclass or a loop that processes the string from end to beginning. -
Hacker ("Leet Speak") Replaces certain letters with numbers or symbols. "Agent" → "@g3nt"
-
'a' -> '@'
'e' -> '3'
'i' -> '!'
'o' -> '0'
- NextLetter (Caesar Shift)
Moves each letter one position forward in the alphabet.
Example: abc -> bcd.
Hint: In Java,
charis a numeric type, so you can use:character + 1.
Examples:
'a' -> 'b'
'b' -> 'c'
'k' -> 'l'
and so on.
In this exercise, you do not need to worry about wrapping around the alphabet for letters such as z, å, ä, or ö, unless you want to.
You also do not need to worry about encryption and decryption always restoring the exact original message. For example, when using the Hacker encryptor, if the original message actually contains the character @, the decrypt() method will convert it to a. This is acceptable for this exercise, although a real encryption system should ensure that no information is accidentally lost or altered.
A main program is provided in TIM for testing your class structure.
The Comparable Interface and Natural Ordering
The Comparable interface defines the method compareTo(), which allows objects of a class to define a natural ordering relative to other objects of the same type.
The interface contains a single method, compareTo(), which returns an integer indicating the ordering relationship between two objects.
The return value is interpreted as follows:
| Case | Meaning | Interpretation |
|---|---|---|
objectA.compareTo(objectB) < 0 | objectA < objectB | objectA is smaller than objectB |
objectA.compareTo(objectB) == 0 | objectA == objectB | objectA is equal to objectB |
objectA.compareTo(objectB) > 0 | objectA > objectB | objectA is greater than objectB |
For example, the Integer type implements the Comparable interface for integer objects. Therefore, two integer objects can be compared using the compareTo() method.
void main() {
Integer number1 = 5;
Integer number2 = 18;
int result = number1.compareTo(number2);
// Prints a negative value (< 0), because 5 < 18
IO.println( "number1.compareTo(number2): " + result);
}
Strings already have a natural ordering defined as alphabetical order.
// Helper function that prints the ordering between two strings.
void describeOrder(String word1, String word2) {
int result = word1.compareTo(word2);
if (result < 0) {
IO.println( "The string '" + word1 + "' comes before the string '" + word2 + "'");
} else if (result > 0) {
IO.println("The string '" + word1 + "' comes after the string '" + word2 + "'");
}
else {
IO.println("'" + word1 + "' is equal to '" + word2 + "'");
}
}
void main() {
String word1 = "apple";
String word2 = "orange";
String word3 = "banana";
describeOrder(word1, word2);
describeOrder(word1, word3);
describeOrder(word2, word3);
}
Similarly, the natural ordering for Integer values is ascending numerical order.
int describeOrder(Integer number1, Integer number2) {
int result = number1.compareTo(number2);
if (result < 0) {
IO.println( number1 + " is smaller than " + number2);
} else if (result > 0) {
IO.println(number1 + " is greater than " + number2);
} else {
IO.println(number1 + " is equal to " + number2);
}
return result;
}
void main() {
Integer number1 = 5;
Integer number2 = 18;
Integer number3 = 5;
describeOrder(number1, number2);
describeOrder(number1, number3);
describeOrder(number2, number3);
}
One of the major benefits of the Comparable interface is that it allows us to write programs and use algorithms that require comparisons in a completely general way for any objects that implement Comparable.
Classes implementing this interface can also be sorted using Java's built-in collection sorting implementations, such as the Collections.sort method.
As a result, we do not need to implement sorting algorithms ourselves.
void main() {
List<Integer> numbers = Arrays.asList(18, 5, 42);
List<String> fruits = Arrays.asList("apple", "pear", "orange");
IO.println(numbers); // [18, 5, 42]
IO.println(fruits); // [apple, pear, orange]
// Sort lists according to the natural order of their elements.
Collections.sort(fruits);
Collections.sort(numbers);
IO.println(numbers); // [5, 18, 42]
IO.println(fruits); // [apple, orange, pear]
}
Extra: Collections class
In addition to the sort method mentioned above, the Collections class provides many useful utility methods for Java collections.
A collection is Java's general term for data structures that contain elements, such as arrays, lists, and maps.
We will cover collections in more detail in Part 5.
However, you may already explore the Collections class if you wish. Be aware that its documentation contains syntax that will not be introduced until later in the course.
Many methods in the Collections class rely on collection elements implementing interfaces such as Comparable.
By combining Java's collection interfaces and element interfaces, it becomes possible to write highly general algorithms that work regardless of whether the parameter is a list of numbers or, for example, an array of students.
Study the Java documentation. Answer the questions about the Comparable interface.
Implementing the Comparable Interface Yourself
Let's try implementing the Comparable interface for one of our own classes.
Suppose we have a class called CollectibleCard, representing cards used in a collectible card game.
Initially, our collectible card contains only a name and a unique identification number starting from one.
class CollectibleCard {
private String name;
private int idNumber;
public CollectibleCard(String name, int idNumber) {
this.name = name;
this.idNumber = idNumber;
}
@Override
public String toString() {
return "Card: " + name + " (#" + idNumber + ")";
}
}
If we now try to sort CollectibleCard objects using Collections.sort(), we receive a compile-time error because the class does not implement the Comparable interface.
void main() {
List<CollectibleCard> cards =
Arrays.asList(
new CollectibleCard("Brilliant Dragon", 3),
new CollectibleCard("Beginner Amoeba", 1),
new CollectibleCard("Magnificent Seahorse", 2)
);
IO.println("Before sorting:");
for (CollectibleCard card : cards) {
IO.println(card);
}
Collections.sort(cards);
IO.println();
IO.println("After sorting:");
for (CollectibleCard card : cards) {
IO.println(card);
}
}
main.java:14: error: no suitable method found for sort(List<CollectibleCard>)
Collections.sort(cards);
The error message is rather cryptic.
In simple terms, the error occurs because Collections.sort() cannot guess what the natural ordering of CollectibleCard objects should be.
Should cards be ordered alphabetically by name? Or by increasing identifier number?
To answer that question, we must implement the Comparable interface for the CollectibleCard class.
When implementing the Comparable interface for our collectible cards, we immediately have to consider what the natural ordering of our cards should be.
For example, alphabetical ordering by name might be useful. On the other hand, since the cards have unique numerical identifiers starting from one, ordering by identifier might feel more natural and just as useful.
When choosing a natural ordering, it is important to consider both the application domain and the needs of the users. What ordering would other programmers using the class—or the application's end users—expect as the default ordering for collectible cards?
For the purposes of this example, let's decide that ordering by the unique identifier is the most reasonable natural ordering.
With that decision made, we can implement the Comparable interface so that cards are ordered according to their identifier number.
To do this, we need to add the interface implementation to the class definition and implement the compareTo method.
We will use the return-value table presented earlier in the chapter.
class CollectibleCard implements Comparable<CollectibleCard> {
private String name;
private int idNumber;
public CollectibleCard(String name, int idNumber) {
this.name = name;
this.idNumber = idNumber;
}
@Override
public int compareTo(CollectibleCard other) {
if (idNumber > other.idNumber) {
return 1;
}
if (idNumber < other.idNumber) {
return -1;
}
return 0;
}
@Override
public String toString() {
return "Card: " + name + " (#" + idNumber + ")";
}
}
Comparable is a so-called generic interface, meaning that the interface itself does not specify what type of objects are being compared.
We will cover generic programming in more detail in Part 4.4.
Because of this, when implementing the Comparable interface, we must explicitly specify the type for which the natural ordering is being defined.
In this case, we are defining an ordering for collectible cards, which is why we write:
implements Comparable<CollectibleCard>.
Using Existing Comparison Methods
In the previous example, we implemented compareTo() directly according to the definition of the Comparable interface.
However, Java's built-in types often already provide comparison methods that can be used when implementing Comparable.
For example, Java provides the method Integer.compare() for comparing int values.
This allows us to simplify the implementation of compareTo() in CollectibleCard into a single-line method.
class CollectibleCard implements Comparable<CollectibleCard> {
private String name;
private int idNumber;
public CollectibleCard(String name, int idNumber) {
this.name = name;
this.idNumber = idNumber;
}
@Override
public int compareTo(CollectibleCard other) {
return Integer.compare(idNumber, other.idNumber);
}
@Override
public String toString() {
return "Card: " + name + " (#" + idNumber + ")";
}
}
void main() {
List<CollectibleCard> cards = Arrays.asList(
new CollectibleCard("Brilliant Dragon", 3),
new CollectibleCard("Beginner Amoeba", 1),
new CollectibleCard("Magnificent Seahorse", 2)
);
IO.println("Before sorting:");
IO.println(cards);
Collections.sort(cards);
IO.println("After sorting:");
IO.println(cards);
}
When implementing the Comparable interface for your own classes, it is generally a good idea to use existing comparison methods whenever possible.
For example, Integer.compare() correctly handles all special cases related to integers.
Similarly, Double.compare() correctly handles all floating-point special values, such as infinity and Not a Number (NaN).
Comparing Multiple Attributes
A natural ordering may also be based on multiple attributes.
For example, we might decide that cards should be ordered alphabetically by name first, and by identifier number only when the names are the same.
To achieve this, we modify compareTo() so that it first compares the name attributes using the String class's own compareTo() method.
If the names are equal (that is, if compareTo() returns 0), then we compare the identifier numbers.
class CollectibleCard implements Comparable<CollectibleCard> {
private String name;
private int idNumber;
public CollectibleCard(String name, int idNumber) {
this.name = name;
this.idNumber = idNumber;
}
@Override
public int compareTo(CollectibleCard other) {
int nameComparison = this.name.compareTo(other.name);
if (nameComparison != 0) {
return nameComparison;
}
return Integer.compare(this.idNumber, other.idNumber);
}
@Override
public String toString() {
return "Card: " + name + " (#" + idNumber + ")";
}
}
Exercises
The exercise is based on a Person class in its own file and a sortPeople method in main.java. However, the method does not work because it uses Java's built-in Collections.sort method, and the Person class does not provide the required support for it.
Modify the Person class so that lists of type List<Person> can be sorted alphabetically by a person's name using the Collections.sort method.
For example, the list
List<Person> people = Arrays.asList(
new Person("Joukahainen"),
new Person("Ilmatar"),
new Person("Kyllikki"),
new Person("Kokko")
);
should be in the following order after calling
Collections.sort(people);:
- Ilmatar
- Joukahainen
- Kokko
- Kyllikki
Continuation of the previous exercise. The Person class has now been updated so that a person's name is divided into a last name and first name(s).
Modify the updated Person class so that List<Person> collections can be sorted using the Collections.sort method in alphabetical order by last name and first name(s), with the primary sorting criterion being the last name.
For example, the list
List<Person> people = Arrays.asList(
new Person("Pacius", "Fredrik"),
new Person("Mozart", "Wolfgang Amadeus"),
new Person("Mozart", "Leopold"),
new Person("Chopin", "Frédéric")
);
should be in the following order after calling
Collections.sort(people);:
- Chopin Frédéric
- Mozart Leopold
- Mozart Wolfgang Amadeus
- Pacius Fredrik
Inheritance and Interfaces in Object Collaboration
Learning Objectives
After completing this chapter, you will:
- Be able to use interfaces and abstract classes to avoid dependencies between classes.
- Recognize when inheritance should be used and when composition is the better alternative ("Composition over Inheritance").

Inheritance and interfaces can work together, and often do. Inheritance defines a hierarchy between classes and allows them to share common functionality. Interfaces, on the other hand, define capabilities that different classes can implement regardless of their position in the class hierarchy.
In fact, we already used both inheritance (the abstract Device class) and an interface (the Adjustable interface) in our Smart Home example. Let's expand this cooperation between inheritance and interfaces further.
Consider a situation where we have classes that do not share a common superclass but still share a common capability.
Power Outlet and Electrical Devices
Let's do a small thought experiment. Imagine a power outlet on the wall of your home. The outlet provides electricity, but not to just anything. It requires the device to have a suitable plug.
In this analogy, an interface is the standard or contract that a device must satisfy in order to use the outlet. We can also think about it from another direction:
If a device has a plug that fits the outlet, it must be capable of reacting appropriately when connected to power.
The outlet does not care whether you plug in a toaster or a circular saw.
These are actually completely different kinds of devices. One is used for food preparation; the other is a tool. They do not necessarily share a common ancestor in a class hierarchy the way a Car and a Motorcycle might inherit from a Vehicle class.
The only thing connecting the toaster and the circular saw is their ability to connect to mains electricity.
If we tried to model this with inheritance alone, we would immediately run into problems. Should a toaster inherit from ElectricalDevice, KitchenAppliance, or perhaps both?
Java does not allow a class to inherit from multiple superclasses.
An interface solves this elegantly:
Toasteris aKitchenAppliance(inheritance), but it also implements theMainsPoweredDeviceinterface.- Similarly,
CircularSawmight be aTool(inheritance) that also implements the sameMainsPoweredDeviceinterface.
As a result, the outlet can accept either device because both satisfy the same contract.
At its simplest, the MainsPoweredDevice interface might define that a device must be able to react when power begins flowing through it.
public interface MainsPoweredDevice {
// This method is the "plug".
// When the outlet activates it,
// the device receives power.
void connectPower();
}
Now both Toaster and CircularSaw can implement this interface.
public class Toaster implements MainsPoweredDevice {
@Override
public void connectPower() {
// The toaster's way of reacting to electrical power.
IO.println( "Toaster: Heating elements begin glowing red.");
}
}
public class CircularSaw implements MainsPoweredDevice {
@Override
public void connectPower() {
// The circular saw's way of reacting to power.
IO.println("CircularSaw: Motor begins spinning the blade at 4000 rpm.");
}
}
These classes can exist in completely different parts of the class hierarchy.
One is a kitchen appliance. The other is a tool.
Both react to electrical power being connected—but in their own way.
Let's add abstract superclasses KitchenAppliance and Tool, from which Toaster and CircularSaw inherit.
To make the example more meaningful, we will add a few attributes and methods to the superclasses.
public abstract class KitchenAppliance {
/**
* Does the appliance contain heating elements?
*/
boolean heating;
/**
* All kitchen appliances must be cleanable.
*/
public abstract void clean();
}
public abstract class Tool {
/**
* Number of operating hours.
*/
private int operatingHours = 0;
/**
* Use the tool.
*
* @param hours Number of hours the tool is used.
*/
public void use(int hours) {
this.operatingHours = hours;
}
/**
* Service the tool.
*
* @return Whether servicing succeeded.
*/
public abstract boolean service();
}
Now let's implement those behaviors in the subclasses.
// CircularSaw is a Tool that operates on mains power.
public class CircularSaw extends Tool implements MainsPoweredDevice {
@Override
public void connectPower() {
// Circular saw's reaction to electrical power.
IO.println("CircularSaw: Motor begins spinning the blade at 4000 rpm.");
// Also call the superclass
// use() method.
super.use(1);
}
/**
* Service the circular saw.
*
* @return Whether servicing succeeded.
*/
@Override
public boolean service() {
IO.println( "Servicing circular saw..."
+ "Sharpening blade and adjusting rotation speed."
);
return true;
}
}
// Toaster is a KitchenAppliance that operates on mains power.
public class Toaster extends KitchenAppliance implements MainsPoweredDevice {
@Override
public void connectPower() {
IO.println( "Toaster: Heating elements "
+ "begin glowing red."
);
}
@Override
public void clean() {
IO.println( "Toaster: Removing crumbs "
+ "and wiping gently "
+ "with a damp cloth."
);
}
}
The class hierarchy would look like this:
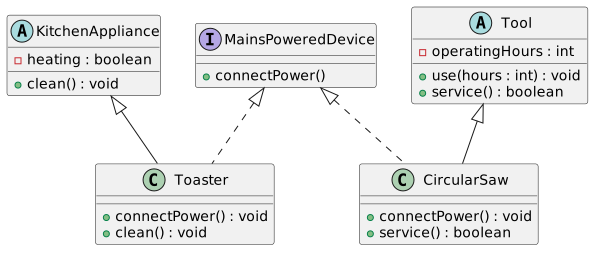
This is the most important point conceptually: The power outlet is a class that uses the interface.
public class PowerOutlet {
// Any mains-powered device
// can be connected.
// Outlot isn't intrested if it's toaster or TV
public void connectDevice(MainsPoweredDevice device) {
IO.println( "--- Power outlet supplies electricity ---");
// The outlet calls the method defined by the contract.
// Polymorphism occurs here:
// each device reacts in its
// own appropriate way.
device.connectPower();
}
}
Notice that the parameter type is the MainsPoweredDevice interface.
The parameter does not need to be a Toaster, a CircularSaw, or any other specific class.
It is enough that the object implements the interface.
This means the method can accept any object implementing MainsPoweredDevice, regardless of where that object belongs in the class hierarchy.
Interfaces as Variable Types
To put PowerOutlet to actual use, we need a main program that creates a PowerOutlet object and connects different devices to it.
Let's first connect a Toaster.
- main.java
- MainsPoweredDevice.java
- Toaster.java
- CircularSaw.java
- KitchenAppliance.java
- Tool.java
- PowerOutlet.java
public class HouseholdElectricity {
public static void main(String[] args) {
// 1. Create the infrastructure:
// the power outlet
PowerOutlet kitchenOutlet = new PowerOutlet();
// 2. Create devices
Toaster toaster = new Toaster();
CircularSaw saw = new CircularSaw();
// 3. Use the devices
// through the outlet
IO.println("--- Morning in the kitchen ---");
kitchenOutlet.connectDevice(toaster);
IO.println("\n--- Renovation begins ---");
kitchenOutlet.connectDevice(saw);
}
}
As we learned in Chapter 3.2 Polymorphism, we don't actually need to declare the variables using their concrete types (Toaster and CircularSaw).
Since we only care that the devices can be plugged into an outlet, both variables can be declared using the interface type instead.
public class HouseholdElectricity {
public static void main(String[] args) {
PowerOutlet kitchenOutlet = new PowerOutlet();
// HIGHLIGHT_GREEN_BEGIN
MainsPoweredDevice toaster = new Toaster();
MainsPoweredDevice saw = new CircularSaw();
// HIGHLIGHT_GREEN_END
IO.println("--- Morning in the kitchen ---");
kitchenOutlet.connectDevice( toaster);
IO.println("\n--- Renovation begins ---");
kitchenOutlet.connectDevice(saw);
}
}
Programming to a Supertype
The practice described above—treating subclass objects as objects of a superclass or interface type—is very common and highly recommended in object-oriented programming. It is often referred to as: programming to an interface or programming to a supertype. This approach reduces coupling between program components and allows implementations to be substituted without changing the rest of the code.
Why Is Programming to a Supertype Useful?
One reason is that it allows us to treat very different kinds of objects as a uniform collection. We already did something similar in the polymorphism examples.
Consider our MainsPoweredDevice example. We can create a list containing different kinds of mains-powered devices and connect all of them to a power outlet in a loop.
List<MainsPoweredDevice> devices = List.of(
new Toaster(),
new CircularSaw(),
new VacuumCleaner()
);
PowerOutlet outlet = new PowerOutlet();
for (MainsPoweredDevice device : devices) {
outlet.connectDevice(device);
}
If each device were treated only as its concrete type, we might end up writing something like this instead (assuming KitchenAppliance and Tool are existing superclasses):
List<KitchenAppliance> kitchenAppliances = ...;
List<Tool> tools = ...;
PowerOutlet outlet = new PowerOutlet();
for (KitchenAppliance appliance : kitchenAppliances) {
outlet.connectDevice(appliance);
}
for (Tool tool : tools) {
outlet.connectDevice(tool);
}
Another advantage is easy substitutability, often referred to as loose coupling. When code uses an interface as the variable type, it is not tied to any specific implementation. This means we can replace one implementation with another without modifying the code that uses the interface.
Imagine we are building a program for testing electrical devices.
Toaster deviceUnderTest = new Toaster();
// ... test the device ...
// Switch to another device implementation
deviceUnderTest = new CircularSaw(); // Does not compile
This does not work because the types do not match. When the variable is declared using the interface type, replacing implementations becomes easy.
MainsPoweredDevice deviceUnderTest = new Toaster();
// ... test the device ...
// Switch to another implementation
deviceUnderTest = new CircularSaw();
// This works because both implement
// the MainsPoweredDevice interface.
A third reason relates to software design.
When you declare a variable as MainsPoweredDevice, the compiler prevents you from calling methods that are specific only to a toaster (such as getHeatingLevel()) or only to a circular saw (such as setBladeHeight()).
While this kind of self-imposed restriction may initially seem inconvenient, it helps keep code clean and prevents mistakes where an object is used in a way that is incompatible with the interface being relied upon.
The Liskov Substitution Principle
Closely related to loose coupling is the Liskov Substitution Principle (LSP). The Liskov Substitution Principle states that an object should be replaceable by another object implementing the same interface or contract without changing the correctness of the program. In practice, this means: a subclass should honor the contracts and behavioral expectations established by its superclass. A class implementing an interface should honor the contract defined by that interface.
Let's briefly return to the instrument example introduced in Chapter 3.2.
Suppose we have an interface Instrument, which defines the ability to perform music for an audience through the method play().
public interface Instrument {
/**
* Performs a musical piece for an audience.
*/
void play();
}
All instruments—such as Guitar, Piano, and DrumSet—implement this interface.
A concert organizer wants to ensure that all instruments can perform, regardless of their specific type.
Let's create a Concert class whose playAllInstruments() method instructs all instruments to play.
public class Concert {
public void playAllInstruments(Instrument[] instruments) {
for (Instrument instrument : instruments) {
instrument.play();
}
}
}
Now let's create a new instrument called PracticePiano.
This piano can only be played through headphones, meaning the audience cannot hear anything.
It still implements the Instrument interface, but its behavior differs from the expectation established by the interface.
class PracticePiano implements Instrument {
@Override
public void play() {
// Technically meaningful,
// but violates the intended contract.
IO.println("Practicing with headphones. The audience hears nothing."
);
}
}
Let's assemble a "concert" in the main program.
void main() {
Instrument[] instruments = {
new Guitar(),
new Piano(),
new PracticePiano()
};
Concert concert = new Concert();
concert.playAllInstruments(instruments);
}
The code works perfectly well from a technical perspective.
However, PracticePiano violates the contract implied by the Instrument interface. Its play() method does not actually "perform music for an audience"; it performs only for the player.
The subclass's behavior might make sense in another context—in this case, practice sessions—but it does not satisfy the expectations established by the interface.
In a well-designed class hierarchy, every object adheres to the contract promised by its superclass or interface.
This allows polymorphism to be used reliably without requiring the programmer to know every concrete implementation in advance.
Our electrical device example relates to the same principle.
Recall that we declared our toaster and circular saw variables as type MainsPoweredDevice.
Because of this, we cannot call methods that are not part of the MainsPoweredDevice interface.
For example:
toaster.clean();
saw.service();
would not be allowed through MainsPoweredDevice references because those methods do not belong to the interface.
If we genuinely need access to those methods, we should stop and ask why we are treating the object merely as a mains-powered device in the first place.
From a software design perspective, such a situation suggests that we may be trying to solve two different problems in the same place.
In a good design, code that works with MainsPoweredDevice objects—such as an electricity meter or fuse box—is interested only in electrical behavior.
It should not care whether the device is a toaster or a circular saw, and it certainly should not be responsible for cleaning or servicing them.
If we find ourselves needing the clean() method, we are probably "in the wrong room":
-
Wrong abstraction level. If we are building application logic for cleaning kitchen equipment, we should not store devices in a
List<MainsPoweredDevice>. Instead, we should use aList<KitchenAppliance>. Then every object in the list naturally provides theclean()method. -
Single Responsibility Principle. If the same method attempts both to measure electricity consumption (an interface concern) and clean the appliance (a kitchen-appliance concern), it is doing too much. A better solution is to separate responsibilities: one part of the program manages electrical devices through the
MainsPoweredDeviceinterface, while another handles maintenance throughKitchenApplianceorTooltypes.
In summary, rather than trying to expose specialized features through a generic interface, we should choose the variable type according to the task at hand. An electrician sees a circular saw as a mains-powered device. A carpenter sees it as a tool. The code should reflect this distinction.
Abstract Class or Interface?
The table below summarizes the key differences between abstract classes and interfaces.
| Question | Abstract Class | Interface |
|---|---|---|
| Can it contain attributes? | Yes | No |
| Can it contain method implementations? | Yes | No (except default methods introduced in Java 8) |
| How many can a class inherit/implement? | A class can inherit only one abstract class | A class can implement multiple interfaces |
| Primary purpose | Shared structure and partial implementation | Shared behavioral contract |
Exercises
Let's implement a simple text adventure game (or, more accurately, a small part of one), where the player can try to pick up items from the ground and eat food to gain energy.
You are provided with two interfaces: Edible and Pickable.
You are also provided with partially implemented classes: Apple and LargeRock, which implement these interfaces.
In addition, you are given a partially implemented main program that keeps track of the player's energy and backpack capacity.
Complete all sections marked with the word TODO so that the program behaves according to the instructions.
Create a Robot that can perform various household tasks, such as vacuum cleaning and watering plants.
Implement the exercise according to the UML diagram below. A dashed line with a filled arrow means that the Robot class uses the Tool interface: the Robot class contains an attribute whose type is Tool.
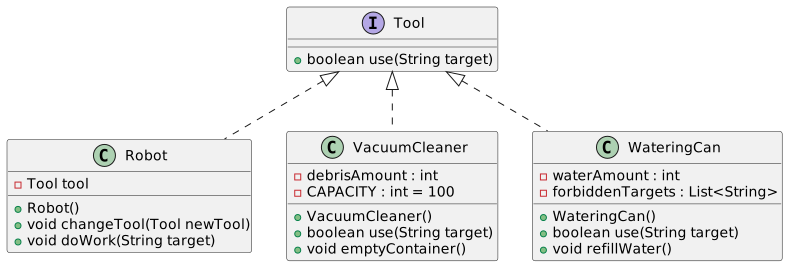
Textual description
The following is a description of the classes and their required features (corresponding to the UML diagram):
The Robot class has the following methods:
-
void changeTool(Tool tool): Changes the tool used by the robot (for example, a vacuum cleaner or a watering can). -
void doWork(String target): Performs a household task. If the target is on the forbidden list of the currently selected tool (for example, aWateringCanobject must not be used on the target"Computer"), the robot should print an error message. Forbidden targets are defined as a string list attribute of the tool. -
A
WateringCanobject does not water if there is not enough water available. It can be refilled using therefillWater()method. The watering can initially contains 50 units of water. If you wish, you may create an additional constructor that allows a different initial water level. -
A
VacuumCleanerobject does not vacuum if its dust container is full. The container can be emptied using theemptyContainer()method. The container capacity is 100 units. If you wish, you may create an additional constructor that allows a different initial fill level. -
Both tools return a boolean value from the
use(String target)method indicating whether the task was completed successfully.
Type Parameters and Generics
Learning Objectives
- Be able to use type parameters to implement reusable, generic classes and methods.
In your previous programming courses, you learned that parameters help reduce repetition by generalizing program behavior for different values. The idea behind parameters is to separate the logic of a computation from the actual values being processed. When we write a method, the computation only needs to be defined once. For example, if we wanted to determine the index where a number first appears without using parameters, we might write code like this:
void main() {
int[] array1 = {2, 3, 4};
// Search for the number 3
for (int i = 0; i < array1.length; i++) {
if (array1[i] == 3) {
IO.println("The number 3 first appears at index " + i);
break;
}
}
int[] array2 = {-20, 10, 2, 1};
// Search for the number 2
for (int i = 0; i < array2.length; i++) {
if (array2[i] == 2) {
IO.println("The number 2 first appears at index " + i);
break;
}
}
}
This works, but the code contains unnecessary duplication. Let's create a function that takes the array as a parameter.
int findIndex(int[] array, int target) {
for (int i = 0; i < array.length; i++)
if (array[i] == target) return i;
return -1;
}
void main() {
IO.println("The number 3 is at index " + findIndex(new int[] {2, 3, 4}, 3));
IO.println("The number 2 is at index " + findIndex(new int[] {-20, 10, 2, 1}, 2));
}
You can think of this as using parameters at the value level: the method remains general, while the values vary.
However, we quickly discover that the same findIndex() method does not work for other numeric types such as long or float, nor for completely different types such as String.
For those cases, we would need separate methods.
int findIndexLong(long[] array, long target) {
for (int i = 0; i < array.length; i++)
if (array[i] == target) return i;
return -1;
}
int findIndexFloat(float[] array, float target) {
for (int i = 0; i < array.length; i++)
if (array[i] == target) return i;
return -1;
}
int findIndexString(String[] array, String target) {
for (int i = 0; i < array.length; i++)
if (array[i].equals(target)) return i;
return -1;
}
void main() {
long[] longArray = {-10L, 5L, 1L};
float[] floatArray = {-10.0f, 2.0f};
String[] stringArray = {"Dog", "Cat", "Bird"};
IO.println("The number -10 is at index " + findIndexLong(longArray, -10L));
IO.println("The number 2.0 is at index " + findIndexFloat(floatArray, 2.0f));
IO.println("The string \"Cat\" is at index " + findIndexString(stringArray, "Cat"));
}
Because Java is a statically typed language, we cannot write a single method that automatically works for all these types.
Without a better solution, we easily end up with a collection of nearly identical methods:
findIndexInt,
findIndexDouble,
findIndexString and so on.
The code is practically the same; only the types differ.
The fundamental idea behind all these methods is really this:
int findIndex(TYPE[] array, TYPE target) {
for (int i = 0; i < array.length; i++)
if (array[i] == target) return i;
return -1;
}
In Java, writing this kind of code is possible through type parameters.
Type Parameters
A type parameter is a parameter whose value is itself a data type. The purpose of type parameters is to reduce duplication in situations where the same code works for different types while preserving the benefits of static typing. Type parameters can also eliminate unnecessary type casts in many situations.
Type parameters can be defined for methods in addition to ordinary parameters. As a special feature, they can also be defined for classes. Together, method and class type parameters enable generic programming, that is, programming algorithms and data structures that are independent of a specific type.
Generic Methods
A method that defines one or more type parameters is called a generic method.
In a generic method, the data type is not fixed when the method is defined. Instead, the type is represented by a symbol whose meaning is determined when the method is called.
A method's type parameter is written inside angle brackets before the return type.
By convention, single uppercase letters are often used. The most common is T, which stands for Type.
// Method "print" with one type parameter T
// and one ordinary parameter "value"
<T> void print(T value) {
IO.println("Hello, I am '" + value + "' and I am an object of class '" + value.getClass() + "'!");
}
void main() {
print(1.0);
print(1);
print("cat");
}
A generic method may be static, non-static, or a constructor. The type parameter can appear in the return type, method parameters, or both.
A method may have one or more type parameters. Multiple type parameters are written as a comma-separated list inside angle brackets, and each type parameter may represent an independent type.
For example we cahn have two type parameters T1 and T2:
<T1, T2> String combine(T1 value1, T2 value2) {
return value1.toString() + ", " + value2.toString();
}
void main() {
IO.println(combine(1, 2)); // T1 = Integer, T2 = Integer
IO.println(combine(true, 1.0)); // T1 = Boolean, T2 = Double
}
The convention for naming type parameters is usually to use a single uppercase letter that reflects the role of the parameter:
T (Type),
E (Element),
K (Key),
V (Value) and
N (Number).
Occasionally numbers are appended, such as T1, T2, and T3.
Notice that in the examples above, type parameters are defined but are not explicitly supplied when calling the method. They could be:
<T> void print(T value) {
IO.println("Hello, I am '" + value + "' and I am an object of class '" + value.getClass() + "'!");
}
void main() {
this.<Double>print(1.0); // same as print(1.0)
this.<String>print("cat"); // same as print("cat")
}
Normally, the type parameter is not provided explicitly because the compiler can infer it automatically.
For example, in the call: print(1.0);
the compiler sees that 1.0 is of type double and infers that T should be Double.
It is nevertheless important to remember that a type parameter value does exist behind the scenes even when it is not written explicitly.
Let's see how our earlier searching problem can be solved using a generic method.
<T> int findIndex(T[] array, T target) {
for (int i = 0; i < array.length; i++)
if (array[i].equals(target)) return i;
return -1;
}
void main() {
Integer[] integers = {2, 3, 4};
Double[] doubles = {-10.0, 2.0, 0.0, 5.5 };
String[] animals = {"dog", "cat", "cheetah", "cat", "cheetah" };
IO.println(findIndex(integers, 3));
IO.println(findIndex(doubles, 5.4));
IO.println(findIndex(animals, "cheetah"));
}
Notice that we had to make a couple of important changes.
First, the comparison is now performed using
array[i].equals(target).
This is because the type parameter T can represent any reference type, and reference values cannot generally be compared using the == operator.
Second, in the main method we must use the wrapper classes Integer, Double, and Long instead of the primitive types int, double, and long.
This is because only reference types can be used as type parameters in Java.
This restriction stems from the way Java implements generics internally.
It is worth mentioning that Java is continually evolving, and it is quite possible that this limitation will disappear in the future.
Optional additional information: Why can't the type parameters be primitive types?
Java uses a mechanism called type erasure.
This means that when Java code is compiled into bytecode, type parameters are removed and replaced with their upper bound.
The upper bound is the type that the generic parameter is guaranteed to represent.
For example, if a type parameter is defined as:
<T extends Number>
then its upper bound is Number.
After compilation, all references to T are treated as if the type were Number.
If no restriction is specified, the upper bound automatically becomes Object.
For example type parameter
T
is treated internally as if T were Object.
In practice, this means that generics are not a runtime feature in Java. They are a compile-time type-checking mechanism. Type information is removed so that generic code remains compatible with older, non-generic Java code.
Because primitive types do not inherit from Object, they cannot be used as type parameters.
This is why generic structures always use wrapper classes(Integer, Double, Boolean)
instead of primitive types.
The same limitation also affects arrays.
Java does not allow generic arrays to be created.
For example:
new T[10]
is not permitted because the actual type parameter is not available at runtime due to type erasure.
In practice, this means that generic code almost always uses collections such as ArrayList instead of arrays.
Generic Classes and Generic Interfaces
Generics are not limited to methods.
The real power of type parameters becomes evident when they are defined for classes or interfaces.
In fact, we have already used type parameters throughout the course in classes such as ArrayList<T>.
The list itself is generic, while the type of elements stored in it is specified later.
A generic class is particularly useful when a class stores values of a specific type and multiple methods operate on that same type parameter.
For example, a Pair<T, U> class might store two values whose types should remain fixed throughout the object's lifetime.
public class Pair<T, U> {
private T first;
private U second;
public Pair(T first, U second) {
this.first = first;
this.second = second;
}
public T getFirst() {
return first;
}
public U getSecond() {
return second;
}
public void setFirst(T first) {
this.first = first;
}
public void setSecond(U second) {
this.second = second;
}
}
Using this class, we can create objects whose values may be of any types without writing separate classes for every possible combination. For example:
public class Pair<T, U> {
private T first;
private U second;
public Pair(T first, U second) {
this.first = first;
this.second = second;
}
public T getFirst() {
return first;
}
public U getSecond() {
return second;
}
public void setFirst(T first) {
this.first = first;
}
public void setSecond(U second) {
this.second = second;
}
}
void main() {
Pair<String, Integer> nameAndAge = new Pair<>("Matti", 30);
IO.println("Name: " + nameAndAge.getFirst() + ", Age: " + nameAndAge.getSecond());
Pair<Double, Double> coordinates = new Pair<>(60.192059, 24.945831);
IO.println("Latitude: " + coordinates.getFirst() + ", Longitude: " + coordinates.getSecond());
}
If we attempted to implement the same functionality using Object attributes and tried to compensate with generic methods, type safety would easily be lost and mandatory type casts would introduce potential runtime errors.
public class Pair {
private final Object first;
private final Object second;
public Pair(Object first, Object second) {
this.first = first;
this.second = second;
}
public <T> T getFirst() {
return (T) first;
// type cast, no compile-time verification
}
}
In the example above, the supposedly generic method does not actually make the class type-safe because the object's state is still stored as Object, and type conversions occur only at runtime.
The core idea of a generic class is that the type becomes attached to the class fields and their usage at compile time.
It is important to note that the choice between a generic method and a generic class does not depend on whether the method is static. Instead, it depends on whether the type belongs to the class's permanent structure or merely to a single operation. A method inside a generic class may still itself be generic, provided it uses its own type parameter and does not conflict with the class's type parameter.
Optional additional information: Java cannot always infer the type unambiguously in every situation.
Earlier we mentioned that Java can often infer a generic method's type parameter automatically. This feature is known as type inference. In practice, the compiler examines the method arguments and their types, then determines which type parameter satisfies the method definition.
For example, in the call findIndex(integers, 3)
the compiler sees that the array type is Integer[] and the search value is an Integer.
Based on this information, it infers that the type parameter T must be Integer, and there is no need to specify it explicitly.
Java also allows explicit generic method invocation, where the type parameter is provided manually:
Finder.<Integer>findIndex(integers, 3);
Although automatic type inference is sufficient in most practical situations, there are cases where the compiler cannot determine a type unambiguously or where making the type explicit improves readability or debugging.
One such situation occurs when arguments have different but compatible types and it is unclear which type should be chosen as the type parameter.
static <T> T choose(T a, T b) {
return a;
}
// choose(1, 1.0);
// COMPILATION ERROR:
// T cannot be inferred
Number n = <Number>choose(1, 1.0);
// OK: type supplied explicitly
In this example, the arguments have different types (Integer and Double).
Both inherit from Number, but the compiler cannot automatically determine whether one of those types or their common superclass should be chosen.
By supplying the type parameter explicitly, we tell the compiler that we want to use the method with the type Number.
Generics and Polymorphism
Generics and polymorphism (more precisely, subtype polymorphism) are two different mechanisms that complement one another. Although both increase code flexibility, they solve different problems and operate at different stages of program execution.
- Polymorphism (subtyping) is a runtime mechanism. We studied it in Chapter 3. It allows objects to be handled through a superclass or interface, with the correct method implementation chosen at runtime.
- Generics (parametric polymorphism) are a compile-time mechanism. Their purpose is to ensure type safety and reduce duplication while allowing the same code to work with different types without losing type information.
- Plain polymorphism (without type safety)
Before generics were introduced (Java 1.4 and earlier), collections relied entirely on polymorphism and the
Objectclass.
void main(){
// Raw list (raw type) - No longer recommended
List list = new ArrayList();
list.add("text");
list.add(123); // Allowed because Integer is an Object
for (Object o : list) {
// Calls each object's own toString()
IO.println(o.toString());
}
}
Here polymorphism itself works, but the code is not type-safe. The compiler cannot prevent us (but it will kindly warn us) from inserting incorrect types into the list, which often leads to errors only when we later attempt to cast values back to their original types.
Generics introduce constraints that the compiler can verify.
import java.util.*;
void main(){
List<String> words = new ArrayList<>();
words.add("cat");
words.add("dog");
words.add(123); // COMPILATION ERROR!
}
In this example, generics prevent incorrect usage before the program is even run. Here we are not really utilizing polymorphism between our own classes; instead, we rely on the compiler's strict enforcement that the list contains only strings.
The most powerful approach is to combine both generics and polymorphism: generics restrict the allowed types to a particular family (for example, Number), while polymorphism handles the individual behavior of members of that family.
void main(){
// The list can contain any kind of number (Integer, Double, Long, ...)
List<Number> numbers = new ArrayList<>();
numbers.add(1); // Integer is a Number
numbers.add(2.5); // Double is a Number
for (Number n : numbers) {
// Generics guarantee that 'n' is at least a Number.
// Polymorphism (the implementation provided by Number subclasses)
// handles the actual values.
IO.println(n.doubleValue());
}
}
Type Bounds
Type parameters can be restricted so that only certain kinds of types may be used as arguments.
This is done using the extends keyword when defining the type parameter.
Bounds may be classes or interfaces, and they define the upper limit of the types that the type parameter may represent.
Notice that extends is used here for both classes and interfaces, even though interfaces do not actually inherit from classes.
// Type parameter T can only be a subtype of Number
<T extends Number> void printNumber(T number) {
IO.println("Number: " + number.doubleValue());
}
void main() {
printNumber(10); // OK: Integer is a Number
printNumber(3.14); // OK: Double is a Number
// printNumber("cat"); // COMPILATION ERROR: // String is not a Number
}
Multiple bounds can be specified using the & operator.
The type parameter must satisfy all specified requirements.
The following method requires T to be both a subtype of Number and an implementation of Comparable<T>.
// T must be both Number and Comparable
<T extends Number & Comparable<T>> void compare(T a, T b) {
if (a.compareTo(b) < 0) {
IO.println(a + " is smaller than " + b);
} else if (a.compareTo(b) > 0) {
IO.println(a + " is larger than " + b);
} else {
IO.println( a + " is equal to " + b);
}
}
void main() {
compare(10, 20); // OK: Integer is Number and Comparable
compare(3.14, 2.71); // OK: Double is Number and Comparable
// compare("cat", "dog"); // COMPILATION ERROR: String is not a Number
}
Type restrictions can also be expressed using the wildcard symbol (?), which represents an unknown type.
Wildcards make it possible to define upper and lower bounds for generic types.
They are commonly used with collections when we want to express that a collection can be read from or written to using a certain family of types, even though the exact element type is not known beforehand.
Consider the following examples.
// Accepts a list containing any subtype of Number.
// Values can be read as Numbers,
// but nothing can be added because
// the exact type is unknown.
void printNumbers(List<? extends Number> numbers) {
for (Number n : numbers) {
IO.println(n); // Note, that we don't know the exact type.
}
// numbers.add(10); // COMPILATION ERROR, because we don't know the exact type
}
/*
* Accepts a list whose element type is Number or one of its supertypes
* (for example Object).
* It is therefore safe to add Number values and subclasses of Number.
*/
void addNumbers( List<? super Number> list) {
list.add(10); // OK: Integer is a Number
list.add(3.14); // OK: Double is a Number
// list.add("cat"); // COMPILATION ERROR: String isn't a Number
// Integer first = list.getFirst(); // COMPILATION ERROR: exact type unknown
// We can't presume it to be Integer
}
We will not discuss wildcards in more detail in this chapter, but you are encouraged to explore them independently in the Java documentation.
Invariance of Generic Types
Although Integer is a subtype of Number, List<Integer> is not a subtype of List<Number>.
These are completely separate types and there is no inheritance relationship between them.
This property is known as invariance.
Generic types are invariant by default for safety reasons.
The following example illustrates the idea.
void main(){
List<Integer> integers = new ArrayList<>();
integers.add(1);
// If generics were NOT invariant, we could do this:
List<Number> numbers = integers; // This is exactly what Java prevents.
// Both variables would now refer to the same list in memory.
// Since numbers has type List<Number>, we could add a floating-point value:
numbers.add(3.14);
// But integers still assumes it contains only Integer values!
Integer i = integers.get(1); // BOOM! Runtime error: ClassCastException
}
If we could treat a list of integers as a general list of numbers, we could accidentally insert floating-point values into it.
Later, when the original code tries to read the list as integers, the program would fail.
Interestingly, Java arrays behave differently.
Arrays are covariant, meaning that an Integer[] array can be treated as a Number[] array.
However, type safety is then checked only at runtime.
If an element of the wrong type is stored, Java throws an ArrayStoreException.
void main(){
// This is allowed in Java:
Integer[] integers = {1, 2};
Number[] numbers = integers; // OK with arrays!
// But this fails at runtime:
numbers[0] = 3.14; // ArrayStoreException!
}
With arrays, Java accepts the risk and reports the error only when the program is running. One of the major goals of generics was to solve this problem by moving such errors to compile time.
If we want to utilize polymorphism between generic collections, we must use wildcards.
For example, if we wish to treat a List<Integer> like a list of numbers, we can use List<? extends Number>.
void main(){
List<Integer> integers = Arrays.asList(1,2,4,8,16);
// Now this is allowed,
// but the list becomes effectively
// read-only for safety reasons.
List<? extends Number> numbers = integers;
for (Number n : numbers) {
IO.println(n); // Works
}
// numbers.set(0,5); // Compile error
}
Exercises
Create a generic method findLargest that finds the largest element in a list.
The list passed as a parameter must contain elements that implement the Comparable interface, but otherwise the list may contain elements of any type.
Do not use any of the built-in methods from the Collections class.
Create a class Container that uses generics and acts as a simple container for a single object of any type.
Add an attribute content, which can store an object of any type. Also add a string attribute owner. Create a constructor that receives these values as parameters.
Also add the getter methods getOwner, getContent, and getType, where the last one returns the type of the container's content as a string. Override the toString method so that it returns all of this information in a single string.
A main program is provided for testing the functionality of the class.
Hint
You can obtain the type of an object as a string using the method
object.getClass().getSimpleName().
Create a class LargeContainer that acts as a container for multiple objects of any type. Objects are packed into the container so that the most recently added object is always the first one to be removed.
Add a list as an attribute to store the objects.
Also add the following methods:
-
addadds the object given as a parameter to the end of the list. -
takereturns the most recently added object and removes it from the list. -
peekreturns the most recently added object without removing it from the list. -
containstakes an object as a parameter and returnstrueif the object is found in the container. Otherwise, it returnsfalse. -
printprints the contents of the container. You may decide the output format yourself.
A main program is provided for testing the functionality of the class.
Add two methods to the LargeContainer class from the previous exercise.
-
The class method (static)
sumNumberstakes aLargeContainerobject as a parameter. The container contains numbers, meaning objects of typeNumberor any of its subclasses. The method returns the sum of all numbers in the container. -
The instance method
transferAlltakes anotherLargeContainerobject as a parameter and transfers the contents of the container on which the method is called into the other container. The other container must be of a type that can contain objects of this container's type.
A main program is provided for testing the functionality of the class.
Hint
You will need type bounds in this exercise.
-
All objects of type
Numberhave adoubleValue()method, which returns their value as adouble. -
Note that the container types do not have to be exactly the same. A
LargeContainer<Number>can containIntegerobjects becauseIntegeris a subclass ofNumber.
Create a generic function that copies all elements of type T from one list to another list, whose type may be T or a superclass of T.
All Exercises in This Part
-
Create an interface named
Converter. Define a single method in the interface:String convert(String input);Remember that methods in an interface do not have a body (no curly braces{}). -
Create the classes
Lowercase,Uppercase, andCapitalize, which implement theConverterinterface.- The
convertmethod of theLowercaseclass converts the given string to lowercase.convert("Hello World")->"hello world". - The
convertmethod of theUppercaseclass converts the given string to uppercase.convert("Hello World"->"HELLO WORLD". - The
convertmethod of theCapitalizeclass converts the given string so that only the first letter is uppercase and all other letters are lowercase.convert("HELLO WORLD")->"Hello world"
- The
-
Test your program using the provided main program.
Spies send messages to each other, but the encryption method changes daily so that the enemy cannot figure out the logic. We need an interface that allows us to switch the encryption algorithm on the fly.
- Create an interface
Encryptor. Define the following two methods in the interface:
String encrypt(String message);
String decrypt(String encryptedMessage);
-
Implement three different classes:
Reverser,Hacker, andNextLetter, which implement theEncryptorinterface using the following logic:-
Reverser (Mirror Writing) Reverses a word or message. Example: "Agent" → "tnegA" Hint: You can use the
reverse()method of theStringBuilderclass or a loop that processes the string from end to beginning. -
Hacker ("Leet Speak") Replaces certain letters with numbers or symbols. "Agent" → "@g3nt"
-
'a' -> '@'
'e' -> '3'
'i' -> '!'
'o' -> '0'
- NextLetter (Caesar Shift)
Moves each letter one position forward in the alphabet.
Example: abc -> bcd.
Hint: In Java,
charis a numeric type, so you can use:character + 1.
Examples:
'a' -> 'b'
'b' -> 'c'
'k' -> 'l'
and so on.
In this exercise, you do not need to worry about wrapping around the alphabet for letters such as z, å, ä, or ö, unless you want to.
You also do not need to worry about encryption and decryption always restoring the exact original message. For example, when using the Hacker encryptor, if the original message actually contains the character @, the decrypt() method will convert it to a. This is acceptable for this exercise, although a real encryption system should ensure that no information is accidentally lost or altered.
A main program is provided in TIM for testing your class structure.
Let's implement a simple text adventure game (or, more accurately, a small part of one), where the player can try to pick up items from the ground and eat food to gain energy.
You are provided with two interfaces: Edible and Pickable.
You are also provided with partially implemented classes: Apple and LargeRock, which implement these interfaces.
In addition, you are given a partially implemented main program that keeps track of the player's energy and backpack capacity.
Complete all sections marked with the word TODO so that the program behaves according to the instructions.
Create a Robot that can perform various household tasks, such as vacuum cleaning and watering plants.
Implement the exercise according to the UML diagram below. A dashed line with a filled arrow means that the Robot class uses the Tool interface: the Robot class contains an attribute whose type is Tool.
Textual description
The following is a description of the classes and their required features (corresponding to the UML diagram):
The Robot class has the following methods:
-
void changeTool(Tool tool): Changes the tool used by the robot (for example, a vacuum cleaner or a watering can). -
void doWork(String target): Performs a household task. If the target is on the forbidden list of the currently selected tool (for example, aWateringCanobject must not be used on the target"Computer"), the robot should print an error message. Forbidden targets are defined as a string list attribute of the tool. -
A
WateringCanobject does not water if there is not enough water available. It can be refilled using therefillWater()method. The watering can initially contains 50 units of water. If you wish, you may create an additional constructor that allows a different initial water level. -
A
VacuumCleanerobject does not vacuum if its dust container is full. The container can be emptied using theemptyContainer()method. The container capacity is 100 units. If you wish, you may create an additional constructor that allows a different initial fill level. -
Both tools return a boolean value from the
use(String target)method indicating whether the task was completed successfully.
Study the Java documentation. Answer the questions about the Comparable interface.
The exercise is based on a Person class in its own file and a sortPeople method in main.java. However, the method does not work because it uses Java's built-in Collections.sort method, and the Person class does not provide the required support for it.
Modify the Person class so that lists of type List<Person> can be sorted alphabetically by a person's name using the Collections.sort method.
For example, the list
List<Person> people = Arrays.asList(
new Person("Joukahainen"),
new Person("Ilmatar"),
new Person("Kyllikki"),
new Person("Kokko")
);
should be in the following order after calling
Collections.sort(people);:
- Ilmatar
- Joukahainen
- Kokko
- Kyllikki
Continuation of the previous exercise. The Person class has now been updated so that a person's name is divided into a last name and first name(s).
Modify the updated Person class so that List<Person> collections can be sorted using the Collections.sort method in alphabetical order by last name and first name(s), with the primary sorting criterion being the last name.
For example, the list
List<Person> people = Arrays.asList(
new Person("Pacius", "Fredrik"),
new Person("Mozart", "Wolfgang Amadeus"),
new Person("Mozart", "Leopold"),
new Person("Chopin", "Frédéric")
);
should be in the following order after calling
Collections.sort(people);:
- Chopin Frédéric
- Mozart Leopold
- Mozart Wolfgang Amadeus
- Pacius Fredrik
Create a generic method findLargest that finds the largest element in a list.
The list passed as a parameter must contain elements that implement the Comparable interface, but otherwise the list may contain elements of any type.
Do not use any of the built-in methods from the Collections class.
Create a class Container that uses generics and acts as a simple container for a single object of any type.
Add an attribute content, which can store an object of any type. Also add a string attribute owner. Create a constructor that receives these values as parameters.
Also add the getter methods getOwner, getContent, and getType, where the last one returns the type of the container's content as a string. Override the toString method so that it returns all of this information in a single string.
A main program is provided for testing the functionality of the class.
Hint
You can obtain the type of an object as a string using the method
object.getClass().getSimpleName().
Create a class LargeContainer that acts as a container for multiple objects of any type. Objects are packed into the container so that the most recently added object is always the first one to be removed.
Add a list as an attribute to store the objects.
Also add the following methods:
-
addadds the object given as a parameter to the end of the list. -
takereturns the most recently added object and removes it from the list. -
peekreturns the most recently added object without removing it from the list. -
containstakes an object as a parameter and returnstrueif the object is found in the container. Otherwise, it returnsfalse. -
printprints the contents of the container. You may decide the output format yourself.
A main program is provided for testing the functionality of the class.
Add two methods to the LargeContainer class from the previous exercise.
-
The class method (static)
sumNumberstakes aLargeContainerobject as a parameter. The container contains numbers, meaning objects of typeNumberor any of its subclasses. The method returns the sum of all numbers in the container. -
The instance method
transferAlltakes anotherLargeContainerobject as a parameter and transfers the contents of the container on which the method is called into the other container. The other container must be of a type that can contain objects of this container's type.
A main program is provided for testing the functionality of the class.
Hint
You will need type bounds in this exercise.
-
All objects of type
Numberhave adoubleValue()method, which returns their value as adouble. -
Note that the container types do not have to be exactly the same. A
LargeContainer<Number>can containIntegerobjects becauseIntegeris a subclass ofNumber.
Create a generic function that copies all elements of type T from one list to another list, whose type may be T or a superclass of T.
Data Structures and Algorithms
Learning objectives
- You understand what a collection is and why collections are used in programming.
- You understand the basic structure of Java's Collections Framework.
- You are familiar with the most common data structures in Java and their key methods.
- You understand how a dynamic list is implemented internally.
- You can implement your own simple collection data structure.
- You understand why an object's
equalsandhashCodemethods are particularly important. - You can evaluate how different data structures affect performance in different situations.
- You understand how recursion works.
Collections
Learning Objectives
- Understand what a collection is and why collections are used in programming.
- Understand the basic structure of the Java Collections Framework.
- Be familiar with the methods provided by Java's
Collectioninterface and know how to use them in programs.
At the heart of programming is often the task of organizing data into meaningful structures. Earlier, we used arrays and lists to store collections of similar values, such as temperatures or students. We have also learned object-oriented programming, which allows us to bundle data and related functionality together.
However, a simple list of values is not always enough. Although arrays and lists are useful, real-world problems often require more specific rules regarding how data is added, removed, or retrieved.
In Java, the term collection refers to an object whose purpose is to manage a group of other values or objects. A collection is not merely a container; it is a data structure that defines the rules for handling data. Choosing the correct data structure is an important skill for a programmer because it affects both program efficiency and code readability.
Here are some examples of situations where an array or a list is no longer the optimal solution:
-
Queue: When you call a customer service center, incoming calls are placed in a queue. New callers join the end of the queue, and the customer service representative always serves the caller at the front. This "first in, first out" structure is called a queue. A queue is optimized for these kinds of insertions and removals, unlike a regular list. A stack, on the other hand, works in the opposite way: the last item added is the first one removed, much like a stack of plates.
-
Set: In a service such as Discord or in a contact list, it usually does not make sense to add the same person as a friend twice. A structure that ensures each element appears only once (unique values) is called a set.
-
Map: In a student information system, each student number corresponds to a particular grade. This is not simply a list; it involves keys (student numbers) and associated values (grades). A structure that allows data to be retrieved using a unique key is called a map or associative array.
In principle, we could implement all of this behavior using ordinary lists and a large amount of additional code, such as if statements to detect duplicates or loops to search for values.
The Java Collections Framework provides ready-made, optimized, and easy-to-use tools for these situations.
The Java Collections Framework
Java provides a large collection of ready-made data structures as well as interfaces for creating new ones through the Java Collections Framework.
The Collections Framework is built around two main concepts:
- Collection interfaces, which define what operations can be performed on a collection (for example,
ListandSet). - Concrete implementation classes, which implement one or more interfaces in a particular way (for example,
ArrayList,HashSet, andHashMap).
For example, List is a collection interface. It defines the methods that a list should provide, but it does not specify how those methods are implemented.
ArrayList, on the other hand, is a class that implements the List interface using an array internally.
Other list implementations will be discussed later in Chapter 5.2.
The most important interface in the Collections Framework is Collection, which serves as a high-level general-purpose interface.
The List interface inherits from Collection, so an ArrayList can be stored in a variable of type Collection.
void main() {
Collection<String> berries = new ArrayList<>(
List.of("strawberry", "blueberry", "lingonberry", "cloudberry")
);
IO.println(berries);
}
The Collection interface makes no assumptions about the order of elements or the specific contents of the collection.
A large number of Java's built-in collections implement the Collection interface.
Next, let's look at the operations available through this interface.
Adding and Removing Elements
Elements are added using the add() method and removed using the remove() method.
Both methods return true if the collection was modified.
void main() {
Collection<String> berries = new ArrayList<>(
List.of("strawberry", "blueberry", "lingonberry", "cloudberry")
);
berries.add("cherry");
IO.println(berries);
berries.remove("strawberry");
IO.println(berries);
}
Adding an element does not always succeed in every collection implementation.
For example, a Set does not allow duplicate elements, so add() may return false.
Likewise, remove() removes the first element found using the equals() method and returns false if no matching element exists.
The Collection interface does not include the concept of indexes.
Therefore, remove() removes elements based on value rather than position, such as "the third element."
If you want to add or remove elements using indexes, you need the List interface instead.
In addition to removing individual elements, an entire collection can be emptied using the clear() method.
void main() {
Collection<String> berries = new ArrayList<>(
List.of("strawberry", "blueberry", "lingonberry", "cloudberry")
);
berries.clear();
IO.println(berries);
}
Checking Whether an Element Exists
The Collection interface also defines the contains() method, which allows you to check whether a collection contains a particular element.
The check is based on the equals() method. Therefore, when working with your own classes, equals() should be implemented appropriately. We will return to this topic in Chapter 5.2.
void main() {
Collection<String> berries = new ArrayList<>(
List.of("blueberry", "lingonberry", "cloudberry", "cherry")
);
IO.println("Contains blueberry: " + berries.contains("blueberry"));
// Strawberry was removed earlier, so it should not be found.
IO.println("Contains strawberry: " + berries.contains("strawberry"));
}
Number of Elements and Emptiness
The Collection interface defines the methods size and isEmpty, which allow you to determine how many elements are stored in a collection and whether the collection is empty.
The isEmpty() method is often a clearer way to express that you are only interested in whether the collection contains any elements.
void main() {
Collection<String> berries = new ArrayList<>(
List.of("blueberry", "lingonberry", "cloudberry", "cherry")
);
IO.println("Number of berries: " + berries.size());
IO.println("Is the berry collection empty: " + berries.isEmpty());
}
Iterating Through Elements
The Collection interface inherits from the Iterable interface.
Because of this, the elements of a collection can be traversed using a for-each loop.
void main() {
Collection<String> berries = new ArrayList<>(
List.of("blueberry", "lingonberry", "cloudberry", "cherry")
);
for (String berry : berries) {
IO.println("Berry: " + berry);
}
}
The Collection interface does not make any guarantees about the ordering of elements.
As a result, iteration is not based on indexes, and the order of traversal always depends on the specific collection implementation being used.
For example, ArrayList preserves insertion order, whereas HashSet does not guarantee any particular ordering.
As a side note, Collection truly does inherit the Iterable interface.
We did not discuss interface inheritance earlier, but the idea works in interfaces just as it does with classes: every implementation of Collection must also satisfy the requirements defined by Iterable.
List Structures
The List interface describes a collection whose elements are stored in a specific order and can be accessed using an index.
In many ways, this resembles an array, but it provides a significantly more flexible interface.
As a side note, it would be more precise to say that we are dealing with the List<E> interface, where E represents the type of the list's elements. However, for the sake of readability, we will ignore generics in this discussion.
Imagine a program that stores student names in the order in which students enrolled in a course. In this situation, order matters, and the same name may appear multiple times because two different people can share the same name.
void main() {
List<String> students = new ArrayList<>();
students.add("Aino");
students.add("Ville");
students.add("Aino");
IO.println(students.get(1)); // Ville
}
Using a list feels natural because the data is viewed as a sequence:
first, second, third.
ArrayList is the most common choice because it provides fast access to elements through indexes.
At this stage of the course, you can generally think of List as meaning ArrayList, unless there is a specific reason to use a different implementation.
The relative order of elements is preserved even when elements are removed. When one element is removed, all subsequent elements automatically shift one position toward the beginning of the list.
void main() {
List<String> students = new ArrayList<>();
students.add("Aino");
students.add("Ville");
students.add("Aino");
students.remove("Ville");
IO.println(students);
}
Every element in a list always has a particular position, called its index. Because of this, a list is always traversed in a predictable order. This makes lists suitable for situations where order matters, order should be modified or preserved, or duplicate elements are allowed.
Our Own List Implementation
Next, we will build a simple dynamic list structure on top of an array.
The goal is to illustrate the basic principles behind how ArrayList works internally.
The implementation will not be complete and will not cover the entire List interface, but it is sufficient for understanding the core ideas.
We begin by creating our own class List<T>, which contains an array for storing elements.
The following code is provided:
public class List<T> {
private T[] elements;
private int size;
@SuppressWarnings("unchecked")
public List(int capacity) {
this.elements = (T[]) new Object[capacity];
this.size = 0;
}
}
As a result, the elements array is initialized with capacity number of null values.
At this point, it is necessary to explain why
@SuppressWarnings("unchecked")
is required.
Java does not allow us to directly create a generic array of type T.
A type parameter such as T exists only during compilation. At runtime, Java does not know what T actually represents. This phenomenon is known as type erasure.
Arrays, however, are type-aware at runtime. When an array is created, the JVM knows exactly what type of elements may be stored in it.
This creates a conflict:
Java cannot create an array of type T because the real type of T is not available at runtime.
Therefore, the following is not allowed:
new T[10]; // Compilation error
The only way around this limitation is to create an array of the most general reference type, Object, and cast it into a generic array.
(T[]) new Object[capacity];
The compiler knows that this conversion is not completely safe.
It cannot prove that elements of the wrong type will never end up in the array.
The annotation
@SuppressWarnings("unchecked")
does not make the code safer or less safe. It merely tells the compiler that you are aware of this limitation and choose to accept it.
Without the annotation, the program behaves exactly the same way, but the compiler displays a warning.
Optional information: In which cases type cast might cause issues?
Suppose we create a List<String> object.
In this case, T is String.
Internally, however, the array used to store elements is actually an Object[].
As long as the list is used correctly, there is no problem.
However, Java allows the following:
List<String> names = new List<>(10); // List, where T is string and length 10
Object o = names;
List<Integer> numbers = (List<Integer>) o; // unchecked cast
The compiler warns about this code but still allows it. Both references now point to the same list.
Next, we add an element through the numbers reference:
numbers.add(42); // assuming add() has been implemented
This succeeds at runtime because the underlying array is actually an Object[], and an Integer is an Object.
The JVM does not detect any problem at this stage.
The problem appears when we later retrieve an element:
String s = names.get(0); // ClassCastException
At this point, the JVM attempts to convert the value into a String because the list is a List<String>.
However, the stored element is actually an Integer, so a ClassCastException occurs.
This is the exact reason why the compiler warns about unchecked conversions.
It cannot guarantee that the internal type contract of the list will remain valid in all circumstances.
It is important to note that the problem does not come from normal use of the list itself. The problem is caused by intentionally bypassing generic type safety through explicit casts.
The standard Java collections face the same limitation internally, but their interfaces and implementations are designed so that such violations rarely occur during normal use.
Basic List Operations
The first operation we will implement is add(element), which adds an element to the end of the list.
For now, we will ignore the situation where the array becomes full.
If there is still space available in the array, adding an element is simple:
place the element in the next available position
and increase the size by one.
If the array is already full, we simply return immediately without doing anything. We will improve this behavior later.
Because we cannot yet retrieve values from the list, we cannot programmatically verify that insertion worked correctly.
However, we can use a debugger.
Call the add method from the main program and place a breakpoint afterward.
void main() {
List<String> list = new List<>(10);
list.add("Aino");
list.add("Ville");
list.add("Matti");
// Place a breakpoint at the closing brace
}
Start IntelliJ IDEA's debugger.
Open the Threads and Variables view.
You should now be able to inspect the list object and its elements array.
The added names should appear at the beginning of the array.
By default, IntelliJ IDEA hides the trailing null values in arrays. To display them, right-click the array, select "Customize Data View", and disable "Hide Null Elements".
Create a class List. Define an array inside it for storing the elements of the list, as well as an integer variable that keeps track of the current number of elements in the list.
Implement the method:
add(T element): adds an element to the end of the list.
At this stage, you do not need to increase the size of the data structure, so the array may become full.
Use the debugger to verify that the element has been added correctly.
Do not implement get or toString methods yet; inspect the state of the list specifically through the debugger.
Next, let's implement a method get(int index) that returns the element at a specified index, and a method set(int index, T element) that replaces the element at a particular index.
public T get(int index) {
if (index < 0 || index >= size) {
throw new IndexOutOfBoundsException("Index " + index + " is not in the range 0.." + (size - 1));
}
return elements[index];
}
public void set(int index, T element) {
if (index < 0 || index >= size) {
throw new IndexOutOfBoundsException("Index " + index + " is not in the range 0.." + (size - 1));
}
elements[index] = element;
}
We will discuss exceptions in more detail later, but it is useful to briefly explain what the line
throw new ...
means.
List indexes start at zero and continue up to size - 1.
If an attempt is made to access an index that is less than zero or greater than or equal to size, the index lies outside the bounds of the list.
This is standard behavior in Java collections and should already be familiar from basic programming courses.
Dynamic Behavior
Although the List interface in Java does not strictly require dynamic resizing, in practice lists are expected to support adding and removing elements dynamically.
This means that the size of a list can change while the program is running.
This is a significant difference compared to arrays, whose size is fixed once they have been created.
Implementing dynamic behavior on top of an array requires a bit of additional logic.
If there is still room in the array—that is, if size is smaller than the array length—adding a new element is straightforward: place the element in the next available position and increment the size by one.
If the array is full, the usual approach is to create a new array, typically twice as large, copy all elements from the old array into the new one, and then add the new element to the new array.
This process ensures that the list can continue growing whenever necessary.
Modify the add method so that it adds an element to the end of the list and, if necessary, creates a new larger array (1.5× or 2× the current size) and copies the elements from the old array into the new one. Remember to update the list size appropriately.
Also implement a size() method that returns the current number of elements in the list.
Use the get and size methods to help test that the add method works correctly even when the array is full and a new array has been created.
Removing elements is slightly more complicated, because removing an element leaves an empty slot in the array.
One possibility would be to leave the position as null.
However, this would cause problems because the ordering of elements and their indexes would no longer match the logical structure of the list.
Another option would be to copy all elements except the removed one into a new array. This would be quite inefficient because every removal would require copying the entire array. A more common approach is to shift all elements after the removed element one position toward the beginning of the array. This keeps the list compact and avoids allocating a new array.
Implement a remove(int index) method that removes an element from the list at the specified index. The method must return the removed element.
- Elements following the removed element must be shifted to the left so that no "gaps" remain in the array.
- No unnecessary contents may remain in the array after removal.
- Remember to update the size of the list appropriately.
Use the debugger and/or the get and size methods to verify that the removal was performed correctly.
Elements can also be removed based on value. In that case, the first element equal to the specified value is located and removed.
For the method
remove(T element)
to work correctly, equality must be checked using the equals() method.
This ensures that comparisons work correctly even when the list contains generic types.
Let's now take a closer look at how equals() works.
The equals Method
At this point it is useful to take a short detour into the equals() and hashCode() methods, because understanding them is essential when working with collections.
Let's begin with equals().
In Java, the == operator performs reliable value comparison only for primitive types.
For example, it works perfectly well when comparing numbers.
For object references, however, == compares the references themselves rather than the contents of the objects.
For example:
Integer a = new Integer(42); and
Integer b = new Integer(42);
Here, a == b evaluates to false, even though the contents of both objects are identical.
The purpose of the equals() method is to compare the contents of objects—that is, whether they should be considered the same from the application's point of view.
All classes inherit an equals() method from the Object class.
The default implementation in Object behaves similarly to ==, meaning it compares references.
Because of this, meaningful content comparison often requires a custom implementation of equals().
The equals() method has a well-defined contract:
- Reflexive:
x.equals(x)must always betrue. - Symmetric: if
x.equals(y)istrue, theny.equals(x)must also betrue. - Transitive: if
x.equals(y)andy.equals(z)are bothtrue, thenx.equals(z)must also betrue. - Consistent: repeated calls with unchanged data must return the same result.
x.equals(null)must always befalse.
A typical implementation follows these steps:
- If both references point to the same object, return
true. - If the other object is
nullor has a different type, returnfalse. - Cast the object to the appropriate type and compare the fields that determine object equality.
Consider the following Student class.
Two students are considered equal only if both their names and student numbers are equal.
public class Student {
private String name;
private String studentNumber;
public Student(String name, String studentNumber) {
this.name = name;
this.studentNumber = studentNumber;
}
@Override
public boolean equals(Object other) {
if (this == other) return true;
if (other == null || getClass() != other.getClass())
return false;
// This cast is now safe
Student otherStudent = (Student) other;
return this.studentNumber.equals(otherStudent.studentNumber)
&& this.name.equals(otherStudent.name);
}
}
If either studentNumber or name may be null, it is safer to use Objects.equals(a, b), which performs null-safe comparisons.
import java.util.Objects;
@Override
public boolean equals(Object other) {
// ...
Student otherStudent = (Student) other;
return Objects.equals(this.studentNumber, otherStudent.studentNumber)
&& Objects.equals(this.name, otherStudent.name);
}
The hashCode Method
Whenever a class overrides equals, it is absolutely essential to override hashCode as well.
These two methods work together, and forgetting one of them can lead to subtle and difficult-to-find bugs.
To understand why, we need to briefly examine how hash-based data structures such as HashSet and HashMap operate.
How Hashing Works
Imagine a library containing thousands of books.
If you wanted to locate a particular book, you would not walk through every shelf one book at a time.
Instead, you would first go to the correct section of the library (for example 800-899).
In Java, the hashCode method serves a similar purpose.
- bucketing:
hashCodecompresses an object's data into a single integer called a hash value. The collection uses this value to determine which bucket should contain the object. - Speed: When searching for an object, Java calculates its hash value and jumps directly to the correct bucket.
- Verification: Java then scans only the objects in that bucket and uses
equalsto determine whether the desired object is actually present.
Java collections rely on the following rule:
If equals says two objects are equal, their hash codes must also be equal.
-
Required direction:
x.equals(y) == truex.hashCode() == y.hashCode() -
The reverse is not required. Two different objects may have the same hash code. This situation is called a collision. Collisions merely mean that multiple objects are stored in the same bucket;
equals()is still used to distinguish them.
Implementation
The easiest and safest way to implement hashCode is to use Java's helper method Objects.hash.
It is extremely important that hashCode uses exactly the same fields that are compared in equals.
If equals compares both name and studentNumber, then hashCode must also use both fields.
@Override
public int hashCode() {
// Create a hash value from the same fields used in equals()
return Objects.hash(name, studentNumber);
}
Optional information: Don't change keys!
There is one important danger when working with hash-based structures: modifying objects after they have been inserted.
Suppose an object is added to a HashSet.
If one of the fields used by hashCode() is later modified, the object's hash code changes.
However, the object remains physically stored in the bucket corresponding to its original hash code.
When Java later tries to find the object using the updated value, it searches in a different bucket and fails to locate it.
A useful rule of thumb is:
If an object is used as a key in a
HashMapor as an element in aHashSet, try to keep it immutable.
As a side note, Java's modern record types automatically generate correct implementations of both equals() and hashCode(), taking all record fields into account.
Although you do not need to implement equals() or hashCode() yourself when building a dynamic list, understanding their purpose is crucial because collections such as HashSet and HashMap depend heavily on them internally.
Removing an Element by Value
As we learned earlier, removing an element by value requires that the element type provides a meaningful implementation of equals.
Once this requirement is satisfied, removal can be implemented reliably by traversing the list and comparing each element to the target using equals.
If the list contains multiple equal elements, this implementation removes only the first one found. Removing all matching elements would require additional traversals.
Continue the List class by implementing the remove(T element) method, which removes the first occurrence of the given element.
- If the element is found and removed, return
true. - If the element is not found, the list remains unchanged and the method returns
false.
Hint: You can use the remove(int index) method you have already implemented. Do not duplicate the element-shifting logic in this method.
Map Data Structures
Learning Objectives
- Be familiar with Java's most common built-in map data structures:
Mapand its implementationsHashMap,LinkedHashMap, andTreeMap. - Know how to use these data structures.
- Understand their most important operations and recognize their time complexities.
- Understand why objects need a
hashCode()method.
Imagine that we maintain a large student registry. We want to store each student's ID number and name so that we can easily retrieve the student's name based on the student number.
If we used a list for this purpose, we would either need multiple lists or a separate object containing all student information. Whenever we wanted to find a particular student, we would need to traverse the list until the correct student was located. This becomes increasingly inefficient as the number of students grows.
Map data structures provide a solution by allowing direct lookup based on a unique identifier, often without traversing the entire collection. In this case, the identifier could be the student number. A map works somewhat like a dictionary: instead of reading an entire book from beginning to end to find a specific word, we can look directly at the correct entry. In many programming languages, map structures are therefore called dictionaries. In Java, they are known as maps.
void main() {
// Create key–value pairs.
Map<String, String> students = Map.of(
"123", "Joni",
"555", "Maija",
"789", "Mikko"
);
// We can retrieve student information
// directly using the key.
IO.println("Student with ID 123: " + students.get("123"));
}
Map data structures store information as key–value pairs, also known as entries. Whereas a list uses a unique integer index as the route to an element, a map uses a unique object of any type as the route to a value. Keys are always unique. A key may appear in a map only once and can refer to only one value at a time. Values, however, do not need to be unique.
note
In Java, both keys and values are always objects.
They cannot be primitive types such as int or double; instead, wrapper classes such as Integer and Double must be used.
The Map Interface
Map is the second major interface of the Java Collections Framework alongside the Collection interface.
It defines the general rules for all map data structures and provides the most important operations for storing and manipulating key–value pairs.
Like Collection, the Map interface makes no assumptions about element ordering or contents and does not require its implementations to use any particular internal data structure.
Unlike Collection, Map does not implement the Iterable interface.
As a result, maps cannot be iterated directly using a for-each loop. Instead, iteration must be performed through keys, values, or entries.
In the examples below we use the concrete class HashMap, but all methods shown are defined in the Map interface and therefore work with any Map implementation.
Adding and Removing Elements
Elements can be added using the methods put and putIfAbsent.
Both methods take a key and its corresponding value as parameters.
If the key already exists in the map, the methods return the previous value associated with the key before replacement. If the key does not already exist, they return null.
void main() {
Map<String, Integer> grades = new HashMap<>();
// Add or replace a value.
grades.put("Maija", 3);
grades.put("Maija", 5); // Returns 3 and replaces it.
// Add only if absent.
grades.putIfAbsent("Joni", 1);
grades.putIfAbsent("Joni", 0); // Returns 1 but does not replace it.
IO.println(grades);
}
Removal works using the remove method, just as with collections.
The key to be removed is provided as a parameter.
Like insertion methods, remove returns the value associated with the key if it exists. Otherwise it returns null.
void main() {
Map<String, Integer> grades = new HashMap<>();
grades.put("Maija", 5);
grades.put("Joni", 5);
// Remove the key–value pair whose key is "Joni".
grades.remove("Joni");
IO.println(grades);
}
Retrieving a Value Using a Key
Values can be retrieved using the methods get() and getOrDefault().
If the key does not exist, get() returns null.
The getOrDefault() method allows you to define your own default value.
void main() {
Map<String, Integer> grades = new HashMap<>();
grades.put("Maija", 5);
// Value is 5.
IO.println("Maija's grade: " + grades.get("Maija"));
// Key does not exist, so value is null.
IO.println("Joni's grade: " + grades.get("Joni"));
// Use default value 0.
IO.println("Joni's grade: " + grades.getOrDefault("Joni", 0));
}
We can also check whether a map contains a particular key or value using the methods containsKey() and containsValue(), which return either true or false.
void main() {
Map<String, Integer> grades = new HashMap<>();
grades.put("Maija", 5);
IO.println(grades.containsKey("Maija")); // true
IO.println(grades.containsKey("Matti")); // false
IO.println(grades.containsValue(5)); // true
IO.println(grades.containsKey(0)); // false
}
Number of Elements
Like the Collection interface, Map defines the methods size() and isEmpty().
These allow us to determine the number of entries stored in the map and whether the map is empty.
void main() {
Map<String, Integer> grades = new HashMap<>();
grades.put("Maija", 5);
IO.println("Entries: " + grades.size()); // 1
IO.println("Empty: " + grades.isEmpty()); // false
}
Iterating Through Entries
Map does not implement Iterable and therefore cannot be iterated over directly with a for-each loop.
Instead, it provides the methods keySet, values, and entrySet, which return the keys, values, or key–value pairs as collections.
Note that entrySet returns a collection of Map.Entry<K,V> objects, where K and V correspond to the key and value types of the map.
Map.Entry represents a key–value pair and provides the methods getKey and getValue.
void main() {
Map<String, Integer> grades = new HashMap<>();
grades.put("Maija", 3);
grades.put("Matti", 4);
// Iterate through all keys.
for (String key : grades.keySet()) {
IO.println(key + " : " + grades.get(key));
}
// Iterate through all values.
for (Integer value : grades.values()) {
IO.println(value);
}
// Iterate through all key–value pairs.
for (Map.Entry<String, Integer> pair : grades.entrySet()) {
IO.println(pair.getKey() + " : " + pair.getValue());
}
}
Hash Tables
Before examining specific Map implementations, let's first look at the general principle behind a hash table.
A hash table is the underlying data structure used by several Java map implementations, including HashMap and LinkedHashMap.
A hash table is based on an array used to store key–value pairs. The key idea is that information does not have to be found by searching sequentially. Instead, the correct location is calculated directly from the key.
When an entry is inserted into a hash table:
- Hash value: A key is converted into an integer using the
hashCode()method. - Index: Because the hash value may be very large or even negative, it must be transformed into a valid array index.
This is typically done using the remainder operation:
index = abs(hashValue % capacity)
The resulting index is always within the range:
[0 .. capacity - 1]
Because there are vastly more possible hash values than array positions, multiple keys may end up at the same index. This is called a collision. Two main strategies are used to handle collisions:
- Chaining: This is used by Java's
HashMap. Each index contains a bucket, typically implemented as a list. Entries that map to the same index are stored in the same bucket. - Open Addressing: Each index can contain only one element. If a position is occupied, another available position is searched for.
When retrieving an element, the same index calculation is performed. The remaining search process depends on the collision-resolution method being used.
The number of collisions directly affects performance. Insertion, removal, and lookup are extremely fast in a hash table.
Their average-case time complexity is: because the correct index can usually be found directly through a simple calculation. In the worst case, all elements end up in the same bucket. Finding the correct element then requires traversing the entire structure, resulting in a time complexity of: . where is the number of stored elements.
note
Time complexities are covered in much greater detail in the Algorithms 1 course; here we will only touch on them briefly. For the purposes of this course, it is sufficient to understand that means that an operation runs in constant time, meaning that its running time does not depend on the size of the data structure. means that the running time grows proportionally to the size of the data structure. For example, if a data structure contains 1,000 elements, an operation would require approximately 1,000 times more work than an operation.
In order for a hash table to remain fast (), collisions must be minimized. This is influenced by the load factor. If the capacity of the underlying array is too small relative to the number of stored elements, the table becomes crowded and collisions become more frequent. When the load factor exceeds a certain threshold, the hash table is resized—typically by doubling its capacity—and all existing elements are reinserted into a new, larger table. This resizing operation is relatively expensive, which is why choosing a reasonable initial capacity is important.
A hash table can be compared to a storage facility containing many storage bins into which any number of items can be placed. The capacity corresponds to the number of storage bins, and the bins themselves correspond to the indexes of the hash table. The bins provide a way to organize items so that finding a particular item becomes easier. One bin might be designated for clothing, another for tools, and a third for everything else. As a simplified analogy, we can imagine that all tools produce the same result from the hash function and therefore end up in the same storage bin. When searching for a hammer, we can immediately look in the tools bin. However, if that bin contains a large number of items, finding the correct tool may still take some time.
HashMap
HashMap is the most commonly used implementation of the Map interface.
Its implementation is based on the hash table described above, and it provides the best average-case performance for the basic map operations.
Looking up, inserting, and removing elements by key can, in the best case, be performed in constant time
.
Iterating through all elements is slightly slower than with a simple list because of the more complex internal structure.
The performance differences become most noticeable when the number of elements is very large. With small collections, the difference compared to a list is usually insignificant.
HashMap does not guarantee any ordering of elements.
When iterating through a map, entries may appear in any order, and that order may change when new elements are added.
LinkedHashMap
LinkedHashMap is a class that extends HashMap.
In addition to the underlying hash table, it internally maintains a linked list containing all inserted entries.
This allows it to preserve insertion order, although the additional structure requires slightly more memory.
void main() {
Map<String, Integer> hashMap = new HashMap<>();
hashMap.put("Joni Virtanen", 20);
hashMap.put("Maija Meikäläinen", 10);
hashMap.put("Matti Korhonen", 5);
// Insertion order is not guaranteed.
for (String key : hashMap.keySet()) {
IO.println(key + " : " + hashMap.get(key));
}
IO.println();
Map<String, Integer> linked = new LinkedHashMap<>();
linked.put("Joni Virtanen", 20);
linked.put("Maija Meikäläinen", 10);
linked.put("Matti Korhonen", 5);
// Insertion order is preserved.
for (String key : linked.keySet()) {
IO.println(key + " : " + linked.get(key));
}
}
LinkedHashMap is well suited for situations such as storing recently viewed products in an online store.
A product can be retrieved quickly using its product identifier as a key, while the products remain in the same order in which the user viewed them.
This makes the structure useful when both fast lookup and a user-friendly ordering are required.
TreeMap
TreeMap differs from the previous implementations in that it uses a tree structure rather than a hash table as its underlying data structure.
It implements the interfaces SortedMap and NavigableMap.
SortedMap guarantees that keys are always maintained in natural sorted order, and NavigableMap extends this functionality by providing operations for finding keys immediately above or below a given key.
Unlike the other map implementations discussed in this chapter, TreeMap does not allow null as a key because null values cannot be compared with other keys to determine their order.
Because of its tree structure, TreeMap is slower than HashMap, but it provides automatic ordering of keys.
The time complexity of its main operations is .
void main() {
Map<String, Integer> tree = new TreeMap<>();
tree.put("Olli", 100);
tree.put("Heikki", 200);
tree.put("Anna", 300);
// Prints entries ordered by key.
for (String key : tree.keySet()) {
IO.println(key + " : " + tree.get(key));
}
}
The NavigableMap interface also provides several methods that use the ordering of keys.
void main() {
NavigableMap<String, Integer> tree = new TreeMap<>();
tree.put("B", 2);
tree.put("H", 3);
tree.put("A", 1);
tree.put("Q", 1);
// Print smallest and largest keys.
IO.println("Smallest key: " + tree.firstKey());
IO.println("Largest key: " + tree.lastKey());
// Print nearest lower and higher keys.
IO.println(tree.lowerKey("B"));
IO.println(tree.higherKey("B"));
// Return the entire map in reverse order.
IO.println(tree.descendingMap());
}
In addition, TreeMap allows portions of the tree to be extracted using the subMap() method.
void main() {
NavigableMap<String, Integer> tree = new TreeMap<>();
tree.put("B", 2);
tree.put("H", 3);
tree.put("A", 1);
// Create a new map containing
// entries from A through C.
// The true values indicate that
// A and C themselves are included.
Map<String, Integer> subtree = tree.subMap("A", true, "C", true);
IO.println(subtree);
}
A good example of a use case for TreeMap is storing events that are indexed by timestamps.
Suppose a system collects log entries where each event has a precise timestamp and an associated description.
In this situation, a structure such as
TreeMap<LocalDateTime, Event>
is a very good choice.
Its main advantage is automatic ordering of keys.
New events are inserted directly into their correct chronological position, allowing the data to be processed in time order without any additional sorting.
TreeMap also supports fast searches within a specific time interval through methods such as:
subMap, headMap and tailMap.
It can also locate nearby values efficiently.
For example:
floorKey finds the greatest key less than or equal to a given key.
ceilingKey finds the smallest key greater than or equal to a given key.
All of these operations have a time complexity of
which is significantly more efficient than scanning an unordered structure.
TreeMap is therefore especially useful when range queries and ordered searches are important.
The following table summarizes the strengths and weaknesses of different structures in scenarios where ordering matters.
| Structure | Advantage | Disadvantage |
|---|---|---|
| HashMap | Average lookup by key is faster (O(1)). | Ordering is lost. Range queries require traversing or separately sorting all elements. |
| LinkedHashMap | Preserves insertion order. | Does not guarantee chronological order if data is inserted out of order. |
| PriorityQueue | Fast access to extreme values (minimum/maximum). | Does not support efficient lookup by arbitrary key or efficient range searches. |
The appropriate choice therefore depends on the requirements of the application.
HashMap is usually the best choice when the primary goal is the fastest possible key-based lookup and element ordering is irrelevant.
LinkedHashMap is useful when insertion order must be preserved.
TreeMap is somewhat slower, but it is the correct choice when keys must remain continuously sorted and ordering-based queries are required.
Exercises
Create a function countWords that takes a string as a parameter and performs the following tasks:
- Prints all unique words and the number of times each word appears in the string.
- Prints the most common word separately, along with the number of times it appears in the string.
- Prints the number of unique words.
You can test your program using the provided main program, which also includes sample output.
Hint
You can remove punctuation from the string using its replaceAll method.
Create a class Reservations that stores reservations. There can be only one reservation for a given date, and the name of the person making the reservation must also be stored.
In this exercise, you may represent dates as strings in the format YYYY-MM-DD (year-month-day). You may also assume that all dates are always in the correct format.
Implement the following methods:
-
addReservationtakes a date and the reservation holder's name as string parameters and adds the reservation to the data structure. If a reservation already exists for that date, the new reservation must not replace it. The method returnstrueif the reservation is added, otherwisefalse. -
removeReservationtakes a date as a parameter and removes the reservation for that date. The method returnstrueif the reservation is removed from the data structure, otherwisefalse. -
printReservationstakes a start date and an end date as parameters and prints all reservations that fall within that range, sorted by reservation date.
You can test the functionality of the class using the provided main program.
Hint
In this case, it is not advisable to sort the data structure manually. One of the classes implementing the Map interface keeps its elements automatically sorted.
Implement your own simple hash table.
Use an array as the main data structure of the hash table. To handle collisions, you may use a list, for example, so that elements that end up at the same index are stored in a list located at that index. Elements must not be lost when collisions occur.
The hash table capacity may have a default value of 10, or it may be provided as a constructor parameter. The capacity does not need to change at any point during program execution, so you do not need to consider or implement load factor handling.
Java's hashCode method can return a negative value, so it is a good idea to use the absolute value to avoid negative indices.
Add a get method that retrieves an element from the hash table based on its key.
Also add add and remove methods for inserting and removing elements.
Sets and Queue Structures
Learning Objectives
- Be familiar with Java's most common built-in data structures:
Set,Queue,Deque, and their implementationsHashSetandArrayDeque. - Know how to use these data structures.
- Understand their most important operations and their time complexities.
- Understand why objects need a
hashCode()method.
Set Structures
Sets are collections in which all elements are unique. If an attempt is made to add a duplicate element to a set, the state of the set does not change in any way. This property makes sets useful whenever we want to ensure that the same piece of data appears at most once in a data structure.
For example, we could use a set to store the email addresses of recipients on a mailing list. This guarantees that a single email address can appear at most once in the collection, preventing multiple copies of the same message from being sent to the same address. Sets are also commonly used to model mathematical sets and their operations.
Set
The Java Collections Framework includes the Set interface, which defines the basic rules for all set data structures.
Set inherits from the Collection interface, which means that all sets provide the functionality promised by Collection.
As a result, we can iterate through sets just as easily as we iterate through lists.
The most commonly used implementation of Set in Java is HashSet, which, as its name suggests, is based on a hash table.
Internally, HashSet uses a HashMap to store its elements as keys.
Because of this hash-table implementation, inserting, removing, and searching for elements are all very fast constant-time operations on average.
However, a hash table is a more complex structure than a simple array, so iterating through a HashSet is somewhat slower than iterating through an ArrayList, especially when the number of elements becomes very large.
Like the Collection and Map interfaces, neither Set nor its implementation HashSet guarantee any particular ordering of elements.
Other set implementations exist for situations where maintaining order is important.
Let's now look at how HashSet can be used through the Set interface.
Adding and Removing Elements
Adding and removing elements in a HashSet works in much the same way as with other collections.
Elements are added using the add method and removed using the remove method.
Both methods return true if the set was modified by the operation—that is, if an element was actually added or removed.
Insertion and removal in a HashSet are average-case constant-time operations .
void main() {
Set<String> names = new HashSet<>();
// Add elements.
names.add("Matti");
names.add("Maija");
// Returns false because the element is already in the set.
IO.println(names.add("Matti"));
// Remove an element.
IO.println(names.remove("Maija"));
IO.println(names.remove("Maija")); // Returns false because it is no longer present.
}
Finding an Element
Searching for an element in a set is easy using the contains() method.
The method returns a boolean value indicating whether the element exists in the set.
Because HashSet is based on a hash table, it does not need to scan the entire data structure when searching.
Searching is therefore also an average-case constant-time operation.
void main() {
Set<String> names = new HashSet<>();
names.add("Matti");
names.add("Maija");
if (names.contains("Matti")) {
IO.println("Matti was found in the set!");
}
}
Number of Elements and Iteration
Because Set inherits from Collection, we can use familiar methods such as size() and isEmpty() to examine the number of elements and determine whether the set is empty.
Thanks to the Iterable interface, we can also iterate through sets using a for-each loop.
Traversing all elements in a set has time complexity .
void main() {
Set<String> names = new HashSet<>();
names.add("Matti");
names.add("Maija");
for (String name : names) {
IO.println(name);
}
IO.println();
IO.println("The set contains " + names.size() + " elements.");
IO.println("Is empty: " + names.isEmpty());
}
Element Ordering
HashSet does not preserve any ordering of elements.
However, just as with maps, there are set implementations that preserve either insertion order or natural ordering.
LinkedHashSet inherits from HashSet and, similarly to LinkedHashMap, maintains an internal linked list to preserve insertion order.
The primary operations still have average-case time complexity ,
although some additional memory is required for maintaining the linked list.
void main() {
LinkedHashSet<String> linked = new LinkedHashSet<>();
linked.add("Joni Virtanen");
linked.add("Maija Meikäläinen");
linked.add("Matti Korhonen");
// LinkedHashSet preserves insertion order.
IO.println(linked);
}
TreeSet implements the SortedSet and NavigableSet interfaces and stores elements in their natural ordering, similarly to TreeMap.
Unlike HashSet, it is not based on a hash table but instead on a balanced tree structure.
As a result, its fundamental operations are slightly slower.
Insertion, removal, and searching have average-case complexity
.
void main() {
TreeSet<String> tree = new TreeSet<>();
tree.add("Joni Virtanen");
tree.add("Maija Meikäläinen");
tree.add("Matti Korhonen");
// TreeSet automatically sorts elements into natural order.
IO.println(tree);
}
The SortedSet and NavigableSet interfaces also provide useful methods for managing ordered collections.
These operations are very similar to those provided by the SortedMap and NavigableMap interfaces.
void main() {
NavigableSet<Integer> tree = new TreeSet<>();
tree.add(1);
tree.add(2);
tree.add(5);
tree.add(4);
tree.add(3);
// Elements are sorted.
IO.println(tree);
// Print smallest and largest elements.
IO.println("Smallest element: " + tree.first()); // 1
IO.println("Largest element: " + tree.last()); // 5
// Print nearest lower and higher elements.
IO.println(tree.lower(3)); // 2
IO.println(tree.higher(3)); // 4
// Return the set in reverse order.
IO.println(tree.descendingSet());
}
NavigableSet also supports creating subsets using the subSet() method.
void main() {
NavigableSet<Integer> tree = new TreeSet<>();
tree.add(1);
tree.add(2);
tree.add(5);
tree.add(4);
tree.add(3);
// Create a new set containing
// elements between 3 and 5.
//
// The true values indicate that
// 3 and 5 are included.
Set<Integer> subset = tree.subSet(3, true, 5, true);
IO.println(subset);
}
Queues and Stacks
Queues and stacks are linear data structures similar to lists. These structures are particularly useful when we are mainly interested in elements located at the beginning or end of a collection. In practice, queues and stacks are specialized forms of lists where insertion, removal, and retrieval operations are restricted to the ends of the structure. The concepts themselves are extremely important in computer science and are used frequently in real-world systems.
In addition to ordinary queues, there are double-ended queues, which combine the functionality of queues and stacks by allowing insertion and removal operations at both ends. In Java, a double-ended queue also provides many additional useful operations and is used to implement both queues and stacks.
Stack
A stack is a data structure that follows the last in, first out (LIFO) principle. Elements can only be added to the top of the stack, and removals always occur from the top.
A common example is the Undo feature of a word processor. Each modification is pushed onto the top of the stack, and each undo operation removes the most recent modification.
note
Unlike many other languages, Java does not provide a Stack interface.
Historically, Java includes a Stack class, but its use is no longer recommended.
Modern Java uses a double-ended queue—typically ArrayDeque through the Deque interface—to implement stacks.
The fundamental stack operations are
push, pop and peek.
The Deque interface provides these methods directly.
void main() {
Deque<String> stack = new ArrayDeque<>();
// Push elements. Doesn't retur anything
stack.push("A");
stack.push("B");
stack.push("C");
// Notice that the most recently added element appears first.
IO.println(stack);
// Returns "C" but does not remove it.
// Returns null if empty.
IO.println(stack.peek());
// Returns "C" and removes it.
// Returns null if empty.
IO.println(stack.pop());
IO.println(stack);
}
Queue
A queue follows the first in, first out (FIFO) principle. The first element added to the queue is also the first one removed.
Queues behave very much as their name suggests. Network routers provide a good example of queue usage: packets waiting to be transmitted are stored in a queue and sent onward in the same order in which they arrived.
The Queue interface in Java defines the common functionality of queue data structures.
It extends the Collection interface and provides methods for adding elements to the end of the queue and removing or examining elements at the front.
For each of these three basic operations, the Queue interface defines two versions that handle errors differently.
The methods add, remove, and element throw an exception when an error occurs.
The methods offer, poll, and peek, on the other hand, return a special value instead.
Since exceptions will be discussed later in this course, we will focus for now on the methods offer, poll, and peek, which work just as well.
The ArrayDeque class implements the Queue interface and therefore provides all of the required methods.
We will use it to implement a queue.
void main() {
Queue<String> queue = new ArrayDeque<>();
// Add elements to the end of the queue.
// 'offer' returns true if adding succeeds and false otherwise.
queue.offer("A");
queue.offer("B");
IO.println(queue); // [A, B]
// Examine the first element without
// removing it.
// 'peek' returns null if the queue
// contains no elements.
IO.println(queue.peek()); // "A"
// Remove elements from the front of the queue.
// 'poll' returns null if the queue contains no elements.
IO.println(queue.poll()); // "A"
IO.println(queue.poll()); // "B"
IO.println(queue.poll()); // null
}
Double-Ended Queue
A double-ended queue is known as a deque, which is short for double-ended queue. We could use such a structure to model, for example, a queue where particularly important items may occasionally be inserted at the front.
The Deque interface defines all functionality required by double-ended queues.
In practice, this means it provides all methods needed for both queues and stacks, as well as additional useful operations such as iterating through elements in reverse order.
Note that Deque also contains all queue- and stack-related methods discussed earlier.
The most commonly used implementation of Deque is ArrayDeque, which, as its name suggests, uses an array as its internal data structure.
Deque implements the Collection interface, which means familiar methods such as size, isEmpty, and contains are also available.
Adding and Removing Elements
Like Queue, Deque defines two styles of methods:
methods that throw exceptions when an operation fails and
methods that return null or false when an operation fails.
Elements can be added:
to the front using addFirst() or offerFirst(),
and to the back using addLast() or offerLast().
For now we will use offerFirst() and offerLast() because they avoid exceptions.
void main() {
Deque<Integer> numbers = new ArrayDeque<>();
// 'offerFirst' inserts at the front. // 'offerLast' inserts at the back.
// Both return false if insertion fails.
numbers.offerFirst(2);
IO.println(numbers); // [2]
numbers.offerLast(3);
IO.println(numbers); // [2, 3]
numbers.offerFirst(1);
IO.println(numbers); // [1, 2, 3]
}
Removal works similarly from either end.
The methods removeFirst and removeLast remove elements or throw an exception if the deque is empty.
The methods pollFirst and pollLast instead return null when no element can be removed, making them safer to use at this stage.
We can also examine elements without removing them using peekFirst and peekLast.
void main() {
Deque<Integer> numbers = new ArrayDeque<>();
numbers.offerFirst(3);
numbers.offerFirst(2);
numbers.offerFirst(1);
IO.println(numbers); // [1, 2, 3]
// Examine first and last values.
IO.println(numbers.peekFirst()); // 1
IO.println(numbers.peekLast()); // 3
// Remove first and last values.
// Removal returns the removed element
// if successful, otherwise null.
numbers.pollFirst();
numbers.pollLast();
IO.println(numbers); // [2]
}
Both insertion and removal at either end occur in constant time .
This is possible because ArrayDeque is implemented as a circular array whose head and tail positions are tracked using indexes.
Elements do not need to be shifted when inserting or removing from either end.
ArrayDeque also provides the remove() method inherited from the Collection interface.
This method removes a specific element regardless of its position, behaving much like removal in a list by scanning through the structure until the element is found.
Iterating Through Elements
ArrayDeque implements the Iterable interface, so it can be traversed using a for-each loop.
In addition, the method descendingIterator returns an iterator that allows elements to be visited in reverse order.
The time complexity of iterating through all elements is .
which is the same as for an ordinary list.
void main() {
Deque<Integer> numbers = new ArrayDeque<>();
numbers.offerFirst(3);
numbers.offerFirst(2);
numbers.offerFirst(1);
// Normal traversal.
for (Integer number : numbers) {
IO.println(number);
}
// Reverse traversal.
Iterator<Integer> it = numbers.descendingIterator();
while (it.hasNext()) {
IO.println(it.next());
}
}
Priority Queue
A priority queue is a special type of queue implemented in Java by the PriorityQueue class.
An ordinary queue preserves insertion order.
A priority queue instead ensures that the smallest element according to natural ordering is always returned first whenever we request the next element.
void main() {
PriorityQueue<Integer> numbers = new PriorityQueue<>();
numbers.offer(2);
numbers.offer(3);
numbers.offer(1);
numbers.offer(5);
numbers.offer(4);
// Notice that printing the queue
// does not necessarily display
// the elements in sorted order.
IO.println(numbers);
// A priority queue always returns
// the "most important" element,
// which here means the smallest one.
IO.println(numbers.poll()); // 1
IO.println(numbers.poll()); // 2
IO.println(numbers.poll()); // 3
IO.println(numbers.poll()); // 4
IO.println(numbers.poll()); // 5
}
The time complexity of PriorityQueue differs from ordinary queue structures because it is internally based on a heap.
Insertion and removal both have time complexity .
Requesting the smallest element, however, is very efficient and occurs in constant time .
Exercises
You are given two lists of numbers that contain duplicates.
Create the following sets from these numbers:
-
Union: Contains all numbers that belong to the first set, the second set, or both.
-
Intersection: Contains only the numbers that are present in both sets at the same time.
-
Difference: Contains the numbers that belong to the first set but do not belong to the second set.
-
Symmetric Difference: Contains the numbers that belong to exactly one of the sets, but not both.
The sets must not contain duplicates.
The sets can be created using the methods defined by the Set api, so there is no need to iterate through the data structures with loops.
The provided main program contains examples of what these sets should contain.
Create a class TaskList that acts as a todo list. Tasks can be simple strings.
The task list keeps track of both incomplete and completed tasks. Tasks are completed in the same order in which they were added to the task list. For exceptional situations, it must be possible to add urgent tasks directly to the beginning of the task list.
The program must also provide a way to undo marking a task as completed in case a task is accidentally marked as completed too early. Undoing should return the completed task to the beginning of the task list.
Add the following methods to the class:
-
addTask, which adds a task to the task list. A new task is added to the end of the task list. -
addImportantTask, which adds an urgent task to the task list. An urgent task is always placed at the beginning of the task list. -
markDone, which marks the next task in the task list as completed. -
undoDone, which moves the most recently completed task from the completed tasks list back to the beginning of the task list. -
print, which prints the incomplete and completed tasks as separate lists. The exact output format is not very important, as long as the different lists can be clearly distinguished.
You can test the functionality of the class using the provided main program.
Write a function that checks the correctness of the brackets contained in a string. The function must determine whether all brackets are properly closed in the correct order and whether every opening bracket has a matching closing bracket.
Supported bracket types are:
- Parentheses
( ) - Square brackets
[ ] - Curly braces
{ }
Logic and Rules:
-
Nesting: Brackets may be nested (e.g.
([])), but they must not cross. For example,([)]is invalid because the brackets cross each other. -
Order: A bracket must always be opened before it is closed.
-
Other characters, such as letters or numbers, should be ignored.
-
An empty string is considered valid and contains 0 pairs.
Return Value:
- If the brackets are valid, return the number of bracket pairs found (an integer).
- If the bracket structure is invalid (even a single missing pair or incorrect ordering), return
-1.
Examples:
| String | Result | Explanation |
|---|---|---|
"" | 0 | Empty input is valid, 0 pairs. |
"()" | 1 | One valid pair. |
"(())" | 2 | Two nested pairs. |
"([])" | 2 | Two nested pairs. |
"()[]" | 2 | Two adjacent pairs. |
"a(b)c" | 1 | Letters are ignored, one pair. |
"(" | -1 | Missing closing bracket. |
"(()" | -1 | One closing bracket is missing. |
"()}" | -1 | Extra closing bracket. |
")(" | -1 | Incorrect order (missing opening bracket at the beginning). |
"([)]" | -1 | Brackets cross (invalid nesting). |
The function should be implemented so that if new bracket types are added in the future, no changes are required in the core validation logic.
For example, to support the string a<(b)>c, it should be sufficient to add support for angle brackets < >, while keeping the rest of the logic unchanged (in other words, no additional if statements should be needed).
Recursion
Learning Objectives
- Understand how recursion works.
- Understand how recursion can be modeled using a stack.
Recursion means defining a problem in terms of itself so that the problem consists of smaller parts that have the same structure as the original problem. A recursive solution is justified when the problem has: a clear base case, and a recursive step that reduces the problem so that the base case is eventually reached. Recursion is a natural way to implement the divide and conquer principle: a problem is divided into smaller subproblems, the subproblems are solved, and the results are combined.
A recursive data structure is a structure whose definition refers to itself.
One example is a linked list, where each node contains a reference to the next node or a null value that marks the end of the list.
In practice, linked lists appear in situations such as playlist playback ("next track"), browser back/forward history, and the internal data structures of operating systems and software libraries.
Recursive algorithms are particularly natural when working with recursive data structures. The following Java example shows a linked list containing integers and a recursive method for calculating the length of the list.
class Node {
int value;
Node next;
Node(int value) {
this.value = value;
}
}
The length of a list defined in this way can be calculated recursively.
int length(Node node) {
if (node == null) return 0; // base case
return 1 + length(node.next); // recursive case
}
Constructing a list "by hand" would look like this:
class Node {
int value;
Node next;
Node(int value) {
this.value = value;
}
}
int length(Node node) {
if (node == null) return 0; // base case
return 1 + length(node.next); // recursive case
}
void main() {
Node first = new Node(10);
first.next = new Node(20);
first.next.next = new Node(30);
int n = length(first); // n == 3
IO.println(n);
}
This is, however, somewhat cumbersome. In a typical implementation, the list would have its own class that encapsulates the reference to the first node and the insertion operation.
class List {
Node first;
void addToEnd(int value) {
if (first == null) {
first = new Node(value);
return;
}
Node current = first;
while (current.next != null) {
current = current.next;
}
current.next = new Node(value);
}
int length() {
return length(first);
}
}
Using the list would then look like this:
class Node {
int value;
Node next;
Node(int value) {
this.value = value;
}
}
class List {
Node first;
void addToEnd(int value) {
if (first == null) {
first = new Node(value);
return;
}
Node current = first;
while (current.next != null) {
current = current.next;
}
current.next = new Node(value);
}
int length(Node node) {
if (node == null) return 0; // base case
return 1 + length(node.next); // recursive case
}
int length() {
return length(first);
}
}
void main() {
List list = new List();
list.addToEnd(10);
list.addToEnd(20);
list.addToEnd(30);
int n = list.length(); // n == 3
IO.println(n);
}
Recursion in Practice
Lists are linear structures: each node has at most one successor. Many problems involve branching structures instead. A tree is such a branching data structure. It consists of nodes and their child nodes, and it has one root node. A tree contains no cycles, meaning that when moving downward through child references, it is impossible to return to the same node simply by following child links.
A common special case is a binary tree, where each node has at most two children: a left child and a right child. Recursion fits tree processing naturally because a tree consists of subtrees; every child is itself the root of another tree.
Example of a binary tree:
graph TD A((5)) A --> B((8)) A --> C((3)) B --> D((7)) B --> E((1)) C --> F((7)) C --> G((9))
The following example calculates the height of a binary tree using recursion.
The idea follows directly from the definition of tree height:
the height of an empty tree is 0, and
the height of a non-empty tree is 1 plus the height of the taller subtree.
Every path from the root to a leaf must first go either into the left subtree or the right subtree, so the longest path is obtained by choosing the larger of those two heights.
Recursion stops when there is no subtree left (root == null), in which case the base case returns 0.
public class Node {
// Value stored in the node.
int value;
// Reference to left child (null if none exists).
Node left;
// Reference to right child (null if none exists).
Node right;
Node(int value) {
this.value = value;
}
}
public static int height(Node root) {
if (root == null) {
return 0;
}
return 1 + Math.max(height(root.left), height(root.right));
}
void main() {
// Construct a binary tree
Node root = new Node(1);
root.left = new Node(2);
root.right = new Node(3);
root.left.left = new Node(4);
IO.println(height(root));
}
As a side note, nothing in this code currently prevents us from creating cyclic structures where nodes refer to one another, forming a loop. In such a situation, recursion would never terminate and would eventually crash the program with a stack overflow. Although we do not implement cycle detection in this example, real-world programs should ensure that cycles cannot arise when algorithms assume tree-like structures.
When the height method is called for the root node, computation naturally proceeds downward through the tree.
The method calls itself recursively for the left and right subtrees and continues until it encounters a null reference, representing an empty tree.
This is the recursion base case: the height of an empty tree is defined as zero.
Once the base case has been reached, computation begins to return back up through the call stack. Each node receives the heights of its subtrees and determines its own height as: 1 + height of the taller subtree. Thus, the tree's height is constructed step by step from the leaves toward the root using only return values.
Modeling Recursion with a Stack
Recursive solutions often seem deceptively simple—even magical.
How does the computer know where execution should continue after a function has called itself dozens of times?
How do the variables of previous calls (node, left, right, and so on) remain intact?
The computer performs no magic at all. Behind the scenes, it uses a stack.
Every time a function calls itself, the computer:
- Suspends the current execution.
- Creates a new stack frame containing at least:
- the method arguments,
- local variables,
- information about where execution should continue after the method returns.
- Pushes this frame onto the top of the call stack.
When a recursive call completes—that is, when a base case is reached—the top frame is popped from the stack and execution resumes where the previous frame left off. Recursion is therefore fundamentally just the process of filling and emptying a stack.
This mechanism is what makes recursion possible: each recursive call pauses the current computation, stores its state on the stack, and transfers control to the next, smaller subproblem.
The following example illustrates recursion using a recursive sum that computes: .
int sum(int n) {
if (n == 0) return 0; // base case
return n + sum(n - 1);
}
Assume that we call sum(3)
Each stack frame contains the parameter n and the unfinished computation:
.
In other words, the frame is waiting for the result of the recursive call.
The execution of sum(3) can be visualized as follows:
| Step | Stack (bottom → top) | What happens |
|---|---|---|
| 1 | sum(3) | Waiting for sum(2) |
| 2 | sum(3), sum(2) | Waiting for sum(1) |
| 3 | sum(3), sum(2), sum(1) | Waiting for sum(0) |
| 4 | sum(3), sum(2), sum(1), sum(0) | Base case: returns 0 |
| 5 | sum(3), sum(2), sum(1) | Return: sum(1) = 1 + 0 = 1 |
| 6 | sum(3), sum(2) | Return: sum(2) = 2 + 1 = 3 |
| 7 | sum(3) | Return: sum(3) = 3 + 3 = 6 |
| 8 | (empty) | Computation complete, result is 6 |
During the call phase, the stack grows because each frame waits for the result of a recursive call (for example, n + sum(n - 1)).
After reaching the base case, computation proceeds back upward, and each frame completes its own calculation using the result returned by its recursive call.
This is the "memory" that makes recursion work.
Could we do the same thing ourselves without recursion? Yes, we can. We can "play computer" and manage the stack manually. This is not merely an academic exercise. It is a useful skill because it helps us understand what is really happening behind the scenes. There are also situations—for example, extremely deep trees—where the automatic call stack may overflow, while a manually managed stack continues to work.
Let us begin with a classic simple example: the factorial function. As a reminder, here is the recursive version.
int factorial(int n) {
if (n <= 1) return 1;
return n * factorial(n - 1);
}
An iterative version can be written using a stack that we maintain ourselves.
The idea is to first store the "pending multiplications" and then process them afterward.
In modern Java,
ArrayDeque is the recommended stack data structure.
int factorialIter(int n) {
Deque<Integer> stack = new ArrayDeque<>(); // Explicit stack for pending factors
while (n > 1) {
// Call phase: store the pending factor.
stack.push(n--);
}
int result = 1;
while (!stack.isEmpty()) {
// Return phase: pop factors and multiply them.
result *= stack.pop();
}
return result;
}
void main() {
IO.println(factorialIter(10));
}
In this example, the "stack frame" is simply a value stored in a structure that we created ourselves. In simple cases such as the factorial function, a stack frame can consist of nothing more than information about which numbers still need to be multiplied.
Let's also solve the tree-height problem iteratively. To do this, we need two things:
- a
whileloop that continues as long as work remains, - a stack data structure for storing nodes that have not yet been processed—just as recursion does automatically.
Computing the height works by traversing the tree level by level (breadth-first traversal). A queue is particularly well suited for this task because it keeps track of which nodes still need to be processed on each level. At every level, all nodes are processed, and their children are added to the queue for the next level.
public class Node {
int value;
Node left;
Node right;
Node(int value) {
this.value = value;
}
}
public static int treeHeightIter(Node root) {
if (root == null) return 0;
// Use a queue for level-order traversal.
// At each level, process all nodes and
// add their children for the next level.
Queue<Node> pendingNodes = new ArrayDeque<>();
pendingNodes.add(root);
int height = 0;
while (!pendingNodes.isEmpty()) {
int levelNodeCount = pendingNodes.size();
height++;
for (int i = 0; i < levelNodeCount; i++) {
// Take the first node from the queue.
Node current = pendingNodes.poll();
// Add left child for the next level if it exists.
if (current.left != null) pendingNodes.add(current.left);
// Add right child if it exists.
if (current.right != null) pendingNodes.add(current.right);
}
}
return height;
}
void main() {
// Construct a binary tree
Node root = new Node(1);
root.left = new Node(2);
root.right = new Node(3);
root.left.left = new Node(4);
IO.println(treeHeightIter(root));
}
Calculate the sum 1 + 2 + ... + n without recursion using your own stack.
The starting point is the following recursive definition:
int sum(int n) {
if (n == 0) return 0;
return n + sum(n - 1);
}
Write a method sumIteratively(int n) that returns the same result.
Model the recursion using a stack: store on the stack the numbers that are "waiting" during the return phase. Use the ArrayDeque implementation for the stack.
You do not yet need a structure such as a Frame object for this exercise.
For both the factorial function and the tree-height calculation, no additional state information was required. In the factorial example, only numbers were stored on the stack. When computing the tree height, only nodes were processed, and every node was handled in the same way. The call phase and return phase of recursion did not need to be distinguished because, once the base case was reached, the final result was constructed automatically through return values. For this reason, a plain stack or queue was sufficient for maintaining processing order and computing the result.
The situation changes when an algorithm performs work both before and after a recursive call, as happens during tree traversal. In such cases, storing only the data is no longer sufficient. We must also remember whether we are in the call phase or the return phase. For this purpose we need a stack frame, which combines node-related data with information about the state of the recursion.
In the following example, recursive execution is modeled using a custom stack-frame object. The frame acts like a reminder note that tells us which node we are returning to and what stage of computation we are currently in. This makes explicit the information that would otherwise be hidden inside the call stack.
static class Frame {
Node node;
boolean visited;
Frame(Node node, boolean visited) {
this.node = node;
this.visited = visited;
}
}
Our goal is to print the nodes of a binary tree in postorder. Postorder traversal means to process the left subtree, process the right subtree, and finally process the node itself. The key point is that the actual work is performed only after the recursive calls have completed, not when the node is first encountered.
Since we are not using recursion, we must explicitly remember whether a node has already been encountered during the call phase and left waiting, or whether we are returning to it from its subtrees.
For this reason, the stack stores Frame objects.
When a node is encountered for the first time, it is marked as visited and pushed back onto the stack to wait.
Its children are then pushed onto the stack so that they are processed before the node itself.
When the same frame later reappears at the top of the stack, we know that we are in the return phase and can print the node's value.
class Node {
int value;
Node left;
Node right;
Node(int value) {
this.value = value;
}
}
static class Frame {
Node node;
boolean visited;
Frame(Node node, boolean visited) {
this.node = node;
this.visited = visited;
}
}
void printPostorder(Node root) {
if (root == null) return;
Deque<Frame> stack = new ArrayDeque<>();
stack.push(new Frame(root, false));
while (!stack.isEmpty()) {
Frame f = stack.pop();
if (f.visited) {
IO.println(f.node.value); // return phase
continue;
}
// Call phase: put the node on hold and push the children.
f.visited = true;
stack.push(f);
if (f.node.right != null) stack.push(new Frame(f.node.right, false));
if (f.node.left != null) stack.push(new Frame(f.node.left, false));
}
}
void main() {
Node root = new Node(5);
// Left sub tree
Node ln = new Node(8);
Node lln = new Node(7);
Node lrn = new Node(1);
ln.left = lln;
ln.right = lrn;
root.left = ln;
// Right subtree
Node rn = new Node(3);
Node rln = new Node(7);
Node rrn = new Node(9);
rn.left = rln;
rn.right = rrn;
root.right = rn;
printPostorder(root);
}
In this way, the loop and stack precisely imitate the behavior of recursion: first work is created for the subtrees, and only during the return phase is the node itself processed. The code follows the definition of postorder traversal directly, but without using recursive method calls.
Implement the calculation of the sum of the nodes in a binary tree containing integers without recursion using your own stack.
Use the following Node class:
public class Node {
int value;
Node left;
Node right;
Node(int value) {
this.value = value;
}
}
The starting point is the following recursive definition:
int sum(Node root) {
if (root == null) return 0;
return root.value + sum(root.left) + sum(root.right);
}
Model the recursion using a stack: each item on the stack represents the state of a recursive call.
For this purpose, you will need a Frame class (for example, containing Node and visited) to maintain the state information. The stack itself does not need to be implemented manually; you may use the ArrayDeque implementation as in the course material.
An example main program is included in the TIM exercise.
All Exercises in This Part
Create a class List. Define an array inside it for storing the elements of the list, as well as an integer variable that keeps track of the current number of elements in the list.
Implement the method:
add(T element): adds an element to the end of the list.
At this stage, you do not need to increase the size of the data structure, so the array may become full.
Use the debugger to verify that the element has been added correctly.
Do not implement get or toString methods yet; inspect the state of the list specifically through the debugger.
Modify the add method so that it adds an element to the end of the list and, if necessary, creates a new larger array (1.5× or 2× the current size) and copies the elements from the old array into the new one. Remember to update the list size appropriately.
Also implement a size() method that returns the current number of elements in the list.
Use the get and size methods to help test that the add method works correctly even when the array is full and a new array has been created.
Implement a remove(int index) method that removes an element from the list at the specified index. The method must return the removed element.
- Elements following the removed element must be shifted to the left so that no "gaps" remain in the array.
- No unnecessary contents may remain in the array after removal.
- Remember to update the size of the list appropriately.
Use the debugger and/or the get and size methods to verify that the removal was performed correctly.
Continue the List class by implementing the remove(T element) method, which removes the first occurrence of the given element.
- If the element is found and removed, return
true. - If the element is not found, the list remains unchanged and the method returns
false.
Hint: You can use the remove(int index) method you have already implemented. Do not duplicate the element-shifting logic in this method.
Create a function countWords that takes a string as a parameter and performs the following tasks:
- Prints all unique words and the number of times each word appears in the string.
- Prints the most common word separately, along with the number of times it appears in the string.
- Prints the number of unique words.
You can test your program using the provided main program, which also includes sample output.
Hint
You can remove punctuation from the string using its replaceAll method.
Create a class Reservations that stores reservations. There can be only one reservation for a given date, and the name of the person making the reservation must also be stored.
In this exercise, you may represent dates as strings in the format YYYY-MM-DD (year-month-day). You may also assume that all dates are always in the correct format.
Implement the following methods:
-
addReservationtakes a date and the reservation holder's name as string parameters and adds the reservation to the data structure. If a reservation already exists for that date, the new reservation must not replace it. The method returnstrueif the reservation is added, otherwisefalse. -
removeReservationtakes a date as a parameter and removes the reservation for that date. The method returnstrueif the reservation is removed from the data structure, otherwisefalse. -
printReservationstakes a start date and an end date as parameters and prints all reservations that fall within that range, sorted by reservation date.
You can test the functionality of the class using the provided main program.
Hint
In this case, it is not advisable to sort the data structure manually. One of the classes implementing the Map interface keeps its elements automatically sorted.
Implement your own simple hash table.
Use an array as the main data structure of the hash table. To handle collisions, you may use a list, for example, so that elements that end up at the same index are stored in a list located at that index. Elements must not be lost when collisions occur.
The hash table capacity may have a default value of 10, or it may be provided as a constructor parameter. The capacity does not need to change at any point during program execution, so you do not need to consider or implement load factor handling.
Java's hashCode method can return a negative value, so it is a good idea to use the absolute value to avoid negative indices.
Add a get method that retrieves an element from the hash table based on its key.
Also add add and remove methods for inserting and removing elements.
You are given two lists of numbers that contain duplicates.
Create the following sets from these numbers:
-
Union: Contains all numbers that belong to the first set, the second set, or both.
-
Intersection: Contains only the numbers that are present in both sets at the same time.
-
Difference: Contains the numbers that belong to the first set but do not belong to the second set.
-
Symmetric Difference: Contains the numbers that belong to exactly one of the sets, but not both.
The sets must not contain duplicates.
The sets can be created using the methods defined by the Set api, so there is no need to iterate through the data structures with loops.
The provided main program contains examples of what these sets should contain.
Create a class TaskList that acts as a todo list. Tasks can be simple strings.
The task list keeps track of both incomplete and completed tasks. Tasks are completed in the same order in which they were added to the task list. For exceptional situations, it must be possible to add urgent tasks directly to the beginning of the task list.
The program must also provide a way to undo marking a task as completed in case a task is accidentally marked as completed too early. Undoing should return the completed task to the beginning of the task list.
Add the following methods to the class:
-
addTask, which adds a task to the task list. A new task is added to the end of the task list. -
addImportantTask, which adds an urgent task to the task list. An urgent task is always placed at the beginning of the task list. -
markDone, which marks the next task in the task list as completed. -
undoDone, which moves the most recently completed task from the completed tasks list back to the beginning of the task list. -
print, which prints the incomplete and completed tasks as separate lists. The exact output format is not very important, as long as the different lists can be clearly distinguished.
You can test the functionality of the class using the provided main program.
Write a function that checks the correctness of the brackets contained in a string. The function must determine whether all brackets are properly closed in the correct order and whether every opening bracket has a matching closing bracket.
Supported bracket types are:
- Parentheses
( ) - Square brackets
[ ] - Curly braces
{ }
Logic and Rules:
-
Nesting: Brackets may be nested (e.g.
([])), but they must not cross. For example,([)]is invalid because the brackets cross each other. -
Order: A bracket must always be opened before it is closed.
-
Other characters, such as letters or numbers, should be ignored.
-
An empty string is considered valid and contains 0 pairs.
Return Value:
- If the brackets are valid, return the number of bracket pairs found (an integer).
- If the bracket structure is invalid (even a single missing pair or incorrect ordering), return
-1.
Examples:
| String | Result | Explanation |
|---|---|---|
"" | 0 | Empty input is valid, 0 pairs. |
"()" | 1 | One valid pair. |
"(())" | 2 | Two nested pairs. |
"([])" | 2 | Two nested pairs. |
"()[]" | 2 | Two adjacent pairs. |
"a(b)c" | 1 | Letters are ignored, one pair. |
"(" | -1 | Missing closing bracket. |
"(()" | -1 | One closing bracket is missing. |
"()}" | -1 | Extra closing bracket. |
")(" | -1 | Incorrect order (missing opening bracket at the beginning). |
"([)]" | -1 | Brackets cross (invalid nesting). |
The function should be implemented so that if new bracket types are added in the future, no changes are required in the core validation logic.
For example, to support the string a<(b)>c, it should be sufficient to add support for angle brackets < >, while keeping the rest of the logic unchanged (in other words, no additional if statements should be needed).
Calculate the sum 1 + 2 + ... + n without recursion using your own stack.
The starting point is the following recursive definition:
int sum(int n) {
if (n == 0) return 0;
return n + sum(n - 1);
}
Write a method sumIteratively(int n) that returns the same result.
Model the recursion using a stack: store on the stack the numbers that are "waiting" during the return phase. Use the ArrayDeque implementation for the stack.
You do not yet need a structure such as a Frame object for this exercise.
Implement the calculation of the sum of the nodes in a binary tree containing integers without recursion using your own stack.
Use the following Node class:
public class Node {
int value;
Node left;
Node right;
Node(int value) {
this.value = value;
}
}
The starting point is the following recursive definition:
int sum(Node root) {
if (root == null) return 0;
return root.value + sum(root.left) + sum(root.right);
}
Model the recursion using a stack: each item on the stack represents the state of a recursive call.
For this purpose, you will need a Frame class (for example, containing Node and visited) to maintain the state information. The stack itself does not need to be implemented manually; you may use the ArrayDeque implementation as in the course material.
An example main program is included in the TIM exercise.
Useful Techniques in Java
Learning objectives
- Use lambda expressions and method references to write more concise code.
- Process collections declaratively using the Stream API.
- Handle errors using exceptions.
- Use the Maven project management tool and external libraries.
- Read from and write to files.
So far, we have learned the fundamentals of Java syntax, object-oriented programming, and the most common data structures. In this section, we will explore modern Java features and become familiar with the basic tools used for project management.
We begin by introducing Java's functional programming features and the Stream API, which provides an efficient way to process data without explicit loop constructs.
To improve software reliability, we will learn how to handle errors using exception handling. We will also see how Maven helps us manage external libraries and how to read from and write to files programmatically.
Functional Interfaces and Lambda Expressions
Learning Objectives
- Understand the concept of a functional interface.
- Be able to use lambda expressions and method references to implement functional interfaces.
- Be familiar with Java's most common built-in functional interfaces (for example,
FunctionandConsumer). - Be able to define alternative orderings for objects using the
Comparatorinterface and lambda expressions.
A functional interface is an interface that contains only one required method. Its purpose is to represent a single operation or capability.
For example, the following interface is a functional interface:
/**
* Interface representing a function that takes
* a number as a parameter and returns another number.
*/
public interface NumberFunction {
int calculate(int number);
}
The Adjustable interface introduced as an example in Chapter 4.1 is also a functional interface because it contains only one method: setValue.
Java provides a simplified way to create objects that implement functional interfaces. This allows us to write code where functions can be handled almost like data.
Creating Objects from Functional Interfaces
If we want to create an object that implements the NumberFunction interface, we can define a class that implements the interface and override its calculate() method.
public class MultiplyByTwo implements NumberFunction {
@Override
public int calculate(int number) {
return number * 2;
}
}
void main() {
NumberFunction multiplyByTwo = new MultiplyByTwo();
IO.println(multiplyByTwo.calculate(3));
}
In this example, we had to write quite a lot of code—a new class and a method override—just to create a small object.
However, NumberFunction is a functional interface because it has only one required method.
In Java, it is possible to use an existing method without creating a separate class and treat that method as if it were an object implementing the interface.
This is called a method reference.
int multiplyByTwo(int number) {
return number * 2;
}
void main() {
// Use an existing method as the implementation of the interface.
NumberFunction function = this::multiplyByTwo;
IO.println(function.calculate(3));
}
Notice the syntax this::multiplyByTwo
This does not call the method.
Instead, it creates a reference to the method.
Java automatically creates an object implementing the interface because the method's parameters and return type match the interface's single method.
If we print the value of the variable function, we do not get an integer. Instead, we get information about an object.
public interface NumberFunction {
int calculate(int number);
}
int multiplyByTwo(int number) {
return number * 2;
}
void main() {
NumberFunction function = this::multiplyByTwo;
IO.println(function);
}
Method references use the :: operator to refer to either an object method or a class method.
In other words this::multiplyByTwo
means that the method reference refers to the multiplyByTwo method of the current object.
Instead of this, we may also use an object reference or, in the case of static methods, a class name.
class Program {
public static int multiplyByTwoStatic(int number) {
IO.println("I am a class method!");
return number * 2;
}
public int multiplyByTwoNonStatic(int number) {
IO.println("I am an object method!");
return number * 2;
}
void main() {
// Static method reference
NumberFunction function = Program::multiplyByTwoStatic;
// Instance method reference
NumberFunction function2 = this:: multiplyByTwoNonStatic;
IO.println(function.calculate(2));
IO.println(function2.calculate(2));
}
}
Bonus: How the function reference works?
You may wonder how a method can suddenly "become" an object. In reality, this is a technical trick performed by Java. Before method references existed, the same thing was commonly accomplished using anonymous classes.
The compiler transforms this::multiplyByTwo
into something roughly equivalent to:
int multiplyByTwo(int number) {
return number * 2;
}
NumberFunction function = new NumberFunction() {
@Override
public int calculate(int number) {
return multiplyByTwo(number);
}
};
A lambda expression is therefore actually an object implementing the desired interface. For this reason, lambda expressions can only be used with interfaces that contain exactly one abstract method—that is, functional interfaces.
Although anonymous classes are used less frequently nowadays, they are still useful when the implemented interface is not functional.
Lambda Expressions
Java makes it possible to define the implementation of a function directly at the point where it is needed, without creating a separate method. Such a function written as an expression is called a lambda expression.
The basic structure is:
(type parameter) -> {
// function body
return result;
}
If there are multiple parameters, they are separated by commas.
(type1 parameter1,
type2 parameter2) -> {
// function body
return result;
}
A lambda expression does not have its own name. Because of this, lambda expressions are also known as anonymous functions. The following example prints elements from a list using a lambda expression.
void main() {
// Pass an anonymous function directly to forEach()
List<String> berries = List.of("strawberry", "blueberry", "lingonberry", "strawberry");
// Print only strawberries
berries.forEach(berry -> {
if (berry.equals("strawberry")) {
IO.println(berry);
}
});
}
This could of course also be written using an ordinary method call:
void main() {
List<String> berries = List.of("strawberry", "blueberry", "lingonberry");
printStrawberries(berries);
}
void printStrawberries(List<String> berries) {
for (String berry : berries) {
if (berry.equals("strawberry")) {
IO.println(berry);
}
}
}
The key idea is this:
A lambda expression is not merely a piece of code. It is an object that implements a functional interface.
Each parameter must correspond to the parameter types of the functional interface's method.
Let's return to our NumberFunction example.
Suppose we want a function that multiplies its input by two.
Such a lambda expression takes an integer parameter and returns an integer.
(int number) -> {
return number * 2;
}
Because this lambda expression implements NumberFunction, we can assign it to a variable of that type:
NumberFunction function = (int number) -> {
return number * 2;
};
We can now call the calculate() method because the lambda expression implements the interface.
void main() {
NumberFunction function = (int number) -> {
return number * 2;
};
IO.println(function.calculate(1));
IO.println(function.calculate(2));
IO.println(function.calculate(3));
IO.println(function.calculate(4));
}
We did not need a separate class—or even a separate method!
The greatest advantage of lambda expressions is their conciseness.
Java can infer many things automatically, allowing the code to be shortened even further.
First, parameter types can often be inferred from the parameter types of the functional interface method.
As a result, the types can usually be omitted.
In our previous example, we can leave out the int type because the method NumberFunction.calculate() already specifies that its parameter must be an integer.
public interface NumberFunction {
int calculate(int number);
}
void main() {
NumberFunction function = (number) -> {
return number * 2;
};
IO.println(function.calculate(1));
IO.println(function.calculate(2));
IO.println(function.calculate(3));
IO.println(function.calculate(4));
}
Second, if the body of a lambda expression contains only a single statement, the braces and the return keyword may be omitted.
public interface NumberFunction {
int calculate(int number);
}
void main() {
NumberFunction function = (number) -> number * 2;
IO.println(function.calculate(1));
IO.println(function.calculate(2));
IO.println(function.calculate(3));
IO.println(function.calculate(4));
}
Finally, if a lambda expression has exactly one parameter, the parentheses around the parameter may also be omitted.
public interface NumberFunction {
int calculate(int number);
}
void main() {
NumberFunction function = number -> number * 2;
IO.println(function.calculate(1));
IO.println(function.calculate(2));
IO.println(function.calculate(3));
IO.println(function.calculate(4));
}
It is also common to use shorter parameter names in lambda expressions because the meaning of the parameters is already documented by the functional interface.
public interface NumberFunction {
int calculate(int number);
}
void main() {
NumberFunction multiplyByTwo = x -> x * 2;
IO.println(multiplyByTwo.calculate(1));
IO.println(multiplyByTwo.calculate(2));
IO.println(multiplyByTwo.calculate(3));
IO.println(multiplyByTwo.calculate(4));
}
Functions as Parameters
Because a lambda expression is an object, we can pass it to methods as an argument. This allows us to write functions at a higher level of abstraction. For example, we could write a method that evaluates and sums two functions.
public interface NumberFunction {
int calculate(int number);
}
/**
* Evaluates two functions for a given value and returns the sum.
*/
int sumFunctions(NumberFunction f1, NumberFunction f2, int x) {
return f1.calculate(x) + f2.calculate(x);
}
void main() {
// Pass two different functions: x * 2 and x * x
int result = sumFunctions(x -> x * 2, x -> x * x, 3);
IO.println("Result: " + result); // (3 * 2) + (3 * 3) = 6 + 9 = 15
}
Built-In Functional Interfaces
Java provides a collection of general-purpose functional interfaces in the package
java.util.function (see JavaDoc)
Function<T, R>
(JavaDoc)
represents a function that takes one parameter of type T and returns a value of type R.
For example, our earlier example can be simplified by using the built-in Function interface instead of NumberFunction.
void main() {
Function<Integer, Integer> multiplyByTwo = x -> x * 2;
Function<Integer, Integer> square = x -> x * x;
IO.println(multiplyByTwo.apply(1));
IO.println(square.apply(2));
}
The Function interface also provides the helper methods andThen and compose, which allow functions to be chained together.
void main() {
Function<Integer, Integer> multiplyByTwo = x -> x * 2;
Function<Integer, Integer> square = x -> x * x;
// Computes: (x²) * 2
Function<Integer, Integer> squareThenMultiply = multiplyByTwo.compose(square);
// Computes: (x * 2)²
Function<Integer, Integer> multiplyThenSquare = multiplyByTwo.andThen(square);
IO.println(squareThenMultiply.apply(2));
IO.println(multiplyThenSquare.apply(2));
}
In the same way BiFunction<T, U, R>
(JavaDoc)
represents a function that takes two parameters and returns a value.
Consumer<T>
(JavaDoc)
and BiConsumer<T, U>
(JavaDoc)
represent functions that accept parameters but do not return a value (their return type is void).
Many collection classes include a forEach method that accepts a Consumer.
void main() {
List<String> berries = List.of("strawberry", "blueberry", "lingonberry");
// IO.println matches Consumer<T>
// because it accepts one parameter and returns nothing.
berries.forEach(IO::println);
Map<String, Integer> grades = new HashMap<>(
Map.of(
"Denis", 1,
"Antti-Jussi", 3,
"Sami", 5,
"Karri", 5,
"Ville", 1)
);
// BiConsumer takes two parameters: key and value
grades.forEach( (name, grade) -> IO.println(name + " => " + grade));
}
Create a program that asks the user for two decimal numbers and an arithmetic operation, and then prints the result as follows:
Number 1 > 12.0
Number 2 > 3.0
Operation (+, -, *, /) > +
12.0 + 3.0 = 15.0
At this stage you do not need to handle invalid input. You may assume that the numbers are always entered as numeric values. The supported operations are addition (+), subtraction (-), multiplication (*) and division (/). You may assume that only these operations are used as input.
Do not use loops or conditional statement. Instead, implement the arithmetic operations as lambda expressions and store them in a lookup structure using the operation symbol as the key.
The program should terminate after displaying the result.
Hint 1
You may use BiFunction<Double, Double, Double>
(See JavaDoc)
or DoubleBinaryOperator
(JavaDoc)
as the type for the lambda expressions.
Hint 2
You may use Map<String, BiFunction<Double, Double, Double>>
or Map<String, DoubleBinaryOperator> as the type of the lookup structure.
You may either choose a specific implementation for the lookup structure or
initialize an immutable lookup structure using the Map.of method:
Map<String, BiFunction<Double, Double, Double>> operations = Map.of(
"+", ...,
"-", ...,
"*", ...,
"/", ...
);
For each ..., simply provide an appropriate lambda expression.
The Comparator Interface
Let's return to the Comparable<T> interface introduced in Chapter 4.2.
Using Comparable, we defined a "natural ordering" for objects.
Sometimes, however, we want to sort the same objects differently in different situations—for example, ordering people either by name or by age.
Java's Comparator interface
(JavaDoc)
provides a way to define alternative orderings.
The interface contains only one required method, compare, meaning that it is itself a functional interface.
The compare method follows exactly the same principle as Comparable.compareTo:
| Case | Meaning | Interpretation |
|---|---|---|
cmp.compare(a, b) < 0 | a < b | a comes before b |
cmp.compare(a, b) == 0 | a == b | a and b are considered equal |
cmp.compare(a, b) > 0 | a > b | a comes after b |
Because Comparator is functional, we can define comparisons very concisely using lambda expressions.
void main() {
List<String> names = Arrays.asList("Ville", "Aino", "Matti");
// Sort by length (shortest first)
names.sort((s1, s2) -> Integer.compare(s1.length(), s2.length()));
IO.println(names); // [Aino, Ville, Matti]
}
Let's return once more to the collectible card example from Chapter 4.2.
We will slightly extend the CollectibleCard class by adding the attribute series, which describes which card series the card belongs to (for example, Animals, Vehicles, and so on).
class CollectibleCard implements Comparable<CollectibleCard> {
private String name;
private String series;
private int identifier;
public CollectibleCard(String name, String series, int identifier) {
this.name = name;
this.series = series;
this.identifier = identifier;
}
@Override
public int compareTo(CollectibleCard other) {
int seriesComparison = this.series.compareTo(other.series);
if (seriesComparison != 0) {
return seriesComparison;
}
return Integer.compare(this.identifier, other.identifier);
}
public String getName() {
return name;
}
public String getSeries() {
return series;
}
@Override
public String toString() {
return "Card: " + name + " (Series: " + series + ", #" + identifier + ")";
}
}
void main() {
List<CollectibleCard> cards = Arrays.asList(
new CollectibleCard("Brilliant Dragon", "Animals", 3),
new CollectibleCard("Speedy Vespa Jet", "Vehicles", 1),
new CollectibleCard("Beginner Amoeba","Animals", 1),
new CollectibleCard("Magnificent Seahorse","Animals", 2),
new CollectibleCard("Fast Flash", "Vehicles", 2));
IO.println("Before sorting:");
for (CollectibleCard card : cards) {
IO.println(card);
}
Collections.sort(cards);
IO.println();
IO.println("After sorting:" );
for (CollectibleCard card : cards) {
IO.println(card);
}
}
At the moment, the collectible cards have a natural ordering defined through the compareTo() method.
Suppose, however, that we want to offer an alternative way of sorting cards based on the series name.
To achieve this, we can use the version of sort that accepts a Comparator.
void main() {
List<CollectibleCard> cards = Arrays.asList(
new CollectibleCard("Brilliant Dragon", "Animals", 3),
new CollectibleCard("Speedy Vespa Jet", "Vehicles", 1),
new CollectibleCard("Beginner Amoeba", "Animals", 1),
new CollectibleCard("Magnificent Seahorse", "Animals", 2),
new CollectibleCard("Fast Flash", "Vehicles", 2));
IO.println("Before sorting:");
cards.forEach(IO::println);
// Collections.sort provides a version
// that accepts a Comparator.
Comparator<CollectibleCard> bySeries =
(card1, card2) -> card1.getSeries() .compareTo( card2.getSeries());
Collections.sort(cards, bySeries);
IO.println();
IO.println("After sorting:");
cards.forEach(IO::println);
}
Notice that sorting is now performed according to the comparator bySeries, which is defined as a lambda expression.
Because the comparator is defined outside the CollectibleCard class, we also added the getter method getSeries.
The Comparator class also provides several helper methods for combining and creating comparators.
Comparator.comparing()
The method Comparator.comparing takes a lambda expression that extracts a value from an object.
The comparison is then performed using the natural ordering of that extracted value.
For example, our bySeries comparator can be written more concisely as follows:
void main() {
List<CollectibleCard> cards = Arrays.asList(
new CollectibleCard("Brilliant Dragon", "Animals", 3),
new CollectibleCard("Speedy Vespa Jet", "Vehicles", 1),
new CollectibleCard("Beginner Amoeba", "Animals", 1),
new CollectibleCard("Magnificent Seahorse", "Animals", 2),
new CollectibleCard("Fast Flash", "Vehicles", 2));
IO.println("Before sorting:");
cards.forEach(IO::println);
// Collections.sort provides a version
// that accepts a Comparator.
Comparator<CollectibleCard> bySeries =
Comparator.comparing(CollectibleCard::getSeries);
Collections.sort(cards, bySeries);
IO.println();
IO.println("After sorting:");
cards.forEach(IO::println);
}
class CollectibleCard implements Comparable<CollectibleCard> {
private String name;
private String series;
private int identifier;
public CollectibleCard(String name, String series, int identifier) {
this.name = name;
this.series = series;
this.identifier = identifier;
}
public String getSeries() {
return series;
}
@Override
public int compareTo(CollectibleCard other) {
int seriesComparison = this.series.compareTo(other.series);
if (seriesComparison != 0) {
return seriesComparison;
}
return Integer.compare(this.identifier, other.identifier);
}
@Override
public String toString() {
return "Card: " + name + " (Series: " + series + ", #" + identifier + ")";
}
}
The method Comparator.thenComparing() combines two comparators into one.
Objects are first compared using the first comparator.
If the first comparison yields 0, the second comparator is used.
For example, the compareTo() method of CollectibleCard can be implemented in a more object-oriented style as follows:
@Override
public int compareTo(CollectibleCard other) {
// Compare cards by series.
Comparator<CollectibleCard> bySeries = Comparator.comparing(c -> c.series);
// Compare cards by identifier.
Comparator<CollectibleCard> byIdentifier = Comparator.comparing(c -> c.identifier);
// First compare by series,
// then by identifier.
Comparator<CollectibleCard> comparison = bySeries.thenComparing(byIdentifier);
return comparison.compare(this, other);
}
Comparator.naturalOrder() returns a comparator that sorts objects according to their natural ordering.
In other words, it allows us to treat the compareTo implementation of a Comparable object as a comparator object.
For example, a comparator corresponding to the normal alphabetical ordering of strings can be created as follows:
void main() {
List<String> strings = new ArrayList<>(List.of("Denis", "Antti-Jussi", "Karri", "Rauli", "Sami"));
Comparator<String> alphabeticalOrder = Comparator.naturalOrder();
Collections.sort(strings, alphabeticalOrder);
IO.println(strings);
}
Comparator.reversed() creates a new comparator with the opposite ordering.
This makes it easy, for example, to sort strings in reverse alphabetical order.
void main() {
List<String> strings = new ArrayList<>(List.of("Denis", "Antti-Jussi", "Karri", "Rauli", "Sami"));
Comparator<String> alphabeticalOrder = Comparator.naturalOrder();
Comparator<String> reverseAlphabeticalOrder = alphabeticalOrder.reversed();
Collections.sort(strings, reverseAlphabeticalOrder);
IO.println(strings);
}
By default, many comparators do not handle null references.
This can lead to exceptions and unexpected behavior.
For example, even the natural ordering of Java String objects cannot handle a null value.
void main() {
String[] strings = {"Programming 1", null, "Programming 2" };
Arrays.sort(strings);
IO.println(Arrays.toString(strings));
}
java.lang.NullPointerException: Cannot invoke "java.lang.Comparable.compareTo(Object)" because "a[runHi]" is null
Comparator.nullsFirst() and Comparator.nullsLast() help in such situations.
They take an existing comparator and return a new comparator that can safely handle null references.
As their names suggest
nullsFirst() places null values before all other values and
nullsLast() places null values after all other values.
void main() {
String[] strings = {"Programming 1", null, "Programming 2" };
Comparator<String> alphabeticalOrder = Comparator.naturalOrder();
Comparator<String> nullsFirst = Comparator.nullsFirst(alphabeticalOrder);
Arrays.sort(strings, nullsFirst);
IO.println(Arrays.toString(strings));
Comparator<String> nullsLast = Comparator.nullsLast(alphabeticalOrder);
Arrays.sort(strings, nullsLast);
IO.println(Arrays.toString(strings));
}
By combining different comparator methods, it is possible to create very sophisticated comparison logic without writing explicit conditional statements.
void main() {
List<String> names = Arrays.asList("Ville", "Bob", "Aino", "Matti", null);
// Build a more complex comparator:
//
// 1. Put null values last.
// 2. Sort by length.
// 3. If lengths are equal,
// use alphabetical ordering.
Comparator<String> comparator = Comparator.nullsLast(
Comparator.comparingInt(String::length)
.thenComparing(Comparator.naturalOrder())
);
names.sort(comparator);
IO.println(names);
}
Extend the CollectibleCard class
by adding an attribute String rarity. The rarity of a collectible card can be one of the following values (from least rare to most rare):
C, U, R, RR, RRR, SR, AR, SAR, UR.
Write a comparator that sorts the cards in a list according to their rarity. You can use the following card collection to test your code:
Example list of collectible cards
List<CollectibleCard> cards = new ArrayList<>(List.of(
new CollectibleCard("Lost Semicolon", "Code Jungle", 101, "C"),
new CollectibleCard("Infinite Loop", "Code Jungle", 102, "U"),
new CollectibleCard("Bug Hunter", "Code Jungle", 103, "R"),
new CollectibleCard("Spaghetti Code Monster", "Code Jungle", 104, "RR"),
new CollectibleCard("Overclocked Processor", "Code Jungle", 105, "SR"),
new CollectibleCard("Holy Stack Overflow", "Code Jungle", 106, "RRR"),
new CollectibleCard("Null Pointer Ninja", "Code Jungle", 107, "U"),
new CollectibleCard("Blue Screen of Death", "Code Jungle", 108, "AR"),
new CollectibleCard("Student Card", "Campus Saga", 201, "C"),
new CollectibleCard("Sleepy Lecturer", "Campus Saga", 202, "C"),
new CollectibleCard("Overall Party", "Campus Saga", 203, "U"),
new CollectibleCard("Overachiever", "Campus Saga", 204, "R"),
new CollectibleCard("Free Bucket", "Campus Saga", 205, "SAR"),
new CollectibleCard("Late Submission", "Campus Saga", 206, "RR"),
new CollectibleCard("Academic Quarter", "Campus Saga", 207, "SR"),
new CollectibleCard("Thesis Anxiety", "Campus Saga", 208, "AR"),
new CollectibleCard("Semma Pancake", "Campus Saga", 209, "UR"),
new CollectibleCard("Angry Moose", "Finnish Myths", 301, "C"),
new CollectibleCard("Eternal November", "Finnish Myths", 302, "RR"),
new CollectibleCard("Sauna Gollum", "Finnish Myths", 303, "SR"),
new CollectibleCard("Salmiakki Rain", "Finnish Myths", 304, "U"),
new CollectibleCard("Väinämöinen's Kantele", "Finnish Myths", 305, "SAR"),
new CollectibleCard("Sisu", "Finnish Myths", 306, "RRR"),
new CollectibleCard("Laser Sauna Ladle", "Finnish Myths", 307, "UR"),
new CollectibleCard("Market Square Police Officer", "Finnish Myths", 308, "R")
));
Write a main() program that sorts and prints the collectible cards by rarity (most common cards first, rarest cards last).
Cards whose rarity is null or some value other than those listed above must be placed at the beginning of the list.
Unused Parameters
In user-interface programming, it is common to encounter situations where a method definition requires a parameter even though the implementation does not actually need it. A typical example is an event listener. The interface requires an event object to be accepted as a parameter, even though the event data itself may not be used.
button.setOnAction(event -> {
IO.println("Button clicked!");
});
An IDE may warn that the parameter event is never used.
Such warnings are normally helpful, but in this situation it is not a mistake.
Since the parameter cannot simply be omitted, Java allows it to be written as _.
Starting from Java 22, this is an official language feature called an unnamed variable.
button.setOnAction(_ -> {
// This event listener does not
// need the event information,
// so the parameter can be
// discarded using "_".
IO.println("Button clicked!");
});
This explicitly communicates that the parameter value is not needed.
A parameter declared using _ cannot be referenced later in the code, and any "parameter is never used" warning disappears.
A similar convention exists in several other programming languages, such as C#. In Java, however, it is no longer merely a convention but an official language feature.
Processing Collections: Stream API
Learning Objectives
- Understand the difference between declarative and imperative programming when processing collections
- Be familiar with the core concepts of the Stream API (intermediate and terminal operations)
- Know how to use streams to filter, transform, and sort collections
- Be able to use the
Optionaltype when dealing with potentially missing values - Be familiar with primitive streams such as
IntStreamandDoubleStream
So far, we have used loops to process collections. For example, if we want to calculate the sum of all even elements in a list, we would typically write something like this:
void main() {
List<Integer> numbers = List.of(508, 18, 17, -148, 67, 42, -41);
int sum = 0;
for (int number : numbers) {
if (number % 2 == 0) {
sum += number;
}
}
IO.println("Sum: " + sum);
}
This programming style is called imperative programming. In imperative programming, we describe step by step what the computer must do in order to reach a result that we already know we want.
In data processing, however, it is often clearer to describe what kind of result we want rather than specifying the exact execution steps. This approach is known as declarative programming. Java's Stream API provides tools for this by utilizing lambda expressions. Using streams, we can replace the loop shown above with a single line:
void main() {
List<Integer> numbers = List.of(508, 18, 17, -148, 67, 42, -41);
int sum = numbers.stream().filter(i -> i % 2 == 0).mapToInt(Integer::intValue).sum();
IO.println("Sum: " + sum);
}
Basic Stream Operation
Let's take a closer look at the previous example. The statement consists of four separate parts:
numbers // Collection to be processed
.stream() // 1. Convert to a stream
.filter(i -> i % 2 == 0) // 2. Filter
.mapToInt(Integer::intValue) // 3. Convert to primitive type
.sum(); // 4. Compute the result
Let's examine each step.
1. Converting a Collection into a Stream
Every Java collection provides a stream method, which returns a Stream<T> object—that is, a stream
(JavaDoc).
A stream can be thought of as a conveyor belt or machine that takes a collection and produces one element at a time as a data flow.
2. The filter Function
The stream method filter executes the supplied lambda expression for every element.
If the lambda returns true, the element continues through the stream.
If it returns false, the element is removed from the stream.
In other words, filter acts as a filter that either lets an element pass through or filters it out based on a lambda expression.
3. The map Function
One of the most important tools in the Stream API is mapping, or transformation.
These methods usually begin with the word map.
They take one element at a time and transform it into something else.
For example, mapToInt transforms each element into an int using a supplied function.
In this example, we use the method reference
Integer::intValue
which converts an Integer object into a primitive integer.
We need this step because a generic Stream<T> cannot contain primitive types such as int.
After calling mapToInt, the stream becomes an IntStream.
(JavaDoc).
IntStream is optimized for integer processing and provides convenient statistical methods such as sum().
4. Computing a Value
At the end of a stream pipeline, we always call some kind of terminal operation.
A terminal operation receives the elements that reach the end of the data flow and returns the result in a desired form (for example, a sum or a list).
In this example, we use sum(), which adds the numbers together and returns a single result.
Using Streams
Everything that can be done with streams could also be written using ordinary loops. However, by combining different Stream API operations, we often get concise solutions to problems that would otherwise require several lines of imperative code.
Creating Streams
The most common way to create a stream is directly from a collection.
Every class implementing the Collection interface provides a stream method.
void main() {
List<String> fruits = List.of("apple", "pear", "orange");
Map<String, Integer> populations = Map.of(
"Helsinki", 695526,
"Tampere", 263526,
"Jyväskylä", 149967
);
Set<String> carBrands = Set.of("BMW", "Audi", "Hyundai", "Volvo");
Stream<String> fruitsStream = fruits.stream();
Stream<Map.Entry<String, Integer>> populationsStream = populations.entrySet().stream();
Stream<String> carBrandsStream = carBrands.stream();
IO.println("Fruits without the letter p: " + fruitsStream.filter(f -> !f.contains("p")).toList());
IO.println("City with the largest population: " + populationsStream.max(Comparator.comparing(Map.Entry::getValue)).get().getKey());
IO.println("Car brand names combined: " + carBrandsStream.reduce("", (previous, next) -> previous + next));
}
Streams can also be created from arrays using Arrays.stream.
void main() {
int[] grades = {5, 1, 2, 3, 4, 5, 2, 5, 5, 4};
String[] teachers = {"Denis", "Antti-Jussi", "Sami", "Karri"};
IntStream gradesStream = Arrays.stream(grades);
Stream<String> teachersStream = Arrays.stream(teachers);
IO.println("Average grade: " + gradesStream.average().getAsDouble());
IO.println("Teacher with the longest first name: " + teachersStream.max(Comparator.comparing(String::length)).get());
}
It is worth mentioning that Java provides special stream types for primitive data types
IntStream,
DoubleStream,
LongStream, and so on.
These specialized streams provide statistical methods such as
max,
min,
average,
sum.
For collections, primitive values are wrapped in wrapper classes, resulting in stream types such as
Stream<Integer>, Stream<Double> or Stream<Long>
The Stream class provides methods such as mapToInt, mapToDouble()
for converting a stream into its primitive counterpart.
We can also create streams that produce infinitely many values.
For example, Stream.generate repeatedly calls a supplied function.
In such cases, it is important to use limiting operations such as limit.
void main() {
Stream<String> hashes = Stream.generate(() -> "#");
List<String> tenHashes = hashes.limit(10).toList();
IO.println(tenHashes);
}
Intermediate Stream Operations
All stream methods that return another Stream object are called intermediate operations.
They are used to modify and filter the elements flowing through the stream.
Imagine that we are maintaining purchase records for a store. We want to determine the average price of purchases made in September.
public class PurchaseEvent {
private double price;
private LocalDate date;
}
Rather than writing loops and if statements, we can build the required result step by step using stream operations.
Let's begin by including only purchases made in September.
The filter method removes elements from the stream according to a boolean condition.
void main() {
List<PurchaseEvent> purchaseEvents = List.of(
new PurchaseEvent(100.0, LocalDate.of(2025, Month.JANUARY, 2)),
new PurchaseEvent(21.5, LocalDate.of(2025, Month.JULY, 3)),
new PurchaseEvent(12.0, LocalDate.of(2025, Month.SEPTEMBER, 1)),
new PurchaseEvent(5.25, LocalDate.of(2025, Month.SEPTEMBER, 12)),
new PurchaseEvent(245.0, LocalDate.of(2025, Month.SEPTEMBER, 21)),
new PurchaseEvent(342.0, LocalDate.of(2025, Month.OCTOBER, 2))
);
Stream<PurchaseEvent> septemberOnly =
purchaseEvents.stream()
.filter(p -> p.getDate().getMonth() == Month.SEPTEMBER);
septemberOnly.forEach(IO::println);
}
Now that we have only September purchases, we want to calculate their average price.
An average can only be calculated from numbers, whereas the stream currently contains PurchaseEvent objects.
We can use the stream method map, which transforms each element according to a given mapping function.
In our case, we only need to retrieve the price attribute from each PurchaseEvent.
void main() {
List<PurchaseEvent> purchaseEvents = List.of(
new PurchaseEvent(100.0, LocalDate.of(2025, Month.JANUARY, 2)),
new PurchaseEvent(21.5, LocalDate.of(2025, Month.JULY, 3)),
new PurchaseEvent(12.0, LocalDate.of(2025, Month.SEPTEMBER, 1)),
new PurchaseEvent(5.25, LocalDate.of(2025, Month.SEPTEMBER, 12)),
new PurchaseEvent(245.0, LocalDate.of(2025, Month.SEPTEMBER, 21)),
new PurchaseEvent(342.0, LocalDate.of(2025, Month.OCTOBER, 2))
);
Stream<Double> septemberPrices =
purchaseEvents.stream()
.filter(p -> p.getDate().getMonth() == Month.SEPTEMBER)
.map(p -> p.getPrice());
septemberPrices.forEach(IO::println);
}
To make the calculation of averages easier, we can convert the values into primitive double values using mapToDouble.
void main() {
List<PurchaseEvent> purchaseEvents = List.of(
new PurchaseEvent(100.0, LocalDate.of(2025, Month.JANUARY, 2)),
new PurchaseEvent(21.5, LocalDate.of(2025, Month.JULY, 3)),
new PurchaseEvent(12.0, LocalDate.of(2025, Month.SEPTEMBER, 1)),
new PurchaseEvent(5.25, LocalDate.of(2025, Month.SEPTEMBER, 12)),
new PurchaseEvent(245.0, LocalDate.of(2025, Month.SEPTEMBER, 21)),
new PurchaseEvent(342.0, LocalDate.of(2025, Month.OCTOBER, 2))
);
DoubleStream septemberPrices =
purchaseEvents.stream()
.filter(p -> p.getDate().getMonth() == Month.SEPTEMBER)
.map(p -> p.getPrice())
.mapToDouble(d -> d.doubleValue());
septemberPrices.forEach(IO::println);
}
DoubleStream already provides a built-in average method that calculates the average value of all elements in the stream.
void main() {
List<PurchaseEvent> purchaseEvents = List.of(
new PurchaseEvent(100.0, LocalDate.of(2025, Month.JANUARY, 2)),
new PurchaseEvent(21.5, LocalDate.of(2025, Month.JULY, 3)),
new PurchaseEvent(12.0, LocalDate.of(2025, Month.SEPTEMBER, 1)),
new PurchaseEvent(5.25, LocalDate.of(2025, Month.SEPTEMBER, 12)),
new PurchaseEvent(245.0, LocalDate.of(2025, Month.SEPTEMBER, 21)),
new PurchaseEvent(342.0, LocalDate.of(2025, Month.OCTOBER, 2))
);
OptionalDouble septemberAverage =
purchaseEvents.stream()
.filter(p -> p.getDate().getMonth() == Month.SEPTEMBER)
.map(p -> p.getPrice())
.mapToDouble(d -> d.doubleValue())
.average();
IO.println(septemberAverage);
}
Notice that average does not return a double directly.
Instead, it returns an OptionalDouble.
This is because the stream may be empty—for example, there might not be any September purchases at all—and in that situation an average cannot be calculated.
We will return to this topic shortly.
Terminal Stream Operations
All stream methods that return something other than a new stream are called terminal operations. Terminal operations typically process all elements remaining in the stream and produce either a value or a side effect.
One common terminal operation is collecting the elements into a collection.
For example, toList gathers all stream elements into a list and toArray gathers them into an array.
void main() {
List<Integer> grades = List.of(1, 4, 5, -1, 0, 15, 2, 4, 5);
List<Integer> validGrades = grades.stream()
.filter(i -> 1 <= i && i <= 5)
.sorted()
.toList();
int[] validGradesArray = grades.stream()
.filter(i -> 1 <= i && i <= 5)
.mapToInt(i -> i.intValue())
.sorted()
.toArray();
IO.println(validGrades);
IO.println(Arrays.toString(validGradesArray));
}
Notice that after a terminal operation, the stream is considered consumed. A consumed stream cannot normally be used again. Trying to reuse it causes an error.
void main() {
List<Integer> grades = List.of(1, 4, 5, -1, 0, 15, 2, 4, 5);
Stream<Integer> gradesStream = grades.stream()
.filter(i -> 1 <= i && i <= 5)
.sorted();
// toList() consumes the stream
List<Integer> gradesList = gradesStream.toList();
// ERROR: attempting to reuse a consumed stream
long gradeCount = gradesStream.count();
}
java.lang.IllegalStateException: stream has already been operated upon or closed
Like collections, streams also provide a forEach method that can execute arbitrary code for every element.
void main() {
IntStream.range(0, 10) // Integers 0–9
.filter(i -> i % 2 == 1) // Keep only odd numbers
.forEach(IO::println); // Print each number
}
Streams also include helper functions for common tasks.
For example, the methods min and max return the smallest and largest element in a stream.
Both methods take a Comparator as an argument.
void main() {
List<String> teachers = List.of("Denis", "Antti-Jussi", "Sami", "Karri");
Optional<String> longestName = teachers.stream().max(Comparator.comparing(String::length));
Optional<String> shortestName = teachers.stream().min(Comparator.comparing(String::length));
IO.println("Longest: " + longestName);
IO.println("Shortest: " + shortestName);
}
Notice that max, min, and many other terminal operations do not return values directly.
Instead, they return an Optional<T> object.
(JavaDoc).
This type represents a value that may or may not exist.
For example, if a stream contains no elements, or if a terminal operation is otherwise unable to produce a result, it returns Optional.empty to indicate that the computation failed.
void main() {
List<String> teachers = List.of("Denis", "Antti-Jussi", "Sami", "Karri");
Optional<String> longestName =
teachers.stream()
.filter(s -> s.startsWith("V"))
.max(Comparator.comparing(String::length));
IO.println("Longest: " + longestName);
}
Before the returned value can be used, we should first check whether the Optional<T> actually contains a value.
This can be done, for example, using the isPresent method.
Once we know that a value exists, it can be retrieved with get.
void main() {
List<String> teachers = List.of("Denis", "Antti-Jussi", "Sami", "Karri");
Optional<String> longestName = teachers.stream()
.max(Comparator.comparing(String::length));
if (longestName.isPresent()) {
String name = longestName.get();
IO.println("Longest: " + name);
} else {
IO.println("No names matched the criteria");
}
}
It is worth mentioning that Optional<T> provides many additional helper methods that often eliminate the need for explicit if statements.
Let's return briefly to streams.
Streams are very convenient for searching values in collections.
The method findFirst returns the first element that reaches the end of the data flow.
For example, suppose we want to find the first purchase event in an inventory application that occurred in September and had a price greater than €100.
void main() {
List<PurchaseEvent> purchaseEvents = List.of(
new PurchaseEvent(100.0, LocalDate.of(2025, Month.JANUARY, 2)),
new PurchaseEvent(21.5, LocalDate.of(2025, Month.JULY, 3)),
new PurchaseEvent(12.0, LocalDate.of(2025, Month.SEPTEMBER, 1)),
new PurchaseEvent(5.25, LocalDate.of(2025, Month.SEPTEMBER, 12)),
new PurchaseEvent(245.0, LocalDate.of(2025, Month.SEPTEMBER, 21)),
new PurchaseEvent(342.0, LocalDate.of(2025, Month.OCTOBER, 2))
);
Optional<PurchaseEvent> event =
purchaseEvents.stream()
.filter(p -> p.getDate().getMonth() == Month.SEPTEMBER)
.filter(p -> p.getPrice() > 100.0)
.findFirst();
if (event.isPresent()) {
IO.println(event.get());
} else {
IO.println("Event not found");
}
}
Finally, streams also provide a number of statistical operations.
For example, the count method mentioned earlier returns the number of elements in the stream as a long.
In addition, the primitive stream types IntStream, DoubleStream, and LongStream provide statistical methods such as:
sum– calculates the sum of all numbersmin/max– finds the smallest or largest valueaverage– calculates the arithmetic meansummaryStatistics– calculates the sum, minimum, maximum, and average simultaneously
void main() {
IntStream numbers = new Random().ints(20, 0, 100);
IO.println(numbers.summaryStatistics());
}
Exercises
Assume there is a class Song that represents a single musical track.
A song has a name, a genre, and a duration in seconds:
class Song {
String name;
String genre;
int durationInSeconds;
}
Add the necessary visibility modifiers, a constructor, the required getter methods, and an appropriate implementation of the toString() method.
Create a function createPlaylist(songs, genre, numberOfSongs) that returns at most the number of songs specified by the numberOfSongs parameter, where the song genre matches the given genre parameter. The songs must be sorted by duration from shortest to longest.
You can use the following sample list to test your code:
Example list of songs
List<Song> songList = List.of(
new Song("Bohemian Rhapsody", "Rock", 354),
new Song("Levitating", "Pop", 203),
new Song("Sandstorm", "Electronic", 225),
new Song("Paranoid", "Metal", 168),
new Song("Toxic", "Pop", 198),
new Song("Master of Puppets", "Metal", 515),
new Song("Cha Cha Cha", "Pop", 175),
new Song("Hotel California", "Rock", 390),
new Song("Stay", "Pop", 141),
new Song("Enter Sandman", "Metal", 331),
new Song("Bad Romance", "Pop", 295),
new Song("Midnight City", "Electronic", 243),
new Song("Billie Jean", "Pop", 294),
new Song("Hard Rock Hallelujah", "Metal", 247),
new Song("Thriller", "Pop", 357),
new Song("As It Was", "Pop", 167),
new Song("Paint It, Black", "Rock", 202),
new Song("Hollywood Hills", "Rock", 210),
new Song("Get Lucky", "Electronic", 369),
new Song("Shake It Off", "Pop", 219),
new Song("Ace of Spades", "Metal", 169),
new Song("Rolling in the Deep", "Pop", 228),
new Song("Sweet Child O' Mine", "Rock", 356),
new Song("Borderline", "Pop", 210),
new Song("Back in Black", "Rock", 255),
new Song("Shape of You", "Pop", 233),
new Song("Fear of the Dark", "Metal", 438),
new Song("Blinding Lights", "Pop", 200),
new Song("Stairway to Heaven", "Rock", 482),
new Song("Uptown Funk", "Pop", 269),
new Song("Smells Like Teen Spirit", "Rock", 301),
new Song("Short Pop Song", "Pop", 120)
);
Do not use loops. Implement createPlaylist using streams.
Hint
You may need at least the following Stream methods:
filter(): filters elementssorted(): sorts elementslimit(): limits the number of elementstoList(): collects the elements into a list
Create a function double average(int[] numbers, int minimum, int maximum). The function calculates the average of the numbers given in the array according to the following rules:
- If an element is less than or equal to
minimum, the element is discarded and is not included in the average. - If an element is greater than or equal to
maximum, that element and all elements after it are discarded.
Example:
IO.println(average(new int[] { -5, 1, -4, 0, 98 }, -7, 99));
IO.println(average(new int[] { 11, 4, 2, 6, 99, 12, 0, -3 }, 3, 99));
IO.println(average(new int[] { 99, 1, 2, 3 }, 0, 99));
18.0
7.0
0.0
The first call returns 18.0 because the entire dataset falls between the minimum and maximum bounds.
The second call returns 7.0 because only the values 11, 4, and 6 are included in the average: the value 2 is smaller than the minimum, and all values starting from 99 are discarded.
If the average cannot be calculated, the function returns the value of the minimum parameter.
Do not use loops. Implement the function using streams.
Hint
Study the IntStream type
(JavaDoc)
and its methods. You may find at least the following useful:
filter(): removes elements from the streamtakeWhile(): takes elements from the stream as long as the condition is true; as soon as the condition becomes false, stream processing stops there (like a "tap" being turned off)average(): calculates the average
Note that average() returns an OptionalDouble object
(JavaDoc).
The object contains an orElse() method that allows you to return either the calculated value or an alternative default value.
Exception Handling
Learning Objectives
- Understand what an exception is and how it differs from the normal flow of program execution.
- Know the difference between checked and unchecked exceptions.
- Be able to handle exceptions using the
try-catch-finallystructure. - Be able to throw exceptions (
throw) and declare them in method signatures (throws). - Understand the benefits of exceptions for code readability and error handling.
- Be able to create custom exception classes.
An exception (short for exceptional event) is a situation that occurs during program execution and interrupts the normal flow of instructions. Exceptions may occur, for example, in the following situations:
- The user provides invalid input (for example, text when a number is expected).
- The program attempts to read a file that does not exist.
- A network or database connection is lost during execution.
- A division by zero occurs.
- A list or array index outside the valid range is accessed.
- A method is called through a reference that is
null.
Java provides a built-in exception handling mechanism that allows such error situations to be handled in a controlled manner. Using this mechanism, a programmer can define how a program should react to different kinds of errors without causing the entire application to crash.
Throwing and Catching Exceptions
Exception handling in Java is based on three main concepts:
- Throwing exceptions: When an error occurs, an exception object is created either by the program itself or by the JVM. The JVM then interrupts the normal execution flow and begins searching the call stack for a suitable handler.
- Catching exceptions: The programmer can define code blocks that handle specific exceptions using a
try-catchstructure. - Final cleanup: A
finallyblock is executed regardless of whether an exception occurred, typically to release resources or restore program state.
We will return to concrete examples shortly, but let us first examine how the mechanism works at a higher level.
When an error occurs during the execution of a method, the method creates an exception object describing the error and passes it to the runtime system. The exception object contains information such as the type of the exception and the state of the program at the moment the error occurred. Creating and passing this exception object to the runtime system is called throwing an exception.
Once an exception has been thrown, the runtime system begins searching the call stack for a suitable exception handler in the reverse order of method calls. A handler is considered suitable if it can handle the type of exception that was thrown. If a suitable handler is found, the exception is delivered to it. At that point, the exception is said to be caught.
If the runtime system examines the entire call stack without finding a suitable handler, the thread in which the error occurred terminates. If that thread happens to be the program's main thread, the entire program crashes.
The following diagram roughly illustrates the process of throwing and catching an exception.
Assume that main() calls a(), which calls b(), which in turn calls c().
The following happens:
- Method
c()throws an exception, perhaps while handling a network connection, butc()does not contain a suitable handler. - The runtime system examines the next method on the call stack, which is
b(). - Method
b()also lacks a suitable handler, so the search continues witha(). - Method
a()contains a suitable handler that catches the exception. - Program execution continues after the handler in
a()has completed.
Checked and Unchecked Exceptions
Java divides exceptions into two categories: checked and unchecked exceptions. The distinction comes from the fact that handling of checked exceptions is verified by the compiler, whereas handling of unchecked exceptions is not.
A checked exception represents a problem arising from the environment or program input that can often be handled in a controlled way. Typical examples include file operations, network communication, and database access. For example, opening a file may fail because the file does not exist or because the program lacks permission to read it, even though the code itself is perfectly correct. Examples of checked exceptions include:
IOException, which represents input/output problems such as failed file access.SQLException, which relates to database operations.
Checked exceptions inherit from the class Exception.
When the compiler encounters code that may throw a checked exception, it essentially tells the programmer: "I see that you are doing something potentially risky (such as reading a file). I will not compile your program until you show that you have considered the possible problems."
In this situation, the programmer must either:
- handle the exception using a
try-catchstructure (similar to methoda()in the previous diagram), or - declare with
throwsthat the exception may be passed to the caller (similar to methodsb()andc()in the diagram).
If neither is done, the code will not compile. This requirement is known as the catch or specify requirement.
An unchecked exception is an exception that is not checked at compile time and therefore does not need to be handled or declared. Such exceptions can still occur during program execution. Common unchecked exceptions include:
NullPointerException, caused by attempting to use a reference whose value isnull.IllegalArgumentException, caused by providing an invalid argument to a method.ArrayIndexOutOfBoundsException, caused by accessing an array index outside the valid range.ArithmeticException, caused by arithmetic errors such as division by zero.
Unchecked exceptions inherit from RuntimeException.
Unchecked exceptions typically represent programming mistakes.
Handling them with try-catch is not required and is usually not recommended.
For example, a NullPointerException is often a clear indication of a bug in the program.
Although a NullPointerException can be caught with try-catch, doing so usually only hides the bug rather than fixing it.
Syntax
A try-catch structure looks like this:
try {
// Code block where an exception may occur
} catch (ExceptionType exception) {
// Code block that handles the exception
}
A throws declaration is placed in a method signature:
void method() throws ExceptionType {
// Method implementation that may throw an exception
}
Multiple exceptions can be handled separately:
try {
// Code block where an exception may occur
} catch (ExceptionType1 e1) {
// Handles ExceptionType1
} catch (ExceptionType2 e2) {
// Handles ExceptionType2
}
If a method can throw multiple checked exceptions, they can be declared in the throws clause separated by commas:
void method() throws ExceptionType1, ExceptionType2 {
// Method implementation that may throw multiple exceptions
}
finally
A finally block is used in situations where resources opened during the try block must be released, or the execution environment must reliably be restored regardless of whether the operation succeeds or fails.
Typical examples include closing files, network connections, or other resources.
When try-catch-finally is used, execution proceeds as follows:
- The
tryblock is executed. - If an exception occurs, the appropriate
catchblock is executed. - Finally, the
finallyblock is always executed.
The following example reads a file using the Scanner class.
We will examine the Scanner class in more detail in Chapter 6.5, but briefly: a Scanner object can be used to read text from a file one character or one line at a time.
When using a traditional try-catch structure, a Scanner object does not automatically close itself if an exception occurs, so it must be closed in a finally block.
import java.io.File;
import java.io.FileNotFoundException;
import java.util.Scanner;
void readFile(String path) {
Scanner reader = null;
try {
reader = new Scanner(new File(path));
while (reader.hasNextLine()) {
IO.println(reader.nextLine());
}
} catch (FileNotFoundException e) {
IO.println("File not found: " + path);
} finally {
if (reader != null) {
reader.close();
}
IO.println("File reading operation finished.");
}
}
void main() {
readFile("./main.java");
}
In the example above, finally closes the reader even if file reading is interrupted by an exception.
If the object is not closed, the file handle (the operating-system resource reserved for reading the file) remains open.
Operating systems place strict limits on the number of files that can be open simultaneously by a process or by the system as a whole.
If a program runs in a loop or as a server and repeatedly opens files without closing them, the system's file descriptor table eventually fills up.
When this limit is reached, the program fails with an error such as
IOException: Too many open files
and can no longer open new files.
The finally block ensures that the file reader is closed even if reading fails.
In modern Java, resource management is often handled using the try-with-resources
(JavaDoc)
construct instead of try-catch-finally.
Using that approach, classes such as Scanner can automatically close themselves.
We will see examples of this later after we have learned about the Closeable interface, which allows resources to be declared as closable.
Example of a Checked Exception
Suppose we want to read the contents of a file.
Let's use the modern Java method Files.readString.
Notice that when using this method, a finally block is not required because the method reads the entire file at once and automatically handles closing the file.
However, it is important to remember that not all methods in the Files class behave this way. For example, Files.lines
(JavaDoc)
requires different handling.
The Files.readString method requires a Path object as its argument, so we will also use Path.of, which provides a convenient way to create a Path from a string.
import java.nio.file.Files;
import java.nio.file.Path;
void main() {
String content = readFile("data.txt");
IO.println(content);
}
String readFile(String path) {
return Files.readString(Path.of(path));
}
Our program fails because Files.readString may throw an IOException.
This is a checked exception.
Let's add a throws IOException declaration to the readFile method.
import java.io.IOException;
import java.nio.file.Files;
import java.nio.file.Path;
void main() {
String content = readFile("data.txt");
IO.println(content);
}
String readFile(String path) throws IOException {
return Files.readString(Path.of(path));
}
The program still does not compile correctly because the throws declaration merely passes the exception to the caller (similar to methods b() and c() in the earlier diagram).
Since main() does not contain a suitable handler, the exception ultimately causes the program to fail.
Let's handle the exception in main() using a try-catch block.
import java.io.IOException;
import java.nio.file.Files;
import java.nio.file.Path;
void main() {
try {
String content = readFile("data.txt");
IO.println(content);
} catch (IOException e) {
IO.println("Failed to read file: " + e.getMessage());
}
}
String readFile(String path) throws IOException {
return Files.readString(Path.of(path));
}
Now the program works and prints an error message even if the file data.txt does not exist.
Example of an Unchecked Exception
Suppose we have a class Person with a method getName() that returns a person's name.
Let's create a list of people.
import java.util.List;
public class Person {
private String name;
public Person(String name) {
this.name = name;
}
public String getName() {
return name;
}
}
void main() {
List<Person> people = new ArrayList<>();
people.add(new Person("Antti-Jussi"));
people.add(new Person("Denis"));
}
Next, let's look at how null references can cause NullPointerExceptions.
Suppose that for some reason a null value ends up in the list.
This could happen, for example, if the data were read from an external source and one of the records was incomplete but was still added to the list.
public class Person {
private String name;
public Person(String name) {
this.name = name;
}
public String getName() {
return name;
}
}
void main() {
List<Person> people = new ArrayList<>();
people.add(new Person("Antti-Jussi"));
people.add(new Person("Denis"));
processList(people);
for (Person p : people) {
IO.println(p.getName());
}
}
void processList(List<Person> people) {
// For some reason a null reference
// ends up in the list.
people.add(null);
}
From the point of view of main, this problem is not obvious at all—it is simply doing its own job.
The real issue is that processList causes a side effect by modifying the contents of the list in a way that violates main's assumption that the list contains only Person objects.
The problem becomes visible when main later attempts to call getName() on a null reference.
Of course, this situation could be handled using a try-catch structure or by explicitly checking whether p is null before printing.
However, that approach is rather unpleasant and does not address the root cause of the problem.
Multiple Exception Objects
The same try block may throw multiple types of exceptions.
In that case, each exception type can have its own catch block.
In the example below, Integer.parseInt may throw a NumberFormatException if the input is not a valid number, and the division may throw an ArithmeticException if the divisor is zero.
void main() {
calculate("42", 2); // succeeds
calculate("abc", 2); // NumberFormatException
calculate("42", 0); // ArithmeticException
}
void calculate(String input, int divisor) {
try {
int value = Integer.parseInt(input);
int result = value / divisor;
IO.println("Result: " + result);
} catch (NumberFormatException e) {
IO.println("Invalid number: " + input);
} catch (ArithmeticException e) {
IO.println("Division by zero is not allowed.");
}
}
When exceptions represent different kinds of problems, they should generally be handled differently as well.
Creating Your Own Exception Classes
Sometimes the built-in exception classes do not describe a problem precisely enough. In such cases, you can create your own exception class.
The usual rule is:
- Extend
Exceptionif you want a checked exception. - Extend
RuntimeExceptionif you want an unchecked exception.
Here is an example of a custom checked exception:
class InvalidPasswordException extends Exception {
public InvalidPasswordException(String message) {
super(message);
}
}
void main() {
try {
registerUser("abc");
IO.println("User registered.");
} catch (InvalidPasswordException e) {
IO.println("Registration failed: " + e.getMessage());
}
}
void registerUser(String password) throws InvalidPasswordException {
if (password.length() < 8) {
throw new InvalidPasswordException("Password must contain at least 8 characters.");
}
if (!password.matches(".*[A-Z].*")) { // regular expression checking for an uppercase letter
throw new InvalidPasswordException("Password must contain at least one uppercase letter.");
}
// ... additional checks ...
}
The advantage of custom exceptions is that the error becomes semantically more precise.
The name of the exception immediately reveals which rule was violated.
Of course, password validation could also be implemented with ordinary if statements alone, but exceptions have the advantage that they force the error condition to be handled rather than accidentally ignored.
The Benefits of Exception Handling
Exceptions significantly improve code readability and maintainability.
Before Java, error handling was often implemented using special return values.
For example, C programs commonly returned values such as -1 or NULL to indicate failure.
This approach was error-prone because programmers could easily forget to check the return values.
Error handling also tended to become mixed together with the program's main logic, resulting in so-called "spaghetti code."
openFile;
IF (success) {
determineSize;
IF (sizeKnown) {
allocateMemory;
IF (memoryAvailable) {
readData;
// ... etc ...
} ELSE returnError -2;
} ELSE returnError -3;
} ELSE returnError -5;
With exceptions, the program's happy path becomes much easier to read, and error handling is separated into dedicated blocks.
try {
openFile();
determineSize();
allocateMemory();
readData();
} catch (FileError e) {
handleError();
} catch (MemoryError e) {
handleError();
}
Sometimes an error occurs deep inside a chain of method calls (for example method1 method2 method3 readFile). Without exceptions, every intermediate method would need to inspect return values and forward errors even if it has no idea how to handle them. With exceptions, intermediate methods can essentially duck the exception. The error automatically bubbles upward through the call stack until it reaches a method that is interested in handling it.
Because exceptions are objects, they form inheritance hierarchies.
This enables flexible error handling.
You can catch a very specific exception (such as FileNotFoundException) if you know how to fix that particular problem.
You can also catch a superclass (such as IOException) to handle an entire family of related problems.
A dangerous temptation is to catch a very general superclass such as Exception.
This catches nearly everything, but in reality you often do not know how to handle all possible problems.
For this reason, constructs such as
catch (Exception e)
should generally be avoided unless you genuinely intend to handle every possible exception—including unexpected programming bugs.
Handling exceptions at too general a level can hide programming errors and make debugging considerably more difficult.
Different programming languages take different approaches to exception handling.
For example:
- In Python, all exceptions are effectively unchecked, and programmers are not required to declare them in advance.
- C++ supports exceptions, but their use is generally less common than in Java.
- Rust does not have exceptions at all; instead, error situations are handled through the
Resulttype, which forces programmers to explicitly deal with possible failures.
Parts of this chapter are based on the Java documentation on exceptions.
Exercises
Complete the multiple-choice question in TIM.
Create a main method that repeatedly reads integers from the user in a loop for as long as the user enters a non-empty input. If the user enters something other than an integer, print an error message and continue reading input.
Store the numbers in an array. Finally, print all numbers stored in the array.
Create a program that checks whether the age entered by the user is sufficient for a certain activity, such as obtaining a driver's license.
Create a method isOldEnough that takes an age (int) as a parameter and returns true if the age is sufficient. If the age is below 18, throw an AgeException, which is your own checked exception class. Provide an appropriate exception message, for example
"Age is not sufficient."
As a hint, the method declaration can be:
static boolean isOldEnough(int age) throws AgeException
If the age is negative, throw an AgeException with the message:
"Age cannot be negative."
Remove the if statement and modify the main method so that it compiles and prints the correct output.
External Libraries and Java Project Management Tools
Learning Objectives
- Understand why build tools (such as Maven or Gradle) are needed in modern software development.
- Be familiar with the basic structure of a Maven project and the role of the
pom.xmlfile. - Be able to find and add external dependencies to a project.
- Understand the role of Java packages in organizing code and preventing naming conflicts.
- Be able to use
importstatements to access classes located in different packages.
Suppose you want to write a Java program that retrieves information from the web using an HTTP request. You find the following example online.
import okhttp3.OkHttpClient;
import okhttp3.Request;
import okhttp3.Response;
public class Main {
public static void main(String[] args) throws Exception {
OkHttpClient client = new OkHttpClient();
Request request = new Request.Builder()
.url("https://api.github.com/zen")
.header("User-Agent", "Demo")
.build();
Response response = client.newCall(request).execute();
IO.println(response.body().string());
response.close();
}
}
You try to compile the program, but receive an error message stating that the package okhttp3 cannot be found.
The question is: where should this library come from? Even if you manage to download it as a .jar file, where should that file be placed? And what if the library itself depends on other libraries?
This brings us to the core of modern software development: your own code is often not enough. We frequently need code written by other developers as part of our applications. Code published for others to use is called a library. When you use a library written by someone else, your project depends on it. Such a dependency is called a dependency. In the previous example, the dependency is the OkHttp library.
Dependency management means:
- obtaining the correct version of a library,
- adding it to the project's classpath,
- taking the library's own dependencies into account, and
- preventing version conflicts.
Managing libraries manually is tedious, which is why special tools have been developed to perform this work automatically. These tools are called build tools. The most common build tools in the Java ecosystem are Maven and Gradle. A build tool automates the dependency-management tasks listed above. It can also perform other tasks, such as running automated tests and packaging the finished application for distribution.
Next, we will introduce Maven in IntelliJ IDEA. The same could just as easily be done using Gradle or Ant. Maven is perhaps slightly easier for beginners, so we will use it in these examples.
Analogy: Furniture Designer
Think of your role as a programmer as somewhat similar to that of an IKEA furniture designer. You do not personally build each piece of furniture for the customer. Instead, you create detailed construction plans, assembly instructions (your code), and a parts list describing everything required for assembly. The person who eventually purchases the furniture and assembles it can be compared to the Java Virtual Machine or another runtime environment: they open the package, follow your instructions, execute the steps in order, and bring the furniture to life.
But how do the plans and instructions on the designer's desk become a ready-to-sell package? You cannot simply mail the assembly instructions and expect the customer to search hardware stores for the correct boards, bolts, nuts, and hinges.
Instead, as the designer, you deliver both the plans and the parts list to the factory and packaging department. There, all necessary parts are automatically collected and packaged together with your instructions into a neatly packed box that can easily be transported and sold.
This is where build tools come into the picture.
Build tools such as Maven, Gradle, and the older Apache Ant act as your project's automated factory and packaging department. Their responsibilities can be divided into three categories.
1. Dependency Management (Ordering the Nuts and Bolts)
As a programmer, you do not write everything from scratch yourself.
For example, you might use libraries for database connections or password encryption.
These reusable pieces of code are called dependencies.
A build tool reads the parts list you provide (for example, pom.xml or build.gradle), searches online repositories for the required libraries, downloads them automatically, and adds them to your project.
Dependency management is a central part of modern Java development and helps ensure that the correct library versions are used and that all required components are available.
2. Compilation and Testing (Quality Control)
Before the package is sealed, the build tool verifies that everything works. It compiles your source code into a form the computer can execute and runs any automated tests. In other words, it functions as a quality-control assembly line, checking that no parts are missing, that everything fits together correctly, and that the instructions make sense.
3. Packaging and Distribution (The Flat Cardboard Box)
Once all parts have been gathered and verified, the build tool packages everything into a single, easy-to-handle file, such as a JAR or WAR file (Java Archive).
Finally, the build tool can assist with deployment—that is, delivering the application to the environment where it will actually be used. This may be a cloud service such as AWS or Azure, an application store such as Google Play or the Apple App Store, or an internal company server. In the IKEA analogy, this is the stage where the factory loads the finished boxes onto trucks and delivers them to the warehouse shelves for customers to pick up.
Your First Maven Project
Let's create our first Java project using Maven.
- Start by creating a new project.
- Name the project
MyFirstMavenProject. - In IDEA, select Maven as the Build System.
- Click Create.
If Maven is not available for some reason, install it through IDEA's plugin manager:
File → Settings
→ Plugins
→ Marketplace
→ Search for "Maven"
→ Install
→ Restart IDEA
After a short wait, IDEA should generate a project containing several files and directories. Let's take a closer look. The project structure should look approximately like this:
- The
srcdirectory contains both application code (main/java) and test code (test/java). - The
pom.xmlfile contains Maven's configuration, including dependencies, build settings, and other important information. - IntelliJ will also automatically create a
.gitignorefile and a.mvndirectory, which we will discuss later.
Let's look at the pom.xml file, which is the heart of a Maven project.
Opening the file reveals XML content that defines the structure, dependencies, and configuration of the project.
A simple "vanilla" Java project (one without external libraries) typically contains something similar to the following:
<?xml version="1.0" encoding="UTF-8"?>
<project xmlns="http://maven.apache.org/POM/4.0.0"
xmlns:xsi="http://www.w3.org/2001/XMLSchema-instance"
xsi:schemaLocation="http://maven.apache.org/POM/4.0.0 http://maven.apache.org/xsd/maven-4.0.0.xsd">
<modelVersion>4.0.0</modelVersion>
<groupId>org.example</groupId>
<artifactId>MyFirstMaven</artifactId>
<version>1.0-SNAPSHOT</version>
<properties>
<maven.compiler.source>25</maven.compiler.source>
<maven.compiler.target>25</maven.compiler.target>
<project.build.sourceEncoding>UTF-8</project.build.sourceEncoding>
</properties>
</project>
At the beginning of the file we find standard XML syntax, followed by the elements <groupId>, <artifactId>, and <version>.
Together, these form the identity of the project and uniquely distinguish it from all other Maven projects.
groupIdacts as an organizational identifier. It is often written as a reversed internet domain name, such asfi.jyu.programming.artifactIdis the project name.versionspecifies the project's version number.
Together these three values form the project's unique identifier. At this stage these identifiers are not particularly important, but if you later publish the project to a repository such as Maven Central, they become essential.
The remaining lines define the Java version and the source-code character encoding used by the project.
Open Main.java, add the HTTP request example shown at the beginning of the chapter, and try to compile it.
The project still will not compile because the OkHttp library has not yet been added to the project's dependencies.
Dependencies are added to a Maven project by modifying the pom.xml file.
Locate the <dependencies> element in the file. If it does not yet exist, create both the opening and closing tags.
<dependency>
<groupId>com.squareup.okhttp3</groupId>
<artifactId>okhttp-jvm</artifactId>
<version>5.3.2</version>
</dependency>
IDEA will still complain that the okhttp-jvm package cannot be found.
After adding dependencies, the Maven project must be refreshed. In the project view, right-click the project name, select Maven, and then Sync Project.
After this, IDEA downloads the required OkHttp dependency and any additional dependencies required by the library itself.
Also add package org.example;
to the beginning of your source file so that the code belongs to the correct package.
We will return to the meaning of packages shortly.
Save the file and compile the project. Maven now downloads the OkHttp library from the Maven Central repository and links it to your project. Compilation succeeds, and you should be able to see the results of the HTTP request in the console.
Maven Central
You do not need to invent dependency XML by yourself. One of the most popular repositories for Java libraries is Maven Central, maintained by Sonatype. Maven Central is a public repository from which Java libraries can be downloaded and added directly to a project.
You can search for libraries and their dependencies in Maven Central and copy the required XML directly into your pom.xml file.
Let's search for the OkHttp library we just used.
- Go to the Maven Central website https://central.sonatype.com/.
- Type
"okhttp"into the search box and press Enter. - The first search result points to an older library named
okhttp. - Instead, select the second result, which corresponds to the newer version.
- Under the Snippets section, you will find XML code that can usually be copied directly into
pom.xml. - Copy the XML and paste it inside the
<dependencies>element.
For some libraries, however, the XML cannot be used exactly as provided.
You should always check the library documentation to ensure that the dependency definition is Maven-compatible.
The OkHttp library is one such case: we specifically need the Maven-compatible okhttp-jvm artifact.
In this situation, it is sufficient to change the value of the <artifactId> element to
okhttp-jvm
and the dependency definition is ready to use.
Using classes provided by a dependency also requires adding the appropriate import statements.
For example, to use the OkHttpClient class from the OkHttp library, you must add
import okhttp3.OkHttpClient;
to the beginning of the file.
Sometimes multiple classes are needed from the same package. In such cases, a wildcard import can be used
import okhttp3.*;
which imports all classes from the okhttp3 package.
Third-Party Dependencies
Java projects often make use of third-party libraries that provide ready-made functionality and save development time.
In Maven projects, the Maven Central repository and the user's local repository are available by default.
If you want to use a dependency that is not available in Maven Central, you can add additional repositories to the project by defining them in pom.xml:
<repositories>
<repository>
<id>repository-id</id>
<url>repository-url</url>
<!-- Other settings -->
</repository>
<!-- Other repositories -->
</repositories>
The repositories available to a project can also be viewed in IntelliJ IDEA:
File > Settings
> Build, Execution, Deployment
> Build Tools
> Maven
> Repositories
Bonus: Where does Maven store libraries?
Maven installs all downloaded dependencies into a local directory.
After installation, those dependencies can be used by any Maven project on the same machine.
This local repository is typically located at .m2/repository
inside the user's home directory.
It is also possible to manually add packages to the local repository and then reference them from pom.xml like any other dependency.
Any JAR file can be installed into the local Maven repository using a command similar to:
mvn install:install-file \
-Dfile=<file-path> \
-DgroupId=<group-id> \
-DartifactId=<artifact-id> \
-Dversion=<version-number> \
-Dpackaging=jar \
-DgeneratePom=true
This requires Maven command-line tools to be installed, so we will not use this approach on this course. However, it is useful to know that such dependencies are then available only on the machine where the manual installation was performed.
A dependency can also be added directly to a project without placing it in the local repository.
This approach allows, for example, a dependency JAR to be stored inside the project directory itself, making it easier to include in version control.
The dependency is declared in pom.xml as usual, but we use the scope value system together with the systemPath setting to specify the path to the local file.
The variable ${project.basedir} refers to the root directory of the project.
In the following example, the dependency is located in the project's lib directory.
<dependencies>
<dependency>
<groupId>organization-id</groupId>
<artifactId>project-id</artifactId>
<version>1.0</version>
<scope>system</scope>
<systemPath>${project.basedir}/lib/file.jar</systemPath>
</dependency>
</dependencies>
Packages in Java
As a Java application grows into a system consisting of many classes, placing all classes into a single directory is no longer sufficient. We need a way to organize related classes into logical groups. This is the purpose of packages. A package is a named collection of classes. It serves both as a logical grouping mechanism and as a technical namespace that prevents naming conflicts.
A class can declare the package to which it belongs at the beginning of the source file:
package fi.jyu.programming;
class User {
// ...
}
The User class now belongs to the package fi.jyu.programming.
Its fully qualified name is fi.jyu.programming.User
Classes in the same package can access one another without using fully qualified names.
They can also use one another without explicit import statements.
package fi.jyu.programming;
class Main {
static void main() {
User user = new User();
// ...
// This also works, but is unnecessary
// because Main and User belong to
// the same package.
fi.jyu.programming.User user2 = new User();
}
}
Packages are directly connected to the project's directory structure.
Each part of a package name corresponds to one directory.
For example, the package org.example
corresponds to the directory structure src/main/java/org/example/Main.java.
This is not merely a recommendation.
The Java compiler requires that the file location matches the package declaration.
Packages are also used when working with external libraries.
When a library is added to a project, its classes reside inside the library's own packages.
Using those classes requires import statements.
For example, the class OkHttpClient belongs to the package okhttp3, so it can be imported as follows
import okhttp3.OkHttpClient;
An import statement does not copy a class into your project.
It merely tells the compiler where the class can be found.
Without an import, the class could only be referenced using its fully qualified name:
okhttp3.OkHttpClient client = new okhttp3.OkHttpClient();
Let's return to the User example.
Suppose the same project also contains another package named com.example.library, which also includes a User class.
package com.example.library;
class User {
// ...
}
Although the project now contains two classes named User, their fully qualified names differ, so no conflict occurs.
Sometimes both User classes may need to be used within the same source file.
In that case, fully qualified names can be used to distinguish between them.
import fi.jyu.programming.User;
import com.example.library.User;
void main() {
fi.jyu.programming.User user1 = new fi.jyu.programming.User();
com.example.library.User user2 = new com.example.library.User();
}
Such situations are relatively uncommon in practice, but they highlight the importance of packages as namespaces.
Package names are usually based on a reversed internet domain name. For example, a University of Jyväskylä project might use a package such as:
fi.jyu.ohj2.myawesomeproject
This convention helps ensure that package names remain globally unique, which is particularly important when libraries are published for use by others.
For very small programs, packages are often unnecessary, and all classes may be placed in the same directory. However, packages are a fundamental part of large Java applications. They help keep code organized and prevent naming conflicts. They also form the foundation of the standardized directory structures used by Java libraries and build tools such as Maven. This structure ensures that development tools and runtime environments can locate classes correctly and use them properly.
In IntelliJ IDEA, packages can be defined conveniently when creating a Maven project. When creating a new project:
- Open Advanced Settings.
- Enter the desired package name into the GroupId field.
IDEA will automatically create the correct directory structure and place Main.java into the package you specified.
Exercises
Create a new Maven project. Set the package name to fi.jyu.username (replace username with your JYU username or another username of your choice).
Name the main class Dependencies. Add the following code to it:
void main() {
JSONObject json = new JSONObject();
json.put("name", "Maija");
json.put("age", 25);
IO.println(json.getString("name"));
IO.println(json.getInt("age"));
}
Now add a dependency to the json artifact in the pom.xml file. Find this library on Maven Central and copy the XML dependency definition into your pom.xml file.
Also add the required import statement at the beginning of the class.
Compile and run the program, and make sure that it prints the expected data.
File Handling
Learning Objectives
- Be able to read and write text files using Java's
Filesclass. - Be able to use the
Scannerclass to read and parse data from files. - Be able to process files line by line using the
Streaminterface. - Know the basics of the JSON file format.
- Be able to use the Jackson library to read and write JSON data.
- Understand how Java records are suitable for modeling data.
File handling always follows the same basic pattern: open a resource, read or write data in a particular format, and close the resource. Java provides several built-in alternatives for this. The choice depends on whether you only need to read data line by line or whether you need to split and parse lines into values (such as numbers), whether you want to process large files efficiently, and what format the data is stored in.
Adding Your Own File to a Project
Suppose we have the following text file:
name,age
Maija,25
Matti,30
The file contains information about people. The first line contains column names, while the following lines contain person data. The values are separated by commas. This file format is called a CSV file (comma-separated values), and it is a very common way of storing tabular data in a text file.
Save such a file as data.csv in the root directory of the project.
To allow IDEA to access the file when running the program, define the project's root directory as the working directory. This can be done via run Edit Configurations.
Select the class containing the main method. In the Working directory field, make sure the directory points to the root of the source code, usually ending in src or src/main/java.
Now we can use the data.csv file in our program.
Processing Files with the Files API
The Files class (more specifically, the API in the java.nio.file package) provides a straightforward way to read an entire file at once when the file size is reasonably small.
You can, for example, read the entire file into memory as a list of lines using Files.readAllLines or as a single string using Files.readString.
If the file contains numbers, dates, or other structured data, those values must still be processed separately.
Let's implement the earlier example using Files.readAllLines. This method reads the entire file into memory as a list of strings, where each string corresponds to one line in the file. We can then iterate through the list and split each line into columns.
import java.io.IOException;
import java.nio.file.Files;
import java.nio.file.Paths;
import java.util.List;
public class FileReader {
public static void main(String[] args) {
try {
List<String> lines = Files.readAllLines(Paths.get("data.csv"));
for (int i = 1; i < lines.size(); i++) {
String line = lines.get(i);
String[] parts = line.split(",");
String name = parts[0];
int age = Integer.parseInt(parts[1]);
IO.println("Name: " + name + ", Age: " + age);
}
} catch (IOException e) {
IO.println("File not found or cannot be read: " + e.getMessage());
} finally {
// Nothing needs to be closed manually because the Files API handles it for us
}
}
}
Using the same approach—processing the entire file at once—you can also write data to a file.
When the entire contents are available as a single string, you can use Files.writeString.
Before writing, you must ensure that the destination directory exists.
Path path = Path.of("data", "result.txt");
Files.createDirectories(path.getParent());
import java.io.IOException;
import java.nio.charset.StandardCharsets;
import java.nio.file.Files;
import java.nio.file.Path;
public class WriteFileWriteString {
public static void main(String[] args) {
Path path = Path.of("data", "result.txt");
try {
Files.createDirectories(path.getParent()); // Make sure the data folder exists
String content = "Hello!\nThis is a new file.\n";
Files.writeString(path, content, StandardCharsets.UTF_8);
IO.println("Written to: " + path.toAbsolutePath());
} catch (IOException e) {
IO.println("Writing failed: " + e.getMessage());
}
}
}
When the data naturally exists as lines, it is often convenient to use Files.write().
import java.io.IOException;
import java.nio.charset.StandardCharsets;
import java.nio.file.Files;
import java.nio.file.Path;
import java.util.List;
public class WriteFileLineByLine {
public static void main(String[] args) {
Path path = Path.of("data", "data.csv");
List<String> lines = List.of(
"name,age",
"Maija,25",
"Matti,30"
);
try {
Files.createDirectories(path.getParent());
Files.write(path, lines, StandardCharsets.UTF_8);
IO.println("Written to: " + path.toAbsolutePath());
} catch (IOException e) {
IO.println("Writing failed: " + e.getMessage());
}
}
}
It is also possible to append text to the end of an existing file. This requires a few extra arguments.
// ...
Path path = Path.of("data", "result.txt");
String line = "A new line appended to the end of the file.\n";
Files.writeString(
path,
line,
StandardCharsets.UTF_8, // UTF-8 encoding
StandardOpenOption.CREATE, // Create a file if it doesn't exists
StandardOpenOption.APPEND // Append to the end of a file
);
// ...
Reading with a Scanner
Scanner is well suited for situations where you want to read text piece by piece: for example, one line at a time, up to the next whitespace, or even the next number.
You can think of a Scanner object as a reading head or cursor that advances whenever methods such as nextLine or next are called.
When there is nothing left to read, hasNext returns false.
Scanner can also read numbers and other primitive types directly (nextInt, nextDouble, etc.), reducing the amount of manual parsing required.
The following example reads a file using a Scanner. Reading is performed line by line, and each line is split into columns.
import java.io.File;
import java.io.FileNotFoundException;
import java.util.Scanner;
public class FileReader {
public static void main(String[] args) {
Scanner scanner = null;
try {
scanner = new Scanner(new File("data.csv"));
// Skip header row
if (scanner.hasNextLine()) {
scanner.nextLine();
}
// Read lines until the end of file
while (scanner.hasNextLine()) {
String line = scanner.nextLine();
String[] parts = line.split(",");
String name = parts[0];
int age = Integer.parseInt(parts[1]);
IO.println("Name: " + name + ", Age: " + age);
}
} catch (FileNotFoundException e) {
IO.println("File not found: " + e.getMessage());
} finally {
// Close the scanner
if (scanner != null) {
scanner.close();
}
}
}
}
Data is not always this nicely formatted. A file might contain numbers separated by spaces, commas, semicolons, or line breaks.
Suppose the file measurements.txt contains:
12 8, 5
-3; 10 7
error 2 1.5 3
You want to read all numeric values regardless of how they are separated.
This is somewhat awkward with the Files API but is easy with Scanner.
Using useDelimiter, you can define which characters act as separators.
For example useDelimiter("[\\s,;]+")
defines spaces, commas, semicolons, and line breaks as delimiters.
Everything between delimiters forms a token, which can be read using next.
import java.io.File;
import java.io.IOException;
import java.util.Locale;
import java.util.Scanner;
public class ReadNumbersWithScanner {
public static void main(String[] args) throws IOException {
double sum = 0.0;
int count = 0;
Scanner sc = new Scanner(new File("measurements.txt"));
try {
sc.useLocale(Locale.US);
sc.useDelimiter("[\\s,;]+");
while (sc.hasNext()) {
if (sc.hasNextDouble()) {
sum += sc.nextDouble();
count++;
} else {
sc.next(); // Skip token which isn't a valid dumber
}
}
} finally {
sc.close();
}
IO.println("Numbers: " + count);
IO.println("Sum: " + sum);
IO.println("Average: " + (count == 0 ? 0 : sum / count));
}
}
A Scanner can only read files; it cannot write to them.
Streams
In addition to collections (see Chapter 6.2), files and other external resources can also be processed using the Stream interface.
Streams are particularly useful when multiple sequential operations are performed on data, such as transformations (map), filtering (filter), and collecting (toList, collect).
The processing is described as a chain that clearly communicates what happens to the data step by step.
Reading a file as a stream typically begins with Files.lines(path).
Unlike readAllLines, which loads the entire file into memory, Files.lines reads lines lazily as the stream is consumed.
This makes it suitable even for large files.
Since the file remains open while reading, the stream must eventually be closed.
Let's start with a simple example that repeats the earlier pattern, but now uses Files.lines and stream processing.
We use the previously learned map operation to transform each row into an array. As the terminal operation, we use forEach, which executes the given lambda expression for each row. Here we parse the rows in the same way as in the earlier examples and finally print the names and ages.
import java.io.IOException;
import java.nio.file.Files;
import java.nio.file.Paths;
public class FileReaderStream {
static void main() {
try {
Files.lines(Paths.get("data.csv"))
.skip(1) // Skip the header row
.map(line -> line.split(",")) // Split the row into columns
.forEach(parts -> {
String name = parts[0]; // First column is the name
int age = Integer.parseInt(parts[1]); // Second column is the age, parse as int
IO.println("Name: " + name + ", Age: " + age);
});
} catch (IOException e) {
IO.println("File not found or cannot be read: " + e.getMessage());
}
}
}
Let's extend the example a little. Filter out people younger than 18 and finally print the names in alphabetical order.
import java.io.IOException;
import java.nio.file.Files;
import java.nio.file.Paths;
import java.util.List;
public class FileReaderStream {
static void main() {
try {
List<String> names = Files.lines(Paths.get("data.csv"))
.skip(1) // Skip the header row
.map(line -> line.split(",")) // Split the row into columns
// HIGHLIGHT_GREEN_BEGIN
.filter(parts -> Integer.parseInt(parts[1]) >= 18) // Filter out people under 18
.map(parts -> parts[0]) // Keep only the name
.sorted() // Sort names alphabetically
.toList(); // Collect results into a list
names.forEach(IO::println); // Print the names
// HIGHLIGHT_GREEN_END
} catch (IOException e) {
IO.println("File not found or cannot be read: " + e.getMessage());
}
}
}
Stream-based processing is very convenient when the processing is relatively simple and progresses linearly. However, it is worth noting that stream-based processing can significantly complicate debugging.
Optional information: More about challenges of stream-based processing
- Single-use nature: A
Streamobject can only be used once, after which it must be closed. If you want to process the same data again, you must create a new stream. - Debugging: Chaining hides intermediate results. If a
maporfilterstep throws an exception, the stack trace tells you which lambda was being executed, but not necessarily which row or intermediate value caused the problem without additional logging or the use of thepeekmethod. - Error handling: Unchecked exceptions inside lambda expressions (for example,
NumberFormatExceptionin a call toInteger.parseInt) must be handled separately because lambda expressions do not allow checked exceptions to be thrown directly. This can make error handling more complicated than in a traditional loop. - Laziness can be surprising: A stream does nothing until a terminal operation (
forEach,toList,collect,count, etc.) is executed. This can be surprising because the code appears to read a file, yet nothing happens if the terminal operation is missing. Likewise, exceptions are not thrown when the file is opened but only when the stream is consumed.
BufferedReader and BufferedWriter
BufferedReader and BufferedWriter are the traditional tools for processing text files when you want to read and write line by line and maintain precise control over the processing loop. They buffer I/O operations, meaning they do not perform a system call for every individual character but instead read and write larger chunks of data. This improves performance, especially when working with large files, and makes processing more predictable. We leave studying these classes as an optional, self-directed exercise.
JSON Files
JSON (JavaScript Object Notation) is a popular data exchange format used extensively in web development. JSON files are text files containing key-value pairs and may contain complex data structures such as arrays and objects.
JSON can contain the following types of values:
- String (
"Maija") - Number (
25) - Boolean (
true/false) - Null (
null) - Array (
[ ... ]) - Object (
{ ... })
For example, the file people.json could look like this:
[
{
"name": "Maija",
"age": 25,
"city": "Jyväskylä"
},
{
"name": "Matti",
"age": 30,
"city": "Tampere"
}
]
Compared to CSV, the advantage of JSON is that fields can be nested.
For example, "city" could itself be an object containing "previous_cities" and "current_city".
Rows are therefore not tied to a single tabular structure.
The disadvantage is that the structure is usually somewhat heavier to read visually compared to CSV. There is also more syntax involved, making it somewhat more difficult to process manually without the help of a library.
Processing JSON Files with the Jackson Library
JSON can of course be processed manually by splitting strings, but in practice this approach is error-prone. Therefore, JSON is usually processed using a dedicated library. One of the most common Java libraries for this purpose is Jackson.
Add the following dependency to your pom.xml file:
<dependency>
<groupId>tools.jackson.core</groupId>
<artifactId>jackson-databind</artifactId>
<version>3.0.4</version>
</dependency>
After adding the dependency, refresh the Maven project.
The following example reads the file people.json into a list of Person objects.
We will explain the code in more detail afterward.
import tools.jackson.core.JacksonException;
import tools.jackson.core.type.TypeReference;
import tools.jackson.databind.ObjectMapper;
import java.nio.file.Path;
import java.util.List;
public class ReadJson {
public static void main(String[] args) {
ObjectMapper mapper = new ObjectMapper();
Path path = Path.of("data", "people.json");
try {
List<Person> people = mapper.readValue(
path.toFile(),
new TypeReference<List<Person>>() {}
);
people.forEach(p ->
IO.println(p.name() + " (" + p.age() + "), " + p.city())
);
} catch (JacksonException je) {
IO.println("Failed to read JSON: " + je.getMessage());
}
}
}
Reading JSON from a file: Reading begins by creating an ObjectMapper object, which is the Jackson library's main tool for converting JSON into Java objects and vice versa.
The readValue method takes a JSON file and information about the type into which the JSON should be converted.
In order for the conversion to be possible, we must model the JSON data using Java objects.
Let's create a Java class Person with fields name, age, and city, matching the fields in the JSON file.
We also create matching getters and setters as well as a no-argument constructor. A class of this form is required by Jackson so that it can create objects from JSON.
public class Person {
private String name;
private int age;
private String city;
public Person() {
}
public void setName(String name) {
this.name = name;
}
public String getName() {
return name;
}
public int getAge() {
return age;
}
public void setAge(int age) {
this.age = age;
}
public void setCity(String city) {
this.city = city;
}
public String getCity() {
return city;
}
}
Reading the file may fail, so the call to readValue() should be wrapped in a try-catch structure.
The Jackson library throws a JacksonException, which is a subclass of IOException.
Writing JSON to a file is slightly easier than reading it.
Writing is performed with the writeValue method, which accepts a file and an object to be stored, and converts the object into JSON format.
In this situation, two different things may fail:
- Creating the directory may fail;
createDirectoriesthrows anIOException. - JSON processing may fail if the file cannot be written, the JSON is invalid, or the type conversion fails;
writeValuethrows aJacksonException.
Both exceptions should be handled separately.
The following example writes a list of people to the file data/people-new.json:
import tools.jackson.databind.ObjectMapper;
import tools.jackson.core.JacksonException;
import java.io.IOException;
import java.nio.file.Files;
import java.nio.file.Path;
import java.util.List;
public class WriteJson {
static void main() {
ObjectMapper mapper = new ObjectMapper();
List<Person> people = List.of(
new Person("Aino", 22, "Turku"),
new Person("Pekka", 41, "Oulu")
);
Path path = Path.of("data", "people-new.json");
try {
Files.createDirectories(path.getParent());
mapper.writeValue(path.toFile(), people);
IO.println("JSON written to: " + path.toAbsolutePath());
} catch (IOException e) {
IO.println("Failed to create directory: " + e.getMessage());
} catch (JacksonException je) {
IO.println("JSON processing failed: " + je.getMessage());
}
}
}
Record Classes for Modeling JSON Data
Let's briefly introduce Java's record feature. A Java record is a special kind of class designed for modeling small, straightforward data structures such as structured JSON data. When you define a record, Java automatically generates a number of common routines for you. You automatically get:
- a constructor that accepts all fields as arguments,
- accessors corresponding to the fields, whose names are simply the field names themselves (for example,
nameinstead ofgetName), - implementations of
equalsandhashCode, - a useful
toStringimplementation.
The components (attributes) of a record are effectively final fields, meaning that records are largely immutable objects.
For this reason, records are a natural match for JSON libraries. A JSON object often corresponds directly to a single "bundle of data" that can be modeled with a record without any additional boilerplate code. Whereas a traditional class typically requires fields, constructors, and getters to be written separately, a record expresses the same idea in a single line.
It is worth noting that methods and validation logic can still be added to a record. However, the primary purpose of a record is to remain small and focused on representing data. If a class begins to accumulate complex behavior or large amounts of mutable state, a regular class is usually a better choice.
Let's define a data type using a record:
public record Person(String name, int age, String city) {}
In this way, the relatively long Person class can be replaced by a single line.
In this particular case, the record provides essentially the same functionality as the traditional class defined earlier.
Exercises
Download the dataset: words.txt
Save the file in your project's working directory as words.txt.
The file contains one word per line. It intentionally contains empty lines, leading/trailing whitespace, duplicate words, and different letter cases (e.g. Java, java, JAVA).
Example from the beginning of the dataset:
Java
python
JAVA
CSharp
java
Create a program that:
- Reads all lines.
- Removes extra whitespace from the words and converts them to lowercase.
Hint:
String.trim()andString.toLowerCase(). - Removes empty lines.
- Removes duplicates. (Hint: the
distinct()method in the Stream API, or aSetcollection.) - Sorts the words alphabetically. (Hint: the
sorted()method in the Stream API, or theCollections.sort()method on aList.) - Writes a new file
output/words-clean.txtcontaining the cleaned word list (one word per line). - Also writes a file
output/report.txtcontaining:- the number of original lines
- the number of unique words after removing empty lines and cleaning the words
- the longest word (if there are several, any one of them is acceptable)
Hint: If you solve the task using the Stream API, you can use the
Stream.max(Comparator) method to find the longest word.
Hint: First create List<String> cleaned = ..., and then use
Files.write(...) to write the results to the two output files.
report.txt should look like this:
Original lines: 1074
Cleaned words: 59
Longest word: binarytree
- Create a new Maven project that uses the Jackson library for processing JSON files.
- Add the required dependency to your
pom.xmlfile. - Download
people.jsonand save it in the same folder as your code. - Create a
Personclass or an equivalent record with the fieldsString name,int age, andString city. - Read the file
people.jsonand convert it into a list ofPersonobjects. - Filter the list so that only people aged 18 or older are included.
- Print their name, age, and city.
Remember to save people.json in the same folder as your code. Then check your run configuration and make sure that the working directory is the same as the folder containing your code so that the file can be found.
You can access the contents of people.json here if necessary:
people.json
[
{ "name": "Maija Laine", "age": 25, "city": "Jyväskylä" },
{ "name": "Matti Virtanen", "age": 30, "city": "Tampere" },
{ "name": "Liisa Niemi", "age": 17, "city": "Helsinki" },
{ "name": "Pekka Korhonen", "age": 41, "city": "Oulu" },
{ "name": "Aino Salmi", "age": 22, "city": "Turku" },
{ "name": "Jari Heikkinen", "age": 19, "city": "Kuopio" },
{ "name": "Sari Lehto", "age": 16, "city": "Lahti" },
{ "name": "Oskari Mäkinen", "age": 28, "city": "Espoo" },
{ "name": "Emilia Ranta", "age": 33, "city": "Vantaa" },
{ "name": "Teemu Koski", "age": 45, "city": "Pori" },
{ "name": "Noora Aalto", "age": 18, "city": "Joensuu" },
{ "name": "Kalle Hämäläinen", "age": 52, "city": "Rovaniemi" }
]
Create a program that reads the file
people.csv
(format: name,age,city) and writes a similar JSON file people.json as the one provided in the previous exercise. If a row is invalid (for example, the age is not a number), skip the row and continue processing.
The output file should look like this. It does not matter if the indentation or line breaks are not exactly the same.
[
{
"name": "Maija Laine",
"age": 25,
"city": "Jyväskylä"
},
{
"name": "Matti Virtanen",
"age": 30,
"city": "Tampere"
},
...
]
Create a simple calculator program that repeatedly asks the user for two numbers and an arithmetic operation, and then prints the result.
The program should work approximately as follows:
Enter an expression in the format <number> <operator> <number>.
Type "exit" to close the program.
> 1 + 1
2.0
> 10 - 1
9.0
> 0.5 * 100
50.0
> 10 / 2
5.0
> 10
Enter an expression in the format <number> <operator> <number>.
> cat
Enter an expression in the format <number> <operator> <number>.
> exit
Program closing.
The program must handle invalid user input so that it does not crash due to incorrect input.
Implement the basic arithmetic operations: addition (+), subtraction (-), multiplication (*), and division (/).
In addition, invent and implement at least two additional operations of your own choice.
Do not use conditional statements to select the arithmetic operation itself. However, you may use conditional statements and try/catch blocks to validate user input.
Hint 1
You may implement the operations as lambda expressions. Use either BiFunction<Double, Double, Double>
(JavaDoc)
or DoubleBinaryOperator
(JavaDoc)
as the type for the lambda expressions.
Hint 2
You may use the Scanner class to read the user's input:
Scanner reader = new Scanner(userInput);
double number1 = reader.nextDouble();
String operation = reader.next();
double number2 = reader.nextDouble();
You may need to add the necessary exception handling.
All Exercises in This Part
Create a program that asks the user for two decimal numbers and an arithmetic operation, and then prints the result as follows:
Number 1 > 12.0
Number 2 > 3.0
Operation (+, -, *, /) > +
12.0 + 3.0 = 15.0
At this stage you do not need to handle invalid input. You may assume that the numbers are always entered as numeric values. The supported operations are addition (+), subtraction (-), multiplication (*) and division (/). You may assume that only these operations are used as input.
Do not use loops or conditional statement. Instead, implement the arithmetic operations as lambda expressions and store them in a lookup structure using the operation symbol as the key.
The program should terminate after displaying the result.
Hint 1
You may use BiFunction<Double, Double, Double>
(See JavaDoc)
or DoubleBinaryOperator
(JavaDoc)
as the type for the lambda expressions.
Hint 2
You may use Map<String, BiFunction<Double, Double, Double>>
or Map<String, DoubleBinaryOperator> as the type of the lookup structure.
You may either choose a specific implementation for the lookup structure or
initialize an immutable lookup structure using the Map.of method:
Map<String, BiFunction<Double, Double, Double>> operations = Map.of(
"+", ...,
"-", ...,
"*", ...,
"/", ...
);
For each ..., simply provide an appropriate lambda expression.
Extend the CollectibleCard class
by adding an attribute String rarity. The rarity of a collectible card can be one of the following values (from least rare to most rare):
C, U, R, RR, RRR, SR, AR, SAR, UR.
Write a comparator that sorts the cards in a list according to their rarity. You can use the following card collection to test your code:
Example list of collectible cards
List<CollectibleCard> cards = new ArrayList<>(List.of(
new CollectibleCard("Lost Semicolon", "Code Jungle", 101, "C"),
new CollectibleCard("Infinite Loop", "Code Jungle", 102, "U"),
new CollectibleCard("Bug Hunter", "Code Jungle", 103, "R"),
new CollectibleCard("Spaghetti Code Monster", "Code Jungle", 104, "RR"),
new CollectibleCard("Overclocked Processor", "Code Jungle", 105, "SR"),
new CollectibleCard("Holy Stack Overflow", "Code Jungle", 106, "RRR"),
new CollectibleCard("Null Pointer Ninja", "Code Jungle", 107, "U"),
new CollectibleCard("Blue Screen of Death", "Code Jungle", 108, "AR"),
new CollectibleCard("Student Card", "Campus Saga", 201, "C"),
new CollectibleCard("Sleepy Lecturer", "Campus Saga", 202, "C"),
new CollectibleCard("Overall Party", "Campus Saga", 203, "U"),
new CollectibleCard("Overachiever", "Campus Saga", 204, "R"),
new CollectibleCard("Free Bucket", "Campus Saga", 205, "SAR"),
new CollectibleCard("Late Submission", "Campus Saga", 206, "RR"),
new CollectibleCard("Academic Quarter", "Campus Saga", 207, "SR"),
new CollectibleCard("Thesis Anxiety", "Campus Saga", 208, "AR"),
new CollectibleCard("Semma Pancake", "Campus Saga", 209, "UR"),
new CollectibleCard("Angry Moose", "Finnish Myths", 301, "C"),
new CollectibleCard("Eternal November", "Finnish Myths", 302, "RR"),
new CollectibleCard("Sauna Gollum", "Finnish Myths", 303, "SR"),
new CollectibleCard("Salmiakki Rain", "Finnish Myths", 304, "U"),
new CollectibleCard("Väinämöinen's Kantele", "Finnish Myths", 305, "SAR"),
new CollectibleCard("Sisu", "Finnish Myths", 306, "RRR"),
new CollectibleCard("Laser Sauna Ladle", "Finnish Myths", 307, "UR"),
new CollectibleCard("Market Square Police Officer", "Finnish Myths", 308, "R")
));
Write a main() program that sorts and prints the collectible cards by rarity (most common cards first, rarest cards last).
Cards whose rarity is null or some value other than those listed above must be placed at the beginning of the list.
Assume there is a class Song that represents a single musical track.
A song has a name, a genre, and a duration in seconds:
class Song {
String name;
String genre;
int durationInSeconds;
}
Add the necessary visibility modifiers, a constructor, the required getter methods, and an appropriate implementation of the toString() method.
Create a function createPlaylist(songs, genre, numberOfSongs) that returns at most the number of songs specified by the numberOfSongs parameter, where the song genre matches the given genre parameter. The songs must be sorted by duration from shortest to longest.
You can use the following sample list to test your code:
Example list of songs
List<Song> songList = List.of(
new Song("Bohemian Rhapsody", "Rock", 354),
new Song("Levitating", "Pop", 203),
new Song("Sandstorm", "Electronic", 225),
new Song("Paranoid", "Metal", 168),
new Song("Toxic", "Pop", 198),
new Song("Master of Puppets", "Metal", 515),
new Song("Cha Cha Cha", "Pop", 175),
new Song("Hotel California", "Rock", 390),
new Song("Stay", "Pop", 141),
new Song("Enter Sandman", "Metal", 331),
new Song("Bad Romance", "Pop", 295),
new Song("Midnight City", "Electronic", 243),
new Song("Billie Jean", "Pop", 294),
new Song("Hard Rock Hallelujah", "Metal", 247),
new Song("Thriller", "Pop", 357),
new Song("As It Was", "Pop", 167),
new Song("Paint It, Black", "Rock", 202),
new Song("Hollywood Hills", "Rock", 210),
new Song("Get Lucky", "Electronic", 369),
new Song("Shake It Off", "Pop", 219),
new Song("Ace of Spades", "Metal", 169),
new Song("Rolling in the Deep", "Pop", 228),
new Song("Sweet Child O' Mine", "Rock", 356),
new Song("Borderline", "Pop", 210),
new Song("Back in Black", "Rock", 255),
new Song("Shape of You", "Pop", 233),
new Song("Fear of the Dark", "Metal", 438),
new Song("Blinding Lights", "Pop", 200),
new Song("Stairway to Heaven", "Rock", 482),
new Song("Uptown Funk", "Pop", 269),
new Song("Smells Like Teen Spirit", "Rock", 301),
new Song("Short Pop Song", "Pop", 120)
);
Do not use loops. Implement createPlaylist using streams.
Hint
You may need at least the following Stream methods:
filter(): filters elementssorted(): sorts elementslimit(): limits the number of elementstoList(): collects the elements into a list
Create a function double average(int[] numbers, int minimum, int maximum). The function calculates the average of the numbers given in the array according to the following rules:
- If an element is less than or equal to
minimum, the element is discarded and is not included in the average. - If an element is greater than or equal to
maximum, that element and all elements after it are discarded.
Example:
IO.println(average(new int[] { -5, 1, -4, 0, 98 }, -7, 99));
IO.println(average(new int[] { 11, 4, 2, 6, 99, 12, 0, -3 }, 3, 99));
IO.println(average(new int[] { 99, 1, 2, 3 }, 0, 99));
18.0
7.0
0.0
The first call returns 18.0 because the entire dataset falls between the minimum and maximum bounds.
The second call returns 7.0 because only the values 11, 4, and 6 are included in the average: the value 2 is smaller than the minimum, and all values starting from 99 are discarded.
If the average cannot be calculated, the function returns the value of the minimum parameter.
Do not use loops. Implement the function using streams.
Hint
Study the IntStream type
(JavaDoc)
and its methods. You may find at least the following useful:
filter(): removes elements from the streamtakeWhile(): takes elements from the stream as long as the condition is true; as soon as the condition becomes false, stream processing stops there (like a "tap" being turned off)average(): calculates the average
Note that average() returns an OptionalDouble object
(JavaDoc).
The object contains an orElse() method that allows you to return either the calculated value or an alternative default value.
Complete the multiple-choice question in TIM.
Create a main method that repeatedly reads integers from the user in a loop for as long as the user enters a non-empty input. If the user enters something other than an integer, print an error message and continue reading input.
Store the numbers in an array. Finally, print all numbers stored in the array.
Create a program that checks whether the age entered by the user is sufficient for a certain activity, such as obtaining a driver's license.
Create a method isOldEnough that takes an age (int) as a parameter and returns true if the age is sufficient. If the age is below 18, throw an AgeException, which is your own checked exception class. Provide an appropriate exception message, for example
"Age is not sufficient."
As a hint, the method declaration can be:
static boolean isOldEnough(int age) throws AgeException
If the age is negative, throw an AgeException with the message:
"Age cannot be negative."
Remove the if statement and modify the main method so that it compiles and prints the correct output.
Create a new Maven project. Set the package name to fi.jyu.username (replace username with your JYU username or another username of your choice).
Name the main class Dependencies. Add the following code to it:
void main() {
JSONObject json = new JSONObject();
json.put("name", "Maija");
json.put("age", 25);
IO.println(json.getString("name"));
IO.println(json.getInt("age"));
}
Now add a dependency to the json artifact in the pom.xml file. Find this library on Maven Central and copy the XML dependency definition into your pom.xml file.
Also add the required import statement at the beginning of the class.
Compile and run the program, and make sure that it prints the expected data.
Download the dataset: words.txt
Save the file in your project's working directory as words.txt.
The file contains one word per line. It intentionally contains empty lines, leading/trailing whitespace, duplicate words, and different letter cases (e.g. Java, java, JAVA).
Example from the beginning of the dataset:
Java
python
JAVA
CSharp
java
Create a program that:
- Reads all lines.
- Removes extra whitespace from the words and converts them to lowercase.
Hint:
String.trim()andString.toLowerCase(). - Removes empty lines.
- Removes duplicates. (Hint: the
distinct()method in the Stream API, or aSetcollection.) - Sorts the words alphabetically. (Hint: the
sorted()method in the Stream API, or theCollections.sort()method on aList.) - Writes a new file
output/words-clean.txtcontaining the cleaned word list (one word per line). - Also writes a file
output/report.txtcontaining:- the number of original lines
- the number of unique words after removing empty lines and cleaning the words
- the longest word (if there are several, any one of them is acceptable)
Hint: If you solve the task using the Stream API, you can use the
Stream.max(Comparator) method to find the longest word.
Hint: First create List<String> cleaned = ..., and then use
Files.write(...) to write the results to the two output files.
report.txt should look like this:
Original lines: 1074
Cleaned words: 59
Longest word: binarytree
- Create a new Maven project that uses the Jackson library for processing JSON files.
- Add the required dependency to your
pom.xmlfile. - Download
people.jsonand save it in the same folder as your code. - Create a
Personclass or an equivalent record with the fieldsString name,int age, andString city. - Read the file
people.jsonand convert it into a list ofPersonobjects. - Filter the list so that only people aged 18 or older are included.
- Print their name, age, and city.
Remember to save people.json in the same folder as your code. Then check your run configuration and make sure that the working directory is the same as the folder containing your code so that the file can be found.
You can access the contents of people.json here if necessary:
people.json
[
{ "name": "Maija Laine", "age": 25, "city": "Jyväskylä" },
{ "name": "Matti Virtanen", "age": 30, "city": "Tampere" },
{ "name": "Liisa Niemi", "age": 17, "city": "Helsinki" },
{ "name": "Pekka Korhonen", "age": 41, "city": "Oulu" },
{ "name": "Aino Salmi", "age": 22, "city": "Turku" },
{ "name": "Jari Heikkinen", "age": 19, "city": "Kuopio" },
{ "name": "Sari Lehto", "age": 16, "city": "Lahti" },
{ "name": "Oskari Mäkinen", "age": 28, "city": "Espoo" },
{ "name": "Emilia Ranta", "age": 33, "city": "Vantaa" },
{ "name": "Teemu Koski", "age": 45, "city": "Pori" },
{ "name": "Noora Aalto", "age": 18, "city": "Joensuu" },
{ "name": "Kalle Hämäläinen", "age": 52, "city": "Rovaniemi" }
]
Create a program that reads the file
people.csv
(format: name,age,city) and writes a similar JSON file people.json as the one provided in the previous exercise. If a row is invalid (for example, the age is not a number), skip the row and continue processing.
The output file should look like this. It does not matter if the indentation or line breaks are not exactly the same.
[
{
"name": "Maija Laine",
"age": 25,
"city": "Jyväskylä"
},
{
"name": "Matti Virtanen",
"age": 30,
"city": "Tampere"
},
...
]
Create a simple calculator program that repeatedly asks the user for two numbers and an arithmetic operation, and then prints the result.
The program should work approximately as follows:
Enter an expression in the format <number> <operator> <number>.
Type "exit" to close the program.
> 1 + 1
2.0
> 10 - 1
9.0
> 0.5 * 100
50.0
> 10 / 2
5.0
> 10
Enter an expression in the format <number> <operator> <number>.
> cat
Enter an expression in the format <number> <operator> <number>.
> exit
Program closing.
The program must handle invalid user input so that it does not crash due to incorrect input.
Implement the basic arithmetic operations: addition (+), subtraction (-), multiplication (*), and division (/).
In addition, invent and implement at least two additional operations of your own choice.
Do not use conditional statements to select the arithmetic operation itself. However, you may use conditional statements and try/catch blocks to validate user input.
Hint 1
You may implement the operations as lambda expressions. Use either BiFunction<Double, Double, Double>
(JavaDoc)
or DoubleBinaryOperator
(JavaDoc)
as the type for the lambda expressions.
Hint 2
You may use the Scanner class to read the user's input:
Scanner reader = new Scanner(userInput);
double number1 = reader.nextDouble();
String operation = reader.next();
double number2 = reader.nextDouble();
You may need to add the necessary exception handling.
JavaFX Part 1: SceneBuilder
Learning objectives
- Be able to create a JavaFX project.
- Understand the principles of building user interfaces using SceneBuilder.
- Be able to create a form that asks the user for information, stores that information in memory, and displays the entered information in the user interface.
- Be able to create a local Git repository for a project with appropriate settings and make commits to the repository.
So far, we have implemented programs that run in a text-based command-line environment. In this part, we take a step toward more visual applications and become familiar with the JavaFX library, which allows us to build graphical user interfaces.
We will use the SceneBuilder tool for visually designing the user interface. At the same time, we will start using version control (Git), which helps us manage our project's source code and prepares us for the first phase of the course project.
During Parts 7 and 8, we will build a simple Todo application. This section contains exercises in which you will learn how to create the same application independently. These chapters provide the understanding of JavaFX that you will need in order to create your own course project during Parts 9–11.
In Part 7, we will implement the following features:
- The user can add a new task.
- The user can view a list of all tasks.
- The user can mark a task as completed.
- The user can delete a task.
- The user can restore a completed task back to an unfinished state.
- Tasks are saved to a file so that they persist after the application is closed.
- Tasks are loaded from the file when the application starts.
By the end of this part, our application will function as follows:
As before, you must complete at least 50% of the exercises in this part. However, for Parts 7 and 8 we strongly recommend completing all exercises, as this will make developing the course project much easier. The bonus exercises remain completely optional.
JavaFX Fundamentals
Learning Objectives
- Understand the structure of a JavaFX application.
So far, we have built command-line applications and mainly printed text to the screen. However, a graphical user interface (GUI) is an essential part of many programs. A graphical user interface allows the user to interact with buttons, menus, and images instead of learning how to type commands in the correct format.
There are several libraries available for creating graphical user interfaces in Java, but JavaFX is perhaps the most modern and versatile of them. JavaFX treats the user interface as a tree-like structure. Every part of a window, such as a button, text element, or layout container, is a node (Node) that belongs to some larger structure. This makes even complex views logical to manage.
In JavaFX, appearance and application logic are separated from one another. The visual layout is defined using FXML, an XML-based file format. Functional logic is written in ordinary Java code. This resembles the way web development separates HTML (structure) from JavaScript (behavior).
JavaFX also has its own implementation of CSS (Cascading Style Sheets), supporting parts of CSS 2.1 and some CSS 3 features. This allows user-interface styling to be implemented in a manner somewhat familiar from web development. However, CSS support is fairly limited, and features such as float, position, and flexbox are not supported. In some cases JavaFX offers its own alternatives, such as VBox and HBox instead of Flexbox. Additionally, the JavaFX community continuously develops open-source libraries that bring some familiar CSS features to JavaFX.
Tutorial: Todo Application
During Parts 7 and 8, we will build a simple Todo application. These chapters include exercises in which you learn to build the same application independently. Together, these chapters provide the JavaFX knowledge required to create your own course project during Parts 9–11.
In Part 7, we will implement the following features:
- The user can add a new task.
- The user can see a list of all tasks.
- The user can mark a task as completed.
- The user can delete a task.
- The user can restore a completed task back to an unfinished state.
- Tasks are saved to a file so they persist after the application is closed.
- Tasks are loaded from a file when the application starts.
By the end of this chapter, our application will function as follows:
The First JavaFX Application
Let's create a new JavaFX project in IDEA. Open IDEA and select:
File → New → Project
The familiar New Project view appears.
In previous chapters, we created empty projects and manually added code and dependencies. JavaFX, however, requires several dependencies, configuration settings, and initialization code that would be tedious to add manually every time a new application is created.
A Maven project can be based on a predefined template called a Maven Archetype. An archetype contains, for example, a predefined project structure, example code, and required dependencies. There are many different archetypes available for different purposes. For this course, we have prepared our own template and will use it from now on.
Select Maven Archetype from the left-hand side. The following settings become available.
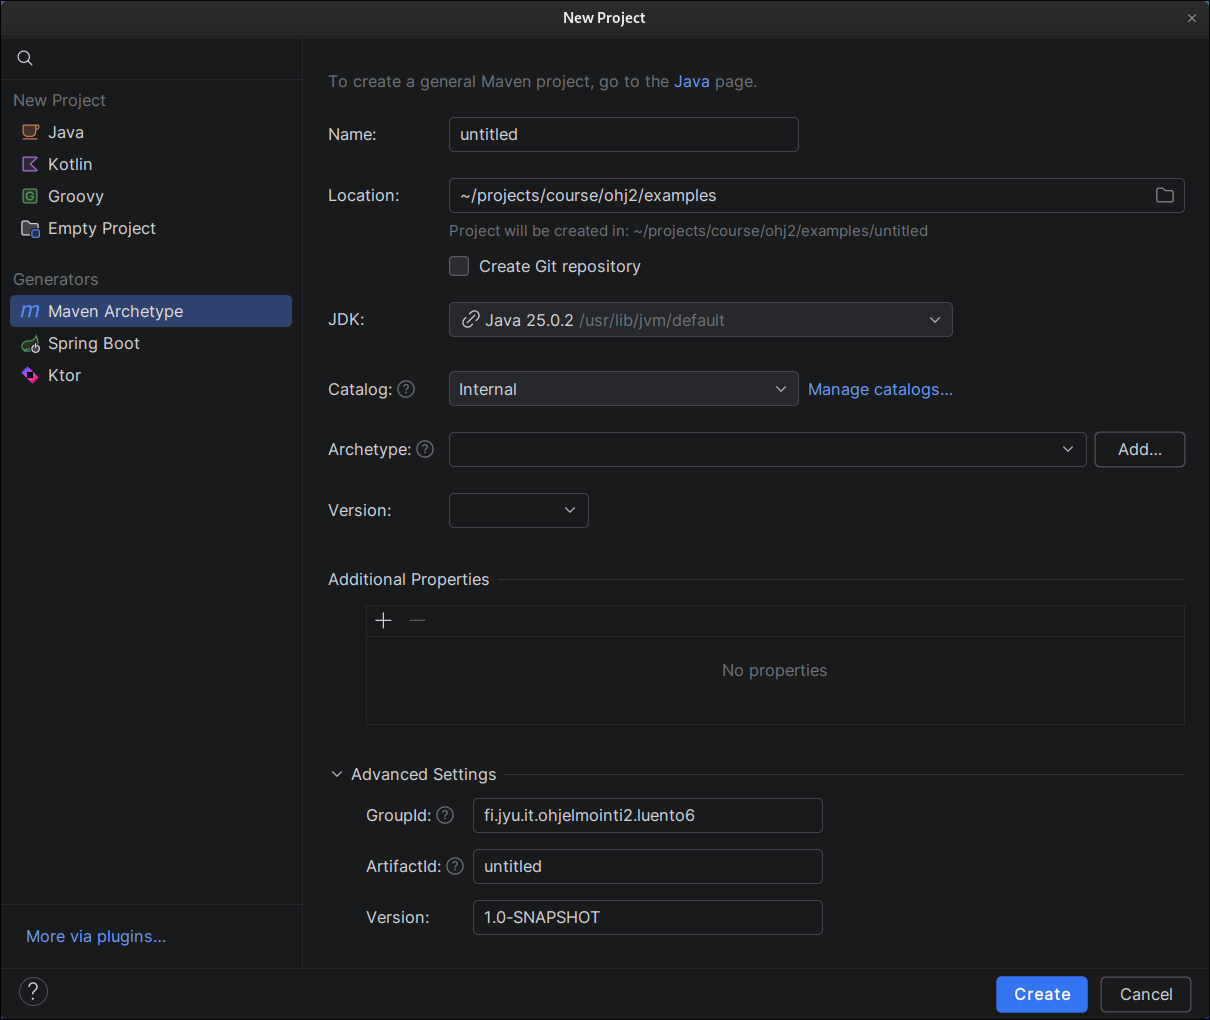
Fill in the form as follows:
- Name:
TodoFx - Location: Choose a directory where you want to create the project. You can type the path manually or select it using the folder browser icon.
- Create Git repository: Leave unchecked. We will create our own Git repository later.
- JDK: Select a Java 25 installation. The default is usually suitable. If necessary, download a JDK by following the installation instructions.
- Catalog:
Maven Central - Archetype:
io.github.ohj-perus-jy:javafx-fxml-template - Version: Select the latest version if available. Otherwise, enter
1.0.1manually. - Additional properties: Leave unchanged. The template defaults are sufficient.
- Additional settings (click the heading if the options are hidden):
- GroupId: A public, unique identifier for the application. A common Java convention is to use the format:
<reversed-domain-name>.<application-identifier>In this course, you may use:fi.jyu.ohj2.yourname.todowhereyournameis your first name or username without special characters. - ArtifactId: Should match the Name field.
- Version:
0.1
- GroupId: A public, unique identifier for the application. A common Java convention is to use the format:
After filling in the information, the form should look approximately like the one shown below.
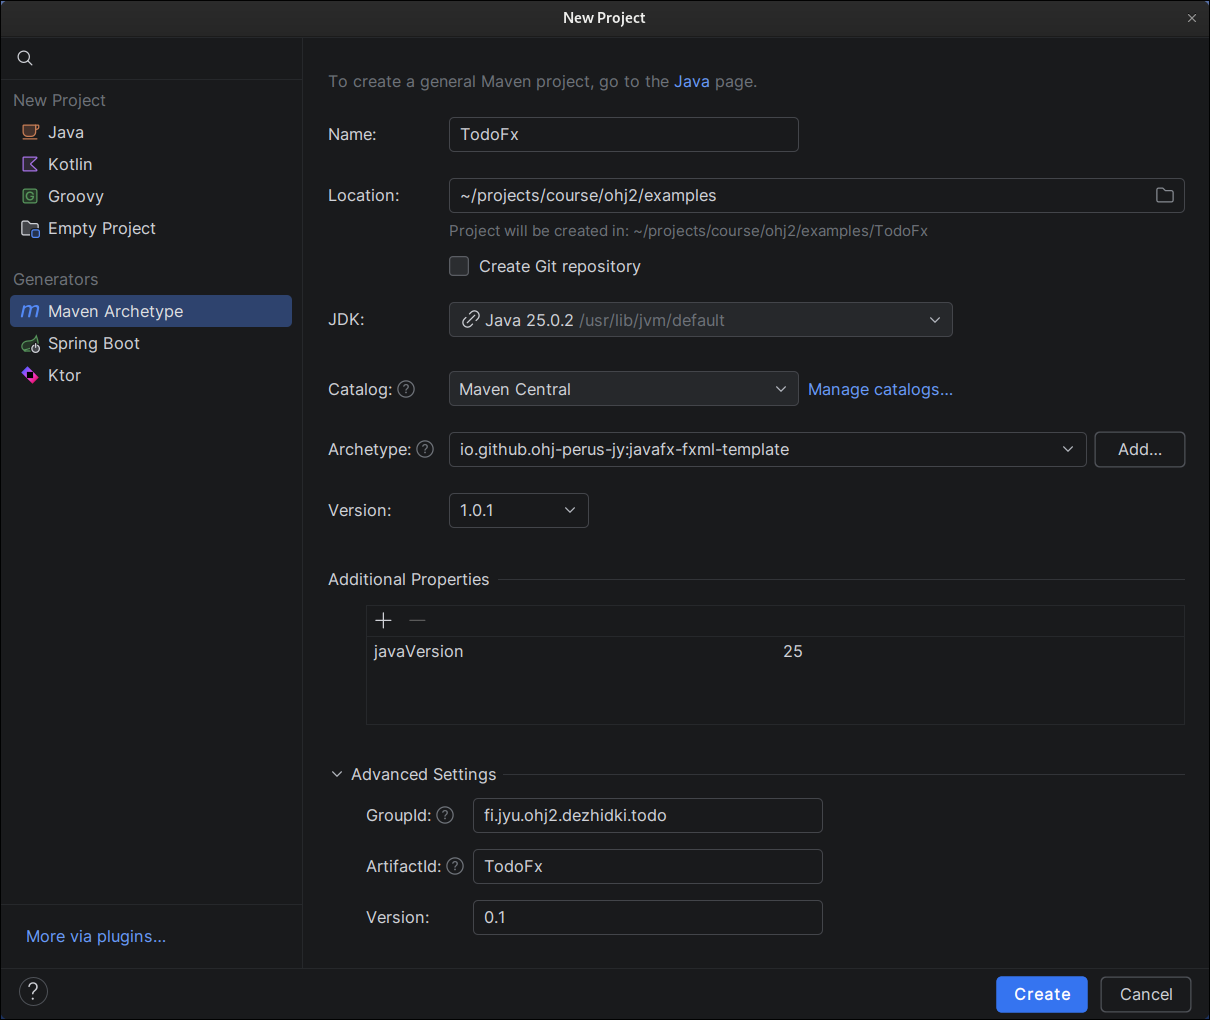
Press Create.
This creates the project and downloads the Maven archetype dependencies. The process may take a moment, so be patient.
Eventually, the Run panel should display:
BUILD SUCCESS
indicating successful creation.
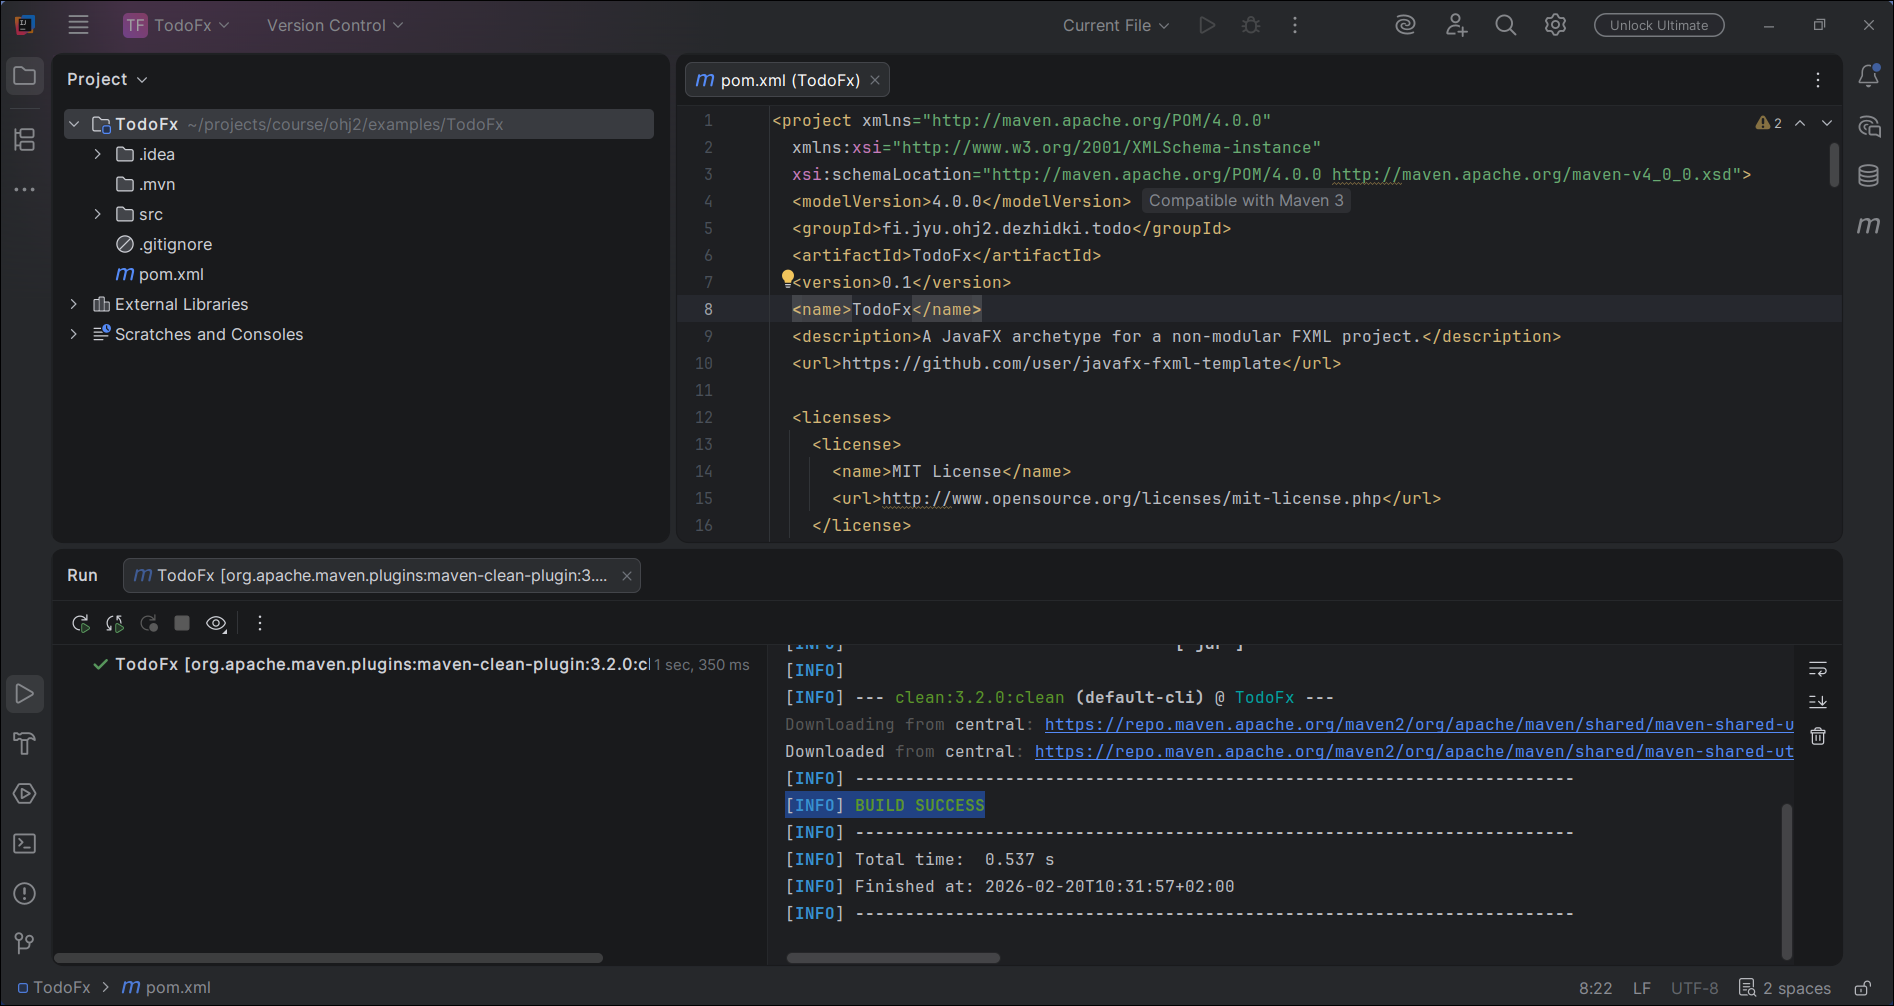
Let's try running the application.
Open the Main class located under:src/main/java/<package-name>
and click the run button next to the main() method, then select Run.
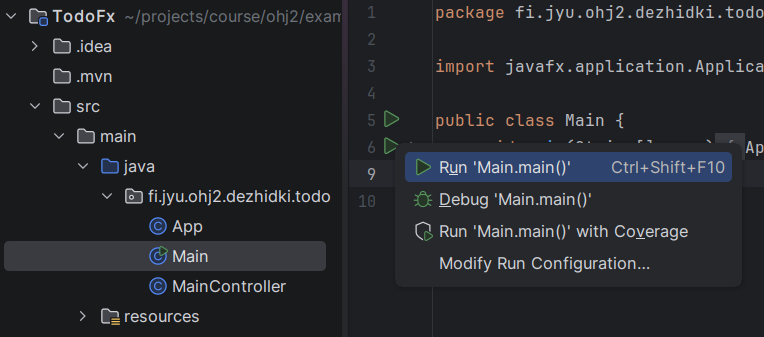
This launches the application, where you should see a single clickable button.
A run configuration is also created, allowing you to launch the project using the toolbar run button.
Structure of a JavaFX Application
You may already have noticed that the JavaFX project template contains several files:
pom.xmlis the Maven project configuration file.fi/jyu/ohj2/yourname/todocorresponds to the GroupId value you specified and acts as the project's main package. Java source files are located here.App.java,MainController.java, andMain.javaare Java classes related to the JavaFX application.main.fxmlis the file that defines the application's user interface.
A JavaFX application usually consists of three main components: the main class, the view, and the controller class.
The main class is the Java class that serves as the application's entry point. In our example this is App.java, which is called from the traditional main method in Main.java.
The main class extends Application and defines how the application creates and displays its window. It is responsible for managing the application's lifecycle.
The user-interface view is defined in an FXML file, which is an XML-based description of the interface. In our example, it is located in the resources directory as main.fxml.
The FXML file describes, in textual form, which components the window contains and how they are arranged.
Small projects often have zero or one FXML file, while larger projects may contain several. For example, if an application has separate views for the main window, settings, and other screens, each view can have its own FXML file.
The controller class is a Java class that contains the logic for handling user-interface components.
A controller class and its corresponding FXML view are linked together.
For example, MainController.java acts as the controller for main.fxml.
The controller defines how the application responds to user input and other events.
In other words, while the FXML file defines the user interface, the controller makes that interface interactive.
Application Startup and Core JavaFX Classes
Let's examine the structure of the main class App.java more closely:
public class App extends Application {
@Override
public void start(Stage stage) throws IOException {
/* 1 */ FXMLLoader loader = new FXMLLoader(getClass().getResource("main.fxml"));
/* 1 */ Scene scene = new Scene(loader.load());
/* 2 */ stage.setScene(scene);
/* 3 */ stage.setTitle("MyApp");
/* 4 */ stage.show();
}
}
The main JavaFX class extends the Application class, which is responsible for initializing the application and creating a window at the operating-system level.
The JavaFX runtime calls the start method once the application window has been created.
The start method receives a Stage object as its parameter.
A Stage represents the application's window.
The responsibility of start usually consists of four main steps (corresponding to the numbered comments above):
-
Initialize the view: First, the primary user interface is initialized by creating a
Sceneobject. ASceneis a collection of user-interface components, that is, a view object. In this project template, the components are loaded frommain.fxmlusing the helper classFXMLLoader, which initializes the components defined in the view. Components could also be created manually by instantiating Java objects directly. -
Attach the view to the window: The
stage.setScenemethod attaches the newly createdSceneand its components to the window. Note that a singleStagecan contain only oneSceneat a time, but the scene can be changed whenever needed. This allows different views to be presented within the same application, such as a login view and the main application view. -
Configure the window: The
Stageobject provides numerous methods for modifying window behavior. One common example issetTitle(), which changes the window title. -
Show the window: Initially, the window is hidden from the user to prevent visible interface flickering during initialization. Calling
show()makes the window visible so that the user can begin interacting with it. This is usually the final step once initialization is complete.
In JavaFX, all user-interface elements inherit from the Node class.
A node represents an individual component in the interface, such as a button or a piece of text.
Nodes are recursive: a node can contain other nodes.
As a result, a JavaFX user interface forms a tree structure in which components contain other components.
For example, the structure of the template application's interface could be modeled as follows:
flowchart TD
Stage["
Stage
(Main Window)
"]
Scene["
Scene
(View)
"]
VBox["
VBox
(Node)
"]
Label["
Label
text: Hello JavaFX
"]
Button["
Button
text: Click Me!
"]
Stage --- Scene
Scene --- VBox
subgraph "UI Components (Node)"
VBox --- Label
VBox --- Button
end
Return the project you created in Exercise 7.1.
Recap of the steps in this part:
- Create a JavaFX project based on the
io.github.ohj-perus-jy:javafx-fxml-template-archetype. - Run the program and verify that the JavaFX application window appears.
Return your project files.
SceneBuilder
Learning Objectives
- Be able to use the SceneBuilder tool to create JavaFX user interfaces.
- Be able to connect an FXML file with a controller class.
important
From this chapter onward, you will need the SceneBuilder tool.
Install it by following the ../tyokalut.md#scenebuilder.
SceneBuilder is a visual tool that makes creating JavaFX user interfaces easier. It provides a drag-and-drop interface that allows you to create and modify the user interface defined in an FXML file without writing FXML by hand. With SceneBuilder, you can easily add components, configure their properties, and arrange them as desired. It is particularly useful if you are not yet comfortable writing FXML directly or if you want to speed up the user-interface design process.
The main SceneBuilder window consists of three primary areas.
The First Component
Let's begin by opening the project's main.fxml view file in SceneBuilder.
Open SceneBuilder and select Open Project from the lower left corner.
Locate and open main.fxml from the src/resources/package directory (package here refers to the package hierarchy of the project created in the previous chapter).
The same user interface that we previously saw in IDEA should now be visible in SceneBuilder.
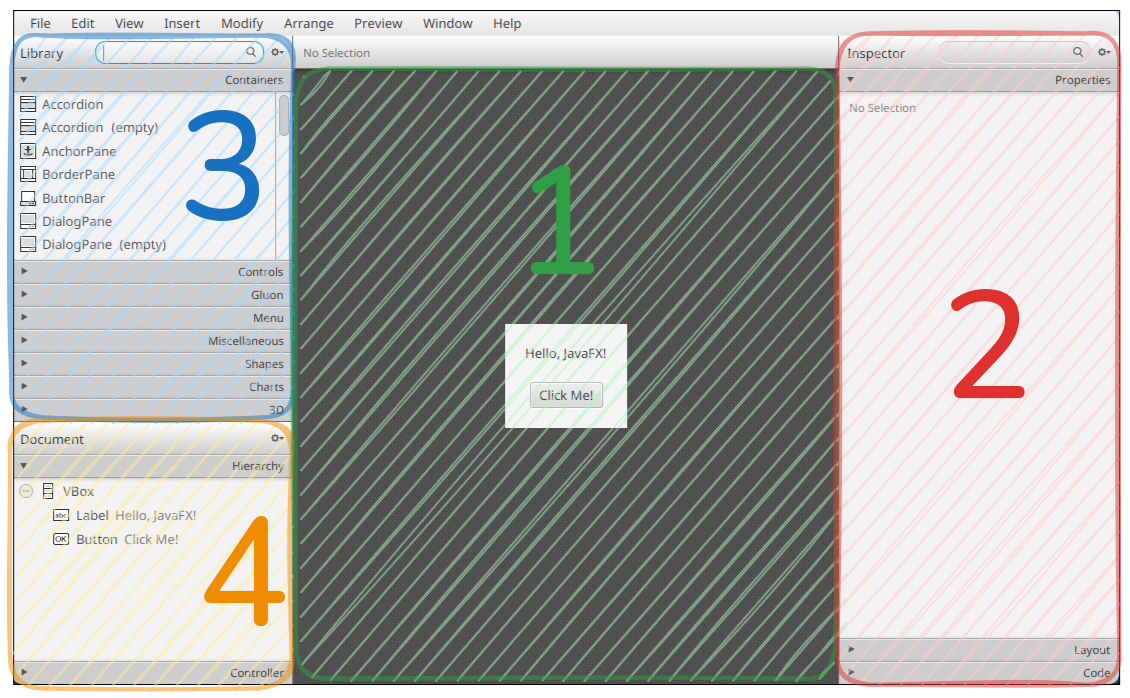
Let's also familiarize ourselves with the SceneBuilder interface:
- Design View. This displays the user interface defined by the FXML file as a visual representation. You can drag components around and arrange them however you like.
- Inspector View. Here you will find panels such as Properties, Layout, and Code. These allow you to modify the selected component's properties, such as text, font, color, layout settings, and the configuration required for connecting the component to a controller.
- Library View. This contains all available components, including buttons, text fields, layout components, and more. Components can be added to the interface by dragging them into the design view.
- Document View. This displays all components in your application as a tree structure. You can use this view to precisely select, move, and remove components.
The design view already contains a Button component and a Label component.
If you click the Button component, the Properties panel on the right displays its properties.
You can modify its text, font, color, and many other settings.
As a first exercise, let's change the button's text. Click the button in the design view. The component's basic properties appear in the Inspector's Properties panel.
Change the button's Text property to
Add Task
and press Enter.
Notice that the button text immediately updates in the design view.
Save the changes (File → Save). Now run the application again through IDEA. You should notice that the button text has changed.
The Hierarchical Structure of the User Interface
In the Document panel on the left, you can see the user-interface structure as a hierarchy.
The Button and Label components are children of a VBox component.
VBox (Vertical Box) is a layout component that automatically arranges its child components vertically.
JavaFX provides many similar classes derived from Pane, which help organize the interface into logical structures instead of placing all components directly under the application window.
HBoxarranges children horizontally.GridPanearranges children in a grid.BorderPanearranges children around the edges and center.- and so on.
These components make it possible to build even complex user interfaces that scale gracefully to different window sizes.
A Text Input Field
Next, let's add a text field where the user can type.
In the Library view, select:
Controls → TextField
and drag it inside the VBox, between the label and the button.
(If you accidentally drop the text field in the wrong place, you can undo the change with Ctrl+Z or ⌘+Z.)
Save the changes (File → Save) and run the application again in IDEA.
A text field should now appear, allowing the user to enter text.
Bonus: Where is the user interface defined?
Open main.fxml from the resources directory in IDEA.
The file should now look approximately like this:
<?xml version="1.0" encoding="UTF-8"?>
<?import javafx.geometry.Insets?>
<?import javafx.scene.control.Button?>
<?import javafx.scene.control.Label?>
<?import javafx.scene.control.TextField?>
<?import javafx.scene.layout.VBox?>
<VBox alignment="CENTER" spacing="20.0" xmlns="http://javafx.com/javafx/25" xmlns:fx="http://javafx.com/fxml/1" fx:controller="fi.jyu.ohj2.dezhidki.MainController">
<padding>
<Insets bottom="20.0" left="20.0" right="20.0" top="20.0" />
</padding>
<Label text="Hello, JavaFX!" />
<TextField />
<Button text="Add Task" />
</VBox>
The FXML file contains a textual description of the user interface. Compare the file contents with the hierarchy shown in SceneBuilder.
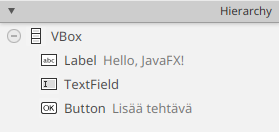
SceneBuilder is essentially an application that can read and generate FXML user-interface files.
Connecting FXML and a Controller Class
At this point, clicking the button does nothing. To handle user-interface events such as button presses, we need to create a connection between the FXML file and the controller class. This happens in two steps: Assign identifiers to components in SceneBuilder and define matching variables in Java code.
Assigning Identifiers to Components
Every component we wish to access programmatically must have a unique identifier in FXML. Let's start by giving identifiers to the text field and button and then print the contents of the text field to the console.
Select the text field in SceneBuilder and open the Code panel in the Inspector.
Set the fx:id field to a unique camelCase name describing the component, for example:
newTaskName
Press Enter to confirm.
Repeat the process for the button and assign it the identifier:
addNewTaskButton
Finally, save the FXML file.
Defining Components in the Controller
You may have noticed that immediately after assigning an identifier, SceneBuilder displays a warning:
No injectable field found
Let's fix that by adding matching fields to the controller class.
For now, you can clear the warning by pressing Clear, as SceneBuilder does not automatically refresh warnings.
Return to IDEA and open MainController.java.
Add two fields near the beginning of the class:
@FXML
private Button addNewTaskButton;
@FXML
private TextField newTaskName;
Add any missing imports from the javafx.scene.control package for Button and TextField.
important
The variable name must exactly match the corresponding fx:id value defined in SceneBuilder.
JavaFX connects components and fields using these identifiers. If they do not match, JavaFX cannot link them together.
Run the application again. It should behave exactly as before.
What did this actually do?
When the application starts, the FXMLLoader defined in App reads the main.fxml file and notices the components and their fx:id values.
It then creates an instance of MainController and searches for fields marked with the @FXML annotation.
Finally, it assigns the actual component objects to those fields by matching the field names against the corresponding fx:id values.
In other words, FXMLLoader effectively performs something similar to:
// Do not copy.
// FXMLLoader does this automatically using
// the field name and fx:id value.
this.newTaskName =
(TextField)findComponentById("newTaskName");
// After this assignment, newTaskName refers
// to the TextField object defined in the view.
The Controller Lifecycle and the initialize Method
If a controller implements the Initializable interface, JavaFX automatically calls its initialization method once the FXML file has been fully loaded and all controller fields have been initialized.
This is the correct place to define component behavior.
Let's add the following line to initialize() to verify that the text-field object is available:
newTaskName.requestFocus();
Run the program again. Immediately after startup, the text field should become active and receive the keyboard focus, as if it had been clicked.
Handling Events
Setting focus is not particularly exciting. Let's add functionality so that clicking the button prints the text field contents to the console.
In JavaFX, all interactions with components produce events. For example:
- clicking a button,
- pressing a key in a text field,
- copying text,
- pasting text,
all generate different events. User-interface programming largely consists of defining visible components and responding to their events.
In JavaFX, event handling is usually implemented using methods beginning with setOn.
These methods accept either a lambda expression or a method reference that is executed when the event occurs.
Let's add a generic action event handler using setOnAction.
The action event occurs whenever the user interacts with a component in its standard way.
For buttons, this happens when the button is clicked or when Enter is pressed while the button has focus.
For other components, an action event may represent a different component-specific interaction.
Add the following event handler inside initialize():
addNewTaskButton.setOnAction(event -> {
String text = newTaskName.getText(); // Retrieve text field contents
IO.println("Text field contents: " + text); // Print to console
});
Additional Information: Why Not Add the Handler in the Constructor?
The reason is related to the JavaFX initialization sequence and when FXML components become available.
When a JavaFX application starts:
- JavaFX creates the controller by calling
new MainController(). - At this point, all
@FXMLfields are stillnull. FXMLLoaderreads the FXML file and injects the actual components into the fields based on theirfx:idvalues.- Finally,
initialize()is called.
If you attempt to use FXML components in the constructor, you will get a NullPointerException.
For example:
public MainController() {
newTaskName.requestFocus();
addNewTaskButton.setOnAction(event -> {
String text = newTaskName.getText();
IO.println(text);
});
}
In the code above, both addNewTaskButton and newTaskName are still null during construction.
That is why event handlers and other initialization code involving FXML components belong in initialize().
Save and run the application. Now whenever the button is clicked, the contents of the text field are printed to the console.
We now have a graphical version of "Hello, World!" 🥳
Displaying the Text in the Window
Printing to the console is useful, but in a real application the console is rarely visible to the user. Let's modify the application so that the text entered into the text field is added to the label above it.
Open SceneBuilder and select the Label component currently displaying
"Hello, JavaFX!"
In the Inspector's Properties panel, remove all text from the Text property.
The label should become empty.
img src="images/scenebuilder-label-cleanup.png">
Next, assign an fx:id value in the Code panel.
For example
pendingTasks
Save the FXML file.
Add a matching field to the controller:
@FXML
private Label pendingTasks;
Add any required imports.
If IntelliJ offers multiple Label classes, choose the one from:
javafx.scene.control
Now modify the event handler created earlier so that the entered text is added to the label.
addNewTaskButton.setOnAction(event -> {
String text = newTaskName.getText();
// HIGHLIGHT_RED_BEGIN
IO.println("Text field contents: " + text);
// HIGHLIGHT_RED_END
// HIGHLIGHT_GREEN_BEGIN
pendingTasks.setText(pendingTasks.getText() + text + "\n");
// HIGHLIGHT_GREEN_END
});
Save and run the application. Now clicking the button adds the entered text to the label above the text field, one line at a time.
You may notice that adding a second line is not visible unless the window is enlarged. We will address layout and window-sizing issues later in this tutorial.
Return the project you advanced in Exercise 7.2.
Recap of the steps in this part:
- In SceneBuilder, add your own
TextFieldcomponent inside theVBoxin the FXML file. - Add an
onActionevent handler to the button that adds the text entered into the text field to theLabelcomponent. - Display all tasks in the
Labelcomponent, separating them with line breaks.
Return your project files.
Version Control
important
This chapter assumes that you have used Git version control before.
If you have not used Git previously or need a refresher, first review the Git materials from your earlier programming studies.
At this stage, we do not yet need a remote repository.
Similarly, using Git from the command line assumes that you are already somewhat familiar with command-line tools. If necessary, revisit the command-line materials from earlier courses.
At this point, it is a good idea to begin using version control. We will use Git* which is one of the most widely used version-control tools in software development. After this section, you should create a separate Git commit for each tutorial exercise, describing the changes made during that exercise.
Git can be used through many different interfaces—including one built into IDEA—but we will use the command line because it is a common approach that works the same way in practically every environment.
Let's begin by creating a Git repository for the project.
Open a terminal and navigate to your project's root directory.
The root directory is the folder that contains the src directory and the pom.xml file.
Initialize the Git repository with git init.
You should receive a message indicating that an empty Git repository has been created. The path shown in the message will naturally be different on your own computer.
Before creating the first commit, we must tell Git which files should be included.
To begin, simply add all files in the project directory
git add .:
This adds all files in the current directory and its subdirectories to the next commit. Note that the command itself usually produces no output.
Let's verify which files will be included by running `git status:
You will see a list of files that Git is tracking and which will be included in the next commit.
Let's briefly examine the contents.
You should see familiar files from the previous chapters:
pom.xml, Java source files (.java) and FXML view files (.fxml).
The .idea directory contains settings used by IntelliJ IDEA.
You will also see a .gitignore file.
This file was included in the project template.
It tells Git which files should never be added to commits.
This ensures that compiled .class files and IDEA-specific configuration files do not end up under version control.
The .gitignore file can and should be modified if you later decide that additional files should be excluded from version control.
Now we can create our first commit, which stores the current state of the project in Git as a kind of snapshot.
When creating a commit, you provide a descriptive message explaining the changes being recorded.
Typical messages for the first commit are
"Initial commit"
or
"Project initialization"
Create the commit using: git commit
Git will display a list of files whose current state has been successfully stored in the repository.
From this point onward, create a new commit after each exercise and describe the changes made during that exercise. You may also create multiple commits for a single exercise if you wish.
Create a Git repository for your project and make the first commit.
After that, run the git status command in the command line and submit its output to the submission box for this exercise.
Connecting Application Logic and the User Interface
Our application could already function as a kind of Todo list. However, let's recall the features we planned at the beginning of this part:
- The user can add a new task.
- The user can see a list of all tasks.
- The user can mark a task as completed.
- The user can delete a task.
- The user can restore a completed task back to an unfinished state.
- Tasks are saved to a file so that they persist after the application is closed.
- Tasks are loaded from a file when the application starts.
Considering these requirements, our application is not yet very usable: tasks can be added and we can see all tasks, but tasks cannot be deleted or marked as completed.
Let's modify the user interface so that tasks are displayed as checkboxes, allowing them to be marked as completed or incomplete. In addition, completed and incomplete tasks will be displayed in separate lists.
Let's draw a preliminary wireframe design:
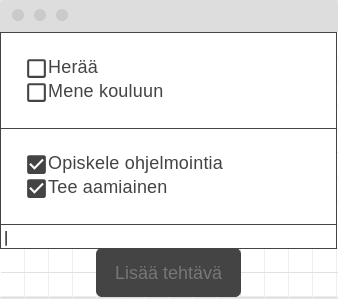
The figure above was drawn using the
wireframe.cc(https://wireframe.cc/Mq98ie)
service, but similar design mockups can be created using any drawing tool. In general, it is a good idea to plan user interfaces a little in advance so that implementation becomes more straightforward.
Creating Components Dynamically
Let's begin by modifying the button so that a new task is added to the user interface as a checkbox, that is, a CheckBox component.
Since users may add an unlimited number of tasks, we cannot create all checkboxes through SceneBuilder. Instead, we create components directly in the controller code.
First, let's prepare the user interface.
Open SceneBuilder and remove the existing Label component.
Since the label has no default text, it cannot easily be selected in the design view. Instead, select it using the Hierarchy panel in the Document view.
Delete the label by pressing Delete (macOS: ⌫ delete). You will receive the warning: "This component has an fx:id. Do you really want to delete it?" This indicates that the label component is used in the controller code. Choose Delete.
Next, locate a VBox component in the Library view:
Library → Containers → VBox
and drag it above the text field.
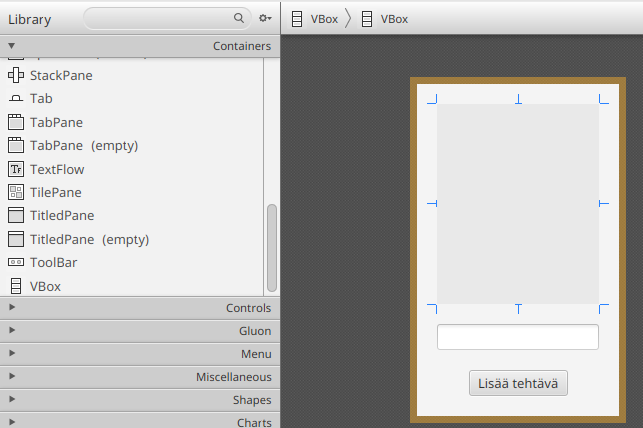
VBox (Vertical Box) is a container component intended for grouping and arranging other components.
Container components can hold other elements and arrange them according to their own rules.
For example, VBox arranges all components it contains vertically from top to bottom.
Assign the new VBox the fx:id:
pendingTasks
using the same identifier as the deleted label.
Save the FXML file and then modify the MainController class so that the type of pendingTasks becomes VBox:
// HIGHLIGHT_RED_BEGIN
@FXML
private Label pendingTasks;
// HIGHLIGHT_RED_END
// HIGHLIGHT_GREEN_BEGIN
@FXML
private VBox pendingTasks;
// HIGHLIGHT_GREEN_END
Now the event handler no longer works because a VBox does not contain getText or setText methods.
Instead, the most important method of a VBox is getChildren, which returns a list of all components contained within it.
Let's modify the button event handler so that pressing the button creates a new CheckBox object and adds it to the VBox component:
addNewTaskButton.setOnAction(event -> {
String text = newTaskName.getText();
CheckBox task = new CheckBox(text);
pendingTasks.getChildren().add(task);
});
Run the application at this point. You will notice that the "Add Task" button now creates a new checkbox component and adds it above the text field. The checkboxes are clickable as an indication of whether the task has been completed.
Let's improve the usability of the application a little.
First, if the "Add Task" button is pressed without entering any text, an empty checkbox appears.
Let's add a validation check: if the text is null, contains no text, or contains only whitespace, we stop processing the event.
This can be done using the String method isBlank().
We will also remove unnecessary whitespace from the beginning and end of the task name using trim:
addNewTaskButton.setOnAction(event -> {
String text = newTaskName.getText();
// HIGHLIGHT_GREEN_BEGIN
if (text == null || text.isBlank()) {
return;
}
text = text.trim();
// HIGHLIGHT_GREEN_END
CheckBox task = new CheckBox(text);
pendingTasks.getChildren().add(task);
});
Second, after adding a task, the task text remains in the text field, forcing us to erase it before entering another task.
We can clear the contents using the TextField method clear:
addNewTaskButton.setOnAction(event -> {
String text = newTaskName.getText();
if (text == null || text.isBlank()) {
return;
}
text = text.trim();
CheckBox task = new CheckBox(text);
pendingTasks.getChildren().add(task);
// HIGHLIGHT_GREEN_BEGIN
newTaskName.clear();
// HIGHLIGHT_GREEN_END
});
Third, after adding a task we must click the text field before entering another task.
Let's perform this click programmatically using requestFocus(), which moves the focus as if the component had been selected.
Notice that the focus must be restored at every point where event processing ends:
addNewTaskButton.setOnAction(event -> {
String text = newTaskName.getText();
if (text == null || text.isBlank()) {
// HIGHLIGHT_GREEN_BEGIN
newTaskName.requestFocus();
// HIGHLIGHT_GREEN_END
return;
}
text = text.trim();
CheckBox task = new CheckBox(text);
pendingTasks.getChildren().add(task);
newTaskName.clear();
// HIGHLIGHT_GREEN_BEGIN
newTaskName.requestFocus();
// HIGHLIGHT_GREEN_END
});
Bonus: Automatically Setting Focus at the End of an Event
Now we somewhat annoyingly have to set the focus in two separate places.
One JavaFX-style solution is to use the Platform.runLater
(JavaDoc)
method, which executes a piece of code later during application execution (but not before the current event has completed).
The method accepts an object implementing the Runnable interface.
Since Runnable is a functional interface
(see Chapter 6.1)
, we can provide either a lambda expression or a method reference.
Because requestFocus matches the parameter and return-value requirements of Runnable, we can use a method reference directly:
addNewTaskButton.setOnAction(event -> {
Platform.runLater(newTaskName::requestFocus);
String text = newTaskName.getText();
if (text == null || text.isBlank()) {
return;
}
text = text.trim();
CheckBox task = new CheckBox(text);
pendingTasks.getChildren().add(task);
newTaskName.clear();
});
Another possibility is to combine generic methods
(see Chapter 4.4)
and functional interfaces
(see Chapter 6.1)
.
Since lambda expressions can be passed as parameters and returned as values, we can create a helper method runAndFocus, which accepts an event handler and returns a new event handler that always calls requestFocus at the end:
static <T extends Event> EventHandler<T> runAndFocus(EventHandler<T> handler, Node component) {
return e -> {
handler.handle(e);
component.requestFocus();
};
}
Such a method is commonly known as a wrapper method. As the name suggests, it "wraps" one function inside another. Using the helper method, the event handler becomes:
addNewTaskButton.setOnAction(runAndFocus(event -> {
String text = newTaskName.getText();
if (text == null || text.isBlank()) {
return;
}
text = text.trim();
CheckBox task = new CheckBox(text);
pendingTasks.getChildren().add(task);
newTaskName.clear();
}, newTaskName));
Notice that all JavaFX components inherit from the Node class.
Finally, adding a task always requires pressing the Add Task button.
For a power user, it would be more convenient to add tasks using the Enter key, allowing tasks to be entered much more quickly.
The TextField component's onAction event is triggered when the user presses Enter in the text field.
(see
JavaDoc).
Let's therefore add an event handler to the newTaskName text field using setOnAction.
Since we want both the button click and the Enter key to perform the same operation, let's refactor the event handling into a separate method:
public void initialize(URL url, ResourceBundle resourceBundle) {
addNewTaskButton.setOnAction(event -> addTask());
newTaskName.setOnAction(event -> addTask());
}
private void addTask() {
String text = newTaskName.getText();
if (text == null || text.isBlank()) {
newTaskName.requestFocus();
return;
}
text = text.trim();
CheckBox task = new CheckBox(text);
pendingTasks.getChildren().add(task);
newTaskName.clear();
newTaskName.requestFocus();
}
Run the application again and verify that everything works.
After these changes, the application is noticeably more usable:
- Tasks cannot be added if the text field is empty.
- Adding a task clears the text field and restores focus for faster entry.
- Tasks can also be added by pressing Enter.
Completed Tasks
Let's continue improving the application. We want completed tasks to always be separated from incomplete tasks so that progress is easier to track.
Return to SceneBuilder and add another VBox component below the incomplete-tasks container.
Give the new VBox the fx:id:
completedTasks
Save the FXML file and define the corresponding field in the controller:
@FXML
private VBox completedTasks;
Let's make it so that whenever a checkbox is clicked, the task moves from the incomplete list to the completed list.
We notice that CheckBox inherits from ButtonBase, meaning the onAction event is triggered whenever the checkbox is clicked.
(see.
JavaDoc).
Modify the addTask method so that a handler is assigned to the checkbox.
The event handler first removes the checkbox from pendingTasks and then adds it to completedTasks:
private void addTask() {
// beginning of method hidden...
String text = newTaskName.getText();
if (text == null || text.isBlank()) {
newTaskName.requestFocus();
return;
}
text = text.trim();
CheckBox task = new CheckBox(text);
// HIGHLIGHT_GREEN_BEGIN
task.setOnAction(event -> {
pendingTasks.getChildren().remove(task);
completedTasks.getChildren().add(task);
});
// HIGHLIGHT_GREEN_END
pendingTasks.getChildren().add(task);
// end of method hidden...
newTaskName.clear();
newTaskName.requestFocus();
}
Run the application. Clicking a task now moves it to the lower container. However, clicking a completed task does not move it back, and you will see the following exception in the IDEA console:
java.lang.IllegalArgumentException: Children: duplicate children added: parent = VBox[id=completedTasks]
The exception indicates that we are attempting to add the same CheckBox to completedTasks even though it is already there.
Let's modify the logic so that selecting a task moves it to the completed list and deselecting it moves it back.
We can use the CheckBox method isSelected(), which tells us whether the checkbox is currently selected (see
JavaDoc).
The event handler then becomes:
task.setOnAction(event -> {
if (task.isSelected()) {
// Task selected --> move to completed tasks
pendingTasks.getChildren().remove(task);
completedTasks.getChildren().add(task);
} else {
// Task deselected --> move back to pending tasks
completedTasks.getChildren().remove(task);
pendingTasks.getChildren().add(task);
}
});
Run the application again. Marking a task as completed should move it to the lower container. Likewise, marking a task as incomplete moves it back to the upper container.
Notice that isSelected() already returns the new value.
The state update happens before the setOnAction event is fired.
When the user clicks a checkbox, the sequence of events is approximately:
- The operating system registers the mouse click.
- JavaFX updates the internal
selectedproperty (for example,false → true). - An
ActionEventis created and thesetOnActionhandler runs. - Calling
isSelected()inside the handler therefore returns the updated state.
Labels for the Containers
Let's make one final improvement to usability.
Add a Label component above the incomplete-tasks container and set its Text attribute to:
TODO
Then add another Label above the completed-tasks container and set its text to:
DONE
Save the FXML file and run the application again from IDEA to verify that everything still works correctly.
Return the project you advanced in Exercise 7.4.
Recap of the steps in this part:
- Create two
VBoxcomponents for incomplete and completed tasks. - When the user enters a task, add it to the incomplete tasks
VBoxas aCheckBoxcomponent. - When the user marks a task as completed by clicking the check box, move it from the incomplete tasks
VBoxcontainer to the completed tasks container. - When the user marks a completed task as incomplete by clicking the check box, move it from the completed tasks container back to the incomplete tasks container.
- When the user adds a task, focus should return to the input field.
- The user should not be able to add a task without text or a task whose text consists only of whitespace characters.
- The user should also be able to add a task by pressing the Enter key while the input field has focus.
When the phase is complete, remember to run git add for the modified files and create a git commit.
Return your project files.
It does not matter if TIM shows a warning or even a compilation error. TIM may not contain all the dependencies required by the exercises, and therefore the JavaFX project may not even compile there.
The important thing is that you have the project working correctly in your local environment.
Reading and Writing Tasks to a File
Our application is starting to be functionally complete. Let's implement the final two features:
- Tasks are saved to a file so that they persist after the application is closed.
- Tasks are loaded from a file when the application starts.
In Part 6.5, we learned how to save objects to files using the JSON file format. Let's first design the file format. At the moment, a single task can be modeled using two attributes: the task's text as a string and a boolean value indicating whether the task is completed. In other words, a single task can be represented as a JSON object:
{
"text": "Study programming",
"completed": true
}
Since there are multiple tasks, we store them all in a single list, giving the JSON file the following structure:
[
{
"text": "Study programming",
"completed": true
},
{
"text": "Go to school",
"completed": false
}
]
Preparing for Saving
First, add the Jackson dependency following the instructions from Part 6.5.
Next, create a class Task that models a single task.
Add the attributes text and completed as well as the required getter methods.
Also create a constructor that initializes the attribute values:
public class Task {
@SuppressWarnings("FieldMayBeFinal")
private String text;
@SuppressWarnings("FieldMayBeFinal")
private boolean completed;
@SuppressWarnings("unused")
public Task() { /* Leave empty or provide a default implementation */ }
public Task(String text, boolean completed) { /* Add implementation */ }
public boolean getCompleted() { /* Add implementation */ }
public String getText() { /* Add implementation */ }
}
Implement the missing functionality yourself.
We intentionally omit setter methods for now because the class is currently used only for loading and saving tasks.
However, we do not mark the fields as final, allowing Jackson to assign values to them.
We also add a no-argument constructor, which Jackson uses when constructing objects from JSON.
Optional information: Task is a record
If the fields are not intended to be modified (that is, all fields are final), the class can be written more compactly using Java's record syntax:
record Task(String text, boolean completed) {}
Records were discussed in more detail in Part 6.5.
In the next chapter, task objects will be used directly in the user interface, at which point we will add the necessary setter methods. For this reason, we implement tasks as a normal class.
Saving Tasks
Let's start with saving tasks.
First, we need to produce a list of tasks as Task objects.
At the moment, tasks are represented directly by CheckBox components.
Therefore, we must convert the checkboxes stored inside a VBox into a list of tasks.
Converting lists is easy using streams (see Part 6.2).
Add the following code to the end of addTask to retrieve all incomplete tasks:
void addTask() {
// ... beginning of method hidden
String text = newTaskName.getText();
if (text == null || text.isBlank()) {
newTaskName.requestFocus();
return;
}
text = text.trim();
CheckBox task = new CheckBox(text);
task.setOnAction(event -> {
if (task.isSelected()) {
pendingTasks.getChildren().remove(task);
completedTasks.getChildren().add(task);
} else {
completedTasks.getChildren().remove(task);
pendingTasks.getChildren().add(task);
}
});
pendingTasks.getChildren().add(task);
newTaskName.clear();
newTaskName.requestFocus();
List<Task> pendingTasksList = pendingTasks.getChildren().stream()
.map(n -> (CheckBox)n)
.map(cb -> new Task(cb.getText(), cb.isSelected()))
.toList();
}
We use a stream consisting of two map() transformations and a toList() collector.
Notice that the child components of a VBox are of type Node.
In JavaFX, all visual components, including CheckBox, inherit from Node.
In this case, we know that the completed-task and pending-task containers contain only checkboxes.
For that reason, the first map safely converts everything to CheckBox.
The second map converts the CheckBox objects into Task objects.
The getText method returns the text displayed inside the checkbox
(see JavaDoc)
, and isSelected
(ks. JavaDoc)
returns whether the checkbox is selected—that is, whether the task is completed.
Finally, toList collects everything into a list.
Pending tasks lists with traditional loop
Of course, the same list could also be built using a traditional loop:
List<Task> pendingTasksList = new ArrayList<>();
for (Node node : pendingTasks.getChildren()) {
CheckBox c = (CheckBox)node;
String textC = c.getText();
boolean completedC = c.isSelected();
Task task = new Task(textC, completedC);
pendingTasksList.add(task);
}
Bonus: What if the container contains other components than CheckBox-components?
Here we omitted type checking because we know the container contains only checkboxes.
If the container contained various types of components and we wanted only checkboxes, we could use instanceof:
List<Task> pendingTasksList = new ArrayList<>();
for (Node node : pendingTasks.getChildren()) {
// In principle all child components should be
// CheckBox components, but let's verify that.
if (!(node instanceof CheckBox c)) {
continue;
}
// If we get here, node is a CheckBox and
// c can safely be used as a CheckBox.
String textC = c.getText();
boolean completedC = c.isSelected();
Task task = new Task(textC, completedC);
pendingTasksList.add(task);
}
Equivalent filtering can also be implemented using streams and mapMulti
(JavaDoc)
pendingTasks.getChildren().stream()
.<CheckBox>mapMulti((n, consumer) -> {
// Check whether the component is a CheckBox
if (n instanceof CheckBox c) {
// If it is, c contains the converted component.
// consumer.accept adds it to the stream.
consumer.accept(c);
}
})
.map(cb -> new Task(cb.getText(), cb.isSelected()))
.toList();
Let's now save at least the pending tasks to a file using Jackson.
Add an ObjectMapper and call writeValue():
private void addTask() {
// ... beginning of method hidden
String text = newTaskName.getText();
if (text == null || text.isBlank()) {
newTaskName.requestFocus();
return;
}
text = text.trim();
CheckBox task = new CheckBox(text);
task.setOnAction(event -> {
if (task.isSelected()) {
pendingTasks.getChildren().remove(task);
completedTasks.getChildren().add(task);
} else {
completedTasks.getChildren().remove(task);
pendingTasks.getChildren().add(task);
}
});
pendingTasks.getChildren().add(task);
newTaskName.clear();
newTaskName.requestFocus();
List<Task> pendingTasksList = pendingTasks.getChildren().stream()
.map(n -> (CheckBox)n)
.map(cb -> new Task(cb.getText(), cb.isSelected()))
.toList();
// HIGHLIGHT_GREEN_BEGIN
ObjectMapper mapper = new ObjectMapper();
mapper.writeValue(Path.of("tasks.json").toFile(), pendingTasksList);
// HIGHLIGHT_GREEN_END
}
Try running the application and adding a few tasks.
Every time a task is added, the tasks are saved to tasks.json.
note
You should add the following line to .gitignore:
tasks.json
since this file should not be tracked by version control.
After modifying .gitignore, commit the change:
git add .gitignore
git commit -m "Added tasks.json to .gitignore"
If you already added tasks.json to version control, first remove it with
git rm --cached tasks.json, and make a new commit, and only after that
change .gitingore-file.
Naturally, completed tasks must also be saved.
To avoid code duplication, let's create a helper method getTasks(VBox container) that converts the container's child components into a list of Task objects.
After that, we combine both task lists:
private List<Task> getTasks(VBox container) {
return container.getChildren().stream()
.map(n -> (CheckBox)n)
.map(cb -> new Task(cb.getText(), cb.isSelected()))
.toList();
}
private void addTask() {
// ... beginning of method hidden
// HIGHLIGHT_RED_BEGIN
List<Task> pendingTasksList = pendingTasks.getChildren().stream()
.map(n -> (CheckBox)n)
.map(cb -> new Task(cb.getText(), cb.isSelected()))
.toList();
// HIGHLIGHT_RED_END
// HIGHLIGHT_GREEN_BEGIN
List<Task> tasks = new ArrayList<>();
tasks.addAll(getTasks(pendingTasks));
tasks.addAll(getTasks(completedTasks));
// HIGHLIGHT_GREEN_END
ObjectMapper mapper = new ObjectMapper();
mapper.writeValue(Path.of("tasks.json").toFile(), tasks);
}
Try running the application and inspect how tasks.json changes.
Now both pending and completed tasks are stored whenever a new task is added.
However, changing a task's status does not yet update the file. We could duplicate the save logic inside the checkbox event handler, but that would not be a good solution. Instead, let's refactor saving into its own method:
private void save() {
List<Task> allTasks = new ArrayList<>();
allTasks.addAll(getTasks(pendingTasks));
allTasks.addAll(getTasks(completedTasks));
ObjectMapper mapper = new ObjectMapper();
mapper.writeValue(Path.of("tasks.json").toFile(), allTasks);
}
Now we can simply call save() from both places:
private void addTask() {
// method beginning hidden...
Platform.runLater(newTaskName::requestFocus);
String text = newTaskName.getText(); // Retrieve text field contents
if (text == null || text.isBlank()) {
return;
}
text = text.trim();
CheckBox task = new CheckBox(text);
task.setOnAction(event -> {
// event-handler beginning hidden...
if (task.isSelected()) {
// Task selected --> move to completed tasks
pendingTasks.getChildren().remove(task);
completedTasks.getChildren().add(task);
} else {
completedTasks.getChildren().remove(task);
pendingTasks.getChildren().add(task);
}
// HIGHLIGHT_GREEN_BEGIN
save();
// HIGHLIGHT_GREEN_END
});
pendingTasks.getChildren().add(task);
newTaskName.clear();
// HIGHLIGHT_RED_BEGIN
List<Task> tasks = new ArrayList<>();
tasks.addAll(getTasks(pendingTasks));
tasks.addAll(getTasks(completedTasks));
ObjectMapper mapper = new ObjectMapper();
mapper.writeValue(Path.of("tasks.json").toFile(), tasks);
// HIGHLIGHT_RED_END
// HIGHLIGHT_GREEN_BEGIN
save();
// HIGHLIGHT_GREEN_END
}
At this point, addTask() is also becoming a bit too large.
Creating a checkbox is clearly its own responsibility, so let's move that into a new method.
private CheckBox createCheckBox(String text) {
CheckBox task = new CheckBox(text);
// method body hidden...
task.setOnAction(event -> {
if (task.isSelected()) {
pendingTasks.getChildren().remove(task);
completedTasks.getChildren().add(task);
} else {
completedTasks.getChildren().remove(task);
pendingTasks.getChildren().add(task);
}
save();
});
return task;
}
private void addTask() {
Platform.runLater(newTaskName::requestFocus);
String text = newTaskName.getText(); // Retrieve text field contents
if (text == null || text.isBlank()) {
return;
}
text = text.trim();
// HIGHLIGHT_RED_BEGIN
CheckBox task = new CheckBox(text);
task.setOnAction(event -> {
if (task.isSelected()) {
pendingTasks.getChildren().remove(task);
completedTasks.getChildren().add(task);
} else {
completedTasks.getChildren().remove(task);
pendingTasks.getChildren().add(task);
}
save();
});
// HIGHLIGHT_RED_END
// HIGHLIGHT_YELLOW_BEGIN
pendingTasks.getChildren().add(createCheckBox(text));
// HIGHLIGHT_YELLOW_END
newTaskName.clear();
save();
}
Loading Tasks
Now that tasks can be saved, they also need to be loaded when the application starts.
Let's immediately create a load() method.
We'll use the same approach we learned in Part 6.5 and call ObjectMapper.readValue().
We use try-catch to handle expctions:
private void load() {
Path path = Path.of("tasks.json");
if (Files.notExists(path)) {
return;
}
try {
ObjectMapper mapper = new ObjectMapper();
List<Task> allTasks = mapper.readValue( path.toFile(), new TypeReference<>() {});
allTasks.forEach(task -> {
CheckBox checkBox = createCheckBox(task.getText());
if (task.getCompleted()) {
completedTasks.getChildren().add(checkBox);
} else {
pendingTasks.getChildren().add(checkBox);
}
});
} catch (JacksonException je) {
IO.println("Failed to read JSON: " + je.getMessage()
);
}
}
Add a call to the beginning of initialize():
public void initialize(URL url, ResourceBundle resourceBundle) {
load();
// method ending hidden...
newTaskName.setOnAction(event -> addTask());
addNewTaskButton.setOnAction(event -> addTask());
}
Try running the application. Tasks should now remain available even after the application is closed and reopened.
However, there is one small problem.
Completed tasks are loaded into the completed-task list, but their checkboxes are no longer checked.
This happens because createCheckBox does not yet know whether the task is completed.
Let's add an additional parameter:
private CheckBox createCheckBox(String text, boolean selected) {
CheckBox task = new CheckBox(text);
// HIGHLIGHT_GREEN_BEGIN
task.setSelected(selected);
// HIGHLIGHT_GREEN_END
// rest of method hidden...
}
Now loading can restore the correct state:
private void load() {
// beginning of method hidden...
allTasks.forEach(task -> {
// HIGHLIGHT_YELLOW_BEGIN
CheckBox checkBox = createCheckBox(task.getText(), task.getCompleted());
// HIGHLIGHT_YELLOW_END
// rest of method hidden...
}
At the same time, update the call inside addTask().
New tasks are always incomplete, so pass false:
private void addTask() {
// beginning of method hidden...
String text = newTaskName.getText();
if (text == null || text.isBlank()) {
newTaskName.requestFocus();
return;
}
text = text.trim();
// HIGHLIGHT_YELLOW_BEGIN
pendingTasks.getChildren().add(createCheckBox(text, false));
// HIGHLIGHT_YELLOW_END
// rest of method hidden...
}
Save and run the application again. Now completed tasks are correctly restored as selected when the application starts.
Return the project you advanced in Exercise 7.5.
Recap of the steps in this part:
-
Save the tasks to a JSON file whenever the user adds a task or changes a task's status.
-
Read the tasks from the JSON file when the program starts (if the file exists). The JSON file should look approximately as follows (excluding the line breaks and indentation added for readability):
[
{
"task": "Buy milk",
"done": false
},
{
"task": "Take out the trash",
"done": true
}
]
When the phase is complete, remember to run git add for the modified files and create a git commit.
Return your project files.
Component Layout
Our application is functionally complete, but there are still a few issues with its appearance:
- The default window size is too large.
- Resizing the window leaves empty space in the wrong places.
- The component layout needs some refinement: the checkboxes are too close together, the labels are centered oddly, and the button is far away from the input field.
Let's improve the application's appearance and become familiar with HBox, the close relative of the VBox container.
Open the application's main.fxml file in SceneBuilder.
Immediately select:
View → Show Outlines
or press Ctrl+E (macOS: Cmd+E).
This makes components appear as boxes, making it easier to understand their size and position.
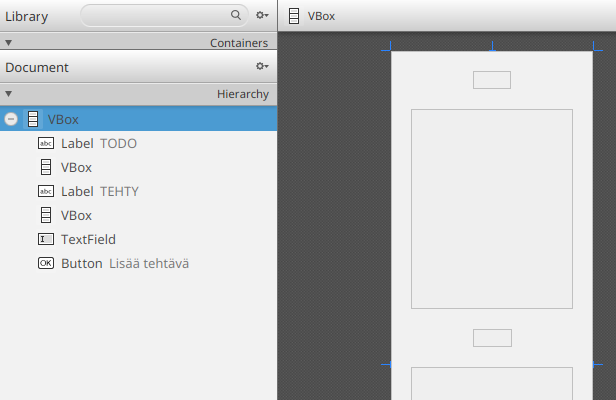
After completing this chapter, you can return to the normal view using: View → Hide Outlines
Window and Component Size
Let's begin by fixing the window size.
Select the VBox that contains the entire application from the Hierarchy panel on the left and open the Layout panel on the right.
The Layout panel contains size-related properties. In JavaFX, every component has three types of width and height:
- Preferred size (
Pref WidthandPref Height): the default size when the view is loaded. The actual size may still change depending on the component itself and the surrounding layout. - Minimum size (
Min WidthandMin Height): the smallest size to which the component may shrink. - Maximum size (
Max WidthandMax Height): the largest size to which the component may grow.
You can assign decimal values or use the following special values:
USE_COMPUTED_SIZE: JavaFX calculates the most appropriate size from the component's contents.USE_PREF_SIZE: JavaFX uses the preferred size (Pref). Useful for restricting component size.
Set the following values for the root VBox:
- Min Width:
USE_PREF_SIZE - Min Height:
USE_PREF_SIZE - Pref Width:
400 - Pref Height:
400 - Max Width:
USE_COMPUTED_SIZE - Max Height:
USE_COMPUTED_SIZE
In other words: initialize the view at 400×400 pixels, do not allow it to shrink below that size, but allow it to grow freely. You should immediately see the change in SceneBuilder.
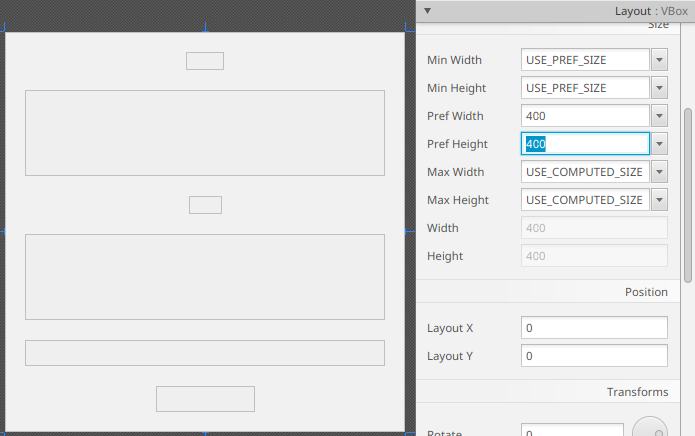
Save the FXML file and launch the application. The default window size is now 400×400.
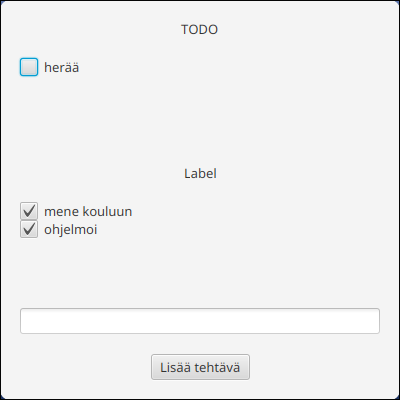
However, the window can still be resized smaller than 400×400 because we only modified the view's limits, not the window (Stage) itself.
Let's fix that by setting the minimum window size in the start method of the App class.
At the same time, we'll give the application a nicer title:
public void start(Stage stage) throws IOException {
FXMLLoader loader = new FXMLLoader(getClass().getResource("main.fxml"));
Scene scene = new Scene(loader.load());
stage.setScene(scene);
// HIGHLIGHT_GREEN_BEGIN
stage.setMinHeight(400);
stage.setMinWidth(400);
// HIGHLIGHT_GREEN_END
// HIGHLIGHT_YELLOW_BEGIN
stage.setTitle("Todo Application");
// HIGHLIGHT_YELLOW_END
stage.show();
}
Now when you run the application, the window can no longer be resized below 400×400.
Spacing Between Components in a VBox
The VBox component contains a Spacing property that defines the amount of empty space between its child components.
Notice that the main VBox currently has a spacing value of 20, which is a bit too large.
Change it to 10:
Let's also fix the task-list containers, whose checkboxes currently have no space between them.
Set the Spacing value of both task-list VBox containers to 5.
Save the FXML file and run the application.
You should now see a small amount of space between checkboxes.
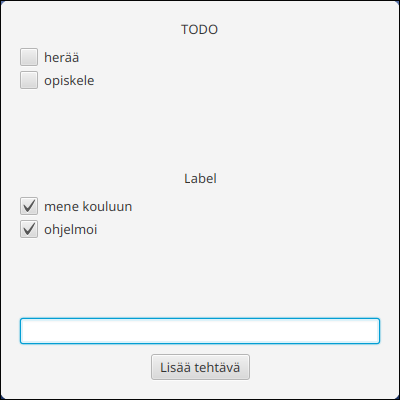
Growing Components When a VBox Grows
Resizing the window reveals another issue: the completed and pending task lists do not grow along with the window.
By default, a VBox keeps the height of its child components unchanged.
However, each component can specify how it should behave when extra space becomes available.
In this case, we want the task lists to expand while other components (labels, text fields, buttons) remain unchanged.
Select the VBox containing pending tasks and open the Layout panel.

Whenever a component is inside a VBox, it can be assigned a Vgrow setting.
This setting controls how the component's height behaves when its containing VBox grows.
The available values are:
NEVER: Height never changes.ALWAYS: Always fills available space. If multiple components use this setting, they share the available space.SOMETIMES: Grows only if nothing else can be expanded.
Set the pending-task container's Vgrow value to
ALWAYS.
Do the same for the completed-task container.
Now both containers will grow proportionally.
Save and test the application. The task lists should now expand vertically with the window while the remaining components keep their original size.
Placing the Button on the Same Row as the Text Field
Currently, the text field appears somewhat disconnected from the button. In most applications, buttons related directly to a text field are placed on the same row.
Since VBox always arranges components vertically, we need its horizontal counterpart: HBox (Horizontal Box).
As its name suggests, an HBox arranges its child components horizontally from left to right.
Add an HBox below the completed-tasks section and drag the text field and button into it.
Configure the HBox with the following settings:
- Spacing:
10(adds empty space between the text field and button) - Pref Width and Pref Height:
USE_COMPUTED_SIZE(the container size adapts to its contents) - Vgrow:
NEVER(the container height never changes even if the surroundingVBoxgrows)
Finally, select the TextField and set its Hgrow value to
ALWAYS
This is the horizontal equivalent of Vgrow inside a VBox.
The text field will now fill all remaining horizontal space.
Left-Aligning the Labels
Let's make one final adjustment. Applications commonly align labels to the left edge. Let's update the alignment to make the interface feel more familiar.
Select the root VBox and set its Alignment property in the Properties panel to
CENTER_LEFT:

Save and run the application. Verify that everything still works correctly and that the components adapt nicely when the window is resized.
Return the project you advanced in Exercise 7.6.
Recap of the steps in this part:
- Set the minimum size of the view and window to 400×400 pixels.
- Add a small amount of empty space between the check boxes using the
spacingproperty. - Make the completed and incomplete task lists grow when many tasks are added.
- Place the button and text field on the same row using an
HBoxcontainer. - Align the labels to the left.
When the phase is complete, run git add for the modified files and create a git commit.
Return your project files.
All Exercises in This Part
Return the project you created in Exercise 7.1.
Recap of the steps in this part:
- Create a JavaFX project based on the
io.github.ohj-perus-jy:javafx-fxml-template-archetype. - Run the program and verify that the JavaFX application window appears.
Return your project files.
Return the project you advanced in Exercise 7.2.
Recap of the steps in this part:
- In SceneBuilder, add your own
TextFieldcomponent inside theVBoxin the FXML file. - Add an
onActionevent handler to the button that adds the text entered into the text field to theLabelcomponent. - Display all tasks in the
Labelcomponent, separating them with line breaks.
Return your project files.
Create a Git repository for your project and make the first commit.
After that, run the git status command in the command line and submit its output to the submission box for this exercise.
Return the project you advanced in Exercise 7.4.
Recap of the steps in this part:
- Create two
VBoxcomponents for incomplete and completed tasks. - When the user enters a task, add it to the incomplete tasks
VBoxas aCheckBoxcomponent. - When the user marks a task as completed by clicking the check box, move it from the incomplete tasks
VBoxcontainer to the completed tasks container. - When the user marks a completed task as incomplete by clicking the check box, move it from the completed tasks container back to the incomplete tasks container.
- When the user adds a task, focus should return to the input field.
- The user should not be able to add a task without text or a task whose text consists only of whitespace characters.
- The user should also be able to add a task by pressing the Enter key while the input field has focus.
When the phase is complete, remember to run git add for the modified files and create a git commit.
Return your project files.
It does not matter if TIM shows a warning or even a compilation error. TIM may not contain all the dependencies required by the exercises, and therefore the JavaFX project may not even compile there.
The important thing is that you have the project working correctly in your local environment.
Return the project you advanced in Exercise 7.5.
Recap of the steps in this part:
-
Save the tasks to a JSON file whenever the user adds a task or changes a task's status.
-
Read the tasks from the JSON file when the program starts (if the file exists). The JSON file should look approximately as follows (excluding the line breaks and indentation added for readability):
[
{
"task": "Buy milk",
"done": false
},
{
"task": "Take out the trash",
"done": true
}
]
When the phase is complete, remember to run git add for the modified files and create a git commit.
Return your project files.
Return the project you advanced in Exercise 7.6.
Recap of the steps in this part:
- Set the minimum size of the view and window to 400×400 pixels.
- Add a small amount of empty space between the check boxes using the
spacingproperty. - Make the completed and incomplete task lists grow when many tasks are added.
- Place the button and text field on the same row using an
HBoxcontainer. - Align the labels to the left.
When the phase is complete, run git add for the modified files and create a git commit.
Return your project files.
JavaFX Part 2: MVC
Learning objectives
- Be able to separate data, application logic, and the user interface in a JavaFX project.
- Be able to use types based on JavaFX's
Observableinterface so that the user interface updates automatically when data changes. - Be able to display task data in a
TableViewcomponent and utilize data binding. - Be able to create a task-editing view that includes validation and priority information.
- Be able to write unit tests for the Todo application's model and business logic.
- Submit the second phase of the tutorial to TIM.
In Part 7, we created a working Todo application in which tasks were modeled largely using user-interface components (CheckBox) and stored in a JSON file.
The solution was a good starting point, but in the long term it makes the application rigid.
For example, if we wanted to add new features to tasks, such as a longer description or a priority level, we would need to introduce new components such as a TaskCheckBox component.
Furthermore, if we wanted to edit task data through a form, we would have to create a separate TaskForm component.
At that point, it would become unclear which representation is the "real" source of truth: should data always be copied from TaskCheckBox objects to TaskForm objects, or the other way around?
Following object-oriented design principles, the core functionality of the problem domain and its presentation to the user are two separate responsibilities. The task data and task management functionality of the Todo application should be modeled as their own separate entity. The sole responsibility of the user interface should be to present the domain data. Checkboxes are not tasks themselves—they are merely one way of displaying tasks.
In this part, we will continue developing the Todo application from Part 7. Our focus now shifts to separating the user interface from the application's core functionality. Finally, we will see how this separation makes it possible to verify the correctness of the application's business logic through automated tests.
JavaFX provides tools that help keep the user interface and application logic loosely coupled.
In this part we will:
- Move all task data into the
Taskclass and model tasks using anObservableList. - Use a
TableViewto display task data. - Organize the application's classes according to the MVC architecture into three separate areas of responsibility.
- Add a task-editing window in which the description, priority, and due date can be modified.
- Verify the correctness of the solution using unit tests.
- Publish the finished project using a GitLab or GitHub remote repository service.
Model and the Observable Interface
In Part 7.5, we created the Task class, whose purpose was to model the data stored in a JSON file. In the user interface, tasks were represented as CheckBox objects. During saving and loading, we converted tasks between the two representations (CheckBox <-> Task). As mentioned in the introduction to this part, that conversion is not a good long-term solution.
The first major step in separating the responsibilities of data and the user interface is reducing data duplication. A clear way to achieve this is to make the Task class the only representation of an individual task's state and behavior. In UI terminology, Task becomes a model class. The term model refers to the structure and state of the application's data without any user-interface dependencies. The model answers the question of what data the application contains, not how that data appears on screen.
The first problem that immediately arises is how to get the information from a Task object into the user interface. Furthermore, if task data changes while the program is running, the view should react automatically without requiring manual update code for every user-interface component after each change.
This is where JavaFX's Observable structures help us by providing a controlled way to connect data and the user interface.
Observable Structures
The word observable means that an object can notify other objects when it changes. Objects that listen to changes in an observable object are often called observers, subscribers, or listeners. In practice, these terms refer to the same idea, although different contexts may favor different terminology.
Observers and observable objects are related to the Observer design pattern, which we will study in more detail later. For now, it is enough to understand that observable structures are the foundation of how JavaFX updates the user interface immediately when data changes.
In JavaFX, we mainly use the following observable structures:
ObservableList<T>, which reports when items are added to or removed from a list.ObservableValue<T>, which reports when its contained value changes.Propertytypes, which report whenever their contained value changes. Property types are observable versions of corresponding primitive types. For example,StringPropertyis an observable version ofString,BooleanPropertyis an observable version ofBoolean, and so on.
An Introductory Example
Let's momentarily forget about the Todo application and focus on understanding how Observable types work.
Create a new JavaFX project following the instructions from Part 7.1. Give it a different name and groupId, for example
ObservableExample and fi.jyu.ohj2.examples.observable.
Comment out the call to Application.launch() inside the main() method:
public static void main(String[] args) {
// HIGHLIGHT_GREEN_BEGIN
// Application.launch(App.class, args);
// HIGHLIGHT_GREEN_END
}
Our application now behaves like a normal command-line program.
Try running the following example. Add the import if necessary import javafx.collections.*;
// ==========================================
// DO NOT COPY THE HIDDEN CODE
// This code exists so that we can mimic ObservableList in mdbood.
// In JavaFX Observablelist is already implemented.
// ==========================================
static interface ListChangeListener<E> {
void onChanged(Change<E> c);
class Change<E> {
boolean next = true, added;
List<E> items;
Change(boolean a, E item) {
added = a;
items = a ? Collections.singletonList(item) : Collections.emptyList();
}
boolean next() { boolean r = next; next = false; return r; }
boolean wasAdded() { return added; }
List<E> getAddedSubList() { return items; }
}
}
static class ObservableList<E> extends ArrayList<E> {
List<ListChangeListener<E>> listeners = new ArrayList<>();
void addListener(ListChangeListener<E> l) { listeners.add(l); }
public boolean add(E e) {
super.add(e);
listeners.forEach(l -> l.onChanged(new ListChangeListener.Change<>(true, e)));
return true;
}
public boolean remove(Object o) {
if (super.remove(o)) {
listeners.forEach(l -> l.onChanged(new ListChangeListener.Change<>(false, null)));
}
return true;
}
}
static class FXCollections {
public static <E> ObservableList<E> observableArrayList() { return new ObservableList<>(); }
}
public static void main(String[] args) {
// 1. Create an observable list instead of a normal ArrayList
ObservableList<String> names = FXCollections.observableArrayList();
// 2. Register a "listener" that reacts whenever the list changes
names.addListener((ListChangeListener<String>) change -> {
int size = names.size();
IO.println("The list now contains " + size + " names.");
});
// 3. Modify the data
names.add("Denis");
names.add("Antti-Jussi");
// Application.launch(App.class, args);
}
When you run the code, you will see output every time names.add() is executed. The message is printed whenever the names list changes, regardless of where in the program that modification occurs.
The key difference between ObservableList and a normal list is that it provides an addListener method, allowing other code to observe changes to the list.
If items are added to a normal ArrayList, no other object automatically knows about the change unless it explicitly checks the list.
ObservableList, on the other hand, is active. Whenever items are added or removed, it sends notifications to all observers registered through addListener.
In the example above, the observer is a lambda expression that prints the list size after every modification.
The lambda parameter change contains information about the modification or modifications that just occurred: which indices were affected, whether items were added or removed, and which items were involved.
It provides methods such as wasAdded(), wasRemoved(), getAddedSubList(), and getRemoved() that can be used to inspect the details of the change
(see
JavaDoc).
Let's try using the change parameter. Add a condition so that additions are printed, while removals are ignored.
// ==========================================
// DO NOT COPY THE HIDDEN CODE
// This code exists so that we can mimic ObservableList in mdbood.
// In JavaFX Observablelist is already implemented.
// ==========================================
static interface ListChangeListener<E> {
void onChanged(Change<E> c);
class Change<E> {
boolean next = true, added;
List<E> items;
Change(boolean a, E item) {
added = a;
items = a ? Collections.singletonList(item) : Collections.emptyList();
}
boolean next() { boolean r = next; next = false; return r; }
boolean wasAdded() { return added; }
List<E> getAddedSubList() { return items; }
}
}
static class ObservableList<E> extends ArrayList<E> {
List<ListChangeListener<E>> listeners = new ArrayList<>();
void addListener(ListChangeListener<E> l) { listeners.add(l); }
public boolean add(E e) {
super.add(e);
listeners.forEach(l -> l.onChanged(new ListChangeListener.Change<>(true, e)));
return true;
}
public boolean remove(Object o) {
if (super.remove(o)) {
listeners.forEach(l -> l.onChanged(new ListChangeListener.Change<>(false, null)));
}
return true;
}
}
static class FXCollections {
public static <E> ObservableList<E> observableArrayList() { return new ObservableList<>(); }
}
public static void main(String[] args) {
ObservableList<String> names = FXCollections.observableArrayList();
names.addListener((ListChangeListener<String>) change -> {
while (change.next()) { // Process all changes that occurred
if (change.wasAdded()) { // Was the change an addition?
IO.println("Added to the list: " + change.getAddedSubList());
}
}
// This code still executes every time
// the listener is called regardless of
// whether the change was an addition or removal
int size = names.size();
IO.println("The list now contains " + size + " names.");
});
names.add("Denis");
names.add("Antti-Jussi");
names.add("Sami");
names.remove("Denis");
// Application.launch(App.class, args);
}
The loop while (change.next()) is JavaFX's way of processing changes in a list.
Several modifications may be bundled together, such as additions, removals, or moves.
The loop ensures each one gets processed.
There may also be multiple listeners. Every call to addListener(...) registers a new listener. Whenever a change occurs, JavaFX notifies all listeners one after another.
One listener might update the user interface, another might write to a log, and a third could perform validation.
An important detail is that an ObservableList listener normally reacts only to structural changes in the list (additions, removals, etc.), not to changes inside the list elements themselves.
For example, if the first element in the list changes from "Denis" to "Antti-Jussi", the listener is not automatically triggered.
We will return to this topic in Part 8.2 when discussing Property types.
Optional information: Why is the typecast needed in the lambda expression?
One final note about the change parameter, which may appear somewhat complicated.
Change is a generic object describing a modification that occurred in the list.
It is used by the onChanged() method of the ListChangeListener interface:
void onChanged(Change<? extends E> c);
In this example E is String, so the full type is:
ListChangeListener.Change<? extends String>
The reason for this syntax is that lists are generic, and different types of modifications (addition, removal, replacement, etc.) can all be represented using the same Change object.
Connecting to the User Interface
In JavaFX, observable objects are typically used so that the observer is a user-interface component. Let's look at how this works in practice.
Restore the Main class so that main() once again contains only the call to Application.launch().
Then use the following controller and FXML view as a starting point. Some import statements have been omitted to save space.
package fi.jyu.ohj2.examples.observable;
public class MainController implements Initializable {
@FXML
private TextField nameField;
@FXML
private Button nameButton;
@FXML
private ListView<String> nameOutputs;
private ObservableList<String> names = FXCollections.observableArrayList();
@Override
public void initialize(URL url, ResourceBundle resourceBundle) {
}
}
Try running the application. It should look roughly like this.
The controller fields nameField and nameButton correspond to the text field and button in the user interface.
The field names is an ObservableList containing the names, just like in the examples above.
Finally, nameOutputs is a ListView
(JavaDoc),
component that knows how to display the contents of an ObservableList.
Components whose names end in "View", such as ListView, are often called view components.
Initially, the ListView does not know which list should be displayed.
Let's connect the list and the view:
public void initialize(URL url, ResourceBundle resourceBundle) {
// HIGHLIGHT_GREEN_BEGIN
nameOutputs.setItems(names);
names.add("Denis");
names.add("Antti-Jussi");
names.add("Sami");
// HIGHLIGHT_GREEN_END
}
This makes nameOutputs observe the names list.
The actual addListener() call happens inside setItems() in exactly the same way we did manually earlier.
After this connection has been established, we never need to call any kind of "refresh list" method.
When the code executes
names.add("New name");
the name automatically appears on the screen.
This is still somewhat difficult to observe because the names are hardcoded into initialize().
Let's add a button handler that inserts a new name into the list.
public void initialize(URL url, ResourceBundle resourceBundle) {
nameOutputs.setItems(names);
// HIGHLIGHT_RED_BEGIN
names.add("Denis");
names.add("Antti-Jussi");
names.add("Sami");
// HIGHLIGHT_RED_END
// HIGHLIGHT_GREEN_BEGIN
nameButton.setOnAction(event -> {
String text = nameField.getText();
names.add(text);
nameField.clear();
nameField.requestFocus();
});
// HIGHLIGHT_GREEN_END
}
Try running the application and adding names through the user interface.
Making Task a Model Class
Now let's return to our Todo application.
Our goal is to model all task state using the Task class.
The responsibility of VBox and CheckBox components should be limited to displaying the data.
Start by adding an ObservableList field to MainController to act as the container for all tasks:
private ObservableList<Task> tasks = FXCollections.observableArrayList();
Then modify addTask() so that it no longer adds a CheckBox component but instead creates a new Task object:
private void addTask() {
String text = newTaskName.getText();
if (text == null || text.isBlank()) {
newTaskName.requestFocus();
return;
}
text = text.trim();
// HIGHLIGHT_RED_BEGIN
pendingTasks.getChildren().add(createCheckBox(text, false));
// HIGHLIGHT_RED_END
// HIGHLIGHT_GREEN_BEGIN
tasks.add(new Task(text, false));
// HIGHLIGHT_GREEN_END
newTaskName.clear();
newTaskName.requestFocus();
save();
}
Likewise, we can now simplify save() so that it saves the tasks list directly, since it becomes the application's single source of truth:
private void save() {
// HIGHLIGHT_RED_BEGIN
List<Task> allTasks = new ArrayList<>();
allTasks.addAll(getTasks(pendingTasks));
allTasks.addAll(getTasks(completedTasks));
// HIGHLIGHT_RED_END
ObjectMapper mapper = new ObjectMapper();
// HIGHLIGHT_YELLOW_BEGIN
mapper.writeValue(Path.of("tasks.json").toFile(), tasks);
// HIGHLIGHT_YELLOW_END
}
Similarly, load() becomes simpler:
private void load() {
Path path = Path.of("tasks.json");
if (Files.notExists(path)) {
return;
}
try {
ObjectMapper mapper = new ObjectMapper();
List<Task> allTasks = mapper.readValue( path.toFile(), new TypeReference<>() {});
// HIGHLIGHT_RED_BEGIN
allTasks.forEach(task -> {
CheckBox checkBox = createCheckBox(task.getText(), task.getCompleted());
if (task.getCompleted()) {
completedTasks.getChildren().add(checkBox);
} else {
pendingTasks.getChildren().add(checkBox);
}
});
// HIGHLIGHT_RED_END
// HIGHLIGHT_GREEN_BEGIN
tasks.addAll(allTasks);
// HIGHLIGHT_GREEN_END
} catch (JacksonException je) {
IO.println("Failed to read JSON: " + je.getMessage());
}
}
At this point, task creation, loading, and saving have been separated from the user-interface components.
In other words, the Task class and the tasks list now form the application's model.
Naturally, tasks no longer appear in the user interface because no connection exists yet between the model and the view. Let's implement that connection next.
At this point, it is also natural to change the signature of the createCheckBox method.
Previously, we passed the task text and completion status as separate parameters, but now that we have a Task object available, we can pass the entire object directly:
// HIGHLIGHT_YELLOW_BEGIN
private CheckBox createCheckBox(Task t) {
CheckBox task = new CheckBox(t.getText());
task.setSelected(t.getCompleted());
// HIGHLIGHT_YELLOW_END
task.setOnAction(event -> {
if (task.isSelected()) {
pendingTasks.getChildren().remove(task);
completedTasks.getChildren().add(task);
} else {
completedTasks.getChildren().remove(task);
pendingTasks.getChildren().add(task);
}
save();
});
return task;
}
Let's now create a helper method updateView for updating the user interface.
private void updateView() {
// Clear the current lists
pendingTasks.getChildren().clear();
completedTasks.getChildren().clear();
// Rebuild the view from the model.
// The createCheckBox(task) method now
// receives the entire object as a parameter.
for (Task task : tasks) {
CheckBox cb = createCheckBox(task);
if (task.getCompleted()) {
completedTasks.getChildren().add(cb);
} else {
pendingTasks.getChildren().add(cb);
}
}
}
Now we can connect everything together.
However, instead of calling updateView() whenever tasks are added or loaded, we connect the model and the view loosely using the ObservableList.
Add a listener to the list that updates the view and saves tasks whenever the task list changes:
public void initialize(URL url, ResourceBundle resourceBundle) {
// HIGHLIGHT_GREEN_BEGIN
tasks.addListener((ListChangeListener<Task>) change -> {
updateView();
save();
});
// HIGHLIGHT_GREEN_END
load();
newTaskName.setOnAction(event -> addTask());
addNewTaskButton.setOnAction(event -> addTask());
}
Since saving now happens automatically whenever the list changes, we can also remove the explicit call to save() from addTask():
private void addTask() {
// beginning of method hidden...
// ...
// HIGHLIGHT_RED_BEGIN
save();
// HIGHLIGHT_RED_END
}
If you run the application now, tasks loaded from the file are visible in the user interface, and adding new tasks works correctly.
Using CheckBox Events to Modify the Model
At this point, the createCheckBox() method still contains logic that manually moves checkboxes between VBox containers.
This duplicates work already performed by the view update mechanism, so let's remove the old code now:
private CheckBox createCheckBox(Task t) {
CheckBox task = new CheckBox(t.getText());
task.setSelected(t.getCompleted());
task.setOnAction(event -> {
// HIGHLIGHT_RED_BEGIN
if (task.isSelected()) {
pendingTasks.getChildren().remove(task);
completedTasks.getChildren().add(task);
} else {
completedTasks.getChildren().remove(task);
pendingTasks.getChildren().add(task);
}
save();
// HIGHLIGHT_RED_END
});
return task;
}
Now we need to change our way of thinking.
Clicking a checkbox should not move the checkbox itself.
Instead, it should only modify the model.
When the model changes, the listener attached to tasks updates the user interface through updateView().
At this stage, a Task object does not yet know how to notify others when its internal state changes.
If we simply called task.setCompleted(true);
the ObservableList would not notice anything, because no item was added to or removed from the list.
For the moment, we work around this limitation by modeling the state change as the removal of the old task and the addition of a new task whose completed state is the opposite.
At the same time, let's rename the CheckBox variable to something more descriptive, since it no longer represents the task itself:
private CheckBox createCheckBox(Task t) {
CheckBox cb = new CheckBox(t.getText());
cb.setSelected(t.getCompleted());
cb.setOnAction(event -> {
// CHANGE:
// We no longer move the component
// manually between VBoxes.
//
// Instead, we update the model list,
// which triggers a view update.
// HIGHLIGHT_GREEN_BEGIN
tasks.remove(t);
tasks.add(new Task(t.getText(), !t.getCompleted()));
// HIGHLIGHT_GREEN_END
});
return cb;
}
The checkbox's behavior is now much simpler:
- The user clicks a checkbox.
- The
setOnActionhandler insidecreateCheckBox()modifies thetaskslist (removeandadd). At this stage, theVBoxcomponents are not touched. - The listener attached to the
taskslist (addListener) notices that the list contents changed. - The listener calls
updateView()andsave(). - Only then does
updateView()clear theVBoxcontainers and rebuild them according to the model's new state.
It should be mentioned that this solution is somewhat inefficient.
The entire user interface is rebuilt because of a single click.
In addition, changing a checkbox state results in two separate changes to the tasks list: removal of the old Task object and addition of the new one.
In other words, updateView() is called twice every time a checkbox is clicked.
This is somewhat wasteful, but it works because ObservableList notices both changes and updates the view automatically.
Nevertheless, we have achieved our primary goal: modeling the application's state and state changes has been moved into the responsibility of the tasks list and Task objects.
Return the project refactored in Exercise 8.1. Recap of the steps in this part:
- Create a separate model object (
Task) for tasks instead of using UI components directly. - Add at least a task title and a done/not-done state to the model.
- Use
ObservableList<Task>as the primary data structure for tasks. - Update the task creation logic to use the model object.
When the phase is complete, run git add for the modified files and create a git commit.
Return your project files.
TableView and Data Binding
In Part 7, tasks were displayed in VBox containers as CheckBox components. This is an excellent way to learn the basic idea behind user interfaces: create components and add them to a view. In the previous chapter, we saw that separating the model and the user interface required an updateView() method that was called whenever the model changed. However, updating the view whenever the model changes can become a bottleneck as an application grows larger, since optimizing view updates is itself a difficult problem that is beyond the scope of this course.
At this point, it is better to rely on JavaFX's built-in view components, which efficiently display objects and react to changes automatically. In this chapter, we introduce the TableView component. TableView is a ready-made JavaFX component that displays objects as rows and object properties as columns. You can think of a TableView as a table where each row represents a task and each column represents a property such as the title, priority, or whether the task has been completed.
Preparation: Making the Task Class Observable
JavaFX's TableView can react not only to changes in the number of objects but also to changes inside the objects themselves. For example, if the title of a task changes, the TableView can detect the change automatically.
For this to work, simply using ObservableList is not enough, because it only notifies listeners when tasks are added or removed. We must also make the task object and its properties observable.
Individual object properties can be made observable using JavaFX's Property types. Property types wrap ordinary values such as Boolean and String and provide a mechanism for reporting value changes. For example, StringProperty is an observable version of String, while BooleanProperty is an observable version of Boolean.
We therefore need observable versions of strings and booleans in our Task class. Previously, a task contained a normal boolean completed field hidden inside the class. We will now replace it with an observable property. The same applies to the task text.
JavaFX provides ready-made implementations called SimpleStringProperty and SimpleBooleanProperty.
import javafx.beans.property.*;
public class Task {
// Original fields replaced with Property wrappers
private final StringProperty text = new SimpleStringProperty("");
private final BooleanProperty completed = new SimpleBooleanProperty(false);
@SuppressWarnings("unused")
public Task() {}
public Task(String text, boolean completed) {
setText(text);
setCompleted(completed);
}
// --- Property setters and getters ---
// Notice that JavaFX convention typically provides
// three methods for each property:
// 1. Normal getter (returns e.g. boolean)
// 2. Normal setter (accepts e.g. boolean)
// 3. Property getter (returns the Property object)
public boolean getCompleted() { return this.completed.get(); }
public void setCompleted(boolean completed) { this.completed.set(completed); }
public BooleanProperty completedProperty() { return this.completed; }
public String getText() { return this.text.get(); }
public void setText(String text) { this.text.set(text); }
public StringProperty textProperty() { return this.text; }
@Override
public String toString() {
return getText() + ": " + (getCompleted() ? "DONE" : "NOT DONE");
}
}
Now the properties of an individual task are observable. This allows the user interface to be bound to the data. The view updates automatically whenever the data changes. Likewise, when the user modifies a value in the interface, the change is written back to the same property. We will explore this idea next.
Adding a TableView and Cleaning Up the UI
Let's start with the view.
Open main.fxml in SceneBuilder.
Remove the completedTasks and pendingTasks VBox components along with their labels.
After the removal, only the HBox containing the input field and button should remain.
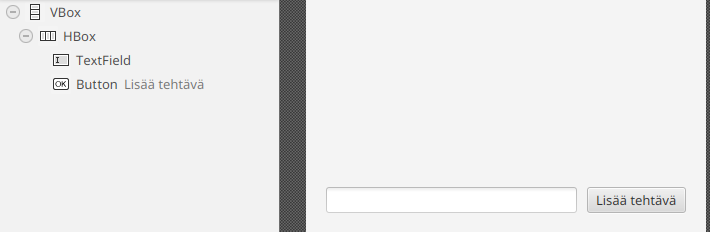
Next, locate the TableView component in the Library panel and place it above the input field.
Be careful to choose TableView, not TreeTableView.
Select the newly added TableView and set its Vgrow property to ALWAYS so that it fills all available space.
Also assign it the fx:id taskTable
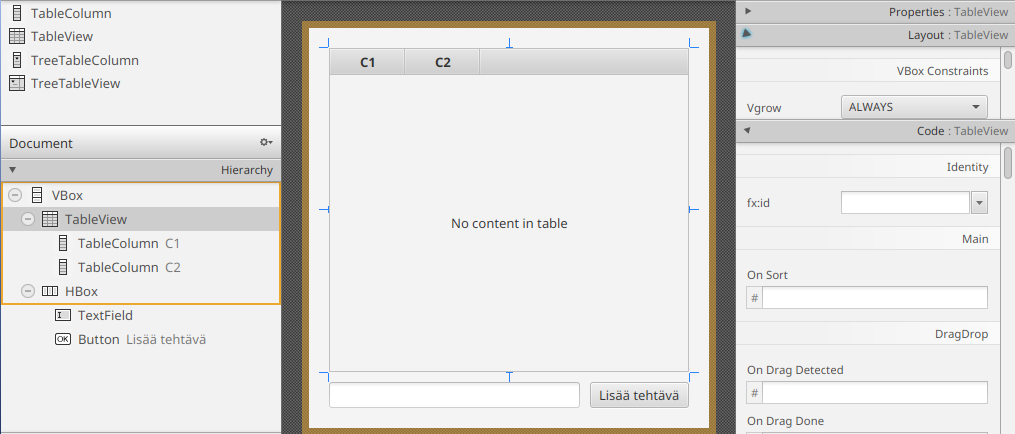
Finally, remove both automatically created TableColumn components from the Hierarchy panel.
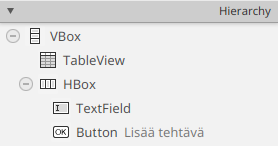
Save the FXML file.
A few words before continuing.
TableView is the table itself. It displays rows but does not yet know what kind of objects those rows contain. We provide that information in the controller momentarily.
A TableView contains one or more TableColumn objects that display object properties as columns. We also configure those columns in code shortly.
Let's now clean up the MainController.
First, remove the old VBox pendingTasks and VBox completedTasks fields and replace them with a TableView<Task> field:
// HIGHLIGHT_RED_BEGIN
@FXML
private VBox pendingTasks;
@FXML
private VBox completedTasks;
// HIGHLIGHT_RED_END
// HIGHLIGHT_GREEN_BEGIN
@FXML
private TableView<Task> taskTable;
// HIGHLIGHT_GREEN_END
Notice that taskTable has type TableView<Task>.
TableView is a generic class whose type parameter specifies the type of object displayed in each row.
In our case, each row displays information from a Task object.
Because of this change, the updateView() method is no longer needed. From now on, TableView updates itself automatically.
Remove the method entirely:
// Remove this entire method. TableView will now
// update the view automatically.
// HIGHLIGHT_RED_BEGIN
private void updateView() {
// ...
}
// HIGHLIGHT_RED_END
Likewise, in initialize() the call to updateView() can be removed from the task-list listener:
public void initialize(URL url, ResourceBundle resourceBundle) {
tasks.addListener((ListChangeListener<Task>) change -> {
// HIGHLIGHT_RED_BEGIN
updateView();
// HIGHLIGHT_RED_END
save();
});
// remainder of method hidden...
}
Binding Tasks and Properties to the Table
Once the FXML structure is ready, we bind the model and view together.
First, bind the tasks list to the table using setItems():
public void initialize(URL url, ResourceBundle resourceBundle) {
// HIGHLIGHT_GREEN_BEGIN
taskTable.setItems(tasks);
// HIGHLIGHT_GREEN_END
// remainder of method hidden...
}
Just like the ListView example in the previous chapter, this connects the task data to the table.
JavaFX automatically registers a listener and updates the displayed rows whenever tasks are added or removed.
Next, let's create a column for the completed property:
public void initialize(URL url, ResourceBundle resourceBundle) {
taskTable.setItems(tasks);
// HIGHLIGHT_GREEN_BEGIN
/* 1 */ TableColumn<Task, Boolean> completedColumn = new TableColumn<>("Completed");
/* 2 */ completedColumn.setCellValueFactory(cd -> cd.getValue().completedProperty());
/* 3 */ taskTable.getColumns().add(completedColumn);
// HIGHLIGHT_GREEN_END
// remainder of method hidden...
}
Let's examine this line by line.
- A new
TableColumn<Task, Boolean>is created. The first type parameter (Task) tells JavaFX what objects each row contains. The second (Boolean) indicates the type displayed in the column."Completed"becomes the visible column heading. setCellValueFactory()binds the column tocompletedProperty(). JavaFX calls this lambda whenever it needs a value for a cell in the column.cd.getValue()returns theTaskon the current row.- The column is added to the table.
Let's create another column for the task text:
public void initialize(URL url, ResourceBundle resourceBundle) {
taskTable.setItems(tasks);
TableColumn<Task, Boolean> completedColumn = new TableColumn<>("Completed");
completedColumn.setCellValueFactory(cd -> cd.getValue().completedProperty());
taskTable.getColumns().add(completedColumn);
// HIGHLIGHT_GREEN_BEGIN
TableColumn<Task, String> textColumn = new TableColumn<>("Task");
textColumn.setCellValueFactory(cd -> cd.getValue().textProperty());
taskTable.getColumns().add(textColumn);
// HIGHLIGHT_GREEN_END
// remainder of method hidden...
}
Optional information: (1) The Factory Method design pattern. (2) "Create first, then configure."
The word factory (for example in setCellValueFactory) comes from the Factory Method design pattern.
A factory method separates object creation into a dedicated method that acts like a factory.
A simple example:
public class Car {
private static int carCount = 0;
private Car() {
// Private constructor prevents direct creation
}
public static Car createCar() {
carCount++;
return new Car();
}
public static int getCarCount() {
return carCount;
}
}
Objects are then created like this:
public class Main {
public static void main(String[] args) {
Car car1 = Car.createCar();
Car car2 = Car.createCar();
System.out.println("Total cars created: " + Car.getCarCount());
// Prints "Total cars created: 2
}
}
In this example, createCar() is the factory method.
It creates a car and could do something other usefull, like increasing counter.
With TableColumn, however, the more important idea is not the factory method itself but an API design style where objects are created first and configured later.
This pattern is not always suitable for ordinary application objects, such as cars or bank accounts, because they should often be in a usable state immediately after construction. The situation is different for components in user interface libraries: they are often intentionally designed to be configured incrementally.
This is exactly how the JavaFX TableColumn API is designed.
First, a column is created:
TableColumn<Task, Boolean> completedColumn = new TableColumn<>("Completed");
Then we configure it separately:
- where values come from (
setCellValueFactory()) - how cells are rendered (
setCellFactory()) - whether editing is allowed
- column width
- sorting behavior
- styling
This is a common design pattern in Java libraries. The constructor creates the object and later methods configure it step by step. This keeps the API flexible and avoids extremely long constructors.
For this reason JavaFX separates these concerns:
- the constructor creates the column
setCellValueFactory()specifies how values are retrievedsetCellFactory()specifies how values are displayed
For this reason, columns are not created in this API using a constructor such as
new TableColumn<>("Completed", cd -> ...)
The constructor is not responsible for retrieving values. Instead, that responsibility is handled separately through the setCellValueFactory() method.
It is also important to distinguish between setCellValueFactory() and setCellFactory().
setCellValueFactory() does not create cells. Instead, it determines where the value for each row is retrieved from.
setCellFactory(), on the other hand, determines what kind of cell (for example, text, a checkbox, or an image) is created for the column and how it displays its value.
For example, a Boolean value could be displayed as ordinary text (true or false) or as a more convenient checkbox.
Likewise, a String value could be displayed as plain text or, in some unusual case, perhaps even as an image representing the meaning of the word.
It is worth mentioning that columns can also be defined directly in FXML using SceneBuilder. In more complex tables, it may be convenient to define columns in advance using SceneBuilder and use the controller only to bind data to the appropriate columns.
Try running the application. Tasks should now appear in the table view, and adding tasks should add them directly to the table. In addition, the table view provides built-in functionality for sorting tasks and rearranging columns:
Notice that we did not need to modify any functionality related to adding, loading, or saving tasks, because model management has been separated from view presentation.
Data binding is at the heart of how the table view works.
Without properties and TableView, we would often have to create components manually for each row, populate them with values, and update the view whenever the data changed.
TableView, together with property types, greatly reduces this manual work.
The code expresses more clearly what should be displayed, while JavaFX takes care of how it is displayed.
Displaying the Completed Column as a Checkbox
By default, the table displays values using their string representations. Because of this, the completed state currently appears as the text values false and true.
However, it is fairly important that a task's state continues to be represented as a checkbox that can be used to mark tasks as completed.
For this purpose, TableColumn provides a setCellFactory() method that allows the appearance of cells in a column to be customized.
JavaFX also provides ready-made factories for the most common column types.
For example, checkbox cells can be created using the CheckBoxTableCell class
(JavaDoc) .
The class method forTableColumn returns a suitable factory object that can be passed directly to setCellFactory().
We must also allow editing in the table by calling setEditable(), otherwise the checkboxes will not be clickable.
public void initialize(URL url, ResourceBundle resourceBundle) {
taskTable.setItems(tasks);
// HIGHLIGHT_GREEN_BEGIN
taskTable.setEditable(true);
// HIGHLIGHT_GREEN_END
TableColumn<Task, Boolean> completedColumn = new TableColumn<>("Completed");
completedColumn.setCellValueFactory(cd -> cd.getValue().completedProperty());
// HIGHLIGHT_GREEN_BEGIN
completedColumn.setCellFactory(CheckBoxTableCell.forTableColumn(completedColumn));
// HIGHLIGHT_GREEN_END
taskTable.getColumns().add(completedColumn);
// rest of method hidden...
}
When the application is started, the Completed column displays task states as checkboxes that can be clicked.
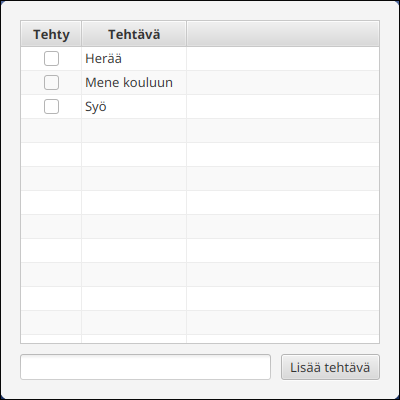
Most importantly, the earlier data binding of the completed property guarantees that the checkbox state and the task object's state remain synchronized: clicking the checkbox changes the object's state, and changes to the object's state are reflected automatically in the table view.
Now that creating checkboxes is the responsibility of TableView, we can remove our own createCheckBox() method:
// No longer needed; TableView creates checkboxes automatically
// HIGHLIGHT_RED_BEGIN
private CheckBox createCheckBox(Task t) {
// method implementation hidden...
}
// HIGHLIGHT_RED_END
However, we quickly notice a problem: clicking a checkbox no longer saves the updated state to the file.
This is partly expected.
In the previous implementation, clicking a checkbox forced a change to the tasks list using the remove() and add() methods, which in turn triggered the listener defined in initialize().
The checkbox now modifies only the task's data value. The tasks list itself does not change, so the listener containing the save() call is never executed.
Saving When a Task Changes
One possible solution would be to add a listener directly to the task's completedProperty() and trigger saving whenever that property changes.
This could be done, for example, inside addTask().
The following demonstrates how this could be implemented—do not do this yet:
private void addTask() {
// beginning of method hidden...
// This would work, but do not do this yet!
// HIGHLIGHT_GREEN_BEGIN
Task task = new Task(text, false);
task.completedProperty().addListener((obs, oldValue, newValue) -> save());
// HIGHLIGHT_GREEN_END
tasks.add(task);
// end of method hidden...
}
This would mean that every time completedProperty() changes (for example, when the checkbox is clicked or setCompleted() is called), all tasks would be saved.
The approach is convenient, but there is a small problem.
Tasks loaded through Jackson would not automatically receive this listener.
If a user changed the state of a task loaded from tasks.json, the task would not be saved because no listener had ever been attached.
We would therefore have to add the same listener inside load() and everywhere else where Task objects might be created.
Let's think about the situation for a moment.
One option would be to create a helper method that always initializes a Task together with the required listener.
On the other hand, we could use the addListener() method of the ObservableList itself.
The idea would be to add another listener to the tasks list in initialize(), similar to the example from the beginning of Part 8.1.
That listener would inspect every newly added task and automatically register a listener for its completedProperty().
The following demonstrates that idea—again, do not implement this yet:
public void initialize(URL url, ResourceBundle resourceBundle) {
// Better, but do not do this solely for saving!
tasks.addListener((ListChangeListener<Task>) change -> {
while (change.next()) {
if (change.wasAdded()) {
for (Task task : change.getAddedSubList()) {
task.completedProperty().addListener((obs, oldValue, newValue) -> save());
}
}
}
});
// rest of method hidden...
}
Now every newly added task would be monitored, and changes to the completed state would trigger saving. This would apply equally to tasks loaded from a file and tasks created through the user interface.
However, every individual task still ends up with its own listener.
That is somewhat awkward.
Saving all tasks becomes directly tied to the completed state of individual tasks.
Logically, saving all tasks should instead be tied to the tasks list itself, because that list represents the application's entire collection of tasks.
There is another solution that is slightly more elegant.
ObservableList can be given a so-called extractor when it is created. An extractor tells the list which properties of each object it should monitor. Modify the creation of the ObservableList as follows:
// Better approach, use this!
private final ObservableList<Task> tasks
= FXCollections.observableArrayList(task -> new Observable[] {task.completedProperty()});
Here task -> new Observable[] { task.completedProperty() }
is the extractor.
It returns an array of Observable objects that the list should monitor for each Task.
As a result, ObservableList reports not only structural changes (task added or removed) but also changes to the properties of items already contained in the list.
In other words, listeners registered through addListener() will now be notified when:
a task is added, a task is removed (which we have not implemented yet),
or the value of a task's completedProperty() changes.
public void initialize(URL url, ResourceBundle resourceBundle) {
// beginning of method hidden...
//_ taskTable.setItems(tasks);
//_ taskTable.setEditable(true
//_ TableColumn<Task, Boolean> completedColumn = new TableColumn<>("Completed");
//_ completedColumn.setCellValueFactory(cd -> cd.getValue().completedProperty());
//_ completedColumn.setCellFactory(CheckBoxTableCell.forTableColumn(completedColumn));
//_ taskTable.getColumns().add(completedColumn
//_ TableColumn<Task, String> textColumn = new TableColumn<>("Task");
//_ textColumn.setCellValueFactory(cd -> cd.getValue().textProperty());
//_ taskTable.getColumns().add(textColumn)
// This already exists!
// It will now execute whenever:
// - A task is added
// - A task is removed
// - A task's completed property changes
// (for example through the table)
tasks.addListener((ListChangeListener<Task>) change -> {
save();
});
// rest of method hidden...
load();
newTaskName.setOnAction(event -> addTask());
addNewTaskButton.setOnAction(event -> addTask());
}
Try running the application now. You should notice that marking tasks as completed automatically saves the changes to the file.
Completed Tasks at the End of the Table
Next, let's reimplement the feature from the earlier VBox-based solution where completed tasks are always shown at the bottom of the list.
Technically, this is already possible through the user interface because TableView supports sorting by clicking column headers.
However, let's configure the sorting in the controller so that users do not need to enable it manually.
JavaFX provides several ways to handle sorting.
One way to create permanent sorting is to use the sorted() method of ObservableList. The method accepts a Comparator and returns a SortedList
(see
JavaDoc).
The SortedList can then be bound directly to the table view:
public void initialize(URL url, ResourceBundle resourceBundle) {
// HIGHLIGHT_GREEN_BEGIN
SortedList<Task> sortedTasks = tasks.sorted(Comparator.comparing(Task::getCompleted));
// HIGHLIGHT_GREEN_END
// HIGHLIGHT_YELLOW_BEGIN
taskTable.setItems(sortedTasks);
// HIGHLIGHT_YELLOW_END
// rest of method hidden...
}
The SortedList contains the same items as the original list but arranged according to the provided comparator.
The two lists remain bound to each other: adding an item to one affects the other, and vice versa.
Again, this highlights how the data-binding approach simplifies view updates.
Try running the application.
Incomplete tasks should now appear first, while completed tasks appear last, because the default Boolean comparator orders false values before true values.
Deleting a Task
Now that we have a table, we can use it to implement task deletion.
Open main.fxml in SceneBuilder and add a new Button component below the HBox.
Set the button text to
"Delete Task"
and give it the fx:id: deleteSelectedButton
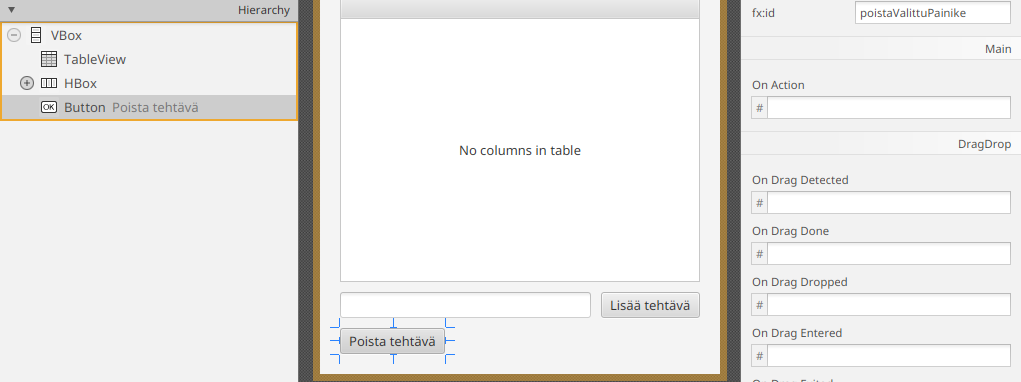
Save the FXML file.
Then add the corresponding field to MainController:
@FXML
private Button deleteSelectedButton;
Next, add a deleteSelected() method to handle deletion.
For deletion to work correctly, the user interface first needs to know which row in the table is selected.
TableView keeps track of selected rows through a SelectionModel, which is accessible through getSelectionModel().
The selected Task object can then be retrieved with getSelectedItem().
Once we have the selected task, we can remove it from the tasks list:
private void deleteSelected() {
// 1. Retrieve the selected task from the table's selection model
Task selectedTask = taskTable.getSelectionModel().getSelectedItem();
// 2. If nothing is selected, do nothing
if (selectedTask == null) {
return;
}
// 3. Remove the task from the model list
tasks.remove(selectedTask);
}
Finally, attach an event handler to deleteSelectedButton that calls this method:
public void initialize(URL url, ResourceBundle resourceBundle) {
// beginning of method hidden...
SortedList<Task> sortedTasks = tasks.sorted(Comparator.comparing(Task::getCompleted));
taskTable.setItems(sortedTasks);
taskTable.setEditable(true);
TableColumn<Task, Boolean> completedColumn = new TableColumn<>("Completed");
completedColumn.setCellValueFactory(cd -> cd.getValue().completedProperty());
completedColumn.setCellFactory(CheckBoxTableCell.forTableColumn(completedColumn));
taskTable.getColumns().add(completedColumn);
TableColumn<Task, String> textColumn = new TableColumn<>("Task");
textColumn.setCellValueFactory(cd -> cd.getValue().textProperty());
taskTable.getColumns().add(textColumn);
tasks.addListener((ListChangeListener<Task>) change -> {
save();
});
load();
newTaskName.requestFocus();
addNewTaskButton.setOnAction(_ -> addTask());
newTaskName.setOnAction(_ -> addTask());
deleteSelectedButton.setOnAction(event -> deleteSelected());
}
Try running the application.
When you select a task in the table and click "Delete Task", the task should disappear from the table.
This works because of data binding: the button removes the task from the tasks list, which automatically updates the sorted sortedTasks list.
The modification to sortedTasks then causes the TableView to refresh itself without any additional code.
Once again, modifications to the model and updates to the view remain only loosely coupled through observable structures.
Bonus: Disabling the button until a task is selected
At this point, the Delete Task button is clickable even when no task is selected. A more user-friendly approach would be to enable the button only when a task is actually selected in the table.
The Button component provides the setDisable() method as well as the observable disableProperty().
Likewise, the table's SelectionModel provides a selectedItemProperty(), which represents the currently selected task.
Because selectedItemProperty() is observable, we can implement enabling and disabling the button using a listener:
deleteSelectedButton.setDisable(true);
taskTable.getSelectionModel().selectedItemProperty().addListener((observable, oldValue, newValue) -> {
if (newValue == null) {
deleteSelectedButton.setDisable(true);
} else {
deleteSelectedButton.setDisable(false);
}
});
Bonus: Showing the button only when a task is selected
Another alternative would be to make the Delete Task button visible only when a task is selected.
Its visibility could then be controlled through setVisible(), which corresponds to the observable property visibleProperty().
The implementation would be otherwise identical, except that the calls to setDisable() would be replaced with setVisible().
Return the project refactored in Exercise 8.2. Recap of the steps in this part:
- Replace the task
VBox+CheckBoxlisting with aTableViewcomponent. - Add at least the following columns to the table: task (title), done status.
- Bind the table's data to an
ObservableList<Task>list. - Allow the user to select a task and delete the selected row.
When the phase is complete, run git add for the modified files and create a git commit.
Return your project files.
MVC Architecture
Now that we have created the Task model with properties and can display a list of tasks using a TableView, it is time to think about the architecture of the entire application.
Application architecture refers to the overall organization of a program's different parts and responsibilities. Architecture consists of decisions that are very difficult to undo, change, or refactor later. A good architecture makes code easier to understand, extend, and test.
In very small projects, architecture does not usually require much thought. In this project, however, architecture has already become important, particularly so that task management, persistence, and the user interface do not all accumulate in a single class.
Fortunately, architecture rarely needs to be invented from scratch. There are many well-established architectural solutions. One such solution is MVC (Model-View-Controller).
In the MVC architecture, an application is divided into three parts: the model, the view, and the controller. The model manages data and data processing, the view displays the user interface, and the controller forwards user actions to the model and updates the view. In this project, MVC helps clarify the structure so that MainController is no longer responsible for everything; task management logic and persistence can be moved into their own model class.
In practice, applications rarely consist of only one model, one view, and one controller. A single program may have multiple models for different kinds of data, multiple views for different screens or use cases, and multiple controllers responsible for their own areas of the user interface. MVC therefore describes the principle of separating responsibilities, rather than requiring an application to be built from exactly one Model, one View, and one Controller class.
In this chapter, we identify the responsibilities of the different parts of our application and move the remaining task-management and persistence functionality out of the controller and into a dedicated model class.
MVC Layers and Responsibilities
Let's take a closer look at the responsibilities of each MVC layer and how those layers are implemented in this project.
View
- Responsibility: What the application looks like.
- Implementation in the Todo application: FXML files that define the user-interface structure.
- Restrictions: Contains no application logic whatsoever (for example, it does not know how tasks are saved to disk).
Model
- Responsibility: What data the application contains and how that data is processed. This is often referred to as application logic, business logic, or domain logic.
- Implementation in the Todo application: We have already created the
Taskclass to represent an individual task. In this chapter, we will also create aTaskCollectionclass that stores the state of the task list and provides methods for adding, removing, and saving tasks. - Restrictions: Knows nothing about JavaFX views (
TableView,TextField, etc.) and instead relies on observable structures to communicate changes to interested parties.
Controller
- Responsibility: Acting as an interpreter between the view and the model.
- Implementation in the Todo application:
MainControllerreacts to user actions such as button clicks, calls methods in the model (TaskCollection), and binds the view (TableView) to the model using observable data structures.
MVC Encourages the Single Responsibility Principle
Single Responsibility is a software-design principle stating that every class or part of a program should have one clear responsibility—that is, one primary reason to change. The idea is that a class should not contain functionality that changes for different reasons. The Single Responsibility Principle is one of the five SOLID principles, which we will revisit later. A "reason to change" means a requirement or need that forces modifications to a class's implementation.
For example, in our Todo application, task persistence might change because we decide to replace JSON files with a database. The user interface might change because we want to display tasks differently or because we decide to provide a command-line or web version of the application. If the same class handled both persistence and the user interface, these unrelated reasons for change would become entangled.
MVC supports the Single Responsibility Principle because concerns that change for different reasons are separated into different layers. In this project, the principle appears as follows:
Task(and laterTaskCollection) belong to the model because they represent application data and its rules.MainControllerdoes not save files directly but delegates that work to the model.- The FXML view contains the structure of the interface, not application logic.
If MainController simultaneously handled button clicks, input validation, persistence, and file loading, the class would have many different reasons to change. This would make it harder to test, maintain, and safely extend.
Refactoring the Application Packages
In a JavaFX application, MVC separation is easiest to see through packages and directory structure. Currently, our application classes are organized as follows:
Let's refactor the package structure so that MVC responsibilities become more visible:
Start by renaming the existing data subpackage to model.
(A subpackage is simply a package located inside another package, such as data inside fi.jyu.ohj2.name.todo.)
Open IDEA's Project view and right-click the data package.
Select Rename and change the package name from data to model, then click Refactor.
Next, create a new subpackage called controller
(see Part 6.4)
and move the MainController class into it.
Notice that IDEA automatically updates package declarations inside classes as well as references within FXML files.
TaskCollection
We will now move the heart of the application—the task list and loading/saving operations—out of the controller and into its own class. This functionality clearly belongs to application data and data processing, so in MVC it belongs in the model layer.
Create a class TaskCollection in the model package and move the task-management functionality there: the tasks list, its initialization, the load() method, and the save() method.
We also follow the principle of encapsulation: make the tasks list private and provide helper methods such as getTasks(), addTask(), and removeTask() for accessing and modifying it.
At the same time, let's perform a few additional refactorings: move the file location and the ObjectMapper into fields, since both are used by loading and saving.
package fi.jyu.ohj2.name.todo.model;
import javafx.beans.Observable;
import javafx.collections.FXCollections;
import javafx.collections.ListChangeListener;
import javafx.collections.ObservableList;
import tools.jackson.core.JacksonException;
import tools.jackson.core.type.TypeReference;
import tools.jackson.databind.ObjectMapper;
import java.nio.file.Files;
import java.nio.file.Path;
import java.util.List;
// imports omitted for brevity
public class TaskCollection {
private final ObservableList<Task> tasks = FXCollections.observableArrayList(
task -> new Observable[]{task.completedProperty()}
);
private final Path filePath = Path.of("tasks.json");
private final ObjectMapper mapper = new ObjectMapper();
public TaskCollection() {
tasks.addListener((ListChangeListener<Task>) change -> {
save();
});
}
public ObservableList<Task> getTasks() {
return tasks;
}
public void save() {
mapper.writeValue(filePath, tasks);
}
public void load() {
if (Files.notExists(filePath)) {
return;
}
try {
List<Task> allTasks = mapper.readValue(filePath, new TypeReference<>() {});
tasks.addAll(allTasks);
} catch (JacksonException je) {
IO.println("Failed to read JSON: " + je.getMessage());
}
}
public void addTask(String text) {
if (text == null || text.isBlank()) {
return;
}
text = text.trim();
tasks.add(new Task(text, false));
}
public void removeTask(Task task) {
if (task == null) {
return;
}
tasks.remove(task);
}
}
Notice how all the rules ("task title cannot be empty", "update the file when a task is added or modified") now live inside the model class.
The Controller's New Role
Finally, let's update MainController.
The controller now has a much clearer role as a "clerk" between the model and the view.
It no longer carries the burden of collection-management logic. Instead, it simply communicates between the user interface and TaskCollection.
TaskCollection acts as the application's top-level model. It owns the task list, handles loading and saving, and provides methods for adding and removing tasks.
Although this refactoring may seem like little more than moving code around, it is really about separating responsibilities according to the MVC model. Once task management, persistence, and validation exist in a dedicated model class, they can be developed and tested independently of the user interface, while the controller remains simpler.
package fi.jyu.ohj2.name.todo.controller;
import fi.jyu.ohj2.nimi.todo.model.Tehtava;
import fi.jyu.ohj2.nimi.todo.model.Tehtavakokoelma;
import javafx.collections.transformation.SortedList;
import javafx.fxml.FXML;
import javafx.fxml.Initializable;
import javafx.scene.control.Button;
import javafx.scene.control.TableColumn;
import javafx.scene.control.TableView;
import javafx.scene.control.TextField;
import javafx.scene.control.cell.CheckBoxTableCell;
import java.net.URL;
import java.util.Comparator;
import java.util.ResourceBundle;
// imports omitted for brevity
public class MainController implements Initializable {
@FXML
private Button addNewTaskButton;
@FXML
private TextField newTaskName;
@FXML
private TableView<Task> taskTable;
@FXML
private Button deleteSelectedButton;
// HIGHLIGHT_YELLOW_BEGIN
private TaskCollection taskCollection = new TaskCollection();
// HIGHLIGHT_YELLOW_END
@Override
public void initialize(URL url, ResourceBundle resourceBundle) {
// HIGHLIGHT_YELLOW_BEGIN
SortedList<Task> sortedTasks = taskCollection.getTasks().sorted(Comparator.comparing(Task::getCompleted));
// HIGHLIGHT_YELLOW_END
taskTable.setItems(sortedTasks);
taskTable.setEditable(true);
TableColumn<Task, Boolean> completedColumn = new TableColumn<>("Completed");
completedColumn.setCellValueFactory(cd -> cd.getValue().completedProperty());
completedColumn.setCellFactory(CheckBoxTableCell.forTableColumn(completedColumn));
taskTable.getColumns().add(completedColumn);
TableColumn<Task, String> textColumn = new TableColumn<>("Task");
textColumn.setCellValueFactory(cd -> cd.getValue().textProperty());
taskTable.getColumns().add(textColumn);
// HIGHLIGHT_YELLOW_BEGIN
taskCollection.load();
// HIGHLIGHT_YELLOW_END
newTaskName.setOnAction(event -> addTask());
addNewTaskButton.setOnAction(event -> addTask());
deleteSelectedButton.setOnAction(event -> deleteSelected());
}
private void addTask() {
// HIGHLIGHT_YELLOW_BEGIN
taskCollection.addTask(newTaskName.getText());
// HIGHLIGHT_YELLOW_END
newTaskName.clear();
newTaskName.requestFocus();
}
private void deleteSelected() {
Task selectedTask = taskTable.getSelectionModel().getSelectedItem();
// HIGHLIGHT_YELLOW_BEGIN
taskCollection.removeTask(selectedTask);
// HIGHLIGHT_YELLOW_END
}
// HIGHLIGHT_RED_BEGIN
private void save() {
ObjectMapper mapper = new ObjectMapper();
mapper.writeValue(Path.of("tasks.json"), tasks);
}
private void load() {
Path path = Path.of("tasks.json");
if (Files.notExists(path)) {
return;
}
try {
ObjectMapper mapper = new ObjectMapper();
List<Task> allTasks =
mapper.readValue(path.toFile(), new TypeReference<>() {});
tasks.addAll(allTasks);
} catch (JacksonException je) {
IO.println("Failed to read JSON: " + je.getMessage());
}
}
// HIGHLIGHT_RED_END
}
Return the project refactored in Exercise 8.3. Recap of the steps in this part:
- Organize the project into layers (at minimum: model + UI logic).
- Move the file reading and writing logic from the controller into a
TaskCollectionclass. - Modify the
MainControllerclass so that it delegates save and load operations to the model.
When the phase is complete, run git add for the modified files and create a git commit.
Return your project files.
Multiple Views and Task Editing
It is very common for an application to contain multiple views in addition to the main window.
JavaFX allows views to be loaded and displayed in three different ways.
First, the view displayed in the main window can be replaced using the stage.setScene() method, as we mentioned in Part 7.1.
Second, a view can be loaded and embedded inside another view. For example, we could add tabs to the main window and place each tab's contents in its own view.
Third, we can create new windows that display a desired view. These windows may operate alongside the main window, or they may be modal. A modal component requires the user's attention. While it is open, the main window cannot be used. Modal windows are useful for dialogs that request input from the user and prevent the user from continuing until the dialog has been closed.
In this chapter, we will focus on the third approach. We will create a dialog that allows the user to edit the detailed information of a task. The dialog will open whenever the user double‑clicks a task.
Preparation: Adding More Information to Tasks
Let's first modify the Task class by adding more information to it.
We would like each task to contain:
- A title, which is displayed in the table
- A completed/not-completed state, as before
- A more detailed description
- A priority with three allowed values: low, medium, high
The first two are already handled by the current task attributes. A description can be modeled as a string.
A priority could be modeled using numbers 0, 1, and 2. However, Java provides a special type for situations like this: an enumeration (enum).
For example, a priority can be modeled as:
// Enumeration type Priority
// Priority allows only three possible values: LOW, MEDIUM, HIGH
public enum Priority {
LOW, MEDIUM, HIGH
}
// Example usage
void main() {
Priority priority = Priority.LOW;
IO.println(priority);
}
Enum values can be stored in variables and attributes just like ordinary objects, but the value must always be one of the values defined by the enumeration.
Create a new file Priority.java inside the model package:
package fi.jyu.ohj2.name.todo.model;
public enum Priority {
LOW, MEDIUM, HIGH
}
Next, extend the Task class by adding new properties for the description and priority.
At the same time, let's rename the text property to title:
public class Task {
// HIGHLIGHT_YELLOW_BEGIN
private final StringProperty title = new SimpleStringProperty("");
// HIGHLIGHT_YELLOW_END
// HIGHLIGHT_GREEN_BEGIN
private final StringProperty description = new SimpleStringProperty("");
// HIGHLIGHT_GREEN_END
private final BooleanProperty completed = new SimpleBooleanProperty(false);
// HIGHLIGHT_GREEN_BEGIN
private final ObjectProperty<Priority> priority = new SimpleObjectProperty<>(Priority.MEDIUM);
// HIGHLIGHT_GREEN_END
@SuppressWarnings("unused")
public Task() {}
// HIGHLIGHT_YELLOW_BEGIN
public Task(String title, boolean completed) {
setTitle(title);
// HIGHLIGHT_YELLOW_END
setCompleted(completed);
}
public boolean getCompleted() { return this.completed.get(); }
public void setCompleted(boolean completed) { this.completed.set(completed); }
public BooleanProperty completedProperty() { return this.completed; }
// HIGHLIGHT_YELLOW_BEGIN
public String getTitle() { return this.title.get(); }
public void setTitle(String title) { this.title.set(title); }
public StringProperty titleProperty() { return this.title; }
// HIGHLIGHT_YELLOW_END
// HIGHLIGHT_GREEN_BEGIN
public String getDescription() { return description.get(); }
public void setDescription(String description) { this.description.set(description); }
public StringProperty descriptionProperty() { return this.description; }
public Priority getPriority() { return this.priority.get(); }
public void setPriority(Priority priority) { this.priority.set(priority); }
public ObjectProperty<Priority> priorityProperty() { return this.priority; }
// HIGHLIGHT_GREEN_END
@Override
public String toString() {
return getTitle() + ": " + (getCompleted() ? "DONE" : "NOT DONE");
}
}
Notice that renaming the text property requires updating the getter, setter, property methods, and all references in the controller.
You can perform this easily by placing the cursor on the symbol, right-clicking, and selecting Rename.
Alternatively, you may rename everything manually.
Remember that MainController also contains references to textProperty(), which must be updated.
Save the changes.
When you run the application now, you will notice that titles disappear from old tasks since the field name changed.
Because we are only testing the application, simply delete tasks.json from the project.
If IDEA asks whether to perform a Safe Delete, disable it.
Creating the New Editing View
Let's create a new view for the upcoming dialog. Remember that every user interface needs both a view (FXML) and a controller class. We begin with the view.
Open SceneBuilder and choose the Empty template from "New Project from Template".
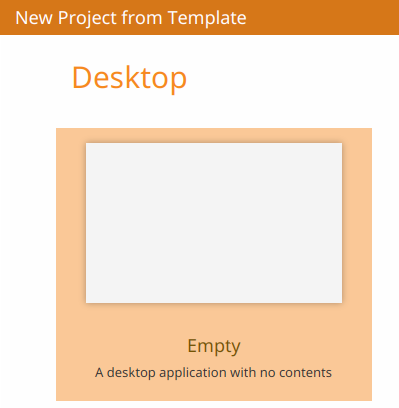
Immediately save the new FXML file.
Place it in the same directory as main.fxml:
src/main/resources/fi/jyu/ohj2/name/todo
Name the file
task-edit.fxml
Then build the following user interface in SceneBuilder.
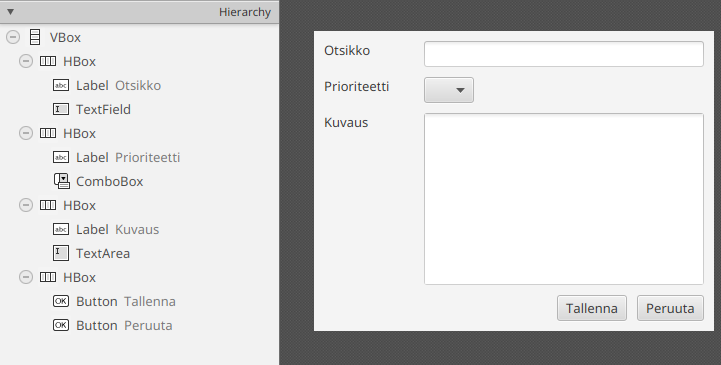
Configure the components as follows:
- VBox container
- Spacing:
10 - Padding:
10on all sides - Pref Width:
400 - Pref Height:
300
- Spacing:
- All Label components
- Min Width:
100 - Other Width and Height settings:
USE_COMPUTED_SIZE
- Min Width:
- HBox containers for the title field, priority field, and buttons
- Vgrow:
NEVER
- Vgrow:
- HBox containing the description field
- Vgrow:
ALWAYS
- Vgrow:
- HBox containing the buttons
- Alignment:
TOP_RIGHT - Spacing:
10
- Alignment:
- TextField, ComboBox, and TextArea
- Hgrow:
ALWAYS - Width and Height settings:
USE_COMPUTED_SIZE
- Hgrow:
Assign the following fx:id values:
- Title TextField:
titleField - Priority ComboBox:
priorityCombo - Description TextArea:
descriptionField - Save Button:
saveButton - Cancel Button:
cancelButton
Save the FXML file.
You can also copy the complete FXML file here
<?xml version="1.0" encoding="UTF-8"?>
<?import javafx.geometry.Insets?>
<?import javafx.scene.control.Button?>
<?import javafx.scene.control.ComboBox?>
<?import javafx.scene.control.Label?>
<?import javafx.scene.control.TextArea?>
<?import javafx.scene.control.TextField?>
<?import javafx.scene.layout.HBox?>
<?import javafx.scene.layout.VBox?>
<VBox maxHeight="-Infinity" maxWidth="-Infinity" minHeight="-Infinity" minWidth="-Infinity" prefHeight="300.0" prefWidth="400.0" spacing="10.0" xmlns="http://javafx.com/javafx/25" xmlns:fx="http://javafx.com/fxml/1">
<children>
<HBox VBox.vgrow="NEVER">
<children>
<Label minWidth="100.0" text="Title" />
<TextField fx:id="titleField" HBox.hgrow="ALWAYS" />
</children>
</HBox>
<HBox>
<children>
<Label minWidth="100.0" text="Priority" />
<ComboBox fx:id="priorityCombo" HBox.hgrow="ALWAYS" />
</children>
</HBox>
<HBox VBox.vgrow="ALWAYS">
<children>
<Label minWidth="100.0" text="Description" />
<TextArea fx:id="descriptionField" prefHeight="200.0" prefWidth="200.0" HBox.hgrow="ALWAYS" />
</children>
</HBox>
<HBox alignment="TOP_RIGHT" spacing="10.0" VBox.vgrow="NEVER">
<children>
<Button fx:id="saveButton" mnemonicParsing="false" text="Save" />
<Button fx:id="cancelButton" mnemonicParsing="false" text="Cancel" />
</children>
</HBox>
</children>
<padding>
<Insets bottom="10.0" left="10.0" right="10.0" top="10.0" />
</padding>
</VBox>
Creating the Controller Class
Once the view is ready, we also need a controller.
Create a new class called TaskEditController inside the controller package.
Remember that the class should implement the Initializable interface.
Add attributes corresponding to the components that were given fx:id values:
package fi.jyu.ohj2.name.todo.controller;
import fi.jyu.ohj2.nimi.todo.model.Prioriteetti;
import javafx.fxml.FXML;
import javafx.fxml.Initializable;
import javafx.scene.control.Button;
import javafx.scene.control.ComboBox;
import javafx.scene.control.TextArea;
import javafx.scene.control.TextField;
import java.net.URL;
import java.util.ResourceBundle;
// imports hidden...
public class TaskEditController implements Initializable {
@FXML
private TextField titleField;
@FXML
private ComboBox<Priority> priorityCombo;
@FXML
private TextArea descriptionField;
@FXML
private Button saveButton;
@FXML
private Button cancelButton;
@Override
public void initialize(URL location, ResourceBundle resources) {
}
}
A few words about the new components.
TextArea is a multi-line text field. It behaves similarly to TextField but allows line breaks.
ComboBox<T> is a component that displays the contents of an ObservableList<T> as a drop-down menu.
Although the controller now exists, we have not yet told JavaFX that the FXML file and controller belong together. Return to SceneBuilder and open the Controller panel at the bottom of the Document view.
The Controller class setting determines which controller class is loaded whenever the view is loaded.
Set its value to:
fi.jyu.ohj2.name.todo.controller.TaskEditController
using your own package name.
Save the FXML file.
Now every time the edit view is displayed, JavaFX will automatically create a corresponding TaskEditController.
Opening the Dialog from the Main View
We would now like to open the dialog whenever a task in the table is double-clicked.
Unfortunately, TableView does not directly provide an event for clicking a row.
Instead, clicks occur on the TableRow object representing the individual row.
To customize rows, TableView provides the setRowFactory() method
(JavaDoc) .
The supplied lambda is executed whenever a new row is created.
The lambda should create and return a TableRow object.
This allows us to attach an onMouseClicked event handler to each row.
Add the following to the initialize() method of MainController where we initialize the columns:
taskTable.setRowFactory(tv -> {
TableRow<Task> row = new TableRow<>();
row.setOnMouseClicked(event -> {
if (event.getButton().equals(MouseButton.PRIMARY)
&& event.getClickCount() == 2 && !row.isEmpty()) {
Task task = row.getItem();
openTaskEditor(task);
}
});
return row;
});
Next, create the openTaskEditor() method:
private void openTaskEditor(Task task) {
try {
/* 1 */ FXMLLoader loader = new FXMLLoader(App.class.getResource("task-edit.fxml"));
/* 1 */ Parent root = loader.load();
/* 1 */ Scene scene = new Scene(root);
/* 2 */ Stage dialog = new Stage();
/* 2 */ dialog.setScene(scene);
/* 3 */ dialog.setTitle("Edit Task: " + task.getTitle());
/* 3 */ dialog.setMinWidth(400);
/* 3 */ dialog.setMinHeight(300);
/* 3 */ dialog.initModality(Modality.APPLICATION_MODAL);
/* 4 */ dialog.showAndWait();
} catch (IOException e) {
throw new RuntimeException(e);
}
}
Notice that the logic is essentially the same as the application startup code from Part 7.1, with a few differences:
- Initializing the view: Load it with
FXMLLoaderand create aScene. - Attaching the view to a window: Create a new
Stagemanually. - Adjusting window settings: Set title, minimum size, and make the window modal.
- Displaying the window: Use
showAndWait(), which blocks until the dialog closes.
Run the application. Double-clicking a row should now open the dialog.
Passing the Selected Task to the Dialog Controller
The dialog still cannot display task information because it knows nothing about the selected task.
We need to pass the selected Task object to the dialog controller.
Add a new attribute to TaskEditController:
public class TaskEditController implements Initializable {
// HIGHLIGHT_GREEN_BEGIN
private Task editedTask;
// HIGHLIGHT_GREEN_END
For encapsulation reasons the field remains private. Add a public setter method:
public void setTask(Task task) {
this.editedTask = task;
titleField.setText(task.getTitle());
priorityCombo.setValue(task.getPriority());
descriptionField.setText(task.getDescription());
}
note
At this point, data binding could also be used:
titleField.textProperty().bindBidirectional(task.titleProperty());
However, then every key press would immediately modify the task. Since we want the user to be able to cancel changes, we copy values manually instead.
Let's return to the openTaskEditor() method in the MainController class.
Now, before creating the window, we can retrieve the TaskEditController instance and pass the task to be edited to it. We can obtain the controller instance created for the view by calling the getController() method of the FXMLLoader object (see the JavaDoc).
private void openTaskEditor(Task task) {
// beginning hidden...
FXMLLoader loader = ...
Parent root = loader.load();
Scene scene = new Scene(root);
// HIGHLIGHT_GREEN_BEGIN
TaskEditController controller = loader.getController();
controller.setTask(task);
// HIGHLIGHT_GREEN_END
Stage dialog = new Stage();
// remainder hidden...
}
Run the application again. Double-clicking a task should now open the dialog with the task information prefilled.
At this point, we notice a small bug: the priority drop-down box does not yet display all the available priority options. We can fix this by setting the Priority values displayed in the ComboBox component using the setItems() method, similarly to how we did earlier with the ListView component introduced in this chapter. Add the following line to the initialize() method of the TaskEditController class:
public void initialize(URL location, ResourceBundle resources) {
priorityCombo.setItems(FXCollections.observableArrayList(Priority.values()));
}
Priority.values() returns all enum values (LOW, MEDIUM, HIGH).
Now all priority values are available in the drop-down list.
Implementing the Dialog Logic
Finally, let's implement the actual logic for the dialog in the TaskEditController class.
The edit dialog contains two buttons:
- The Save button stores the changes made to the task and closes the dialog. We must ensure that a task cannot be saved without a title. The description field, however, is optional.
- The Cancel button closes the dialog without transferring any information to the task object.
Let's begin by adding a helper method close() to TaskEditController, which closes the dialog, along with event handlers for the Save and Cancel buttons:
public void initialize(URL location, ResourceBundle resources) {
priorityCombo.setItems(FXCollections.observableArrayList(Priority.values()));
// beginning of method hidden...
saveButton.setOnAction(event -> {
editedTask.setTitle(titleField.getText());
editedTask.setPriority(priorityCombo.getValue());
editedTask.setDescription(descriptionField.getText());
close();
});
cancelButton.setOnAction(event -> close());
}
private void close() {
// Trick: retrieve the Scene object from any component
Scene scene = titleField.getScene();
// The Scene object's getWindow() method returns the current window.
// We know that the window is a Stage, so we perform a cast.
Stage window = (Stage)scene.getWindow();
window.close();
}
Remember that a task must not be saved if the title field is empty.
Let's implement this check using user-friendly validation: if the title field is empty, we change the color of its border and display a clear warning message.
To accomplish this, create a helper method validate() that checks whether the title field is valid and returns a boolean indicating whether all fields are valid (true) or invalid (false).
If the title field contains no value, the field border is colored red and an error message is shown inside the field.
private boolean validate() {
// Reset any previous error styles and prompt texts
titleField.setStyle("");
titleField.setPromptText("");
String title = titleField.getText();
if (title == null || title.isBlank()) {
// Change the border color to red to indicate an error
titleField.setStyle(
"-fx-border-color: red; " +
"-fx-background-color: #fdf2f2;"
);
// Display the error message as the prompt text
titleField.clear();
titleField.setPromptText("Title is missing!");
// Return false to indicate validation failure
return false;
}
return true;
}
We can now call validate() directly inside the Save button's event handler:
public void initialize(URL location, ResourceBundle resources) {
// beginning of method hidden...
priorityCombo.setItems(FXCollections.observableArrayList(Priority.values()));
saveButton.setOnAction(event -> {
// HIGHLIGHT_GREEN_BEGIN
if (!validate()) {
return;
}
// HIGHLIGHT_GREEN_END
editedTask.setTitle(titleField.getText());
editedTask.setPriority(priorityCombo.getValue());
editedTask.setDescription(descriptionField.getText());
close();
});
// rest of method hidden...
cancelButton.setOnAction(event -> close());
}
Try running the application again. The Save and Cancel buttons should now function correctly. In addition, leaving the title field empty displays an error message to the user.
Saving Changes Made to Task Information
We now notice that editing task information through the dialog updates the values displayed in the table, but the changes are not yet saved to the file.
This happens because saving currently occurs only when the tasks list in TaskCollection changes.
The list currently changes only when:
a task is added,
a task is removed, or
the completed property changes,
as specified in the extractor:
private final ObservableList<Task> tasks =
FXCollections.observableArrayList(
task -> new Observable[] {task.completedProperty()}
);
There are several ways to handle saving after dialog edits.
For now, let's keep the solution straightforward and add all properties of the Task class to the extractor:
private final ObservableList<Task> tasks =
FXCollections.observableArrayList(
task -> new Observable[] {
task.completedProperty(),
task.titleProperty(),
task.descriptionProperty(),
task.priorityProperty()
}
);
Now the tasks list reports changes to all task properties.
In other words, whenever any property of a task changes, the listener defined in TaskCollection saves all tasks.
Optional additional information: Saving after a short delay
The solution above is not ideal: every call to a setter method now triggers saving of the entire task collection.
One way to improve this using JavaFX is to introduce a so‑called debounce object.
A debounce prevents the same code from being executed repeatedly within a short time period.
For example, we can limit calls to save() so that it executes only once every 500 milliseconds.
JavaFX provides the helper class PauseTransition for this purpose:
private final PauseTransition saveDebounce = new PauseTransition(Duration.millis(500));
public TaskCollection() {
// Define the code whose execution should be limited
saveDebounce.setOnFinished(event -> save());
tasks.addListener((ListChangeListener<Task>) change -> {
// Execute the delayed action after 500 ms
// If another change occurs within that period,
// restart the timer.
saveDebounce.playFromStart();
});
}
With this change, multiple consecutive setter calls cause only a single execution of the save() method.
Return the project refactored in Exercise 8.4. Recap of the steps in this part:
- Open the task editing view when the user double-clicks a task.
- Add at least a description and a priority to the task.
- Add validation for user input (for example, the task title must not be empty).
- Save the changes back to the task and update the view.
When the phase is complete, run git add for the modified files and create a git commit.
Return your project files.
Unit Testing
The basic idea of unit testing is simple: test small parts of a program, such as individual classes or methods, separately from the rest of the system. The goal is to ensure that each part works correctly within its own responsibility. When a test remains small and narrowly focused, locating errors is much easier than trying to test the entire application at once.
Unit tests are useful because they reveal errors quickly during development. They also act as a safety net: if we modify code later, running the unit tests quickly shows whether previously working functionality has broken. Third, they force the programmer to think about what a class interface should look like and what the class is actually supposed to do.
Consider the TaskCollection class, for example. We can write a test that adds one task to the collection and verifies that the list now contains one item. We can write another test that attempts to add an empty title and verifies that no task is added. A third test could remove a selected task and verify that the collection size decreases correctly. Each of these tests verifies one clear piece of behavior.
JUnit
In the Java ecosystem, unit tests are commonly written using the JUnit library. JUnit provides ready-made tools for writing test methods and verifying expected results.
At the time of writing, the current JUnit version is 6.1.2, also known as JUnit Jupiter. Add the junit-jupiter dependency to pom.xml:
<dependency>
<groupId>org.junit.jupiter</groupId>
<artifactId>junit-jupiter</artifactId>
<version>6.1.2</version>
<scope>test</scope>
</dependency>
Let's create a simple example using JUnit.
Create a new Maven project. Add a method average to the main class. The method computes the average value of a list, except that if it encounters a number greater than or equal to a stop value, all following numbers are ignored.
public static double average(List<Integer> numbers, int stopNumber) {
if (numbers.isEmpty()) {
throw new IllegalArgumentException("The list must not be empty");
}
int sum = 0;
int count = 0;
for (int number : numbers) {
if (number >= stopNumber) {
break;
}
sum += number;
count++;
}
return (double)sum / count;
}
Let's write a unit test for this method.
Tests are traditionally placed in the src/test/java directory. When creating a new directory under src in a Maven project, IDEA automatically suggests creating the src/test/java structure.
Create the test directory and inside it a class called AverageTest.
If you copy the code below, update the first import statement to match the name of your own main class.
import fi.jyu.ohj2.Main;
import org.junit.jupiter.api.Test;
import java.util.List;
import static org.junit.jupiter.api.Assertions.*;
public class AverageTest {
@Test
void averageCalculatesCorrectly() {
List<Integer> numbers = List.of(1, 2, 3, 4, 5);
double result = Main.average(numbers, 10);
assertEquals(3.0, result, "The average should be 3.0");
}
@Test
void averageStopsCorrectly() {
List<Integer> numbers = List.of(1, 2, 3, 10, 4, 5);
double result = Main.average(numbers, 10);
assertEquals(2.0, result, "The average should be 2.0 because 10 and all following values are ignored");
}
}
Tests can be run using the green arrow beside the AverageTest class.
JUnit runs the tests and displays the results in IDEA's test view.
If all tests pass, a green indicator is shown.
If a test fails, a red indicator appears together with an error message explaining what went wrong.
One important test is still missing: what happens if there are no valid numbers at all?
Let's decide that the method should throw an IllegalArgumentException.
We can verify this using another test.
JUnit allows exception testing through assertThrows. It accepts the expected exception class and a lambda expression containing the code being tested.
@Test
void averageThrowsExceptionWhenNoNumbersAreIncluded() {
List<Integer> numbers = List.of(10, 20, 30, 40, 50, 60);
IllegalArgumentException exception =
assertThrows( IllegalArgumentException.class, () -> {
Main.average(numbers, 10);
}
);
assertEquals("No numbers were included in the average", exception.getMessage());
}
The test now fails with:
org.opentest4j.AssertionFailedError: Expected java.lang.IllegalArgumentException to be thrown, but nothing was thrown.
When using double values, division by zero does not throw an exception. Instead, it produces the NaN value.
Let's fix the method:
public static double average(List<Integer> numbers, int stopNumber) {
// ... previous code unchanged ...
// HIGHLIGHT_GREEN_BEGIN
if (count == 0) {
throw new IllegalArgumentException("No numbers were included in the average");
}
// HIGHLIGHT_GREEN_END
return (double)sum / count;
}
Now all tests pass!
Take your solution (or the model solution) from Exercise 5.10 and write unit tests for it. Test the functionality of the method with at least five different inputs. Use the examples given in the exercise or create your own test cases.
Testing the Todo Application
When testing the Todo application, everything does not need to go through the user interface.
What matters is testing the application's business logic, meaning how TaskCollection behaves in different situations.
Instead of clicking buttons and opening windows, we call model methods directly and verify that the results match our expectations.
Examples of testable behavior include:
addTask("Go shopping")adds a task to the list.removeTask(task)removes the given task.addTask(" ")does not add an empty task.
For this reason, we can create a JUnit test class such as the following in src/test/java:
import fi.jyu.ohj2.name.todo.model.Task;
import fi.jyu.ohj2.name.todo.model.TaskCollection;
import org.junit.jupiter.api.Test;
import static org.junit.jupiter.api.Assertions.*;
class TaskCollectionTest {
@Test
void addTask_addsTaskToList() {
TaskCollection collection = new TaskCollection("testtasks.json");
collection.addTask("Go shopping");
assertEquals(1, collection.getTasks().size());
assertEquals("Go shopping", collection.getTasks().getFirst().getTitle());
}
@Test
void removeTask_removesTaskFromList() {
TaskCollection collection = new TaskCollection("testtasks.json");
collection.addTask("Go shopping");
Task task = collection.getTasks().getFirst();
collection.removeTask(task);
assertEquals(0, collection.getTasks().size());
}
@Test
void addTask_doesNotAddEmptyTask() {
TaskCollection collection = new TaskCollection("testtasks.json");
collection.addTask(" ");
assertEquals(0, collection.getTasks().size());
}
}
We also added a new constructor to TaskCollection that accepts a file name as a parameter.
This allows tests to use a separate test file without interfering with real data.
Add the following constructor to TaskCollection:
public TaskCollection(String path) {
filePath = Path.of(path);
tasks.addListener((ListChangeListener<Task>) change -> {
save();
});
}
The idea behind these tests is straightforward:
- Prepare the initial state.
- Call the method being tested.
- Verify that the collection changed correctly.
This is exactly the kind of business-logic testing that the MVC architecture enables.
Add the line testtasks.json
to .gitignore so that test files are not added to version control.
If the file was already committed, remove it with:
git rm --cached testtasks.json
and create a new commit.
Write unit tests for the TaskCollection class. Test at least the following:
- When a task is added with a title that contains leading and trailing spaces, the spaces are removed before the task is stored in the list.
- When two tasks with the same title are added to the collection, both of them are actually stored in the list.
- Continuing from the previous case: when one of those tasks is marked as completed, only that specific task is marked as completed, not the other one.
- When two different tasks are added to the collection one after another, both are stored in the list in the correct order.
Return the TaskCollectionTest class.
Unit Testing and MVC Architecture
Now that we have moved to an MVC architecture and created the TaskCollection class, we have completely separated the user interface from the application's logic and data.
This provides a crucial software-engineering benefit.
If we attempted to test our code through the user interface by simulating button presses, testing would be slow, vulnerable to random failures, and would require JavaFX to be launched.
Since the collection now has a clear programming interface (addTask, removeTask, and so on), we can build unit tests that exercise the collection directly and verify behavior in milliseconds without opening any windows.
Unfortunately, there is still one practical issue.
The current TaskCollection class also performs file operations.
This means that testing is not yet entirely straightforward.
I/O Is Problematic in Testing
Consider what happens if we start testing our new TaskCollection class.
Suppose a test creates ten new tasks and verifies that the count is correct.
Because we attached a listener that calls save, those test tasks are actually written to disk, for example into tasks.json.
Writing to disk is generally undesirable in tests. In a production environment, tests may be executed hundreds of times in succession, and disk I/O makes them much slower. Furthermore, if tests fail or terminate unexpectedly, they can leave files in a messy state containing partially written or outdated data.
Separating Persistence Behind an Abstraction: The Repository Pattern
The solution is to separate persistence into its own component.
TaskCollection should no longer read and write tasks.json directly, but instead delegate persistence to a separate class.
This improves unit testing because tests are no longer directly tied to real files or file systems.
This approach is commonly known as the Repository pattern.
The Repository pattern hides loading and saving data behind a dedicated interface or class.
The rest of the application no longer deals directly with files, databases, or other storage mechanisms, but instead relies on methods provided by a repository interface such as TaskRepository.
Let's see how this is implemented in practice in our Todo application.
1. Creating the TaskRepository Interface.
Methods related to loading and saving data are typically placed in a package called persistence. Let's do the same.
package fi.jyu.ohj2.name.todo.persistence;
import fi.jyu.ohj2.name.todo.model.Task;
import java.util.List;
public interface TaskRepository {
List<Task> load() throws RepositoryException;
void save(List<Task> tasks) throws RepositoryException;
}
At the same time, let's create a separate RepositoryException class to represent loading and saving failures. Since tasks may eventually be loaded from sources other than files, a more general exception type is useful.
Place this class in the persistence package as well.
package fi.jyu.ohj2.name.todo.persistence;
public class RepositoryException extends Exception {
public RepositoryException(String message) {
super(message);
}
}
2. Moving JSON Persistence into Its Own Implementation
Next, we separate the JSON-specific loading and saving code from the model into a dedicated implementation called JsonTaskRepository, also located in the persistence package.
Copy the loading and saving code from TaskCollection into a new class that implements the TaskRepository interface.
package fi.jyu.ohj2.name.todo.persistence;
import tools.jackson.core.type.TypeReference;
import tools.jackson.databind.ObjectMapper;
import tools.jackson.core.JacksonException;
import fi.jyu.ohj2.name.todo.model.Task;
import java.nio.file.Files;
import java.nio.file.Path;
import java.util.List;
public class JsonTaskRepository implements TaskRepository {
private final Path saveFile;
private final ObjectMapper mapper = new ObjectMapper();
public JsonTaskRepository(Path saveFile) {
this.saveFile = saveFile;
}
@Override
public List<Task> load() throws JacksonException {
if (Files.notExists(saveFile)) {
return List.of();
}
return mapper.readValue(saveFile.toFile(), new TypeReference<>() {});
}
@Override
public void save(List<Task> tasks) throws JacksonException {
mapper.writeValue(saveFile.toFile(), tasks);
}
}
3. Updating TaskCollection to Work with Any Persistence Mechanism.
Next, modify TaskCollection so that it accepts any implementation of the repository interface.
Instead of creating a repository internally, it will receive one through its constructor.
This approach is known as dependency injection.
Dependency injection means that a class does not create its own dependencies. Instead, they are supplied from outside.
In particular, TaskCollection will no longer create a JsonTaskRepository object itself. Instead, it receives one as a constructor parameter.
The benefit will become even clearer when we begin writing tests.
public class TaskCollection {
// The persistence mechanism is now hidden behind an interface.
private final TaskRepository repository;
// The desired persistence implementation
// is injected through the constructor.
public TaskCollection(TaskRepository repository) {
this.repository = repository;
this.tasks.addListener(
(ListChangeListener<Task>) change -> {
save();
}
);
}
public void load() {
try {
List<Task> allTasks = repository.load();
tasks.addAll(allTasks);
} catch (RepositoryException e) {
IO.println(e.getMessage());
}
}
public void save() {
try {
repository.save(tasks);
} catch (RepositoryException e) {
IO.println(e.getMessage());
}
}
// ... addTask(), removeTask(), etc. like before
}
Also update the initialization of TaskCollection inside MainController:
private TaskCollection taskCollection = new TaskCollection(new JsonTaskRepository(Path.of("tasks.json")));
In our Todo application, the Repository pattern supports the MVC architecture because it keeps responsibilities separate even within the model layer.
TaskCollection belongs to the model, but it no longer needs to know the technical details of persistence.
It can simply ask the repository to load or save tasks while focusing on business logic.
As a result, the controller and view remain independent of file handling.
The real strength of the interface is that TaskCollection no longer needs to know how or where data is stored. It could be a JSON file, a database, or even an in-memory collection used for testing.
Mock and Fake Classes
Testing often makes use of so-called mock or fake objects when the class being tested collaborates with another object. The idea is to replace a real dependency with a lightweight substitute whose behavior is easier to control. This allows the test to focus on the class being tested without involving files, databases, networks, or other heavyweight systems.
Consider a simple example where a FrostMonitor class obtains temperature readings through a TemperatureSensor interface.
If we want to test FrostMonitor, we may not want to use a real sensor. The sensor may not even exist in the test environment, or its value may constantly change.
Instead, we can create a fake sensor that always returns 21.5.
This makes the test completely predictable.
For example:
public interface TemperatureSensor {
double measureTemperature();
}
public class FrostMonitor {
private final TemperatureSensor sensor;
public FrostMonitor(TemperatureSensor sensor) {
this.sensor = sensor;
}
public boolean isFreezing() {
return sensor.measureTemperature() < 0;
}
}
In the real application, the sensor might read values from a physical device. In a test, however, we can use a simple fake implementation:
public class FakeTemperatureSensor implements TemperatureSensor {
@Override
public double measureTemperature() {
return 21.5;
}
}
Now we know exactly what value the sensor returns every time.
Such replacement objects are especially useful whenever a real dependency is slow, difficult to control, or produces side effects. Next, we'll apply exactly the same idea to the Todo application by creating a fake repository that pretends to store data but actually keeps everything in memory for the duration of the test.
Testing with a Mock Repository
Inside the test environment (src/test/java/...), we can create a mock class that pretends to save data to a file but actually stores everything in a normal Java list in memory.
public class MockTaskRepository implements TaskRepository {
// Stored in memory instead of a file for tests
private List<Task> savedTasks = new ArrayList<>();
@Override
public List<Task> load() {
return savedTasks;
}
@Override
public void save(List<Task> tasks) {
savedTasks.clear();
// Create copies of all tasks.
// This allows us to verify that
// saved data matches the data
// stored inside the collection.
for (Task task : tasks) {
Task copy = new Task();
copy.setTitle(task.getTitle());
copy.setPriority(task.getPriority());
copy.setDescription(task.getDescription());
copy.setCompleted(task.getCompleted());
savedTasks.add(copy);
}
}
public List<Task> getSavedTasks() {
return this.savedTasks;
}
}
Now we can test the model safely using JUnit:
import org.junit.jupiter.api.Test;
import static org.junit.jupiter.api.Assertions.*;
class TaskCollectionTest {
@Test
void addTask_addsTaskAndSavesIt() {
// 1. Arrange: Inject a FAKE repository
MockTaskRepository mockRepo = new MockTaskRepository();
TaskCollection model = new TaskCollection(mockRepo);
// 2. Act
model.addTask("Go shopping");
// 3. Assert
assertEquals(1, model.getTasks().size(), "The list should contain 1 task.");
assertEquals("Go shopping", model.getTasks().getFirst().getTitle(), "The title should match.");
// 4. Assert 2: Verify that saving occurred
assertEquals(1, mockRepo.getSavedTasks().size(), "Data should have been saved through the repository!");
}
@Test
void addTask_doesNotAddEmptyTitle() {
MockTaskRepository mockRepo = new MockTaskRepository();
TaskCollection model = new TaskCollection(mockRepo);
model.addTask(" ");
assertEquals(0, model.getTasks().size(), "Empty tasks must not be added.");
}
}
We can actually go even further and verify that tasks are saved whenever either the collection or a task changes. Let's create dedicated tests specifically for saving behavior:
@Test
void taskCollectionSavesAfterAddAndRemove() {
// Act and Assert steps can be repeated
MockTaskRepository repo = new MockTaskRepository();
TaskCollection collection = new TaskCollection(repo);
// Act 1: Add task
collection.addTask("Go shopping");
// Assert 1
assertEquals(1, repo.getSavedTasks().size(), "Tasks should be saved when a new task is added");
// Act 2
Task task = collection.getTasks().getFirst();
collection.removeTask(task);
// Assert 2
assertEquals(0, repo.getSavedTasks().size(), "Tasks should be saved when a task is removed");
}
@Test
void taskCollectionSavesPropertyChanges() {
MockTaskRepository repo = new MockTaskRepository();
TaskCollection collection = new TaskCollection(repo);
collection.addTask("Go shopping");
Task task = collection.getTasks().getFirst();
task.setCompleted(true);
Task savedTask = repo.getSavedTasks().getFirst();
assertEquals(task.getCompleted(), savedTask.getCompleted(), "Completed status should be saved when modified");
task.setTitle("Go to sleep");
savedTask = repo.getSavedTasks().getFirst();
assertEquals(task.getTitle(), savedTask.getTitle(), "Title should be saved when modified");
task.setPriority(Priority.HIGH);
savedTask = repo.getSavedTasks().getFirst();
assertEquals(task.getPriority(), savedTask.getPriority(), "Priority should be saved when modified");
task.setDescription("Sleeping is nice");
savedTask = repo.getSavedTasks().getFirst();
assertEquals(task.getDescription(), savedTask.getDescription(), "Description should be saved when modified");
}
Without our MVC architecture, we would be trying to call controller logic directly from Main.java and struggling to count the number of checkboxes inside VBox containers, all while trying not to corrupt the real tasks.json database!
Now we can focus entirely on testing the model layer, which after a small amount of setup becomes fast, reliable, and easy.
Summary of I/O Abstractions
The greatest benefit of a well-designed architecture usually becomes visible first in testing. The relationship can be viewed as:
Automated UI testing is difficult. Automated testing of the real data provider (writing to disk) is typically slow and fragile. However, isolated business logic, the actual heart of the application, can be executed as pure logic code in fractions of a second by using interface-based mock objects to replace surrounding complex systems during testing.
Return the project refactored in Exercise 8.5. Recap of the steps in this part:
- Add unit tests to the project.
- Separate task saving and loading into a dedicated class that implements the
TaskRepositoryinterface. - Create a mock class in the test package that implements the
TaskRepositoryinterface but stores data only in memory. - Test file saving and loading.
When the phase is complete, run git add for the modified files and create a git commit.
Return the TaskRepository interface as well as the JsonTaskRepository, MockTaskRepository, and TaskCollectionTest classes. No other classes or FXML files need to be returned.
Remote Use of Version Control
So far, we have used version control only on our own computer. To protect code from hard drive failures and to make it possible to share it with others, the code is usually uploaded to a remote repository. A remote repository may simply be another computer on a network, but nowadays it is more common to use a public remote repository service such as GitHub or GitLab. These, along with many other similar Git hosting services, also provide additional project management features such as issue tracking, discussion forums, and other collaboration tools. These additional tools are not Git tools themselves, but they make remote repository services versatile collaboration platforms.
In this section, we will move a local project to either GitLab or GitHub. Students at the University of Jyväskylä have access to the university's own GitLab server. Other students can upload their code to GitHub, for example.
Creating a Remote Repository
Before a Git repository can be uploaded to a remote repository service, a remote repository must first be created in that service. Remote repository services often refer to repositories as projects because of the additional services they provide.
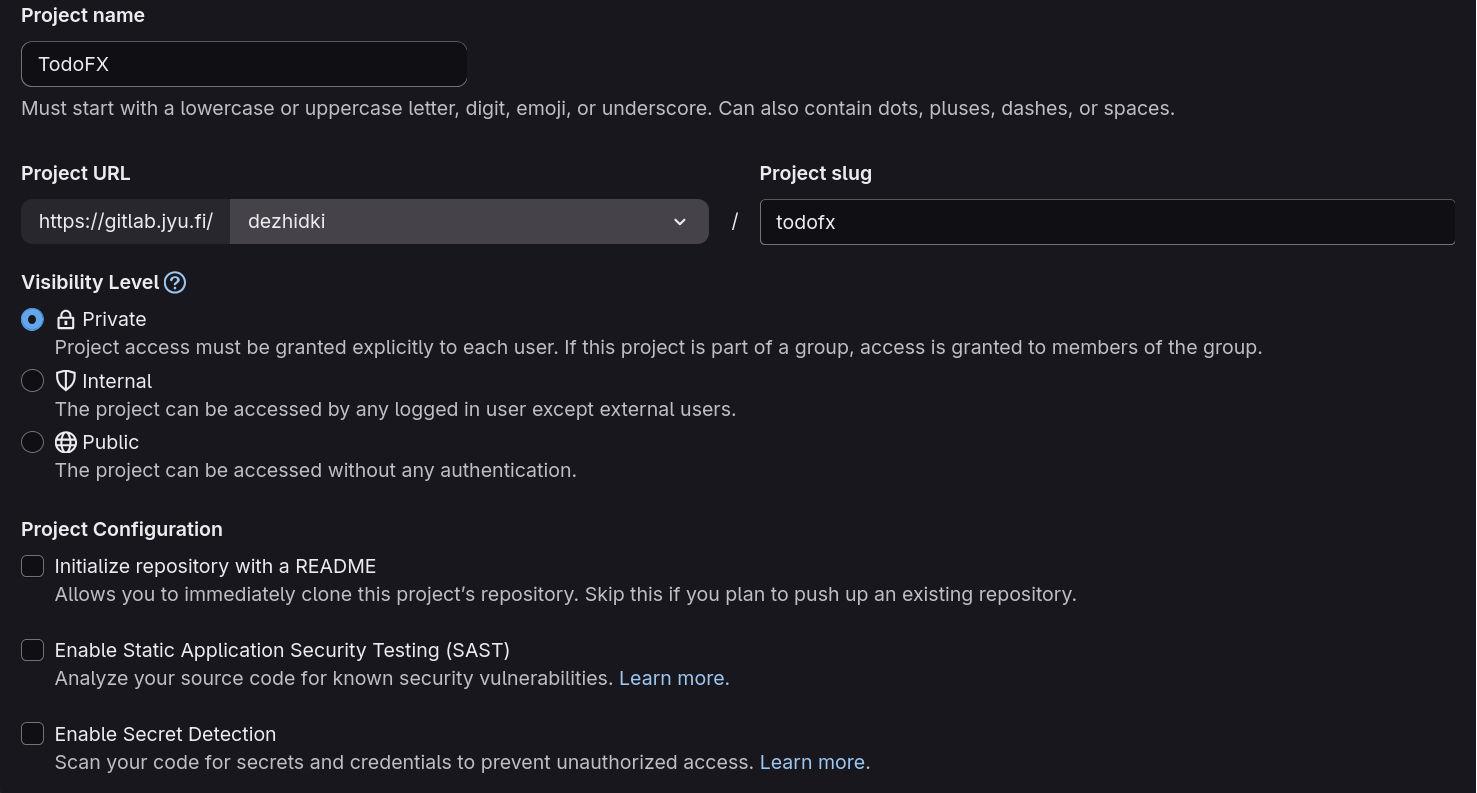
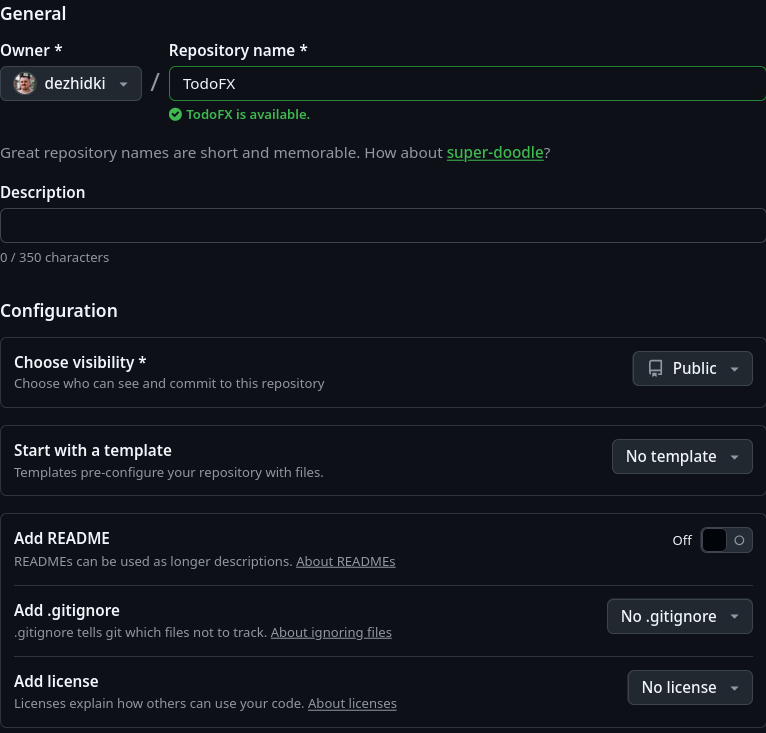
Choose
Select the remote repository service to use:
- University of Jyväskylä students: choose GitLab (JYU). You may use GitHub instead if you wish.
- Otherwise, choose GitHub.
Connecting a Remote Repository to a Local Project
Open a command prompt and navigate to the root directory of your project.
The root directory is the folder that contains the src directory and the pom.xml file.
You can verify that you are in the correct directory by running the git status command. The status of the Git repository should be displayed in the same way as in Section 7.3.
Next, we will add the remote repository address to the local repository. To do this, we first need to know the Git remote repository URL.

Choose
Select the remote repository service to use:
- University of Jyväskylä students: choose GitLab (JYU). You may use GitHub instead if you wish.
- Otherwise, choose GitHub.
Copy the repository URL and add it to the local repository using the git remote add command.
The git remote add command takes two parameters: the name of the remote repository and the URL of the remote repository.
The name origin is the conventional name in Git for the primary remote repository of a project.
Sending Code to the Remote Repository for the First Time
We can now send the code to the remote repository. Before sending the code, we must determine the username and password required by the remote repository service. These depend on the service being used.
Choose
Select the remote repository service to use:
- University of Jyväskylä students: choose GitLab (JYU). You may also use GitHub if you prefer.
- Otherwise, choose GitHub.
Once you know the username and password, you can send the project to the remote repository for the first time using the git push command.
This command does two things:
pushsends local commits to the remote repository.-u origin masterlinks the localmasterbranch to the repository'smasterbranch. Because of this, Git will know in the future that thegit pushcommand, without additional parameters, should send code to theoriginremote repository.
Note that when sending code for the first time (that is, when performing the first push), Git may ask for your username and password. The login dialog varies between operating systems, but the principle is always the same: enter the username and password according to the instructions above.
From Now On
Once the remote repository has been configured and the first push has been completed, the workflow becomes simple:
- Make changes to the source code.
- Run
git add .This adds the changes to Git's staging area. - Run
git commit -m "Added editing window"This creates a commit from the staged changes. - Run
git pushThis sends all commits made so far to the remote repository for safekeeping.
Create a public Git remote repository for your work and save your code there.
All Exercises in This Part
Return the project refactored in Exercise 8.1. Recap of the steps in this part:
- Create a separate model object (
Task) for tasks instead of using UI components directly. - Add at least a task title and a done/not-done state to the model.
- Use
ObservableList<Task>as the primary data structure for tasks. - Update the task creation logic to use the model object.
When the phase is complete, run git add for the modified files and create a git commit.
Return your project files.
Return the project refactored in Exercise 8.2. Recap of the steps in this part:
- Replace the task
VBox+CheckBoxlisting with aTableViewcomponent. - Add at least the following columns to the table: task (title), done status.
- Bind the table's data to an
ObservableList<Task>list. - Allow the user to select a task and delete the selected row.
When the phase is complete, run git add for the modified files and create a git commit.
Return your project files.
Return the project refactored in Exercise 8.3. Recap of the steps in this part:
- Organize the project into layers (at minimum: model + UI logic).
- Move the file reading and writing logic from the controller into a
TaskCollectionclass. - Modify the
MainControllerclass so that it delegates save and load operations to the model.
When the phase is complete, run git add for the modified files and create a git commit.
Return your project files.
Return the project refactored in Exercise 8.4. Recap of the steps in this part:
- Open the task editing view when the user double-clicks a task.
- Add at least a description and a priority to the task.
- Add validation for user input (for example, the task title must not be empty).
- Save the changes back to the task and update the view.
When the phase is complete, run git add for the modified files and create a git commit.
Return your project files.
Take your solution (or the model solution) from Exercise 5.10 and write unit tests for it. Test the functionality of the method with at least five different inputs. Use the examples given in the exercise or create your own test cases.
Write unit tests for the TaskCollection class. Test at least the following:
- When a task is added with a title that contains leading and trailing spaces, the spaces are removed before the task is stored in the list.
- When two tasks with the same title are added to the collection, both of them are actually stored in the list.
- Continuing from the previous case: when one of those tasks is marked as completed, only that specific task is marked as completed, not the other one.
- When two different tasks are added to the collection one after another, both are stored in the list in the correct order.
Return the TaskCollectionTest class.
Return the project refactored in Exercise 8.5. Recap of the steps in this part:
- Add unit tests to the project.
- Separate task saving and loading into a dedicated class that implements the
TaskRepositoryinterface. - Create a mock class in the test package that implements the
TaskRepositoryinterface but stores data only in memory. - Test file saving and loading.
When the phase is complete, run git add for the modified files and create a git commit.
Return the TaskRepository interface as well as the JsonTaskRepository, MockTaskRepository, and TaskCollectionTest classes. No other classes or FXML files need to be returned.
Create a public Git remote repository for your work and save your code there.
Project Assignment, Phase 1
In this chapter, you will begin implementing your own project assignment. The project is completed incrementally during Parts 9–12, and no later than the end of Part 12 the finished project must be submitted and approved by a course instructor during remote or in-person guidance. Read the project requirements carefully before you begin.
Parts 9–12 contain guidance intended to help you make progress with the project. Likewise, Parts 9–12 contain exercises whose purpose is to support the project's gradual development. As before, you must complete at least 50% of the exercises.
We recommend implementing the project using the phased approach described in these chapters.
Project Topic
Start by choosing a project topic and familiarizing yourself with the project requirements. You can find ready-made project topics in the project assignment instructions.
After selecting a topic, report it through the task below.
Choose a project topic that interests you.
You may choose one of the predefined topics from the project guidelines page or create a project based on your own idea.
If you choose a predefined topic, submit the name of the topic you selected: (Expense Tracking, Product Inventory Management, Library, Housing Company Management, Flashcard Application)
If you create a project based on your own idea, write and submit a project plan.
The plan must include:
- The purpose of the application.
- The functional requirements that are essential for the application.
- A description of the entities that are important to model within the application's domain.
You may use the descriptions of the predefined topics as examples. After submitting, present the plan to an instructor in person or through remote supervision before starting the remaining project phases.
For pair projects, the application must contain at least three modeled entities (individual projects require two; requirement 1.1) and three views (individual projects require two; requirement 4.1). For this reason, pair project plans must always be reviewed by an instructor before proceeding to the next phases.
Initializing the Project
Once you have selected a topic, you can create a new JavaFX project. We recommend using the course's JavaFX project template introduced in Part 7.1.
Tips:
- First create a separate empty directory for your project in a location that you can easily find on your computer.
- When creating the project in the IDE, choose that directory as the project location (
Locationsetting). - Give your project a unique identifier (
GroupId). A suitable format isfi.jyu.ohj2.yourname.topicwhereyournameis your university username andtopicis the project topic.
Once the project has been created, try running it and verify that the application starts correctly.
Initializing a Git Repository
After creating the project, immediately create a Git repository inside the project directory using the command
git init.
However, do not create the first commit just yet. First, let's prepare the project directory slightly.
Projects using Git typically include .gitignore and README.md files.
The purpose of the .gitignore file was briefly discussed earlier in the course: files and directories listed in it are not included in commits unless explicitly forced.
Examples include IDE-generated out and target directories that contain compiled code.
It is especially important to remember to add files containing sensitive information, such as personal data, passwords, or API keys, so that they do not accidentally end up in a remote repository.
Make sure your project contains a .gitignore file.
If you are using the course JavaFX template, one is already included.
Pay attention to the spelling
.gitignore begins with a period and is written entirely in lowercase.
README.md is written in uppercase letters and does not begin with a period.
The README.md, or "Read Me" file, is intended both for presenting the project and for providing important development instructions.
Remote repository services usually display this file on the project's front page, making it a good place to describe the project for non-technical users as well.
You can create a README.md file directly in the IDE by right-clicking the project in the project explorer, selecting New → File, and naming the file
README.md
The README.md file is typically written using Markdown.
At this stage, the README can be very simple.
Include at least the project name and a short description consisting of a few sentences
If you are using one of the predefined topics, you may copy the project description from the project assignment instructions.
Once you have created the README.md and .gitignore files, make your first commit.
Finally, create a remote repository and upload your local repository there using the instructions for remote Git usage.
- Create an IDEA project. You may use the JavaFX template provided for the course.
- Initialize a local Git repository.
- Add
README.mdand (if necessary).gitignorefiles. - Create the first commit.
- Create a public remote repository for your project on GitLab or GitHub.
- Push the local repository to the remote repository.
At this stage, README.md may contain only the project name and a brief 1–2 sentence description of the project topic.
Submit a link to your public Git remote repository for this exercise. The easiest way to find the repository URL is from the project's page in the hosting service:
- GitLab (JYU): https://gitlab.jyu.fi/dashboard/projects/personal
- GitHub: https://github.com/repos
Implementing the Data Model
Before diving deeper into the user interface, it is worth thinking carefully about the application's data model and behavior. Begin development by implementing the classes that are essential to the data model. In the predefined project topics, the classes, their attributes, and their relationships are already described using UML diagrams.
Tips:
-
Implement data-model attributes using JavaFX
Propertytypes from the beginning. This will make it easier to connect the model and view later. -
Place data-model classes in a dedicated
modelpackage, separate from other classes. -
Start thinking about which public methods the class should provide to other classes. Although getter and setter methods are needed for JSON serialization, you can already consider methods that improve encapsulation. For example, in the Todo example application, the controller never adds a
Taskobject directly into the task list of the collection. Instead, adding a task is the responsibility of the collection through itsaddTask()method.Do not spend too much time thinking about class behavior at this stage; not every future use case can be predicted. Additional helper methods can always be added later when implementing controller classes.
-
We strongly recommend testing cooperation between model classes by using them directly from the application's
mainmethod (or from a helper method called bymain). You do not need a user interface yet. Create and use objects directly from the main program. Verify that your model supports the application's most important operations, such as: adding data, retrieving data, modifying data and deleting data. The debugger can help verify that the model state is correct.If you wish, you may even write unit tests for the model's basic functionality. You can use the Todo application's model tests from Part 8.5 as an example.
-
There is no need to think about saving or loading data yet.
Once you have implemented an initial version of the data model in Java and the code contains no errors, it is a good time to save your progress in Git.
Create a new commit (git add + git commit) and push it to the remote repository (git push).
Preliminary User Interface Plan
Once you have an understanding of the application's data model and requirements, it is a good time to begin planning the basic layout and behavior of the user interface.
Create a new directory in your project called plan
In the IDE, this can be done by right-clicking the project and selecting:
New → Directory
Create a file named user_interface.md
Write preliminary information about the required user-interface views into the file.
You can use the following template for the user interface design document
# User Interface Plan
## View 1

**Key functionality**
- What the user sees in the interface
- How the user reaches this view
(application startup, button click, etc.)
- What the user can do in the interface:
what can be clicked and what each button does
**Key components**
- Which JavaFX components might be needed
- This is mainly a place to record links to JavaFX classes
and libraries so they can be easily found later
- This section is optional and intended only to make
finding documentation easier
## View 2

**Key functionality**
- What the user sees in the interface
- How the user reaches this view
(application startup, button click, etc.)
- What the user can do in the interface:
what can be clicked and what each button does
**Key components**
- Which JavaFX components might be needed
- This is mainly a place to record links to JavaFX classes
and libraries so they can be easily found later
- This section is optional and intended only to make
finding documentation easier
Draw preliminary sketches of every view. At this stage, the exact appearance does not need to be finalized. The purpose is to focus on what the user sees and what the user can do. You may create sketches using online diagram tools such as wireframe.cc, DrawIO or Figma or any other drawing application. You may also draw on paper and take a photo or scan it.
The detailed visual design of the interface will be developed in Part 10. If you wish, you may also build the views immediately using SceneBuilder. In that case, take screenshots of the views. Do not spend too much time perfecting the views at this stage; the goal is simply to develop a rough understanding of the planned user interface.
Save the images in the plan directory and reference them in the user_interface.md document.
In the plan, describe what is displayed in each view and how users can interact with it. Doing so helps ensure that you remember all required create, read, update, and delete operations for your data model.
Once the user-interface plan is complete, create another commit and push the changes to the remote repository.
Plan your user interface views and their functionality.
Create a preliminary layout for each user interface view. You may use a diagramming tool, a drawing application, or SceneBuilder. You may also draw the layouts on paper and scan them.
Create a folder named plan in your project and place the images of the views there.
Also add a Markdown file named user-interface.md to the folder and describe the following for each view:
- What the user sees in the view (main view, edit view, etc.).
- What the user can do in the view.
- Which components are intended to implement the most important functions.
Create a new commit that includes the plan folder and push the changes to the Git remote repository.
Submit a link to the plan folder in the remote repository. You can obtain the link by opening the repository in a web browser, opening the plan folder, and copying the URL from the browser's address bar.
We recommend that you present your user interface design plan to an instructor, regardless of whether you selected one of the predefined topics or your own project idea. This helps ensure that you are on the right track and allows you to receive useful feedback that will help you successfully complete the project.
After you have presented your plan to an instructor during a remote or in-person supervision session, you may mark this task as completed yourself. The instructor may add comments below the submission box if necessary.
Project Assignment, Phase 2
Continue working on your project assignment by creating an interactive prototype for the application's user interface. The prototype does not yet need to contain actual functionality, but it should provide an idea of what the application will look like. It should also give a sense of how the user will interact with the application.
Creating the Views
Create each view of your project assignment in SceneBuilder.
Add an fx:id to every component that you will likely want to reference later in code.
Do not forget possible instruction texts or warning messages.
Initially, these may contain placeholder text.
Event Handlers
Add event handlers to every component that will later contain functionality, such as navigation between views, adding objects, deleting objects, and so on. Typically, such components are buttons, drop-down menus, or similar controls.
Event-handler stubs can also be created directly in SceneBuilder.
Open the Code section and enter an event-handler name in the On Action field, for example
handleLoginButton.
Naming Components and Event Handlers
It is common practice to append the component type to the end of an fx:id.
This makes coding easier because you can type, for example, button, and the IDE can suggest the correct component automatically.
| Component | Abbreviation / Suffix | Example (fx:id) |
|---|---|---|
| Button | btn or Butto | saveBtn, cancelButton |
| TextField | txt or Field | emailField, statusTxt |
| Label | lbl or Label | notificationLabel, errorLbl |
| ComboBox | combo | countryCombo |
| TableView | table | userTable, taskTable |
| CheckBox | cb or check | filterCheck |
For event handlers, it is customary to use the prefixes handle or process.
For example, handleNewPurchaseTransaction could be the event handler associated with the newPurchaseTransactionButton button.
Naming Controller Classes
It is a good idea to assign a controller class to each view already in SceneBuilder, even if the class does not yet exist.
The name is entered in:
Controller → Controller class.
The name should be chosen so that it matches the view name followed by the word Controller.
For example, for the view
EnterTask.fxml
an appropriate controller class would be:
EnterTaskController
important
The controller class name must be entered together with its package name, for example
fi.jyu.ohj2.anlakane.todo.EnterTaskController
If you enter only the class name, such as
EnterTaskController
the IDE will not be able to find the class.
Make each view as complete as possible in SceneBuilder.
If a view contains components that will be added dynamically (for example, the tasks in the Todo application), those components should not be added in SceneBuilder. However, you should reserve space for them and assign an fx:id so that they can be easily referenced in code.
Add an fx:id to every interactive component.
Add an event handler to every interactive component that is associated with that component.
Creating Controller Classes
Create a separate controller class for each view.
Tip: You can obtain a controller skeleton directly from SceneBuilder and copy-paste it into your project.
Select:
View → Show Sample Controller Skeleton
Fill in the appropriate types in place of the ? placeholders.
Create controller classes for each view. Each event handler must do something, for example print text to the console. At this stage, it is not yet possible to test the functionality of controllers other than the main view controller. However, the project must not contain any compilation errors.
Navigating Between Views
Users must be able to move between views. Write the necessary code in the event handlers so that navigation between views is possible. All other interactive elements, such as buttons, should also perform some action, even if that action is simply printing a message to the console. This gives you a good foundation upon which actual functionality can later be added.
Implement navigation between views. For example, the user must be able to navigate from the main view to an input or edit view and back again. It must be possible to return without closing the window.
Present the phase to the instructor.
Project Assignment, Phase 3
Based on the previous phases, you should now have the basic framework of your application completed. In this phase, the actual functionality of the project is implemented, meaning that the data model is connected to the user interface.
At this stage, each task submission consists of a URL pointing to a specific commit. The URL should contain the corresponding commit hash. This allows the instructor to inspect the code associated with that particular stage of development if necessary.
Commit Hash
A commit hash is a unique identifier generated by Git for an individual commit.
It usually appears as a long character sequence such as a1b2c3d4...
and can be used to refer precisely to a specific state of the project.
The purpose of a commit is to save one version of a project into version control. The commit hash identifies which of those saved versions is being referred to. When a commit hash is included in an assignment submission, the instructor can view the exact version of the code in which the task was completed.
A commit hash does not represent a single file or change. Instead, it represents an entire commit object containing metadata about a commit. This includes information such as: the commit message ("message"), the author ("author"), a reference to the project directory structure ("tree") and a reference to the previous commit ("parent").
Example: Finding a Commit URL in GitLab
- Log in to GitLab and open your project.
- Select Code Commits.
- You will see a list of commits. Select the commit associated with the assignment submission and click it.
- The browser address bar will display a URL containing the commit hash. Copy this URL and submit it with the assignment.
Example: Finding a Commit URL in GitHub
- Log in to GitHub and open your project.
- Click NNN Commits below the green Code button, where NNN is the number of commits.
- You will see a list of commits. Select the commit associated with the assignment submission and click it.
- The browser address bar will display a URL containing the commit hash. Copy this URL and submit it with the assignment.
Exercises
For each exercise, submit a URL that points to the corresponding commit in your remote repository.
If you have completed your project work in a slightly different order than the phase structure presented here, submit the URL of the commit that best represents the requirements of the corresponding exercise.
Implement adding data. After the data has been added, the application must display the newly added data in the user interface. Validation does not need to be implemented yet. At this stage, it is sufficient that the application is capable of creating and displaying data.
Implement data deletion.
When deleting data, you must also handle any other objects that reference the deleted object.
For example, if you delete a Category object in the Expense Tracking application, the category must also be removed (set to null or Optional.empty()) from all Event objects that reference it.
It is also recommended to include a confirmation dialog when deleting data, for example by using the Alert class, so that accidental clicks do not destroy data.
Implement saving data to a file and loading data from a file.
Implement data editing. Changes must be saved immediately to both the data model and the file. As with deletion, editing must also take into account any objects that reference the edited object.
Implement data validation. The application must not allow the user to enter clearly invalid data.
Implement unit tests for the data model using JUnit.
Complete the README file.
Add a description of the functionality you have implemented, as well as instructions for using the application.
Take screenshots of the different views and explain how the various features work.
Present the phase to the instructor.
Project Assignment Submission
Present your project assignment to an instructor or during an in-person guidance session by the announced deadline.
Before the review, make sure that you have addressed all project requirements and that the latest version of your project is available in your Git remote repository.
Be prepared to present your work and answer any questions the instructor may have about it.
JavaFX Tips
This section contains solutions to various JavaFX-related problems, that is, a collection of so-called recipes.
General JavaFX Resources
This section does not provide detailed instructions for every component. We recommend using the following resources when working with the JavaFX library:
- JavaFX JavaDoc
- Jenkov.com JavaFX tutorials and component guides
- FXDocs: advanced JavaFX guides and techniques
Views
Switching Views Within the Same Window
Switching views within the same window is an important part of many JavaFX applications. Users can move between views without opening a new window.
Below is a simple example with two views: MainView and SecondaryView.
One button navigates to the second view, and another button returns to the first one.
The key idea is this:
We set the root node of the current Scene object to a new view.
This way, the window size and other properties remain unchanged, while only the content is replaced.
<?xml version="1.0" encoding="UTF-8"?>
<?import javafx.scene.control.Button?>
<?import javafx.scene.layout.VBox?>
<VBox xmlns:fx="http://javafx.com/fxml" fx:controller="fi.jyu.ohj2.examples.MainController">
<Button text="To the other view" onAction="#navigateToSecondaryView"/>
</VBox>
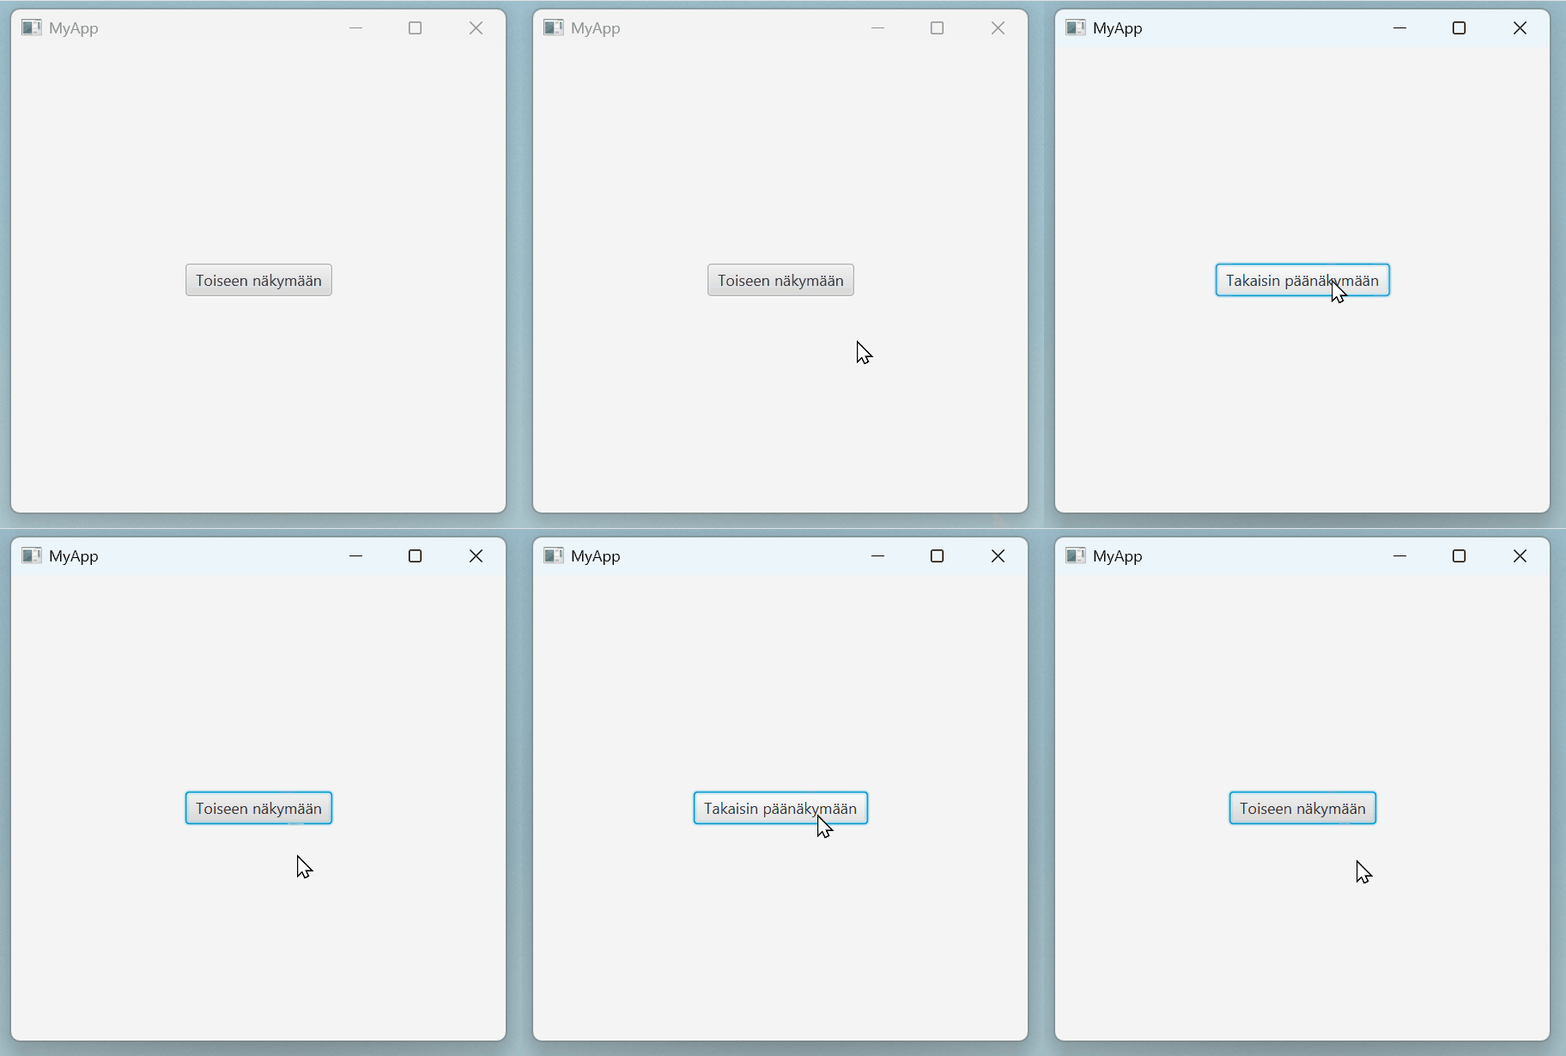
If data needs to be passed between views, this can be done during view loading as follows.
In this example, MainController sends a message to a SecondaryController object, which prints it to the console in its initialize() method.
Exactly the same approach could be used to pass information in the opposite direction.
public class MainController {
@FXML
private void navigateToSecondaryView(ActionEvent event) throws Exception {
FXMLLoader loader = new FXMLLoader(App.class.getResource("secondary.fxml"));
loader.setControllerFactory(_ -> new SecondaryController("Hello"));
Parent secondaryRoot = loader.load();
Scene currentScene = ((Node)event.getSource()).getScene();
currentScene.setRoot(secondaryRoot);
}
}
TableView
Clicking an Empty Row
By default, a TableView component does not clear the selection when the user clicks an empty row. This is often unintuitive.
One way to detect clicks on empty rows is to attach a setOnMouseClicked listener to each row. The listener checks whether the clicked row is empty and clears the selection if it is.
tableView.setRowFactory(tv -> {
TableRow<MyData> row = new TableRow<>();
row.setOnMouseClicked(event -> {
if (row.isEmpty()) {
tableView.getSelectionModel().clearSelection();
}
});
return row;
});
Filtering Rows
This example is fairly long; you can find the complete version on GitHub.
The TableView component does not directly support row filtering. JavaFX provides the FilteredList class, which enables filtering.
Assume we have tasks and categories. Each task belongs to exactly one category. We would like to choose a category from a drop-down menu and display only the tasks belonging to that category.
Task and Category might look like the following:
package fi.jyu.ohj2.examples.filteredlist;
import javafx.beans.property.ObjectProperty;
import javafx.beans.property.SimpleObjectProperty;
import javafx.beans.property.SimpleStringProperty;
import javafx.beans.property.StringProperty;
public class Task {
private final StringProperty title = new SimpleStringProperty();
private final ObjectProperty<Category> category = new SimpleObjectProperty<>();
public Task() {
// Required by Jackson
}
public Task(String title, Category category) {
this.title.set(title);
this.category.set(category);
}
// Title
public void setTitle(String title) {
this.title.set(title);
}
public String getTitle() {
return title.get();
}
public StringProperty titleProperty() {
return title;
}
// Category
public void setCategory(Category category) {
this.category.set(category);
}
public Category getCategory() {
return category.get();
}
public ObjectProperty<Category> categoryProperty() {
return category;
}
}
The user interface might look something like this:
We have a TableView for displaying tasks, a CheckBox for enabling filtering, and a ComboBox for selecting a category.
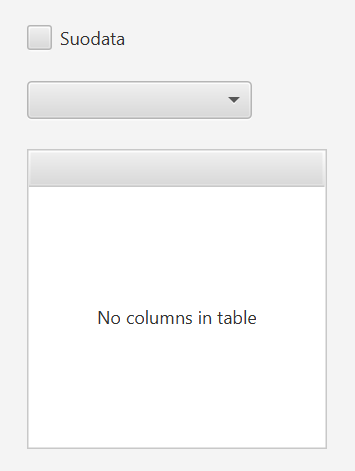
Create an fx:id for each component and corresponding fields in the controller.
Add a FilteredList<Task> attribute called filteredTasks to the controller.
After loading tasks and categories, for example from a JSON file, create a FilteredList object and assign it as the data source for the TableView:
// Assume tasks have been loaded into an ObservableList called 'tasks'
filteredTasks = new FilteredList<>(tasks, t -> true);
tableView.setItems(filteredTasks);
Here, t -> true is a lambda expression that determines which tasks are displayed.
Initially, all tasks are shown because the condition is always true.
Next, add a listener to the ComboBox that updates the filtering criteria:
comboBox.setOnAction(event -> {
updateFilter();
});
private void updateFilter() {
Category selectedCategory = comboBox.getSelectionModel().getSelectedItem();
filteredTasks.setPredicate(t ->
t.getCategory().getName().equals(selectedCategory.getName())
);
}
Here, the setPredicate method defines the filtering criteria.
If no category is selected, all tasks should be displayed. Otherwise, only tasks belonging to the selected category should be shown.
However, this implementation has a problem: once filtering has been enabled, it cannot be removed.
For that reason, we added a CheckBox component that can activate and deactivate filtering.
Modify the updateFilter method as follows:
private void updateFilter() {
Category selectedCategory = comboBox.getSelectionModel().getSelectedItem();
if (checkBox.isSelected() && selectedCategory != null) {
filteredTasks.setPredicate(t ->
t.getCategory().getName().equals(selectedCategory.getName())
);
} else {
filteredTasks.setPredicate(t -> true); // Show all
}
}
Filtering should be completely disabled whenever the CheckBox is not selected.
This can be achieved as follows:
comboBox.disableProperty().bind(checkBox.selectedProperty().not());
This line may require some explanation.
Here, the disabled state of the comboBox is bound to the inverse of the selected property of the checkBox.
In other words, when the checkBox is selected, the comboBox is not disabled.
JavaFX does not provide an enableProperty() method, so we must use disableProperty() and invert its value.
The selectedProperty() already exists in the CheckBox component, so it does not need to be defined separately.
The result might look something like this.
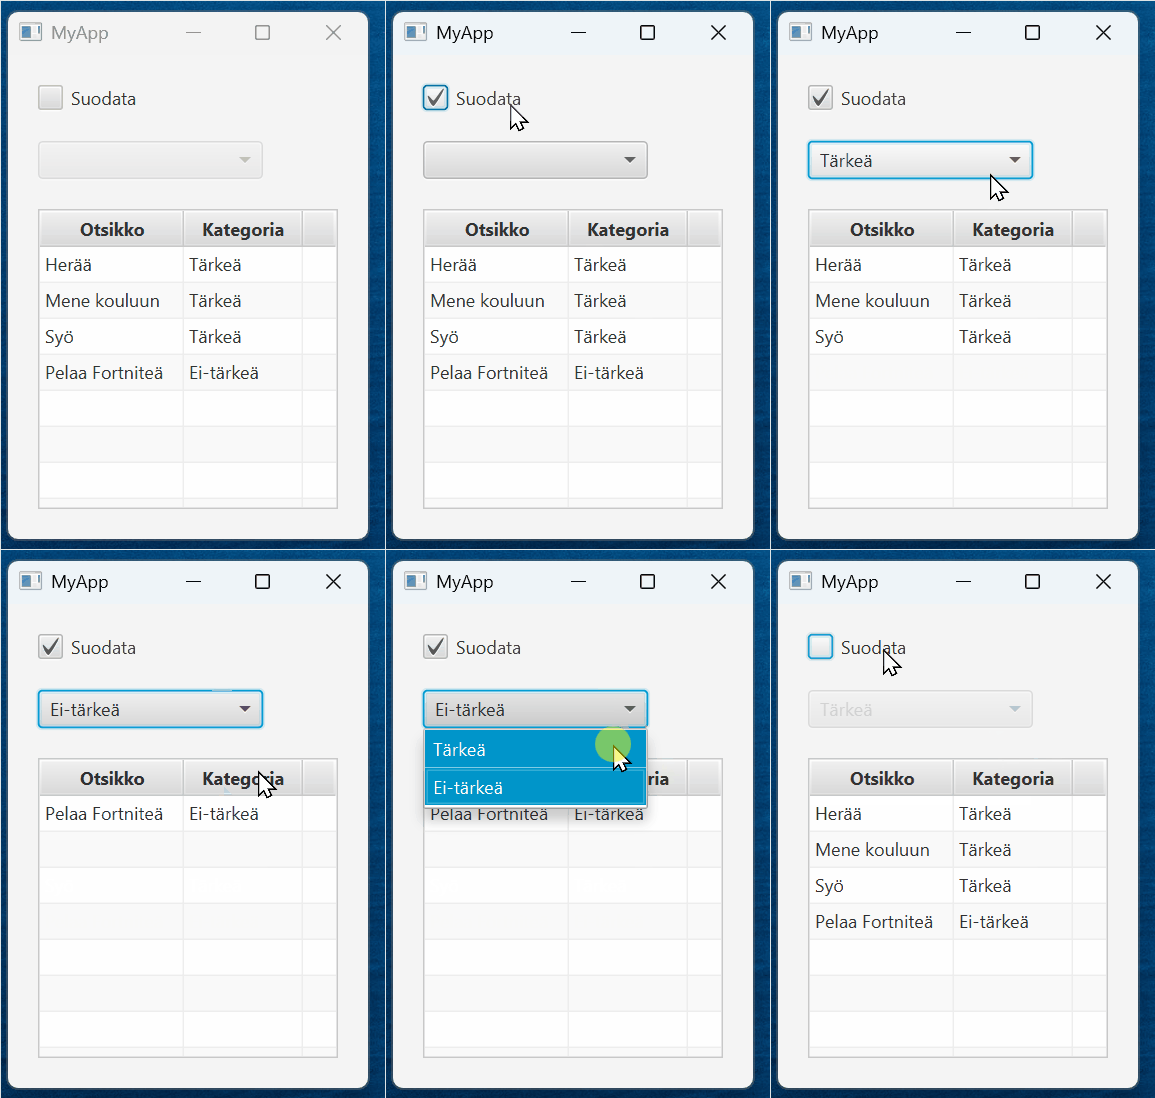
Cell Formatting
This example can also be found in its entirety on GitHub.
Sometimes it is useful to change the appearance of a cell under certain conditions.
Continuing from the previous example, let us assume that categories can be deleted. Deleted categories should be displayed using red text so that users notice that the category has been deleted. The interface might look something like this.
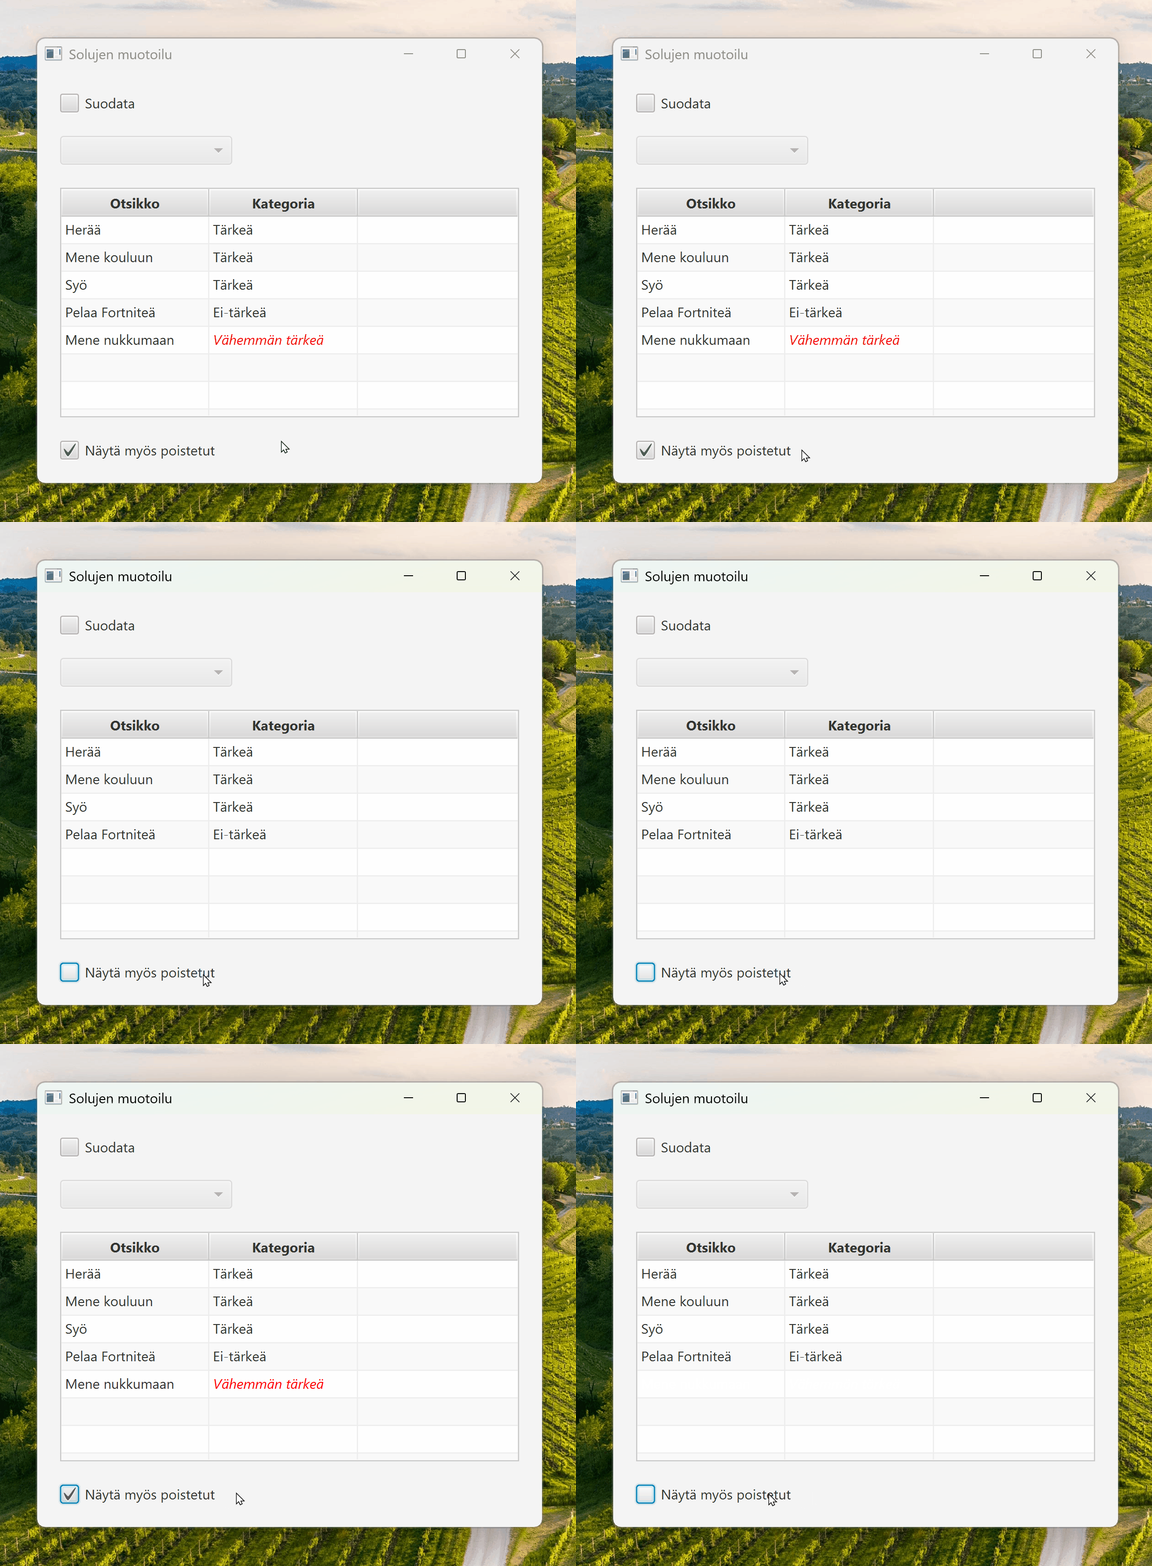
Information about whether a category has been deleted could be stored as a property of the Category class and naturally also in the JSON file. See examples of these classes in Github:
Kategoria.java,
kategoriat.json.
Of course, we could add a separate table column indicating whether a category is deleted and filter based on that. However, this is not always an elegant solution. A better idea is to indicate deleted categories directly through the category name itself, for example by displaying the text in red.
In the previous example, we added the category column like this:
categoryColumn.setCellValueFactory(cellData -> cellData.getValue().categoryProperty().asString());
This only defines where the value is retrieved from.
It cannot affect the cell's appearance.
Appearance must instead be changed using the setCellFactory() method, as we learned in Part 8.2.
Unfortunately, there is no ready-made CellFactory implementation that changes text color.
We therefore have two options:
- Create our own
CellFactoryclass by extendingTableCell. - Use a lambda expression.
The first option is more work, but useful if the same logic is required in multiple columns or tables. In this case, however, we only need to customize a single column, so a lambda expression is sufficient.
categoryColumn.setCellFactory(column -> {
return new TableCell<Task, String>() {
@Override
protected void updateItem(String item, boolean empty) {
super.updateItem(item, empty);
if (item == null || empty) { // Empty cells must be handled separately
setText(null);
setStyle("");
} else {
setText(item); // Get the data object for the current row
Task task = getTableRow().getItem();
if (task != null && task.getCategory().isDeleted()) {
setStyle("-fx-text-fill: red;"); // Sets deleted text red
} else {
setStyle(""); // Sets the default style
}
}
}
};
});
The basic idea is to override the updateItem() method of TableCell.
This method is called whenever the content or appearance of a cell needs updating, for example when the table is rendered or when the cell value changes.
By overriding updateItem(), we can define exactly how a cell's content and appearance are updated.
Let's also add a checkbox that allows the user to show or hide deleted categories. By default, this checkbox should be disabled, and only tasks belonging to non-deleted categories should be shown.
@FXML
private CheckBox showDeletedCategoriesCheckBox;
// ...
public void initialize(URL url, ResourceBundle resourceBundle) {
// ...
showDeletedCategoriesCheckBox.setOnAction(event -> {
if (showDeletedCategoriesCheckBox.isSelected()) {
filteredTasks.setPredicate(t -> true); // Show all
} else {
updateFilter();
}
});
// ...
}
@FXML
private void updateFilter() {
Category selectedCategory = selectCategoryComboBox.getSelectionModel().getSelectedItem();
if (filterCheckBox.isSelected() && selectedCategory != null) {
filteredTasks.setPredicate(t -> t.getCategory().getName().equals(selectedCategory.getName()));
} else {
// Show all tasks that do not belong to deleted categories
filteredTasks.setPredicate(t -> !t.getCategory().isDeleted());
}
}
The "show deleted categories" checkbox should be disabled whenever other filtering is active.
showDeletedCategoriesCheckBox.disableProperty().bind(filterCheckBox.selectedProperty());
As a consequence, the "show deleted categories" checkbox should also be reset whenever filtering changes.
filterCheckBox.selectedProperty()
.addListener((obs, oldValue, newValue) ->
showDeletedCategoriesCheckBox.setSelected(false));
Using UI Libraries
important
The use of external libraries in your own project assignment is allowed on this course, but entirely at your own responsibility.
Keep in mind that documentation quality varies between libraries. In the worst case, you may need to investigate the library's behavior directly from its source code. External libraries may also contain bugs and issues whose resolution can consume time that would otherwise be spent developing the project itself.
Course instructors and teaching assistants provide support only for components and functionality included in the standard JavaFX library.
There are numerous extension libraries available for JavaFX that can make development easier. You may find the following libraries useful:
-
Awesome JavaFX collection of various interesting JavaFX libraries, tools, and projects
JavaFX libraries are added in the same way as any other third-party dependency: locate the corresponding package from Maven Central, copy the required dependency declaration, and add it to the <dependencies> section of the project's pom.xml file.
For example, ControlsFX can be enabled by adding the following to the <dependencies> section of pom.xml:
<dependency>
<groupId>org.controlsfx</groupId>
<artifactId>controlsfx</artifactId>
<version>11.2.3</version>
</dependency>
This alone, however, does not make the library's components appear in SceneBuilder. To make the components available in SceneBuilder as well, follow these steps:
-
Open the
.fxmlfile you want to edit in SceneBuilder. -
In the Library view, click the settings button next to the search bar and select JAR/FXML Manager.
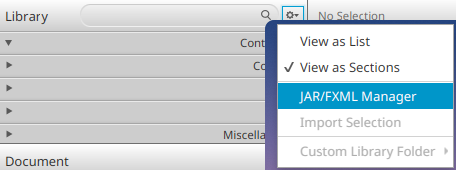
-
In the dialog that opens, choose Manually add Library from repository.
-
Enter the information from the
<dependency>declaration:- Group ID: Same value as the dependency's
groupId. For ControlsFX this isorg.controlsfx. - Artifact ID: Same value as the dependency's
artifactId. For ControlsFX this iscontrolsfx. After entering the Group ID and Artifact ID values, press Enter. SceneBuilder will retrieve the library information from Maven Central. Then select the same version in the<version>field that you use in the dependency declaration. In the ControlsFX example above, this is11.2.3. Make sure that the version added to SceneBuilder matches the version used in the project'spom.xml.
- Group ID: Same value as the dependency's
-
Click Add JAR. This should open a component-selection dialog where you can preview the library's components and choose which ones to import into SceneBuilder.
In most cases, simply clicking Import Components is sufficient, which imports all the components provided by the library.
-
Finally, close the dialog using the Close button.
The library's components should now appear in the Custom section of SceneBuilder's Library view.
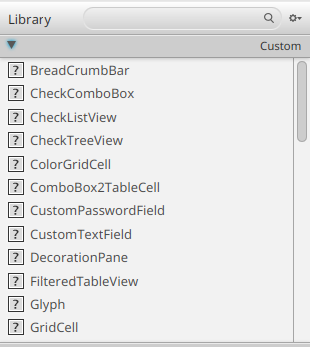
You can now use those components exactly like the built-in JavaFX components.
Derived Observable Values
In a user interface, we often want to display not only the actual data but also values calculated from that data, such as sums, averages, combinations, or similar derived values.
For example, a person's full name can be calculated by combining the first name and last name:
String fullName = person.getFirstName() + person.getLastName();
However, a value calculated this way does not automatically update in the user interface if the first name or last name changes.
Example
Consider the following application for entering player information:
// Imports hidden
import javafx.collections.FXCollections;
import javafx.collections.ObservableList;
import javafx.fxml.FXML;
import javafx.fxml.Initializable;
import javafx.scene.control.Button;
import javafx.scene.control.Label;
import javafx.scene.control.TableColumn;
import javafx.scene.control.TableView;
import javafx.scene.control.cell.TextFieldTableCell;
import javafx.util.converter.NumberStringConverter;
import java.net.URL;
import java.util.ResourceBundle;
public class MainController implements Initializable {
@FXML
private TableColumn<Player, String> nameColumn;
@FXML
private TableColumn<Player, Number> birthYearColumn;
@FXML
private TableColumn<Player, Number> ageColumn;
@FXML
private TableView<Player> playersTable;
@FXML
private Label playerCountLabel;
@FXML
private Button addPlayerButton;
private ObservableList<Player> players = FXCollections.observableArrayList();
@Override
public void initialize(URL url, ResourceBundle resourceBundle) {
nameColumn.setCellFactory(TextFieldTableCell.forTableColumn());
nameColumn.setCellValueFactory(cellData -> cellData.getValue().nameProperty());
birthYearColumn.setCellFactory(TextFieldTableCell.forTableColumn(new NumberStringConverter("####")));
birthYearColumn.setCellValueFactory(cellData -> cellData.getValue().birthYearProperty());
// This does not work!
//
// setCellValueFactory requires an ObservableValue,
// but age is an int value.
//
// ageColumn.setCellValueFactory(cellData -> LocalDate.now().getYear() - cellData.getValue().getBirthYear()
// );
addPlayerButton.setOnAction(event -> {
Player newPlayer = new Player();
newPlayer.setName("New Player");
newPlayer.setBirthYear(2000);
players.add(newPlayer);
});
playersTable.setItems(players);
}
}
In this example we can see two problems:
- Adding a new player does not update the player count.
- Editing a player's birth year does not update the player's age.
Converting an Observable Value into Another Value
All ObservableValue types, such as StringProperty, IntegerProperty, FloatProperty, and so on, provide a helper method called map() (See
JavaDoc)
that allows calculations to be performed on the value.
For example, a player's age can be calculated from the birth year as follows:
ObservableValue<Number> age = player.birthYearProperty().map(year -> LocalDate.now().getYear() - year.intValue());
The value contained in the age variable is then recalculated using
LocalDate.now().getYear() - year.intValue()
whenever the player's birth year changes.
Because ObservableValue is itself observable, it can be used directly in a setCellValueFactory call:
public void initialize(URL url, ResourceBundle resourceBundle) {
nameColumn.setCellFactory(TextFieldTableCell.forTableColumn());
nameColumn.setCellValueFactory(cellData -> cellData.getValue().nameProperty());
birthYearColumn.setCellFactory(TextFieldTableCell.forTableColumn(new NumberStringConverter("####")));
birthYearColumn.setCellValueFactory(cellData -> cellData.getValue().birthYearProperty());
// HIGHLIGHT_GREEN_BEGIN
ageColumn.setCellValueFactory(cellData ->
cellData.getValue().birthYearProperty().map(
birthYear -> LocalDate.now().getYear() - birthYear.intValue()));
// HIGHLIGHT_GREEN_END
addPlayerButton.setOnAction(event -> {
Player newPlayer = new Player();
newPlayer.setName("New Player");
newPlayer.setBirthYear(2000);
players.add(newPlayer);
});
playersTable.setItems(players);
}
Converting a Function into an Observable Value
The number of players can be obtained by calling: players.size().
However, the size() method does not return an observable value, and an ObservableList does not provide the map() method discussed above.
Nevertheless, any function can be converted into an observable value using the Bindings
(See JavaDoc)
class and its createXBinding helper methods.
Here, X refers to the type of observable value, for example Integer, Long, String, or Object.
Since size() returns an integer, we use Bindings.createIntegerBinding()
(See
JavaDoc)
:
IntegerBinding playerCount = Bindings.createIntegerBinding(() -> players.size(), players);
Bindings.createIntegerBinding() takes at least two parameters:
a lambda expression used to calculate the observable value and
one or more Observable values whose changes trigger recalculation.
In this example, the first parameter specifies that playerCount is always calculated using:
players.size().
The second parameter, players, specifies that the value must be updated whenever the contents of the players list change.
The Bindings.createXBinding method returns a binding object, which can be used like any other observable value.
In this case, we can bind the text of playerCountLabel to it:
public void initialize(URL url, ResourceBundle resourceBundle) {
nameColumn.setCellFactory(TextFieldTableCell.forTableColumn());
nameColumn.setCellValueFactory(cellData -> cellData.getValue().nameProperty());
birthYearColumn.setCellFactory(TextFieldTableCell.forTableColumn(new NumberStringConverter("####")));
birthYearColumn.setCellValueFactory(cellData -> cellData.getValue().birthYearProperty());
ageColumn.setCellValueFactory(cellData -> cellData.getValue().birthYearProperty().map(birthYear -> LocalDate.now().getYear() - birthYear.intValue()));
addPlayerButton.setOnAction(event -> {
Player newPlayer = new Player();
newPlayer.setName("New Player");
newPlayer.setBirthYear(2000);
players.add(newPlayer);
});
// HIGHLIGHT_GREEN_BEGIN
IntegerBinding playerCount = Bindings.createIntegerBinding(() -> players.size(), players);
playerCountLabel.textProperty().bind(playerCount.asString());
// HIGHLIGHT_GREEN_END
playersTable.setItems(players);
}
Using the bind() method of a Property, we can bind one value to another observable value.
In this case, the text of playerCountLabel is bound to the number of players.
As a result, whenever the players list changes:
playerCountdetects the change and recalculates its value usingplayers.size().playerCount.asString()detects the change inplayerCountand updates its own value by callingplayerCount.toString().playerCountLabel.textProperty()detects the change inplayerCount.asString()and updates its displayed text accordingly.
After these changes, both the player count and each player's age update automatically.
Data Validation
Data validation refers to checking the correctness of information entered by the user. Validation ensures that user changes do not produce a data model that is invalid from the perspective of the application domain.
Example
Suppose we have the following simple application:
public class MainController implements Initializable {
@FXML
private ListView<Pet> petsList;
@FXML
private TextField nameField;
@FXML
private TextField speciesField;
@FXML
private Button addButton;
ObservableList<Pet> pets = FXCollections.observableArrayList();
@Override
public void initialize(URL url, ResourceBundle resourceBundle) {
petsList.setItems(pets);
addButton.setOnAction(_ -> addPet());
}
private void addPet() {
Pet pet = new Pet();
pet.setName(nameField.getText());
pet.setSpecies(speciesField.getText());
pets.add(pet);
nameField.clear();
speciesField.clear();
}
}
The application contains a list to which pets can be added, represented by the Pet class.
At the moment, the user can add pets without a name or a species, which is not a good idea.
We should prevent users from adding pets that have no name or no species.
Simple Validation
The simplest form of validation can be implemented by checking the domain requirements before creating the model object.
For example, we could check inside the addPet() method whether the name and species fields contain text:
private void addPet() {
// TODO: Perform validation here.
// Add the pet only if the information is valid.
Pet pet = new Pet();
pet.setName(name);
pet.setSpecies(species);
pets.add(pet);
nameField.clear();
speciesField.clear();
}
Validation Method
Validation is often easy to implement as a separate method in the controller:
/**
* Checks whether the contents of the pet fields are valid.
* If not, highlights the invalid fields.
*
* @return true if validation succeeds, otherwise false
*/
private boolean validatePet() {
// Reset field styles
nameField.setStyle("");
speciesField.setStyle("");
// Retrieve field contents
String name = nameField.getText();
String species = speciesField.getText();
// Validation: Name must not be empty
if (name.isBlank()) {
// Highlight the invalid field
nameField.setStyle("-fx-border-color: red; " + "-fx-background-color: #ffcccc;");
return false;
}
// Validation: Species must not be empty
if (species.isBlank()) {
speciesField.setStyle("-fx-border-color: red; " + "-fx-background-color: #ffcccc;");
return false;
}
// true = validation succeeded
return true;
}
private void addPet() {
// Validate before adding
if (!validatePet()) {
return;
}
Pet pet = new Pet();
pet.setName(nameField.getText());
pet.setSpecies(speciesField.getText());
pets.add(pet);
nameField.clear();
speciesField.clear();
}
Moving Validation into the Data Model
From the perspective of testing and separation of responsibilities, it is often clearer if validation is part of the data model itself.
In that case, validation can be implemented directly within the model class.
In this example, validateErrors is part of the Pet class.
At the same time, let's create an enumeration type ValidationError that represents possible error situations.
public enum ValidationError {
NAME_EMPTY,
SPECIES_EMPTY
}
public class Pet {
// ...
// Actual validation method
public ValidationError validateErrors() {
if (getName().isBlank()) {
return ValidationError.NAME_EMPTY;
}
if (getSpecies().isBlank()) {
return ValidationError.SPECIES_EMPTY;
}
return null;
}
}
Adding a pet still happens inside addPet(), but now validation of the model object is performed directly through the model class:
private void addPet() {
nameField.setStyle("");
speciesField.setStyle("");
// Create the model object and assign values
Pet pet = new Pet();
pet.setName(nameField.getText());
pet.setSpecies(speciesField.getText());
// Check whether the model object is valid
ValidationError errorResult = pet.validateErrors();
// If validation fails, display
// an appropriate error indication
if (errorResult != null) {
if (errorResult == ValidationError.NAME_EMPTY) {
nameField.setStyle("-fx-border-color: red; " + "-fx-background-color: #ffcccc;");
}
if (errorResult == ValidationError.SPECIES_EMPTY) {
speciesField.setStyle("-fx-border-color: red; " + "-fx-background-color: #ffcccc;");
}
return;
}
// Add the pet only if it is valid
pets.add(pet);
nameField.clear();
speciesField.clear();
}
Instead of relying on null checks, it is often much clearer to use the Optional type, which explicitly represents a situation where an error may or may not exist.
public Optional<ValidationError> validateErrors() {
if (getName().isBlank()) {
return Optional.of(ValidationError.NAME_EMPTY);
}
if (getSpecies().isBlank()) {
return Optional.of(ValidationError.SPECIES_EMPTY);
}
return Optional.empty();
}
Whereas null is an invisible contract that requires separate documentation (which, unfortunately, is often never written), the Optional type makes the intent explicit.
The validation code then becomes cleaner:
private void addPet() {
// ...
Optional<ValidationError> errorResult = pet.validateErrors();
// If a validation error exists,
// display the corresponding feedback
if (errorResult.isPresent()) {
ValidationError error = errorResult.get();
if (error == ValidationError.NAME_EMPTY) {
nameField.setStyle("-fx-border-color: red; " + "-fx-background-color: #ffcccc;");
}
if (error == ValidationError.SPECIES_EMPTY) {
speciesField.setStyle("-fx-border-color: red; " + "-fx-background-color: #ffcccc;");
}
return;
}
// ...
}
Reference Management and Listening to Nested Property Objects
You can find the complete source code for this example on GitHub.
Often, one object needs to reference another object in order to access the other object's data or functionality.
Suppose we have the following data model:
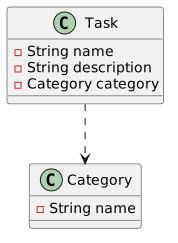
In an application, the dependency might look something like this.
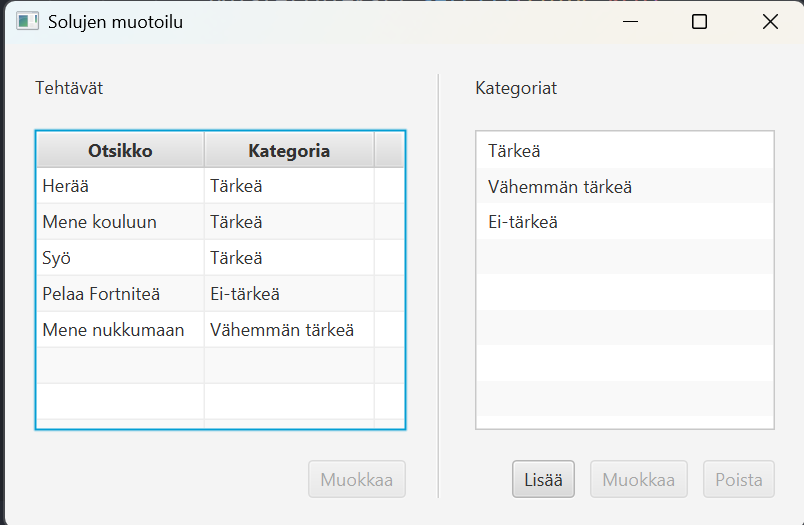
Let's create StringProperty title and ObjectProperty category fields in the Task class corresponding to the JSON fields shown above.
Similarly, we create a StringProperty name field in the Category class.
package fi.jyu.ohj2.examples.fixingreferences;
import javafx.beans.property.ObjectProperty;
import javafx.beans.property.SimpleObjectProperty;
import javafx.beans.property.SimpleStringProperty;
import javafx.beans.property.StringProperty;
public class Task {
private final StringProperty title = new SimpleStringProperty();
private final ObjectProperty<Category> Category = new SimpleObjectProperty<>();
public Task() {
}
public Task(String title, Kategoria Category) {
this.title.set(title);
this.Category.set(Category);
}
// title
public void setTitle(String title) {
this.title.set(title);
}
public String getTitle() {
return title.get();
}
public StringProperty titleProperty() {
return title;
}
// Category
public void setCategory(Kategoria Category) {
this.Category.set(Category);
}
public Category getCategory() {
return Category.get();
}
public ObjectProperty<Kategoria> categoryProperty() { return Category; }
}
Tasks in the JSON file might look roughly like this:
[
{
"title": "Wake up",
"category": "Important"
},
{
"title": "Go to school",
"category": "Important"
},
{
"title": "Eat",
"category": "Important"
},
{
"title": "Play Fortnite",
"category": "Not Important"
},
{
"title": "Go to sleep",
"category": "Less Important"
}
]
Similarly, categories might look like this:
[
{"name": "Important"},
{"name": "Less Important"},
{"name": "Not Important"}
]
If the name of a category is changed, it would be logical for all tasks referring to that category to automatically receive the updated category name, since they all refer to the same Category object.
Below is the desired state of the application.
However, in the JSON file, the category inside a task is only a string that acts as the category identifier.
When a Task object is later created from that string inside the controller, a new Category object is also created containing the same category name as the Category object loaded from categories.json.
These are two different objects.
As a result, whatever happens to the category will not be visible in tasks without manual updating.
This is problematic because it breaks the relationship between objects and makes the application harder to maintain.
To ensure that category names are updated automatically in the task listing without manual intervention, we must:
- Ensure that the task object references the correct category object.
- Make the category column of the
TableViewlisten for changes to the category name using theflatMap(see JavaDoc) method insidesetCellValueFactory().
For example:
categoryColumn.setCellValueFactory(cellData ->
cellData
.getValue()
.categoryProperty()
.flatMap(category -> category.nameProperty())
);
Let's examine this step by step.
First, we will fix the Category references stored in Task objects after the application starts.
Assume that our MainController contains collections for tasks and categories, together with the corresponding UI components.
public class MainController implements Initializable {
// ...
@FXML
private TableView tasksTable;
@FXML
private TableView categoriesTable;
private ObservableList tasks = FXCollections.observableArrayList();
private ObservableList categories = FXCollections.observableArrayList();
// ...
}
Load categories and tasks from JSON files:
public void initialize(URL url, ResourceBundle resourceBundle) {
Path tasksPath = Path.of("tasks.json");
Path categoriesPath = Path.of("categories.json");
ObjectMapper mapper = new ObjectMapper();
try {
Category[] c = mapper.readValue(categoriesPath.toFile(), Category[].class);
Task[] t = mapper.readValue(tasksPath.toFile(), Task[].class);
categories.setAll(c);
tasks.setAll(t);
} catch (JacksonException e) {
e.printStackTrace();
}
}
Next, add tasks and categories to the UI components.
public void initialize(URL url, ResourceBundle resourceBundle) {
// ...
TableColumn<Task, String> titleColumn = new TableColumn<>("Title");
titleColumn.setCellValueFactory(cellData -> cellData.getValue().titleProperty());
TableColumn<Task, String> categoryColumn = new TableColumn<>("Category");
categoryColumn.setCellValueFactory(cellData -> cellData.getValue().categoryProperty().asString());
tasksTable.getColumns().addAll(titleColumn, categoryColumn);
TableColumn<Category, String> nameColumn = new TableColumn<>("Name");
nameColumn.setCellValueFactory(cellData -> cellData.getValue().nameProperty());
categoriesTable.getColumns().add(nameColumn);
}
At this point, if we edit a category name, the change is not reflected in the tasks.
Let's fix the references after loading the files.
ObjectMapper mapper = new ObjectMapper();
try {
Category[] c = mapper.readValue(categoriesPath.toFile(), Category[].class);
Task[] t = mapper.readValue(tasksPath.toFile(), Task[].class);
categories.setAll(c);
// HIGHLIGHT_GREEN_BEGIN
for (Task task : t) {
Category jsonCategory = task.getCategory();
task.setCategory(setCategoryReference(jsonCategory.getName()));
}
// HIGHLIGHT_GREEN_END
tasks.setAll(t);
} catch (JacksonException e) {
e.printStackTrace();
}
// If the task has no category,
// return an empty category.
// HIGHLIGHT_GREEN_BEGIN
private static final Category EMPTY_CATEGORY = new Category("");
private Category setCategoryReference(String name) {
for (Category candidate : categories) {
if (candidate.getName().equals(name)) {
return candidate;
}
}
return EMPTY_CATEGORY;
// HIGHLIGHT_GREEN_END
/*
* Stream-style version:
*
* return categories.stream()
* .filter(candidate -> candidate.getName().equals(category.getName()))
* .findFirst()
* .orElse(EMPTY_CATEGORY);
*/
// HIGHLIGHT_GREEN_BEGIN
}
// HIGHLIGHT_GREEN_END
Now category information is shared correctly between tasks, but changes still do not immediately appear in the TableView.
This is because the category column only listens for changes to the category reference itself.
The first idea might be to add a listener for nameProperty() into the extractor
(task.categoryProperty().get().nameProperty())
Unfortunately, this does not work because categoryProperty() listens for changes to the category reference, and renaming a category does not create a new Category object.
The solution is to use flatMap(), which allows listening to nested property objects.
Add the following to the initialize() method:
TableColumn<Task, String> titleColumn = new TableColumn<>("Title");
titleColumn.setCellValueFactory(cellData -> cellData.getValue().titleProperty());
TableColumn<Task, String> categoryColumn = new TableColumn<>("Category");
// HIGHLIGHT_GREEN_BEGIN
categoryColumn.setCellValueFactory(
cellData -> cellData.getValue().categoryProperty().flatMap(category -> category.nameProperty()));
// HIGHLIGHT_GREEN_END
// HIGHLIGHT_RED_BEGIN
categoryColumn.setCellValueFactory(cellData -> cellData.getValue().categoryProperty().asString());
// HIGHLIGHT_RED_END
tasksTableView.getColumns().addAll(titleColumn, categoryColumn);
Without flatMap(), we have two nested property levels:
categoryProperty() → ObjectProperty
↓
nameProperty() → StringProperty
We want to listen to both levels:
- changes to the category itself
- changes to the category's name
because we always want to display an up-to-date category name in the TableView column.
flatMap() combines these two levels into a single ObservableValue that reacts to changes occurring on both levels.
This combination process is called flattening, because two nested layers become one flat layer.
The name flatMap consists of two parts:
- Map: transforms the value of the outer property (
Category) into an inner property using a function (category -> category.nameProperty()). - Flat: flattens the result so that there is no "property inside property" structure, only a single observable value.
The same naming convention appears in methods such as:
Stream.flatMap() and
Optional.flatMap().
In practice, flatMap() works as follows:
- It listens to the outer property (
categoryProperty()). - When the outer property's value exists, it calls the provided function (
category -> category.nameProperty()) and starts listening to the returned inner property. - If the outer value changes,
flatMap()stops listening to the old inner property and starts listening to the new one's inner property. - The result is a single
ObservableValuethat updates whenever either the category name changes, or the entire category reference changes.